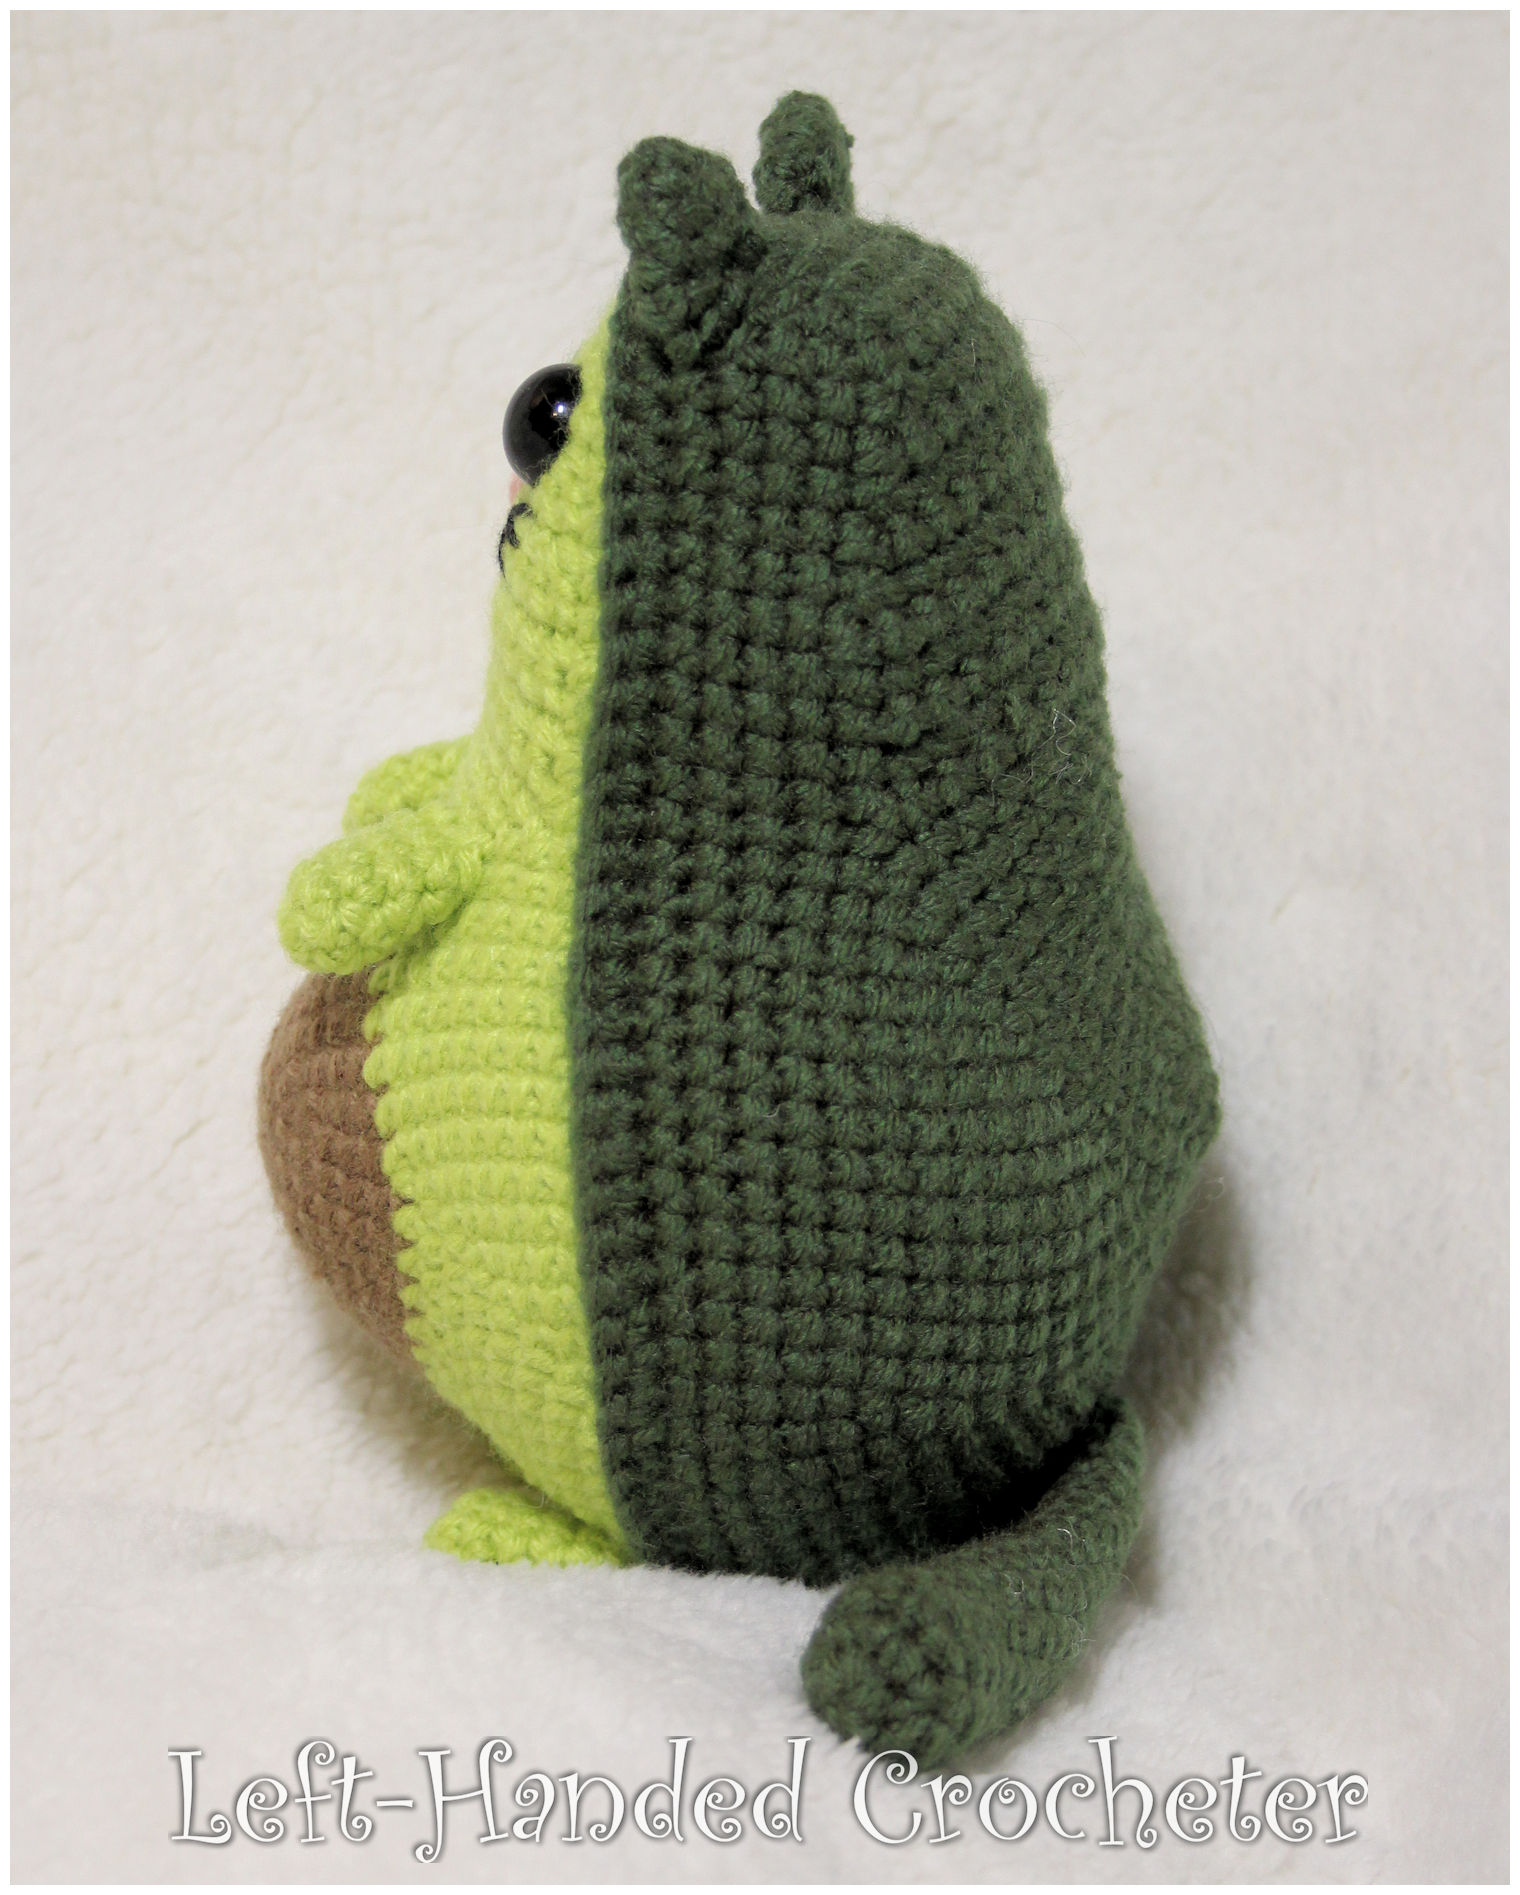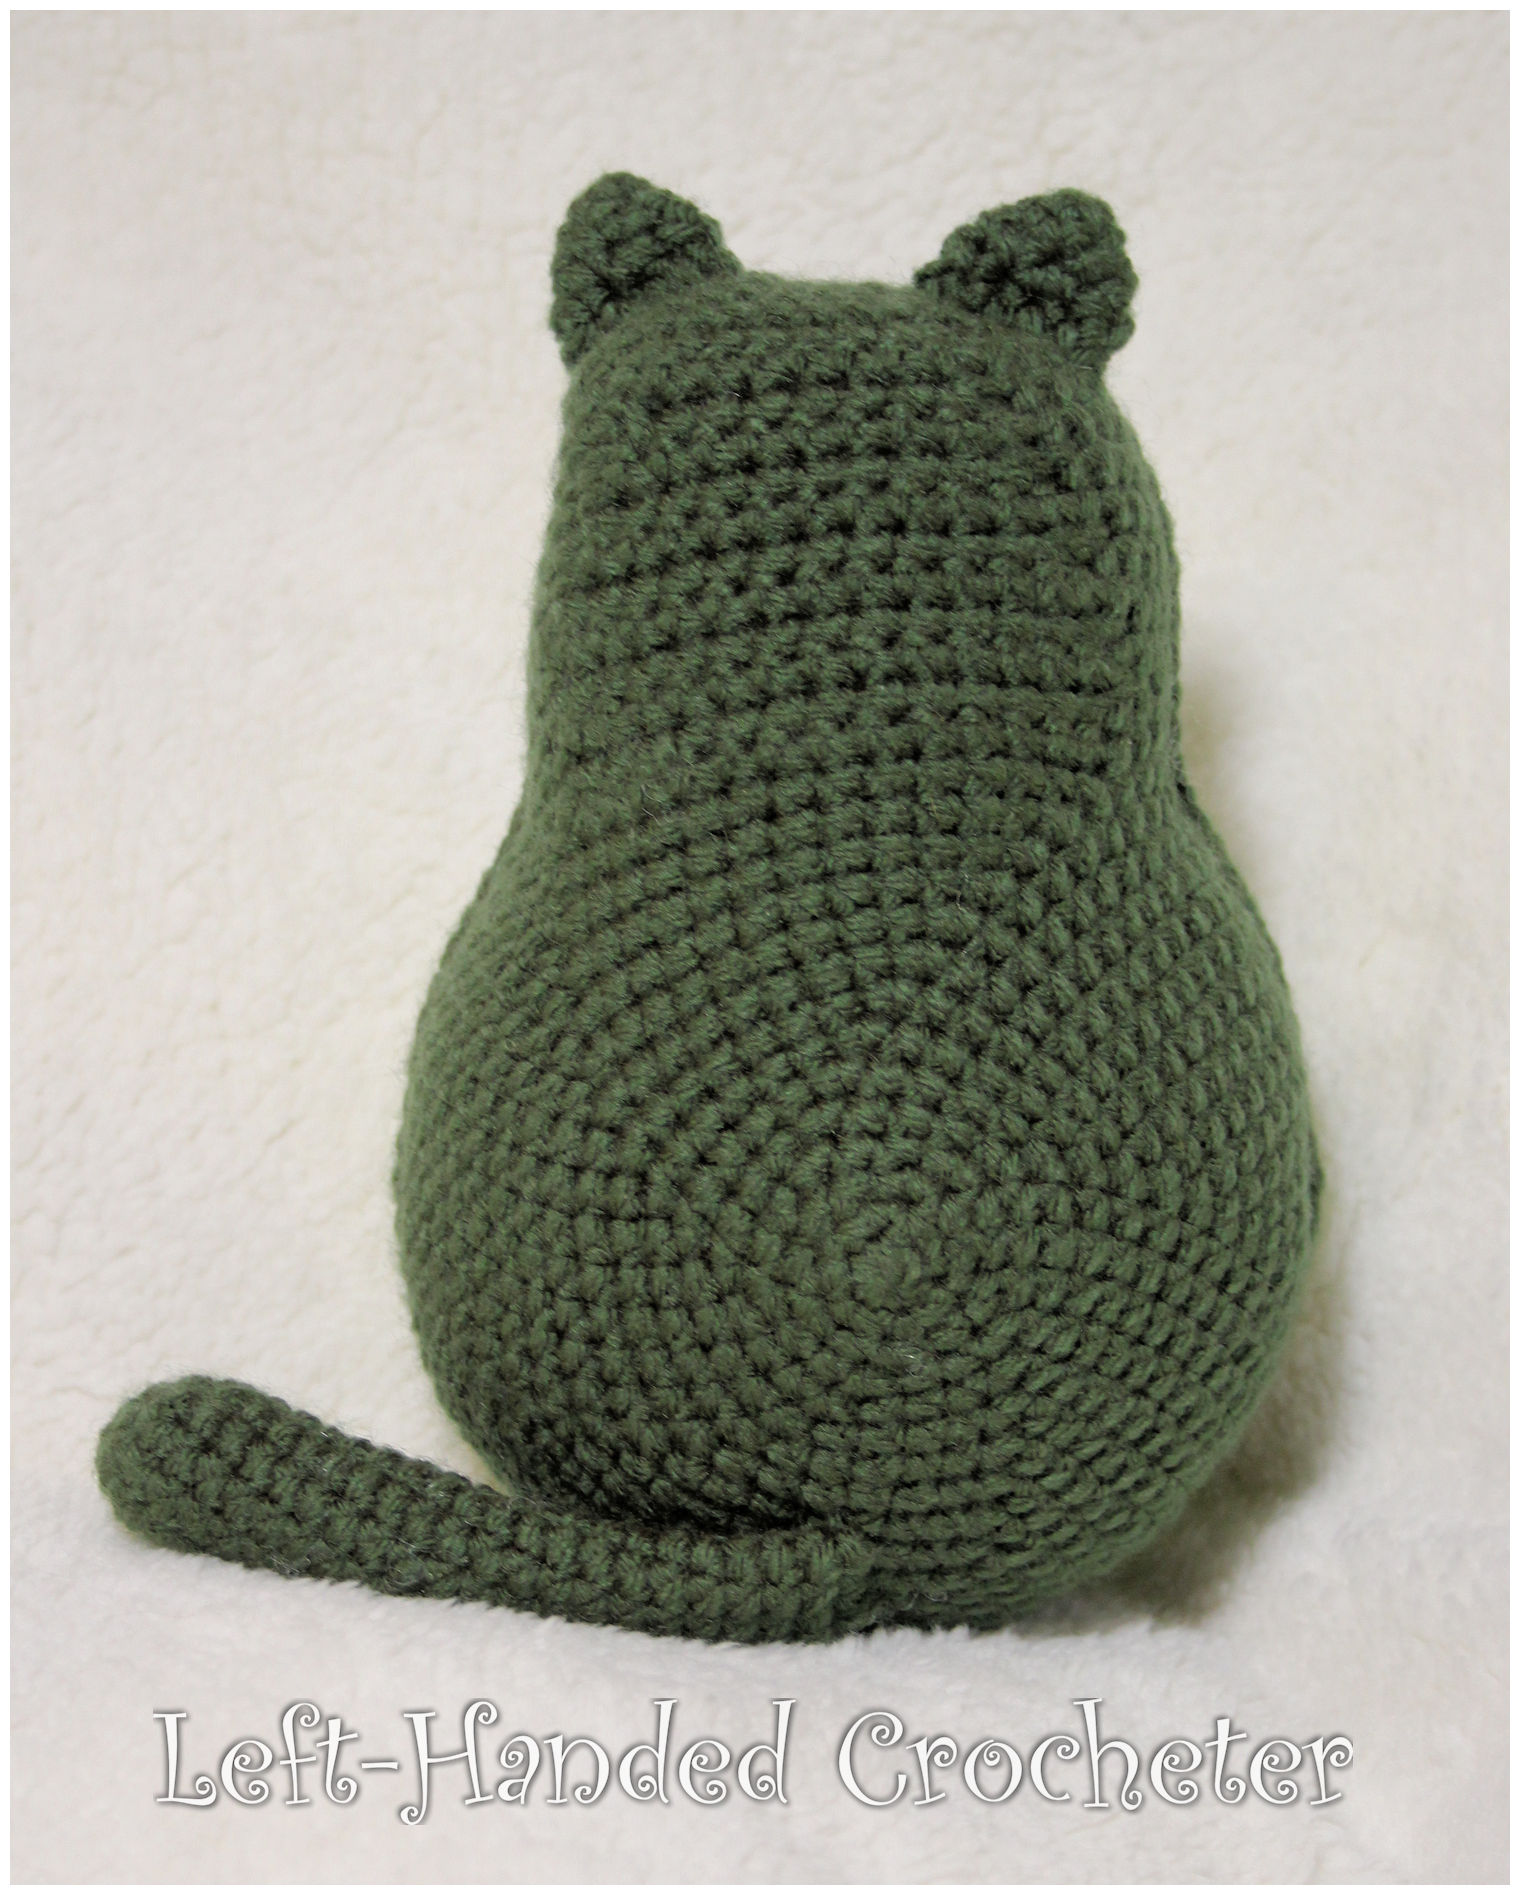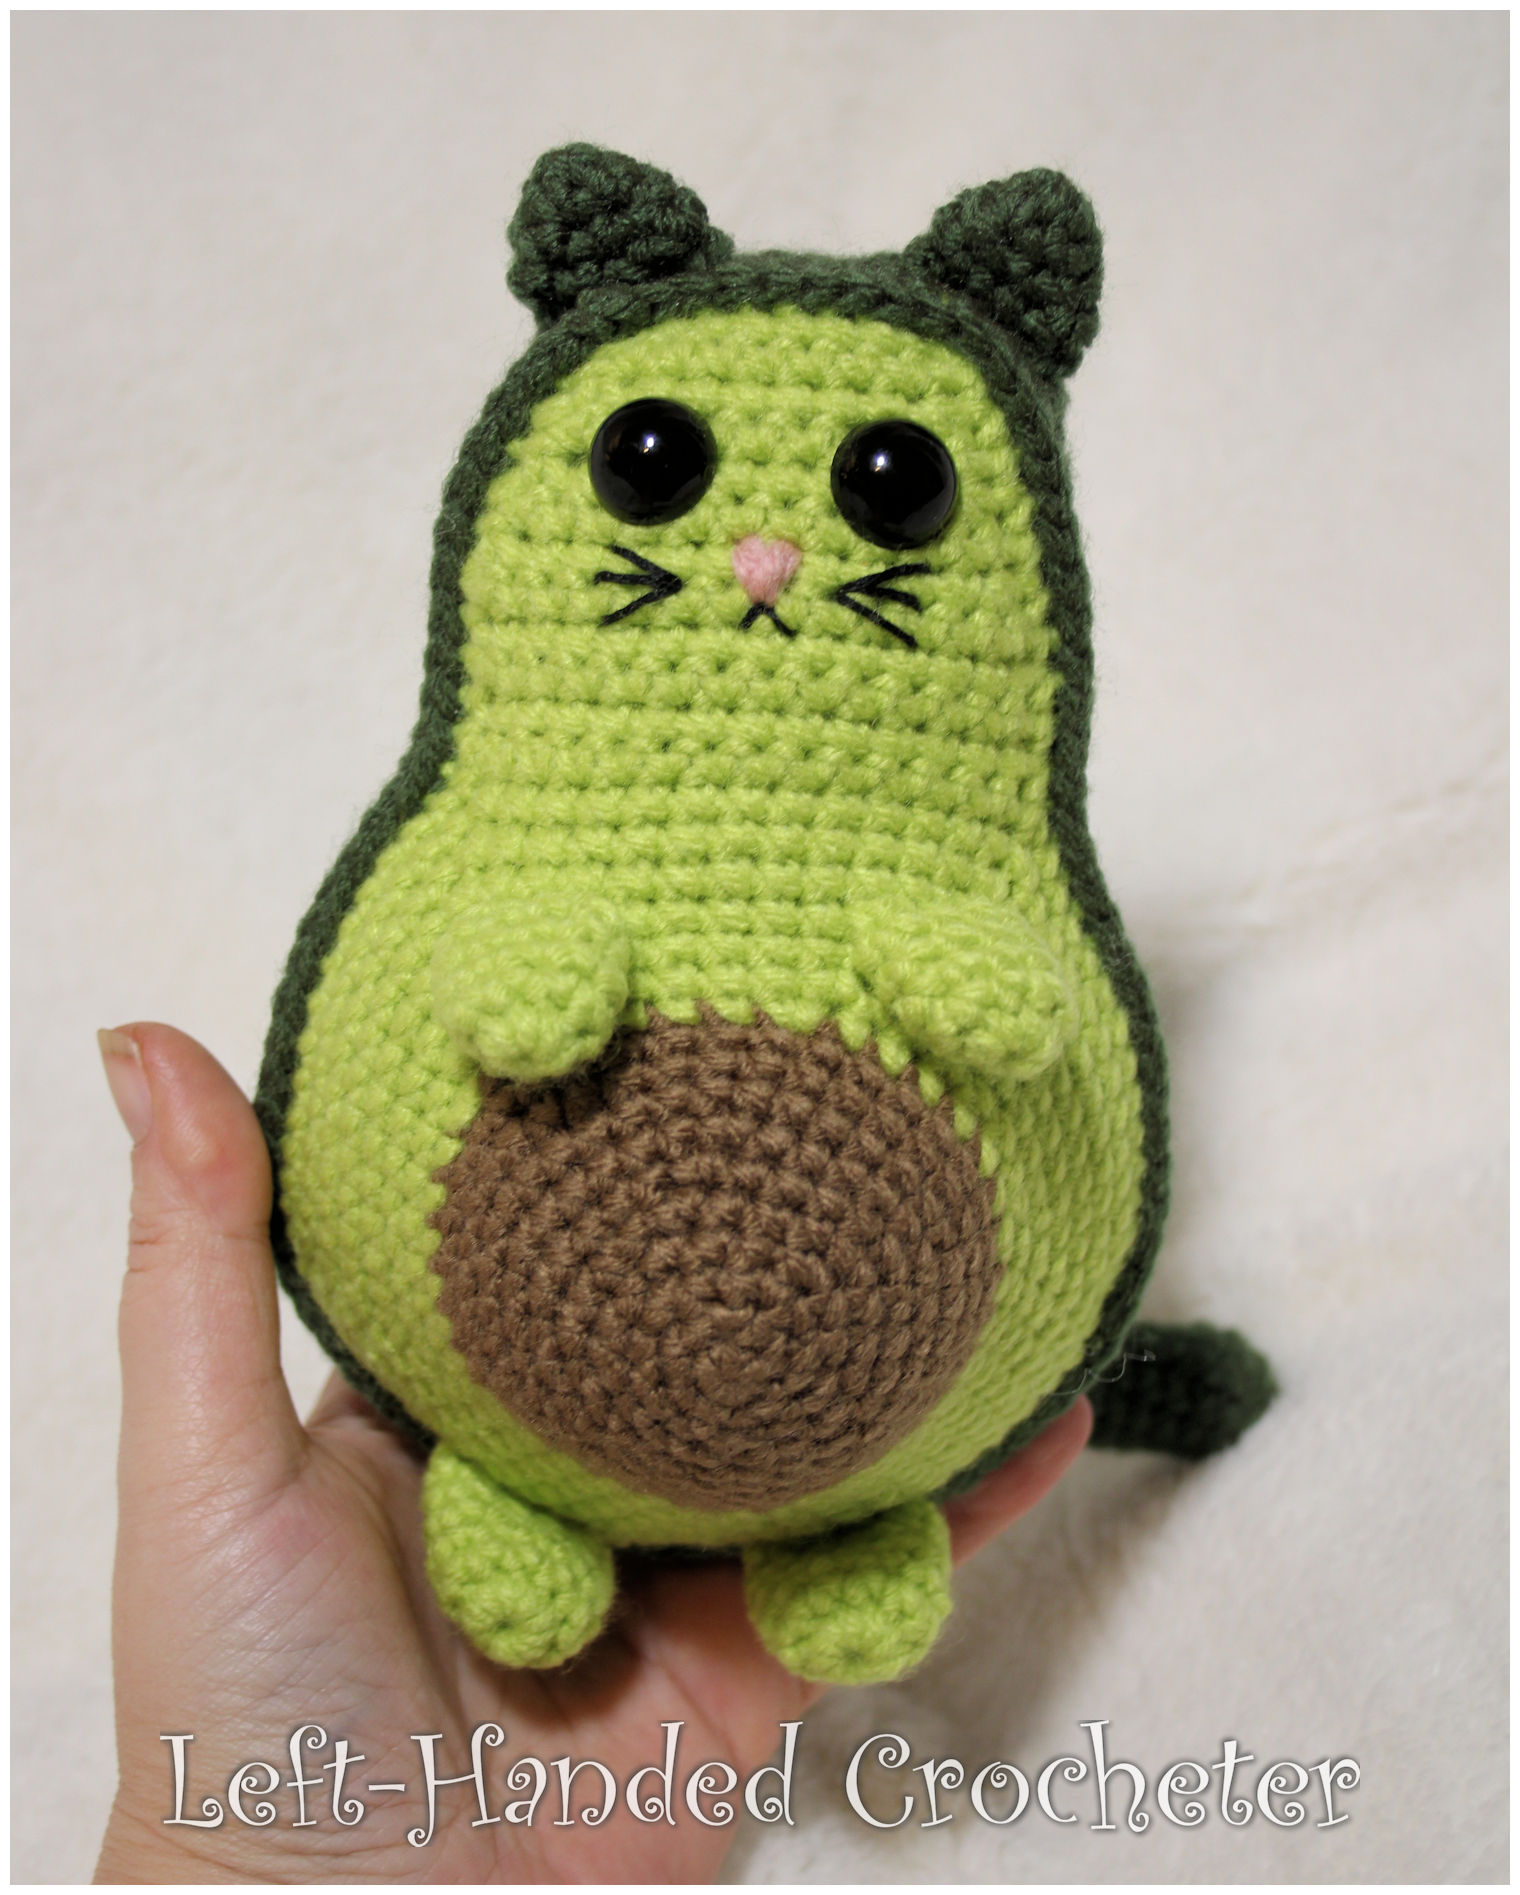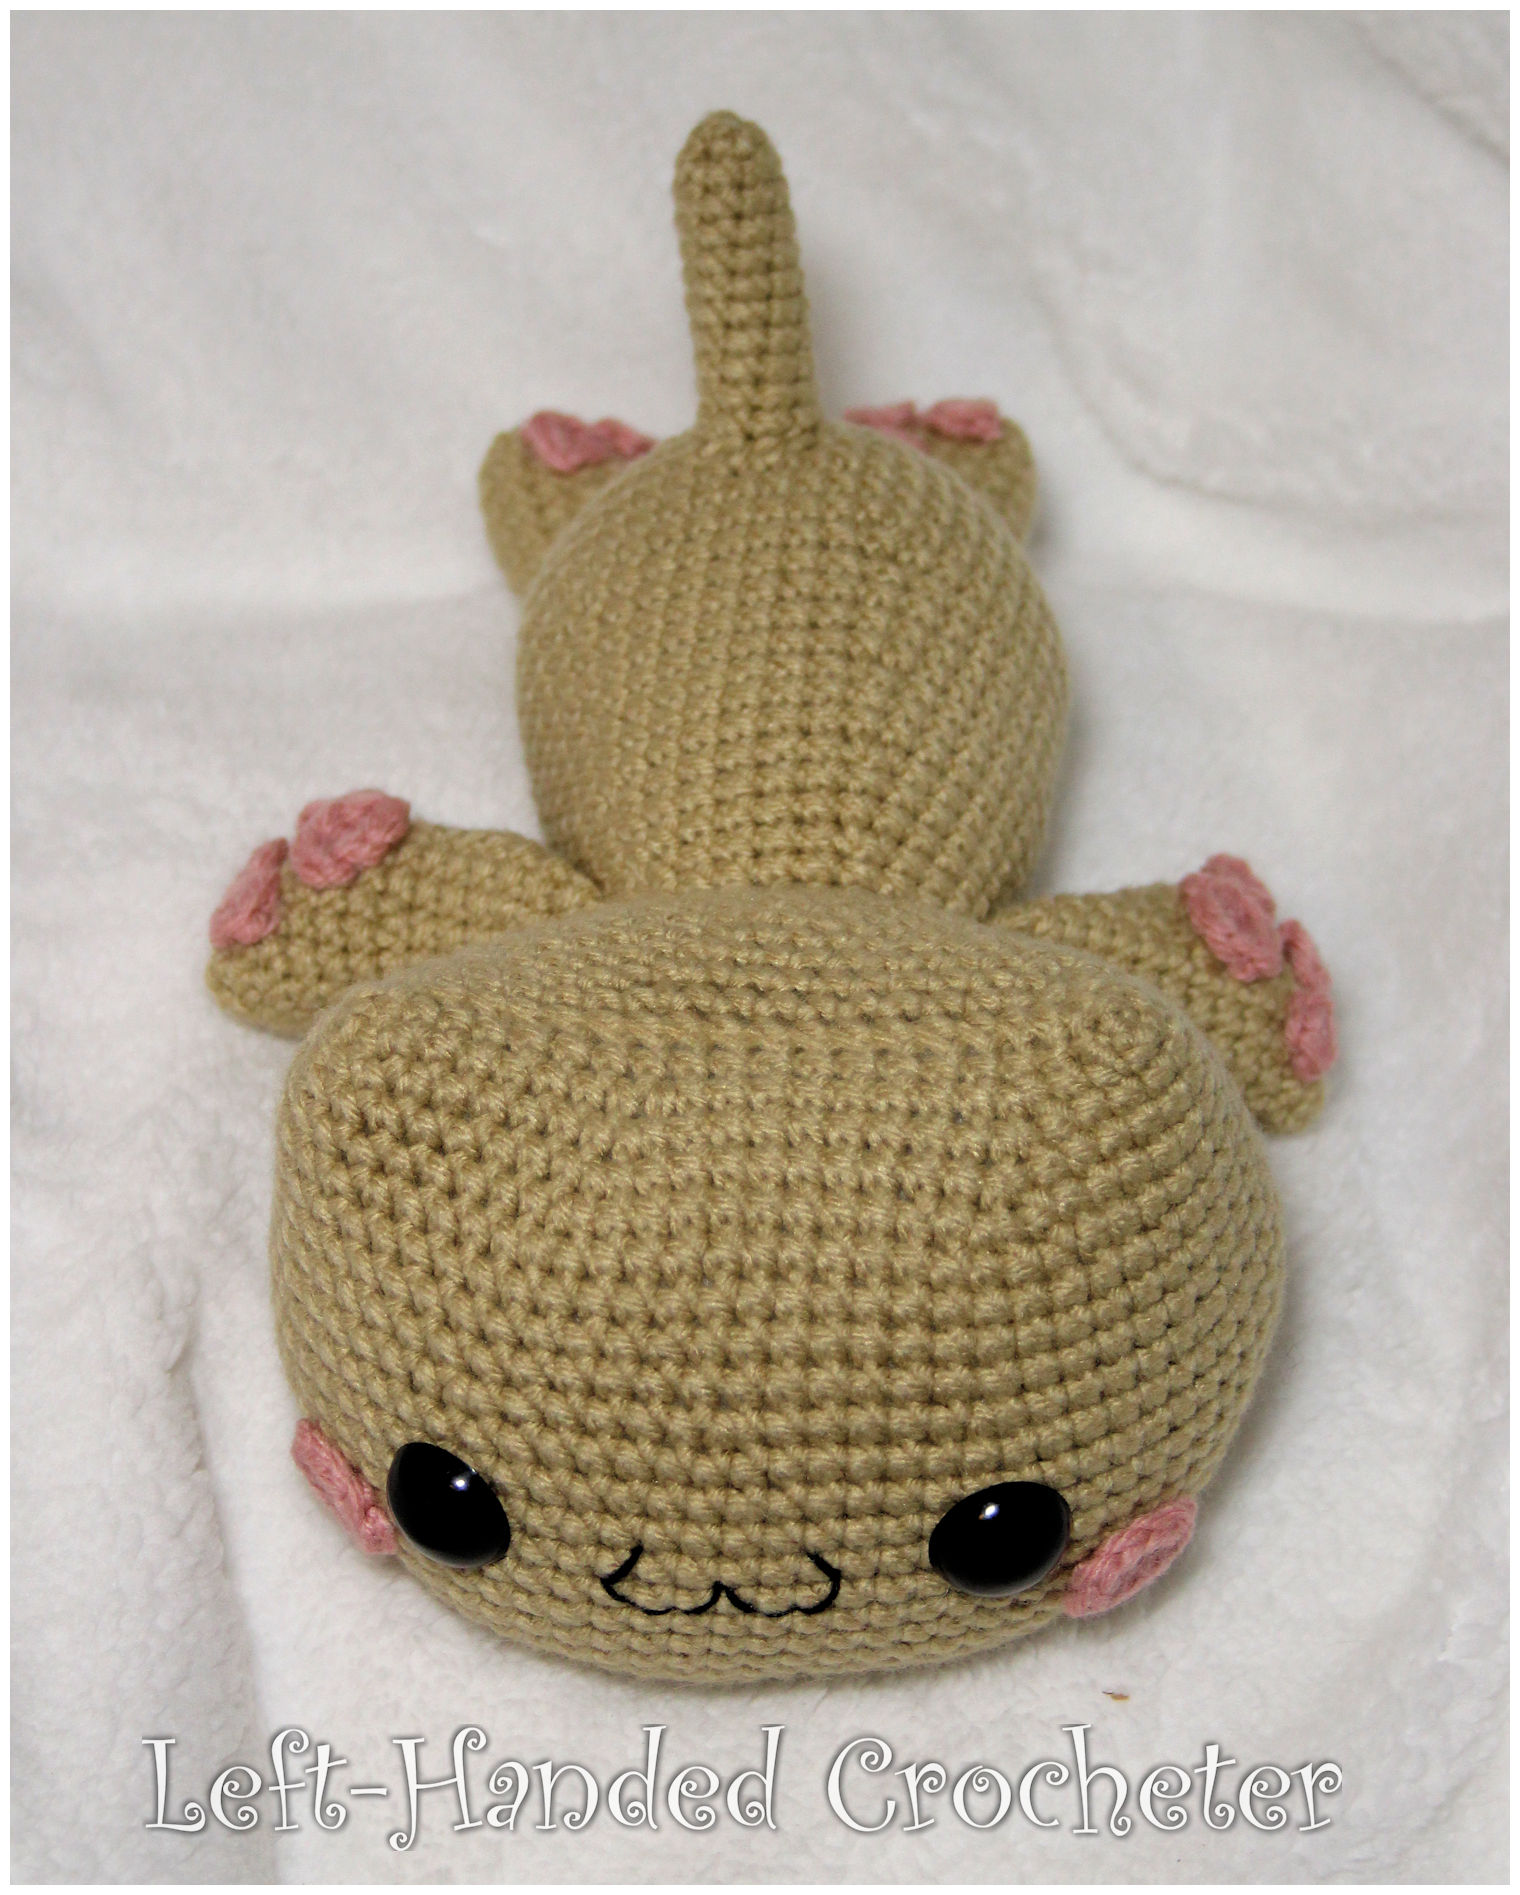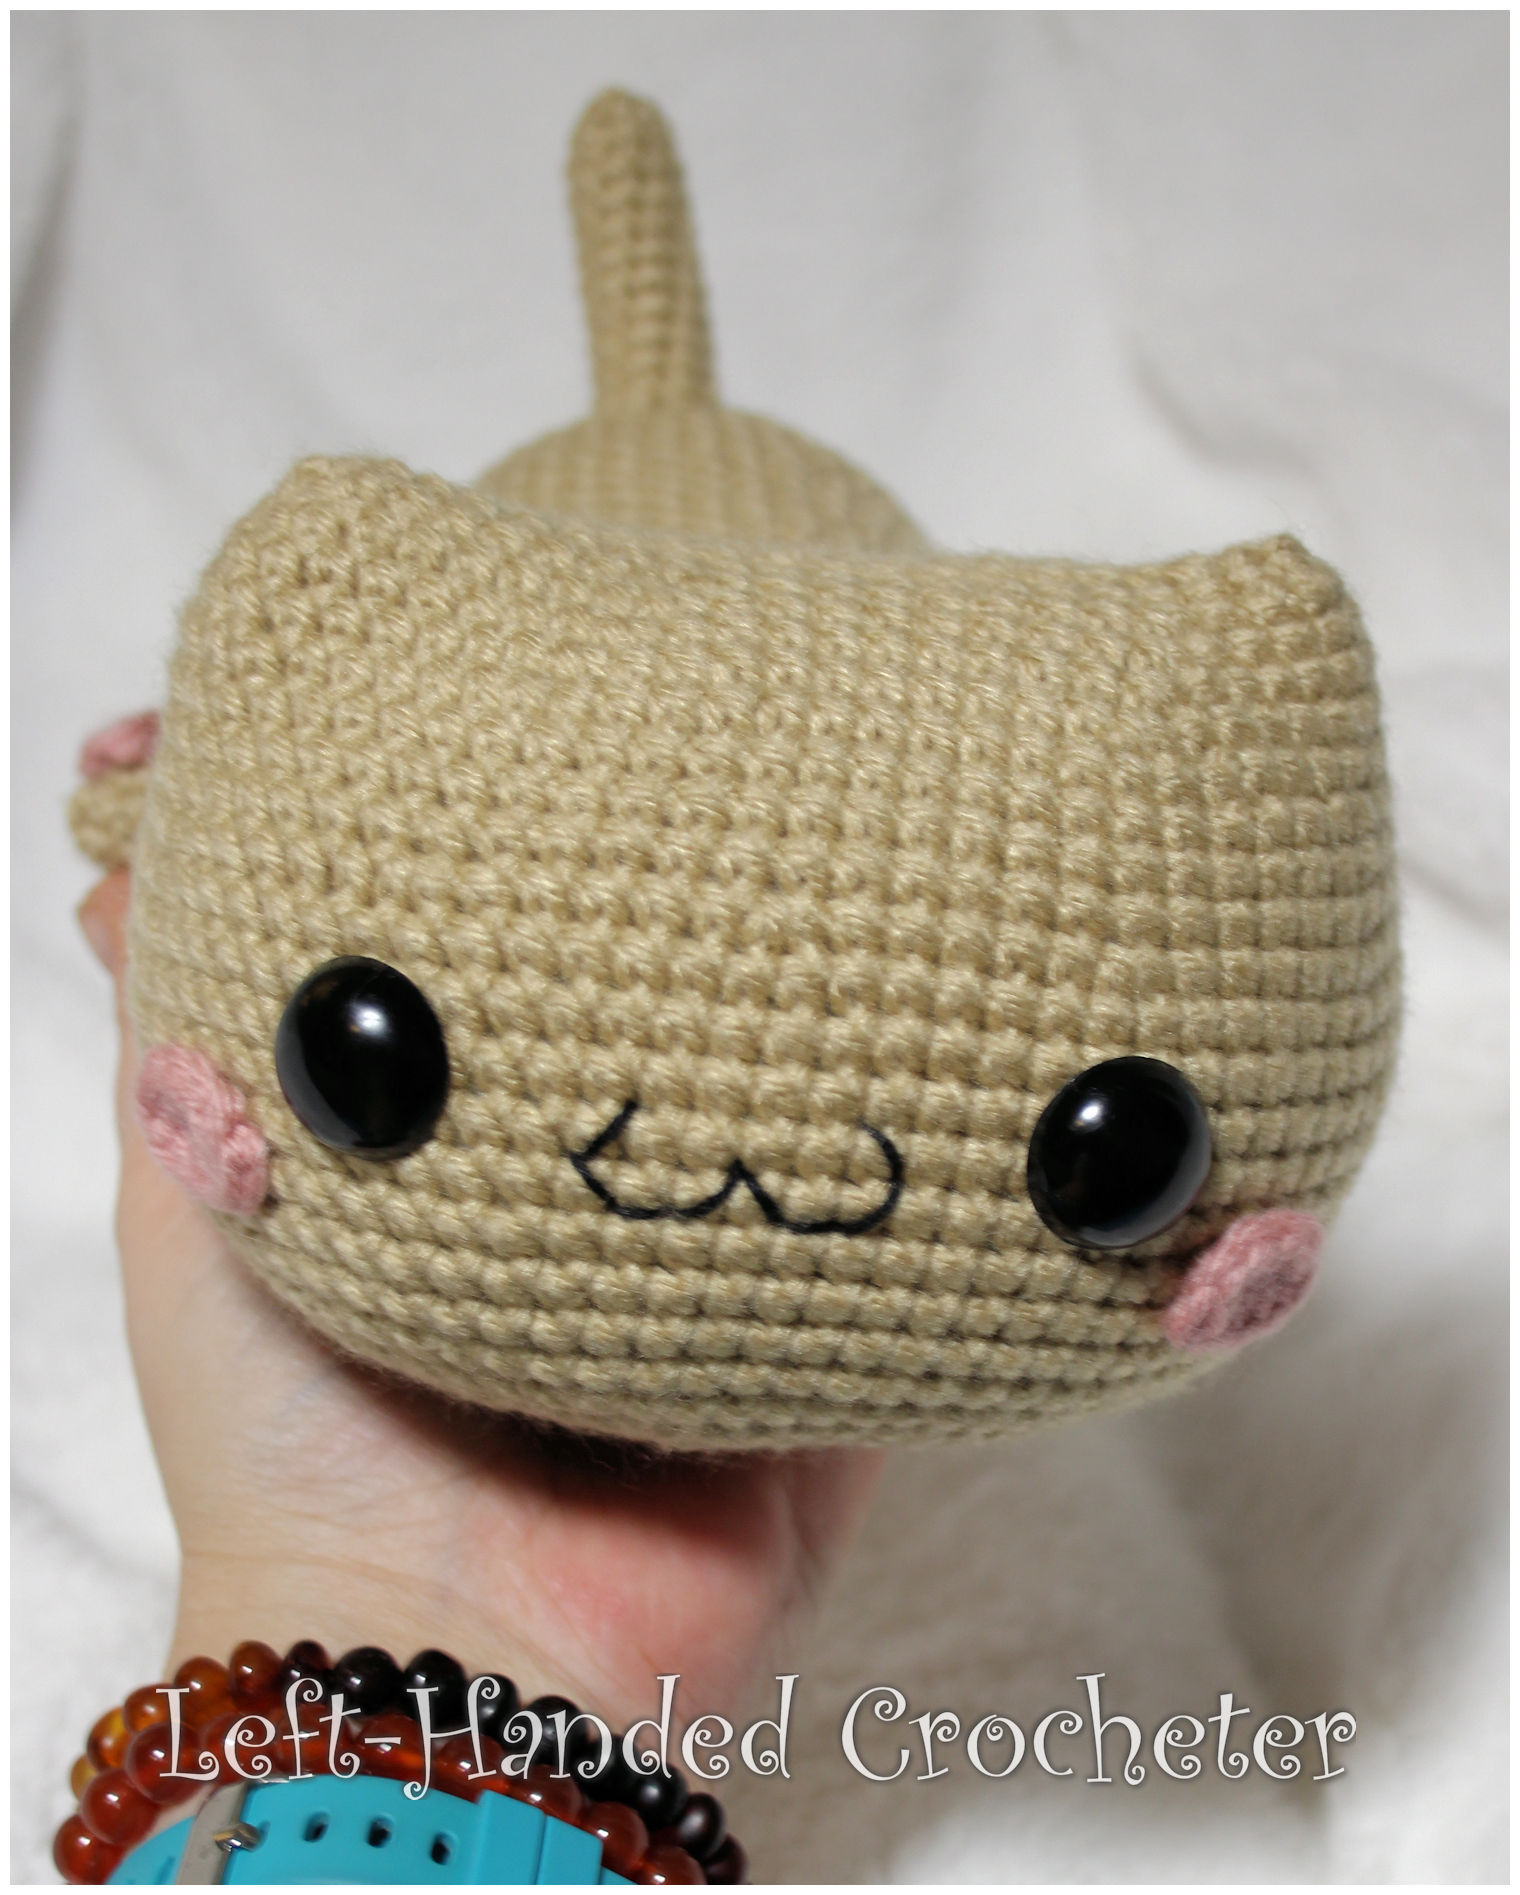
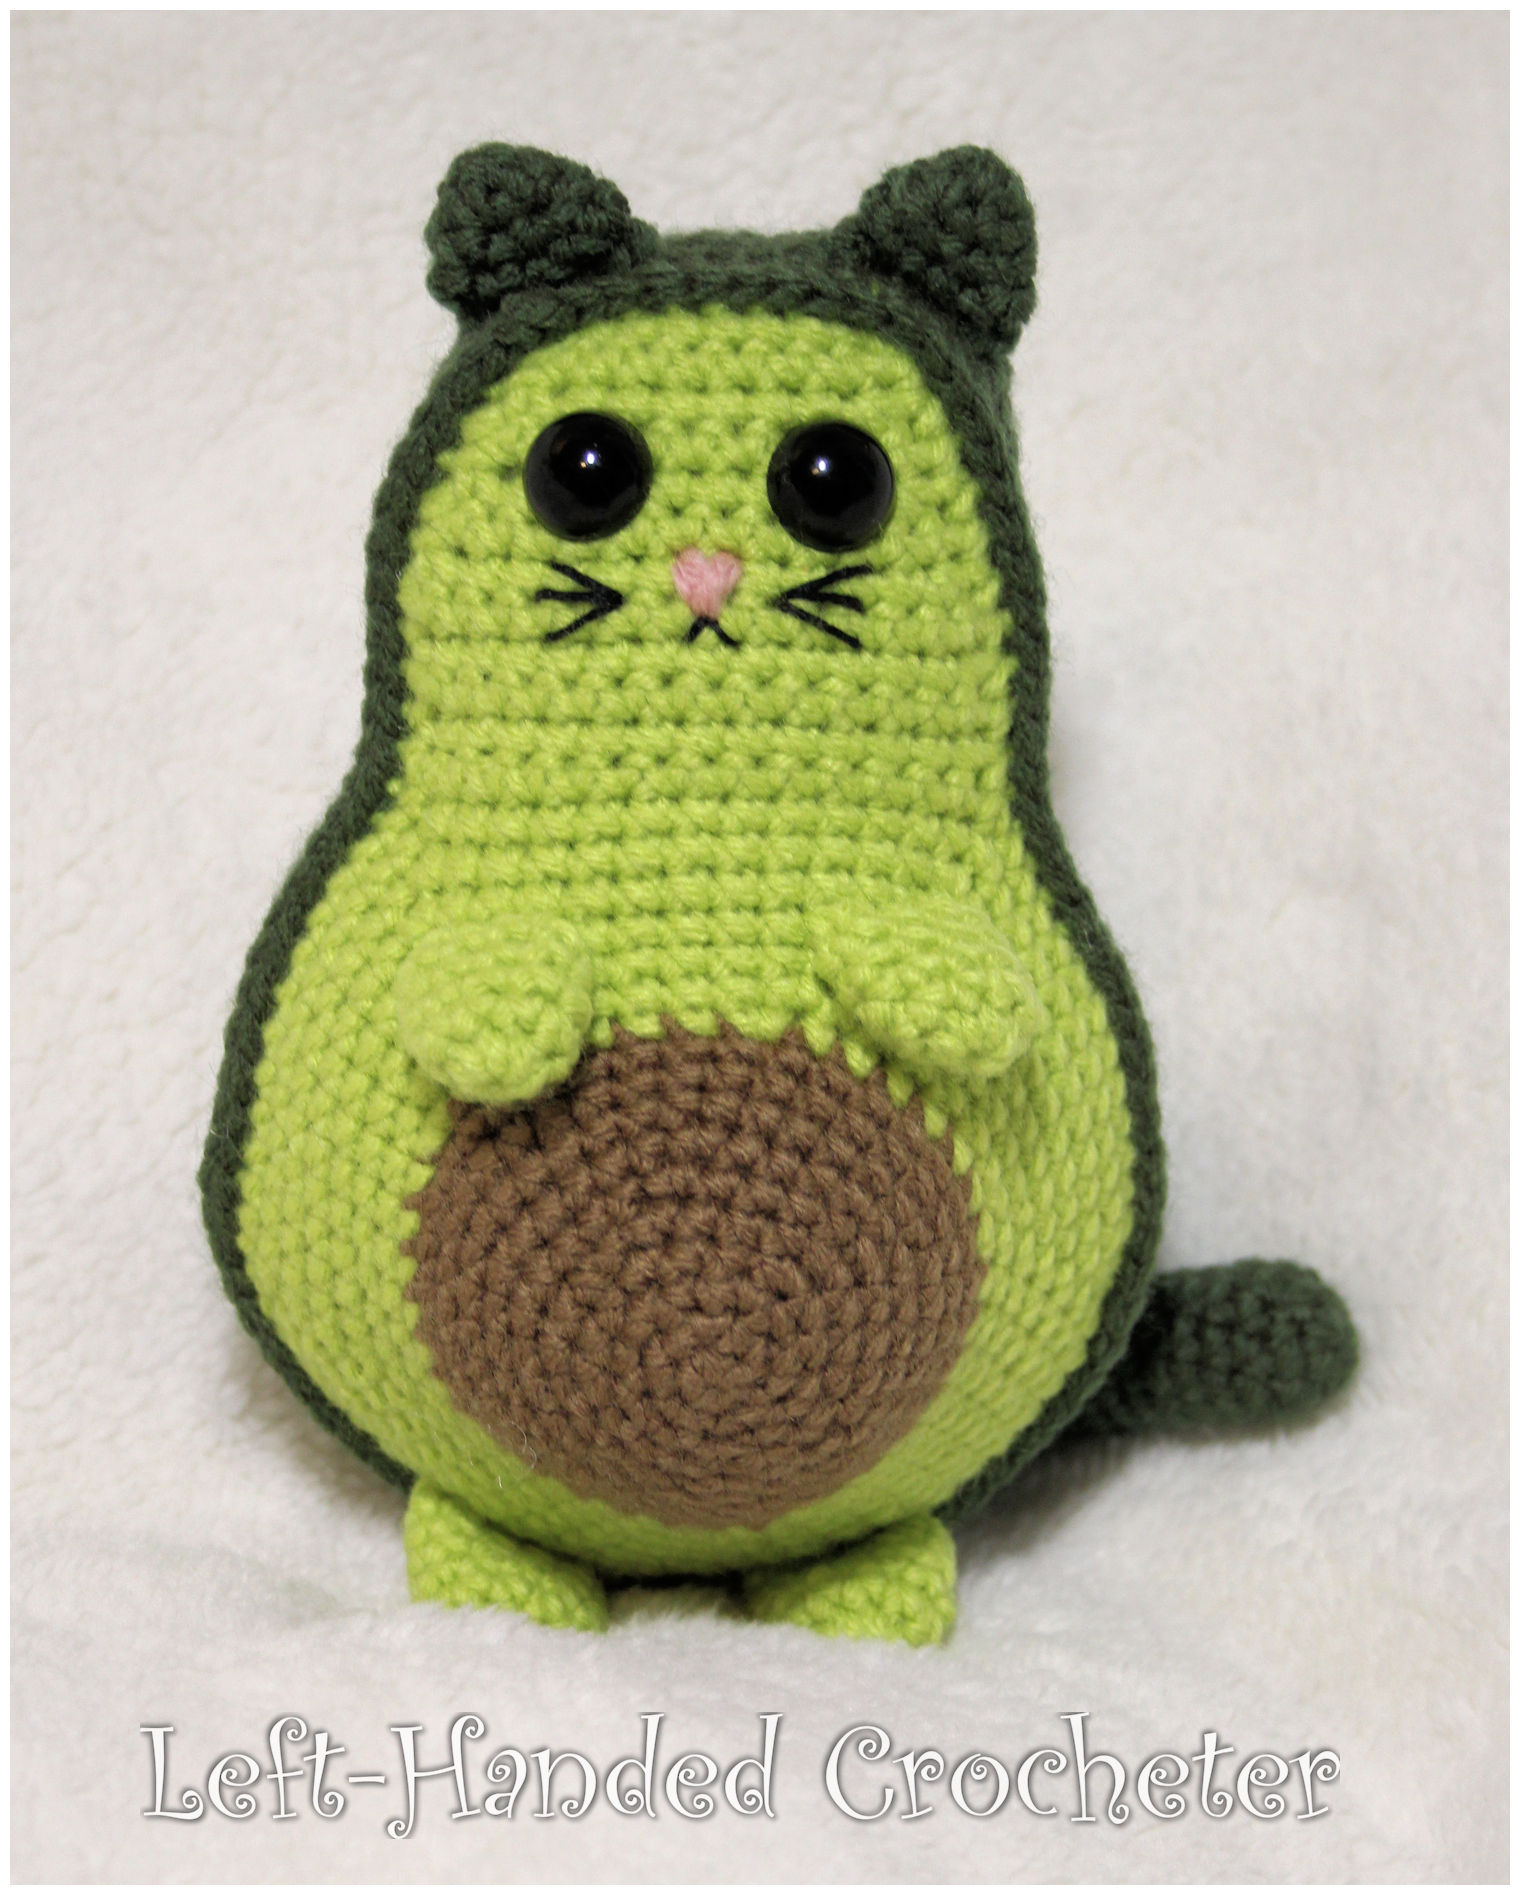
AvoCATo Pattern

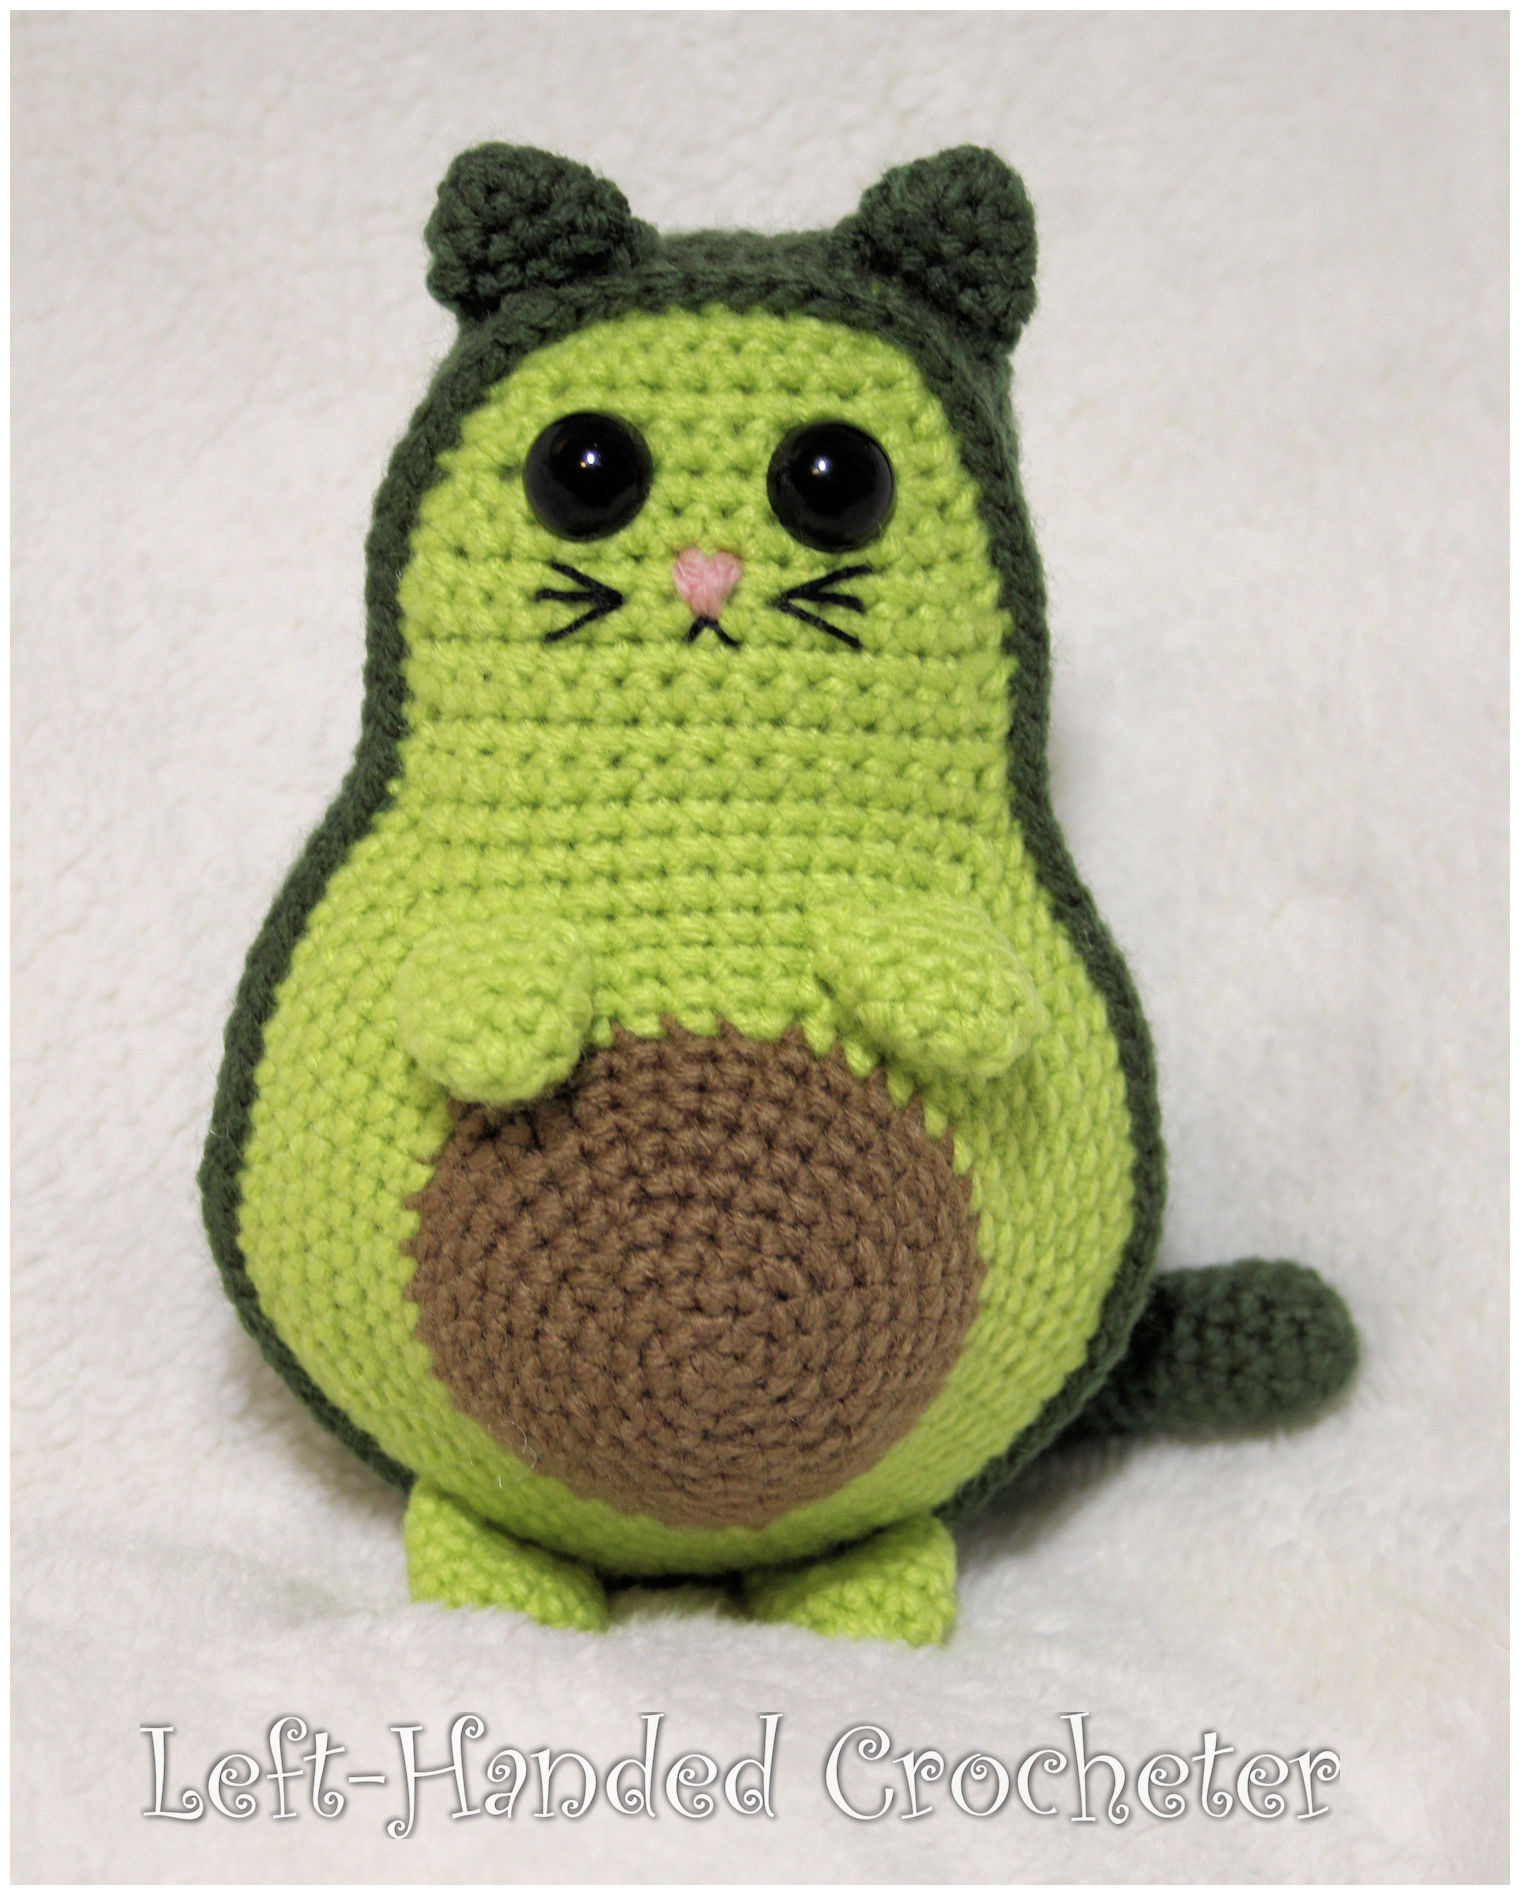
Made with worsted weight yarn, the finished doll measures approximately 7 inches tall with the ears.

Abbreviations:

ch: chain

sc: single crochet

sl st: slip stitch

inc: increase (2 single crochets in one loop)

dec: decrease (pull yarn through loop, pull yarn through second loop, yarn over and pull through all loops)

Materials needed (with affiliate links):

Any worsted weight yarn. I used Red Heart Super Saver in medium thyme and café latte and Impeccable in citron. I also used a little bit of pink yarn.

G (4mm) crochet hook

Poly-fil

Yarn needle

15mm safety eyes

Black embroidery thread

This pattern is worked “in-the-round”, and stitches are worked through both loops unless otherwise noted. 

Front

With café latte, ch 3. Sl st to first ch to create circle. (Instead, you can perform the “magic circle” if you’d like.)

Row 1: Ch 1, 5 sc inside of circle. (5 stitches)

Row 2: Inc in each stitch around. (10 stitches)

Row 3: *Inc in first stitch, sc in next stitch, repeat from * around. (15 stitches)

Row 4: *Inc in first stitch, sc in next 2 stitches, repeat from * around. (20 stitches)

Row 5: *Inc in first stitch, sc in next 3 stitches, repeat from * around. (25 stitches)

Row 6: *Inc in first stitch, sc in next 4 stitches, repeat from * around. (30 stitches)

Row 7: *Inc in first stitch, sc in next 5 stitches, repeat from * around. (35 stitches)

Rows 8-10: Sc in each stitch around. (35 stitches)

Switch to citron.

Row 11: *Inc in first stitch, sc in next 6 stitches, repeat from * around. (40 stitches)

Row 12: *Inc in first stitch, sc in next 7 stitches, repeat from * around. (45 stitches)

Row 13: *Inc in first stitch, sc in next 8 stitches, repeat from * around. (50 stitches)

Row 14: *Inc in first stitch, sc in next 9 stitches, repeat from * around. (55 stitches)

Row 15: *Inc in first stitch, sc in next 10 stitches, repeat from * around. (60 stitches)

Row 16: *Inc in first stitch, sc in next 11 stitches, repeat from * around. (65 stitches)

Row 17: *Inc in first stitch, sc in next 12 stitches, repeat from * around. (70 stitches)

Tie off.
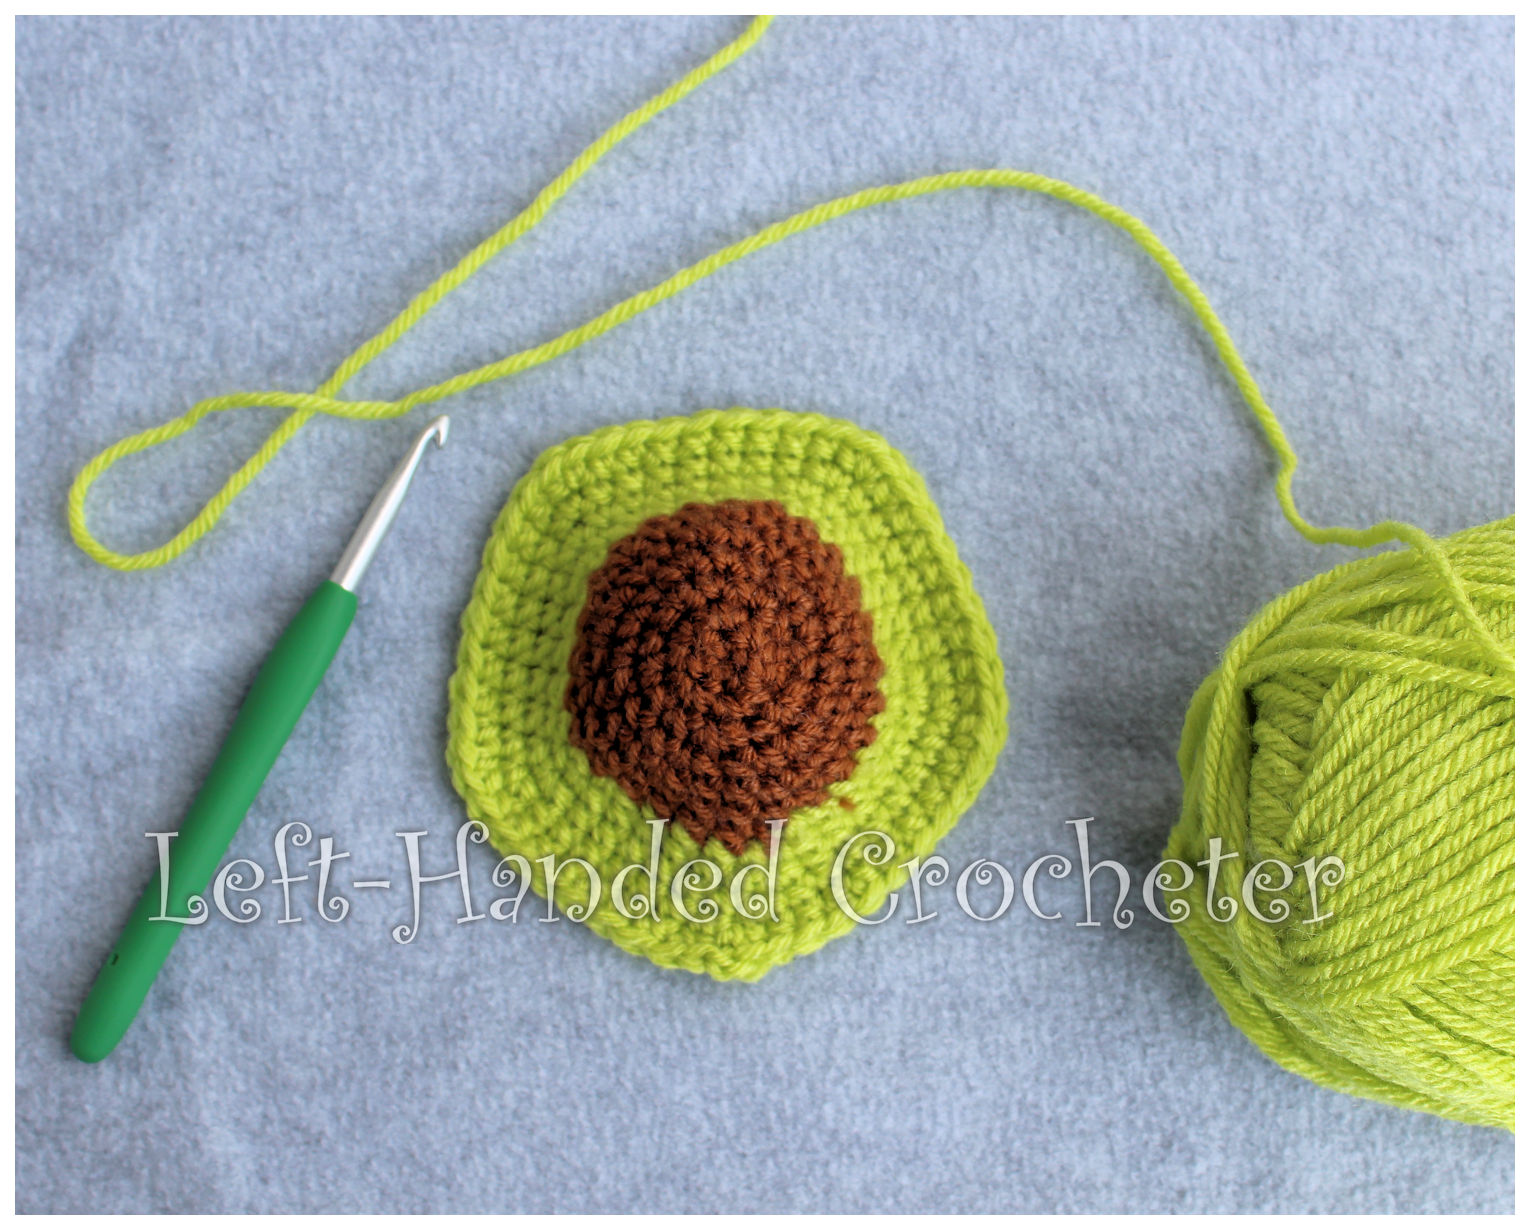
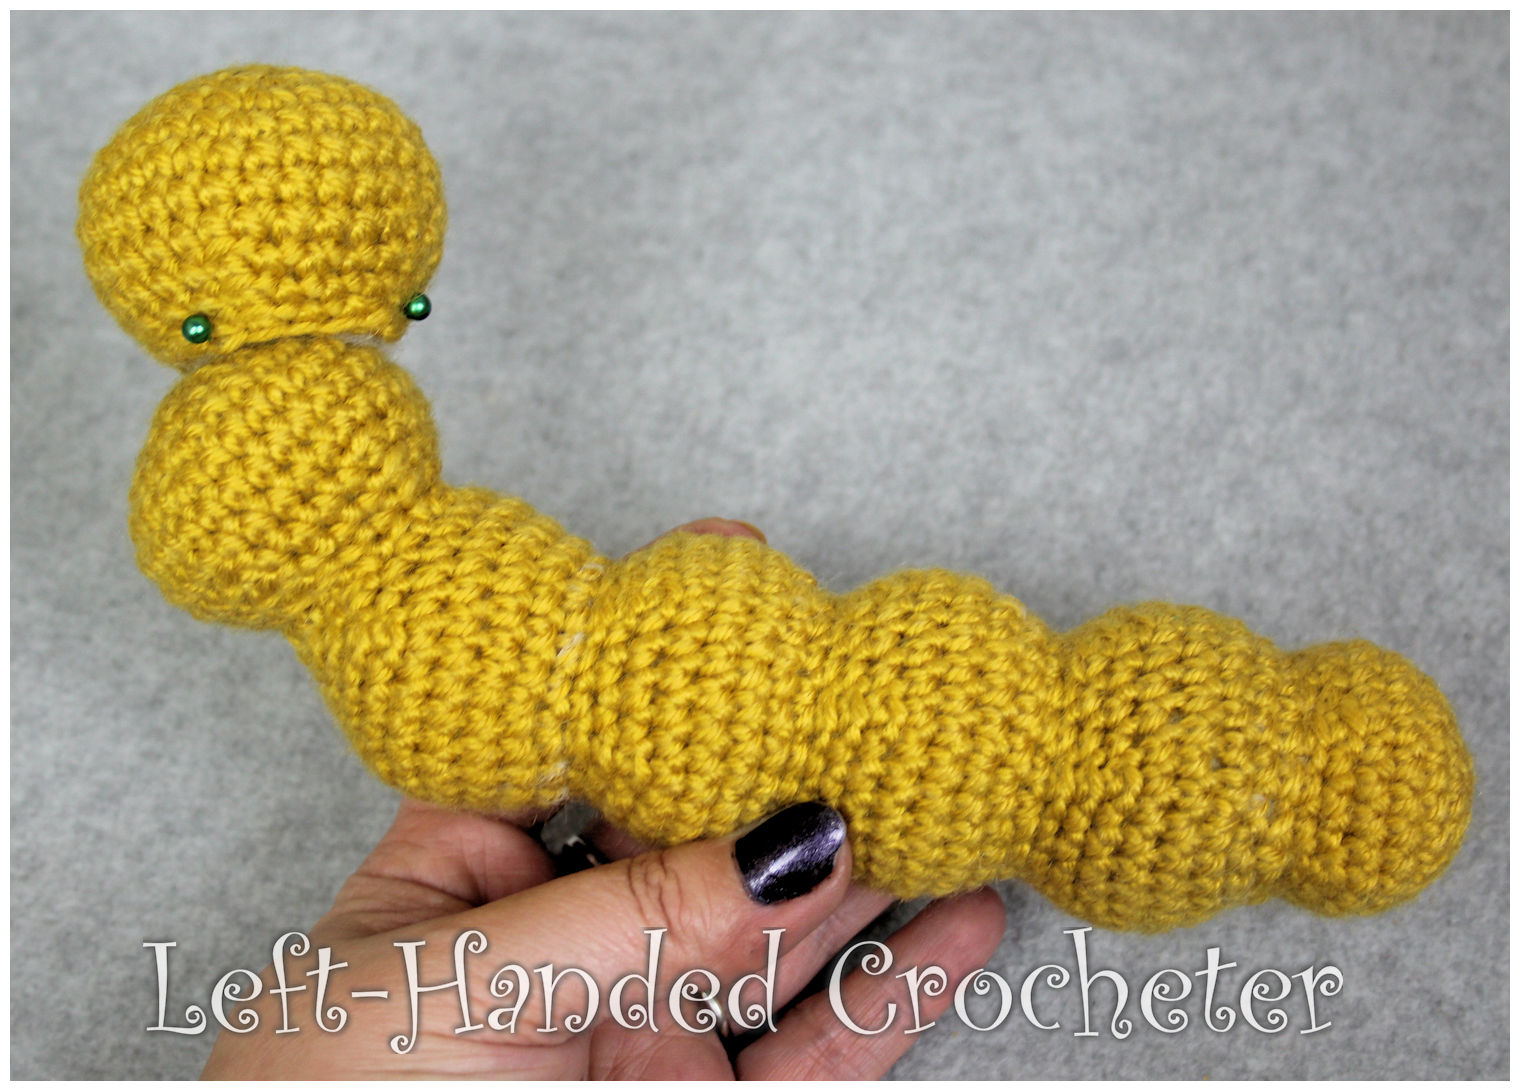
Your piece won’t be round, it should have 5 sides to it like the photo above. With citron, slip stitch into the end of one of those sides.
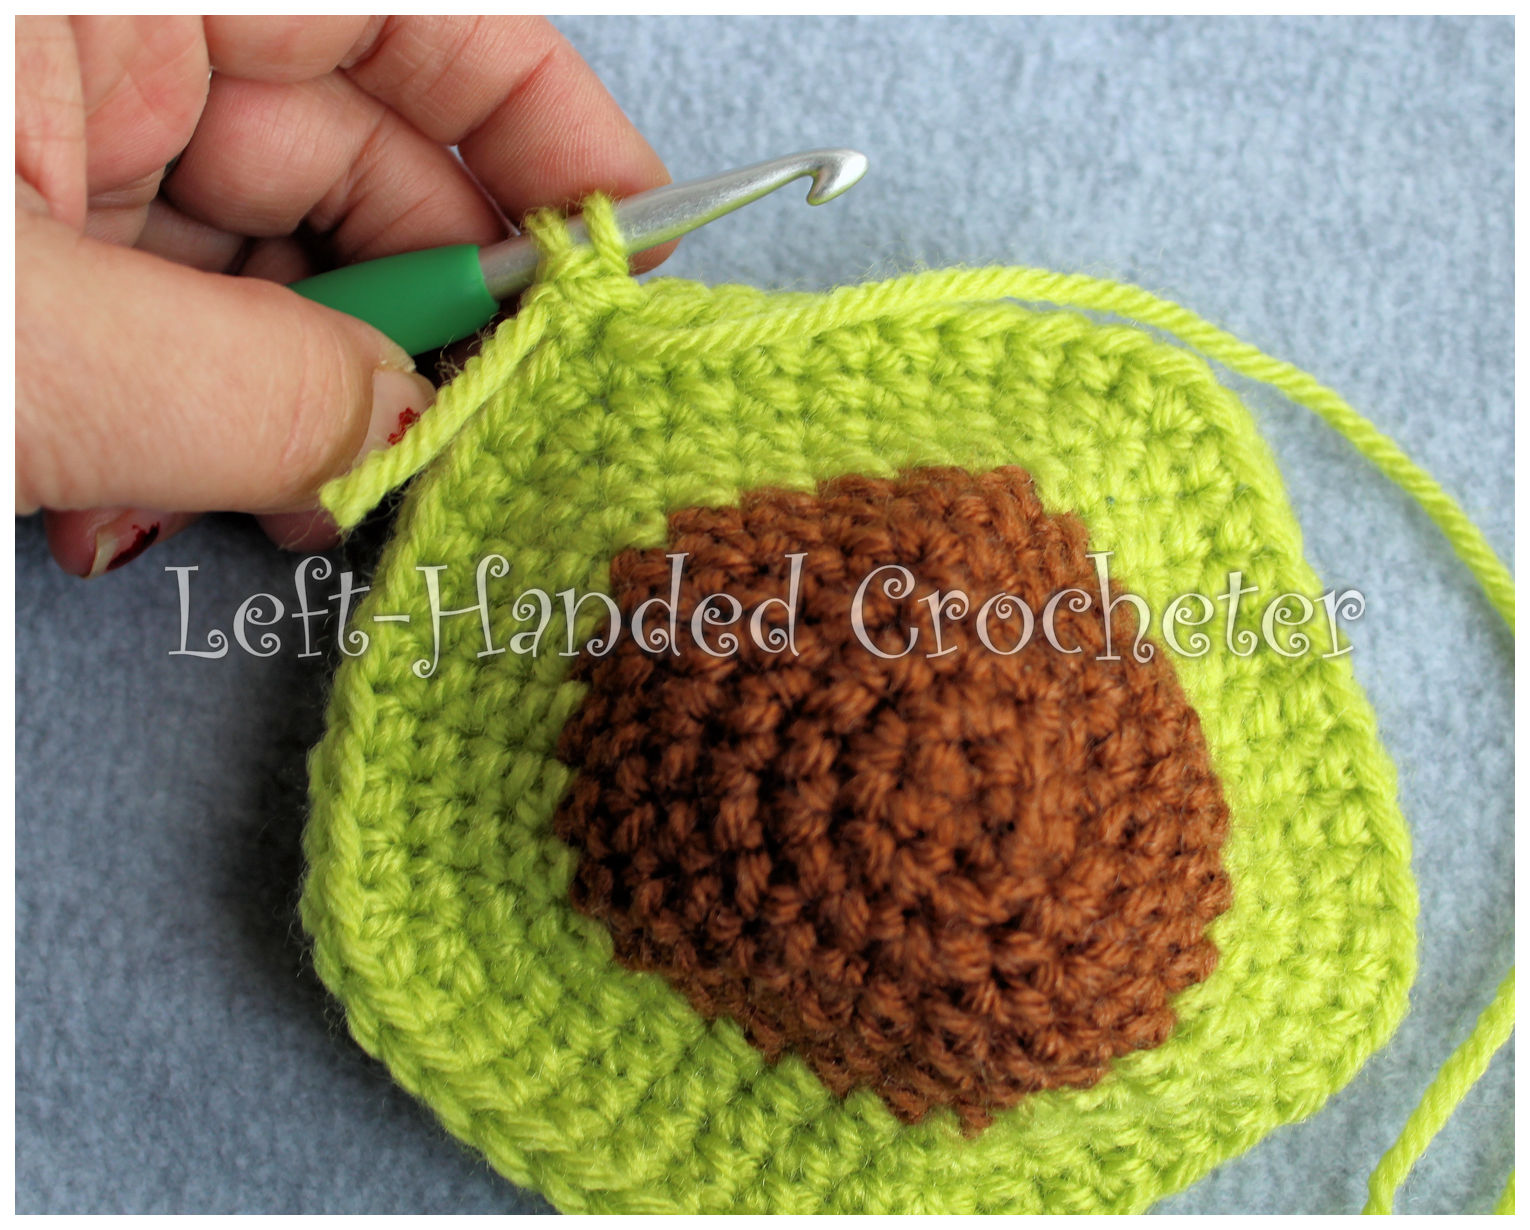
Row 1: Sc in first 14 stitches, ch 1, turn. (14 stitches)

Rows 2-5: Sc in each stitch across, ch 1, turn. (14 stitches)

Row 6: Dec in first 2 stitches, sc in next 10 stitches, dec in last 2 stitches, ch 1, turn. (12 stitches)

Row 7: Sc in each stitch across, ch 1, turn. (12 stitches)

Row 8: Dec in first 2 stitches, sc in next 8 stitches, dec in last 2 stitches, ch 1, turn. (10 stitches)

Row 9: Sc in each stitch across, ch 1, turn. (10 stitches)

Row 10: Dec in first 2 stitches, sc in next 6 stitches, dec in last 2 stitches, ch 1, turn. (8 stitches)

Row 11: Sc in each stitch across, ch 1, turn. (8 stitches)
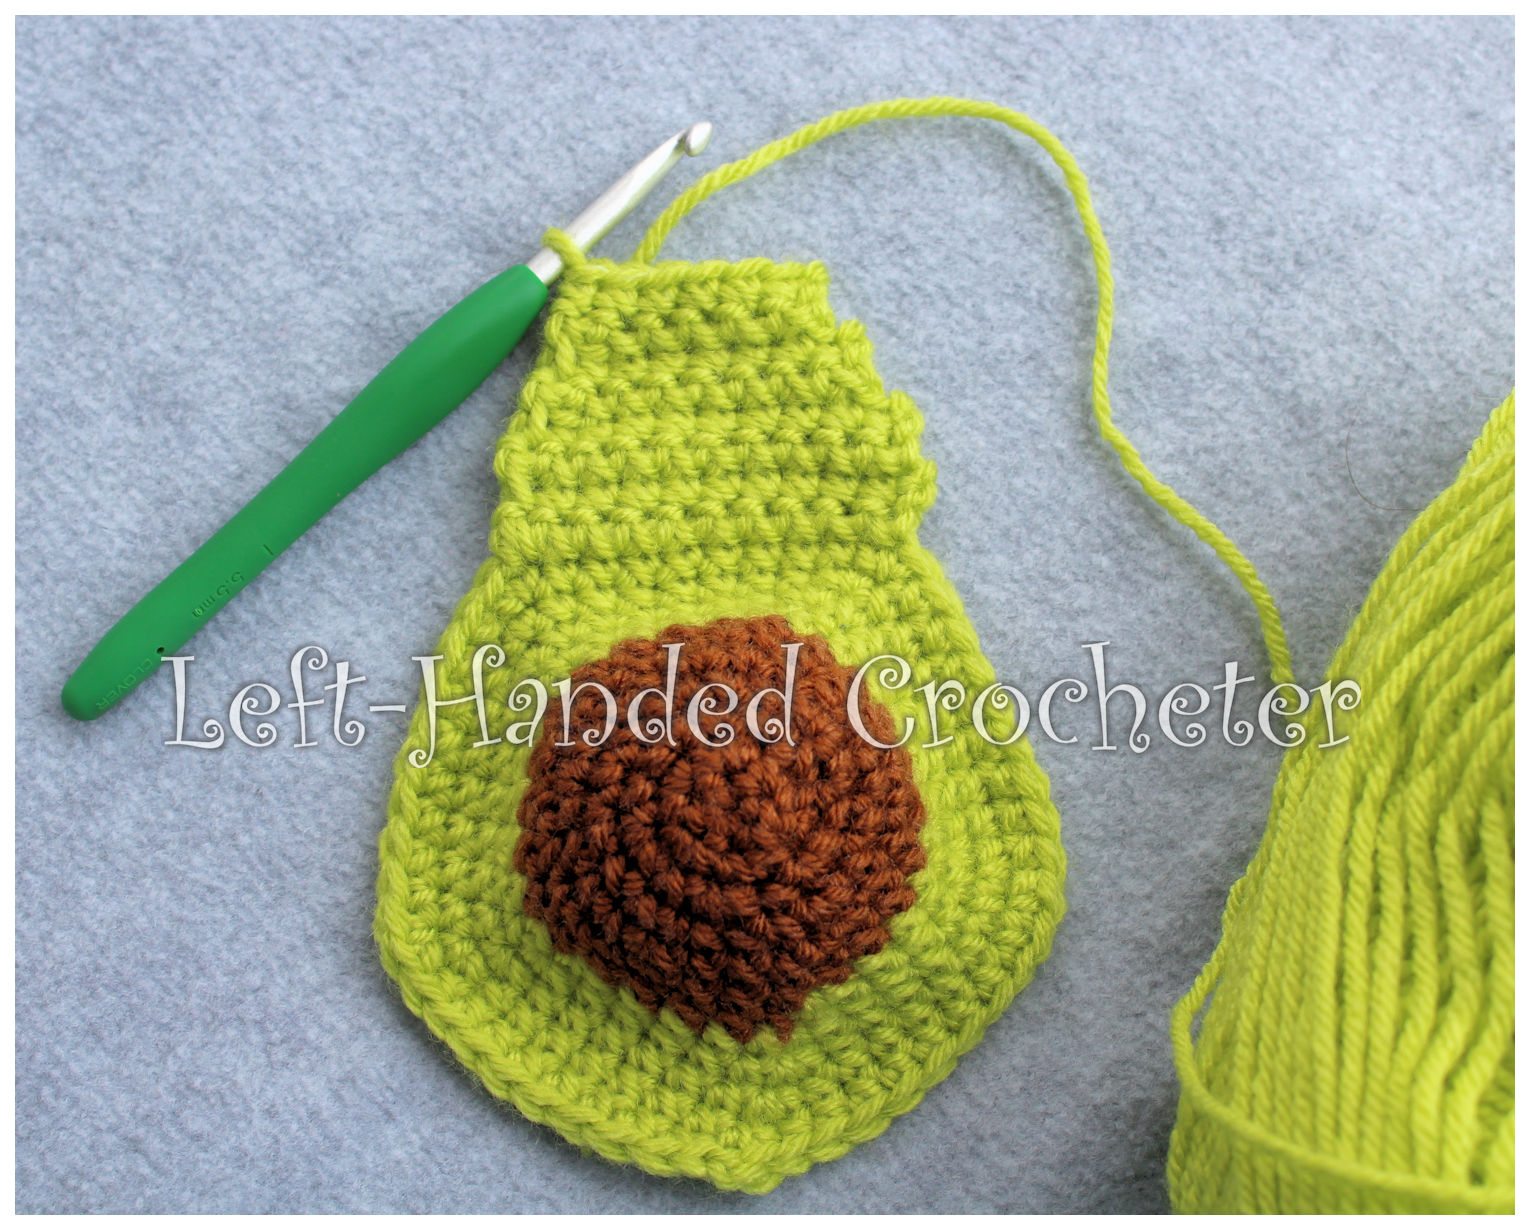
Work 88 sc’s around the whole thing.
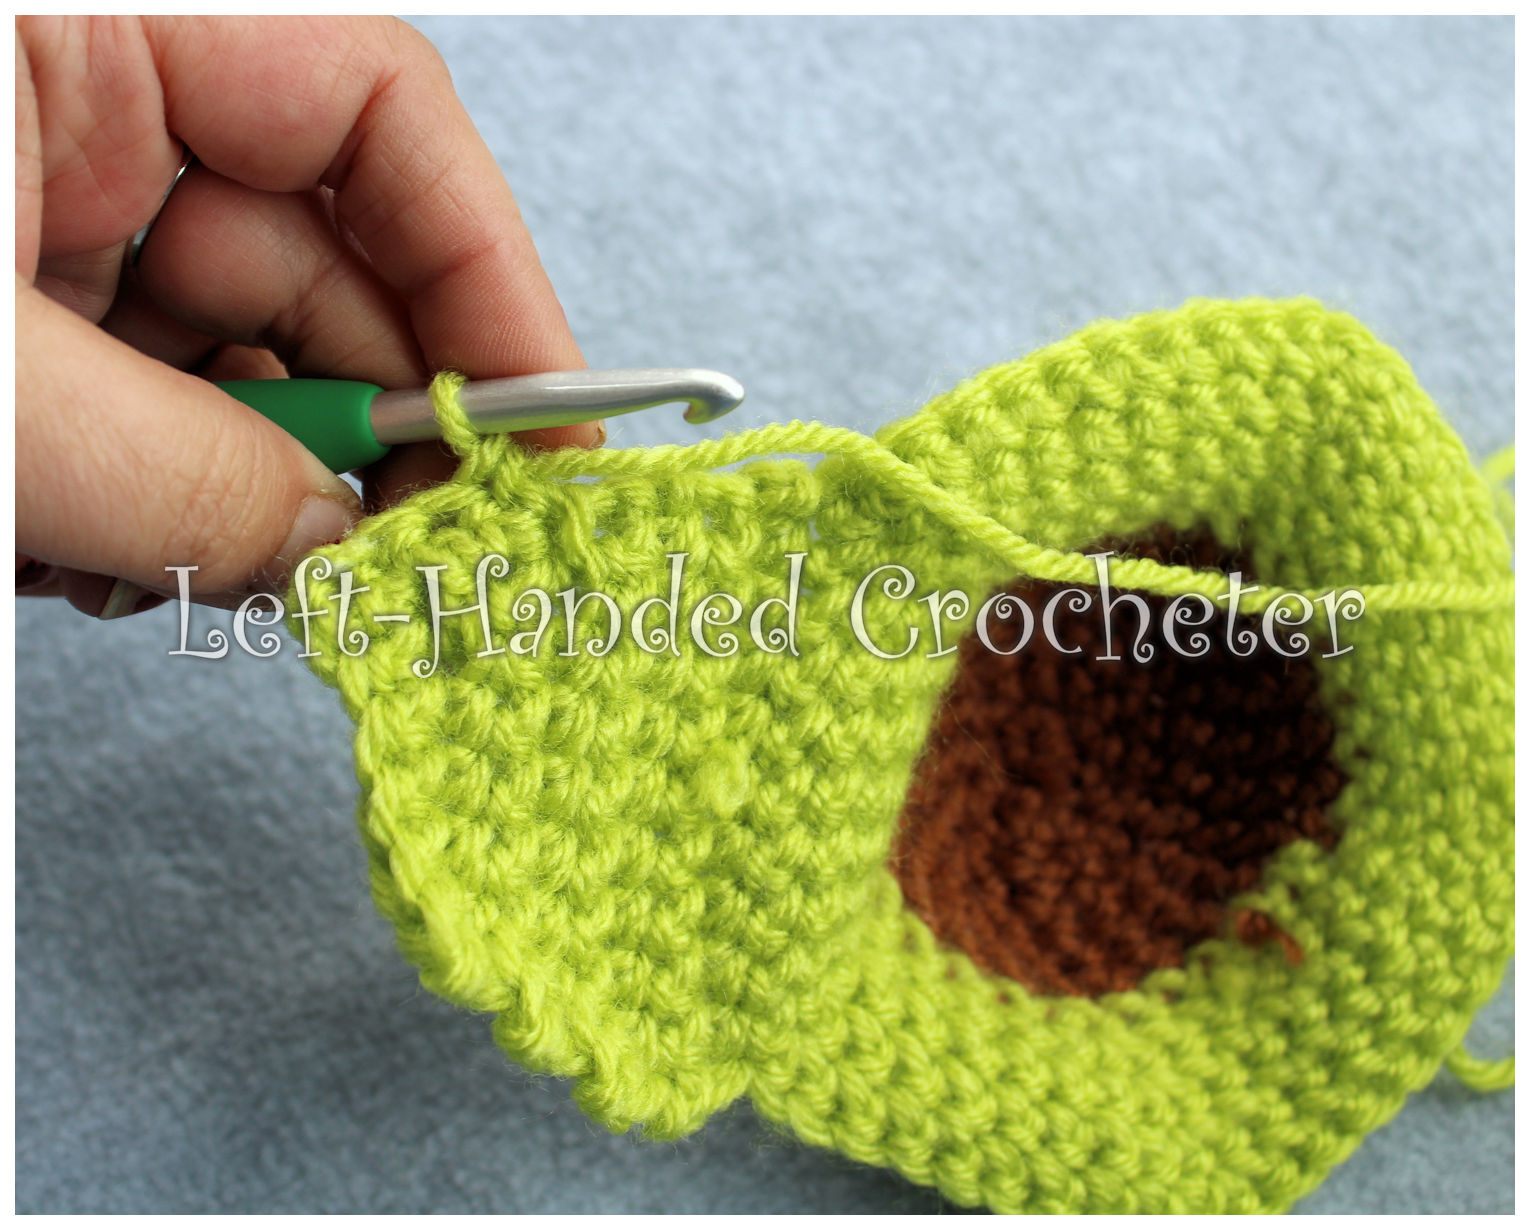
Sl st to first stitch. Tie off. Insert safety eyes 4-5 rows from the top, evenly spaced on each side. Sew a nose on with pink yarn. Sew whiskers and mouth on with black embroidery thread.

Back

With medium thyme, ch 3. Sl st to first ch to create circle. (Instead, you can perform the “magic circle” if you’d like.)

Row 1: Ch 1, 5 sc inside of circle. (5 stitches)

Row 2: Inc in each stitch around. (10 stitches)

Row 3: *Inc in first stitch, sc in next stitch, repeat from * around. (15 stitches)

Row 4: *Inc in first stitch, sc in next 2 stitches, repeat from * around. (20 stitches)

Row 5: *Inc in first stitch, sc in next 3 stitches, repeat from * around. (25 stitches)

Row 6: *Inc in first stitch, sc in next 4 stitches, repeat from * around. (30 stitches)

Row 7:  *Inc in first stitch, sc in next 5 stitches, repeat from * around. (35 stitches)

Row 8: *Inc in first stitch, sc in next 6 stitches, repeat from * around. (40 stitches)

Row 9: *Inc in first stitch, sc in next 7 stitches, repeat from * around. (45 stitches)

Row 10: *Inc in first stitch, sc in next 8 stitches, repeat from * around. (50 stitches)

Row 11: *Inc in first stitch, sc in next 9 stitches, repeat from * around. (55 stitches)

Row 12: *Inc in first stitch, sc in next 10 stitches, repeat from * around. (60 stitches)

Row 13: *Inc in first stitch, sc in next 11 stitches, repeat from * around. (65 stitches)

Row 14: *Inc in first stitch, sc in next 12 stitches, repeat from * around. (70 stitches)

Tie off.

Sl st into one of the flat sides like you did for the front.

Row 1: Sc in first 14 stitches, ch 1, turn. (14 stitches)

Rows 2-5: Sc in each stitch across, ch 1, turn. (14 stitches)

Row 6: Dec in first 2 stitches, sc in next 10 stitches, dec in last 2 stitches, ch 1, turn. (12 stitches)

Row 7: Sc in each stitch across, ch 1, turn. (12 stitches)

Row 8: Dec in first 2 stitches, sc in next 8 stitches, dec in last 2 stitches, ch 1, turn. (10 stitches)

Row 9: Sc in each stitch across, ch 1, turn. (10 stitches)

Row 10: Dec in first 2 stitches, sc in next 6 stitches, dec in last 2 stitches, ch 1, turn. (8 stitches)

Row 11: Sc in each stitch across, ch 1, turn. (8 stitches)

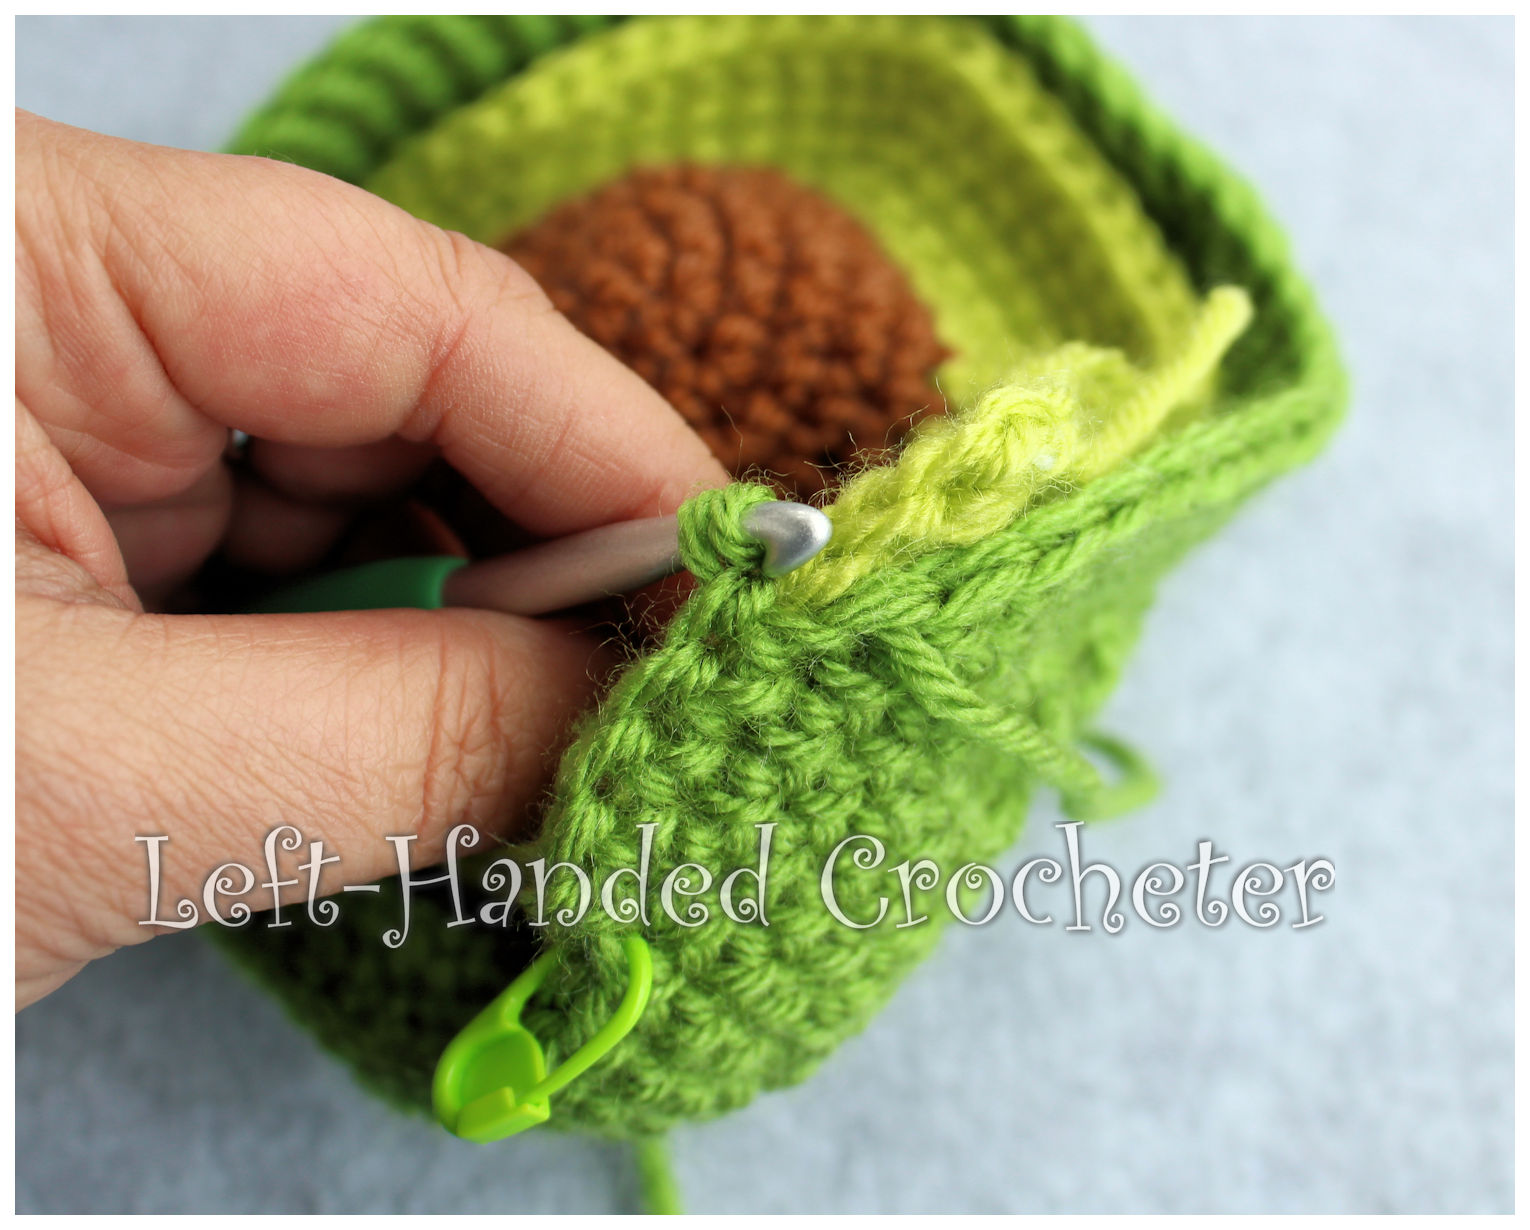
Work 88 sc’s around the whole thing. Repeat this 4 times to create a “bowl” shape. You can make your avocado wider by working more rows around the back piece, or make it slimmer by working less rows around. Don’t tie off.

Holding the 2 pieces together, sc around.
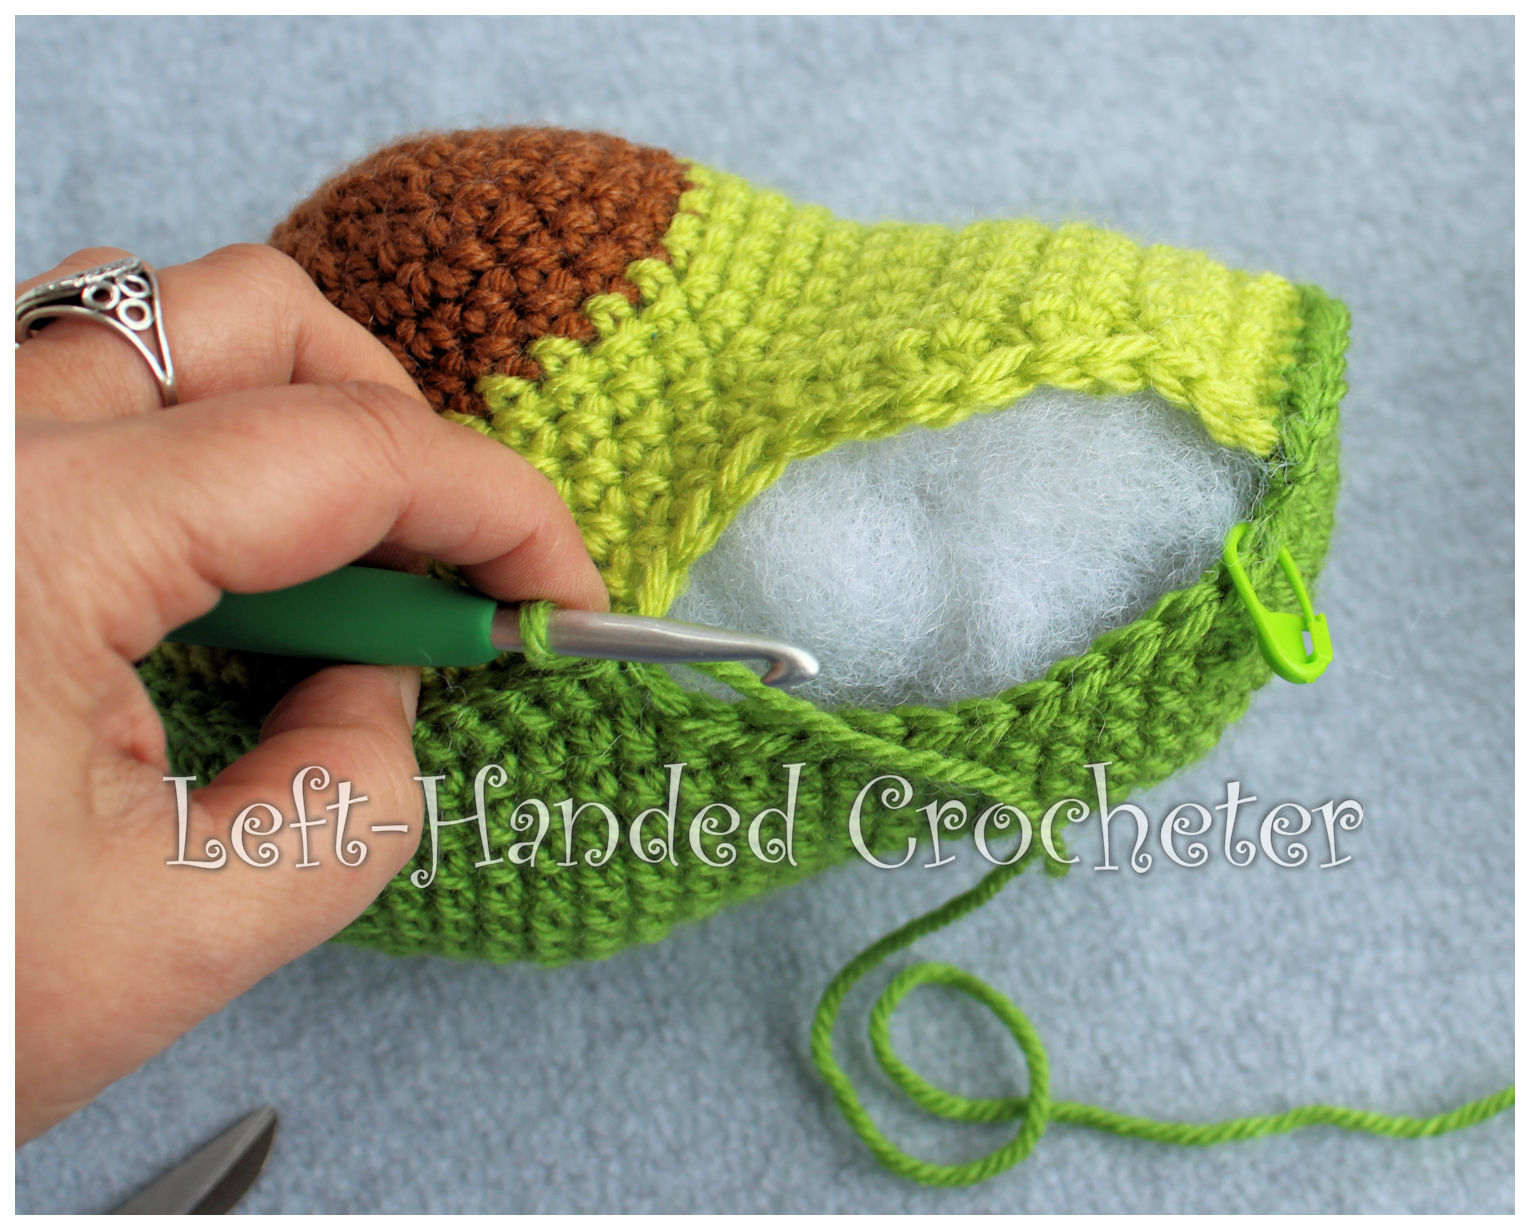
Before you close it up, stuff tight with poly-fil.
Ears:

With medium thyme, ch 3. Sl st to first ch to create circle. (Instead, you can perform the “magic circle” if you’d like.)

Row 1: Ch 1, 4 sc inside of circle. (4 stitches)

Row 2: *Inc in first stitch, sc in next stitch, repeat from * around. (6 stitches)

Row 3: *Inc in first stitch, sc in next 2 stitches, repeat from * around. (8 stitches)

Row 4: *Inc in first stitch, sc in next 3 stitches, repeat from * around. (10 stitches)

Tie off. Don’t stuff. Position and sew onto top of head.

Arms:

With citron, ch 3. Sl st to first ch to create circle. (Instead, you can perform the “magic circle” if you’d like.)

Row 1: Ch 1, 8 sc inside of circle. (8 stitches)

Rows 2-5: Sc in each stitch around. (8 stitches)

Tie off. Don’t stuff. Sew onto front of avocado.

Legs:

With citron, ch 3. Sl st to first ch to create circle. (Instead, you can perform the “magic circle” if you’d like.)

Row 1: Ch 1, 10 sc inside of circle. (10 stitches)

Rows 2-6: Sc in each stitch around. (10 stitches)

Tie off. Don’t stuff. Sew onto front of avocado.

Tail:

With medium thyme, ch 3. Sl st to first ch to create circle. (Instead, you can perform the “magic circle” if you’d like.)

Row 1: Ch 1, 5 sc inside of circle. (5 stitches)

Row 2: Inc in each stitch around. (10 stitches)

Rows 3-22: Sc in each stitch around. (10 stitches)

Tie off. Stuff halfway. Position and sew onto back of avocado.
I hope you enjoy this pattern! You’re welcome to sell items that you make using my patterns, as long as you don’t post the pattern anywhere else, and link back to my page if you’d like to. If there are any mistakes, or something is unclear, please feel free to message me on Facebook.

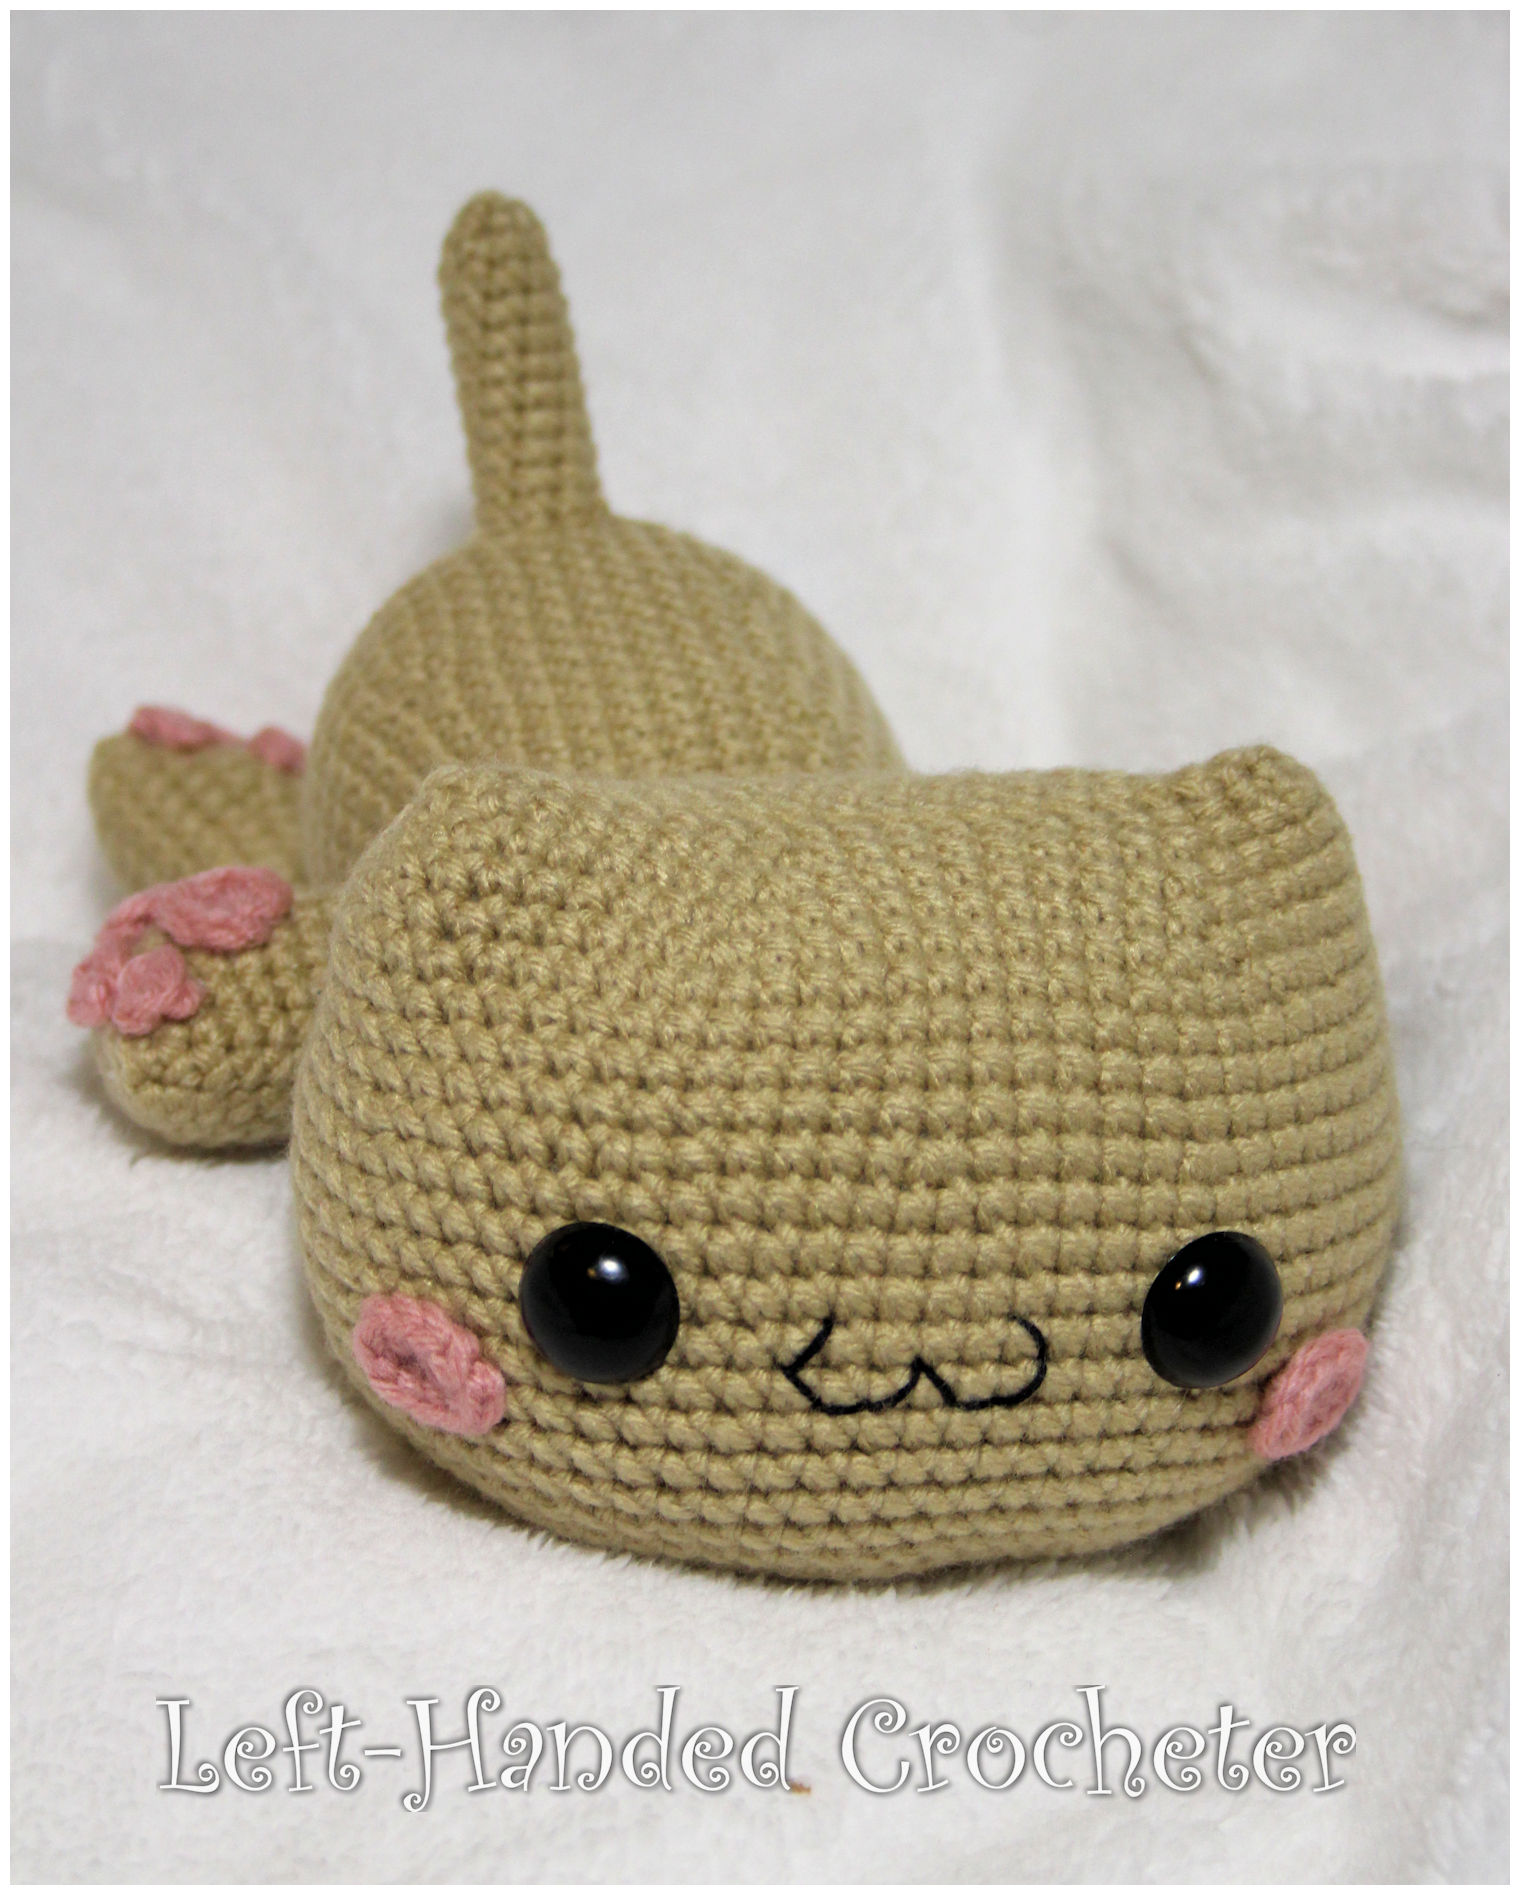
Mochi the Cat

Made with worsted weight yarn, the finished doll measures approximately 10 inches long.

Abbreviations:

ch: chain

sc: single crochet

sl st: slip stitch

inc: increase (2 single crochets in one loop)

dec: decrease (pull yarn through loop, pull yarn through second loop, yarn over and pull through all loops)

Materials needed:

Any worsted weight yarn. I used Caron One Pound in lace and Impeccable in rose.

G (4mm) crochet hook

Poly-fil

Yarn needle

20mm safety eyes

Black embroidery thread (optional)

This pattern is worked “in-the-round”, and stitches are worked through both loops unless otherwise noted. 

Head:

With lace, ch 21.

Row 1: Sc in 2nd ch from hook and in each across. Turn and sc across other side of ch. (40 stitches)

Row 2: *Inc in first stitch, sc in next 7 stitches, repeat from * around. (45 stitches)

Row 3: *Inc in first stitch, sc in next 8 stitches, repeat from * around. (50 stitches)

Row 4: *Inc in first stitch, sc in next 9 stitches, repeat from * around. (55 stitches)

Row 5: *Inc in first stitch, sc in next 10 stitches, repeat from * around. (60 stitches)

*Note: It will probably be curling a bit at this point. Don’t worry about that. This will go away as you work.*

Rows 6-9: Sc in each stitch around. (60 stitches)

Row 10: *Inc in first stitch, sc in next 5 stitches, repeat from * around. (70 stitches)

Rows 11-20: Sc in each stitch around. (70 stitches)

Row 21: *Dec in first 2 stitches, sc in next 5 stitches, repeat from * around. (60 stitches)

Row 22: *Dec in first 2 stitches, sc in next 4 stitches, repeat from * around. (50 stitches)

Row 23: *Dec in first 2 stitches, sc in next 3 stitches, repeat from * around. (40 stitches)

Stuff tight with poly-fil. It should form ears at the top when you stuff it, so make sure to stuff tight into those corners. Insert safety eyes between rows 13 and 14 with 14 stitches between them. Continue stuffing as you work.

Row 24: *Dec in first 2 stitches, sc in next 2 stitches, repeat from * around. (30 stitches)

Row 25: *Dec in first 2 stitches, sc in next stitch, repeat from * around. (20 stitches)

Row 26: Dec around. (10 stitches)

Row 27: Dec around. (5 stitches)

Sew end shut and tie off. Sew mouth on with embroidery thread.

Body:

With lace, ch 3. Sl st to first ch to create circle. (Instead, you can perform the “magic circle” if you’d like.)

Row 1: ch 1, 10 sc inside of circle. (10 stitches)

Row 2: *Inc in first stitch, sc in next stitch, repeat from * around. (15 stitches)

Row 3: *Inc in first stitch, sc in next 2 stitches, repeat from * around. (20 stitches)

Row 4: *Inc in first stitch, sc in next 3 stitches, repeat from * around. (25 stitches)

Row 5: *Inc in first stitch, sc in next 4 stitches, repeat from * around. (30 stitches)

Row 6: *Inc in first stitch, sc in next 5 stitches, repeat from * around. (35 stitches)

Row 7: *Inc in first stitch, sc in next 6 stitches, repeat from * around. (40 stitches)

Row 8: *Inc in first stitch, sc in next 7 stitches, repeat from * around. (45 stitches)

Row 9: *Inc in first stitch, sc in next 8 stitches, repeat from * around. (50 stitches)

Rows 10-13: Sc in each stitch around. (50 stitches)

Row 14: *Dec in first 2 stitches, sc in next 8 stitches, repeat from * around. (45 stitches)

Row 15: *Dec in first 2 stitches, sc in next 7 stitches, repeat from * around. (40 stitches)

Rows 16-18: Sc in each stitch around. (40 stitches)

Row 19: *Dec in first 2 stitches, sc in next 6 stitches, repeat from * around. (35 stitches)

Rows 20-21: Sc in each stitch around. (35 stitches)

Row 22: *Dec in first 2 stitches, sc in next 5 stitches, repeat from * around. (30 stitches)

Rows 23-24: Sc in each stitch around. (30 stitches)

Row 25: *Dec in first 2 stitches, sc in next 4 stitches, repeat from * around. (25 stitches)

Row 26: Sc in each stitch around. (25 stitches)

Tie off. Stuff tight with poly-fil. Position and sew head onto body.

Tail:

With lace, ch 3. Sl st to first ch to create circle. (Instead, you can perform the “magic circle” if you’d like.)

Row 1: ch 1, 4 sc inside of circle. (4 stitches)

Row 2: *Inc in first stitch, sc in next stitch, repeat from * around. (6 stitches)

Row 3: *Inc in first stitch, sc in next 2 stitches, repeat from * around. (8 stitches)

Rows 4-11: Sc in each stitch around. (8 stitches)

Row 12: *Inc in first stitch, sc in next 3 stitches, repeat from * around. (10 stitches)

Tie off. Stuff tight with poly-fil. Position and sew onto butt.

Legs:

With lace, ch 11.

Row 1: Sc in 2nd ch from hook and in each across. Turn and sc across other side of ch. (20 stitches)

Rows 2-6: Sc in each stitch around. (20 stitches)

Row 7: *Dec in first 2 stitches, sc in next 2 stitches, repeat from * around. (15 stitches)

Rows 8-12: Sc in each stitch around. (15 stitches)

Row 13: *Dec in first 2 stitches, sc in next stitch, repeat from * around. (10 stitches)

Tie off. Stuff with poly-fil, leaving the top 5-6 rows unstuffed. Position and sew onto body.

Cheeks:

With rose, ch 5.

Row 1: Sc in 2nd ch from hook and in each across. Turn and sc across other side of ch. (8 stitches)

Sl st to next stitch. Tie off. Position onto face and sew or hot glue on.

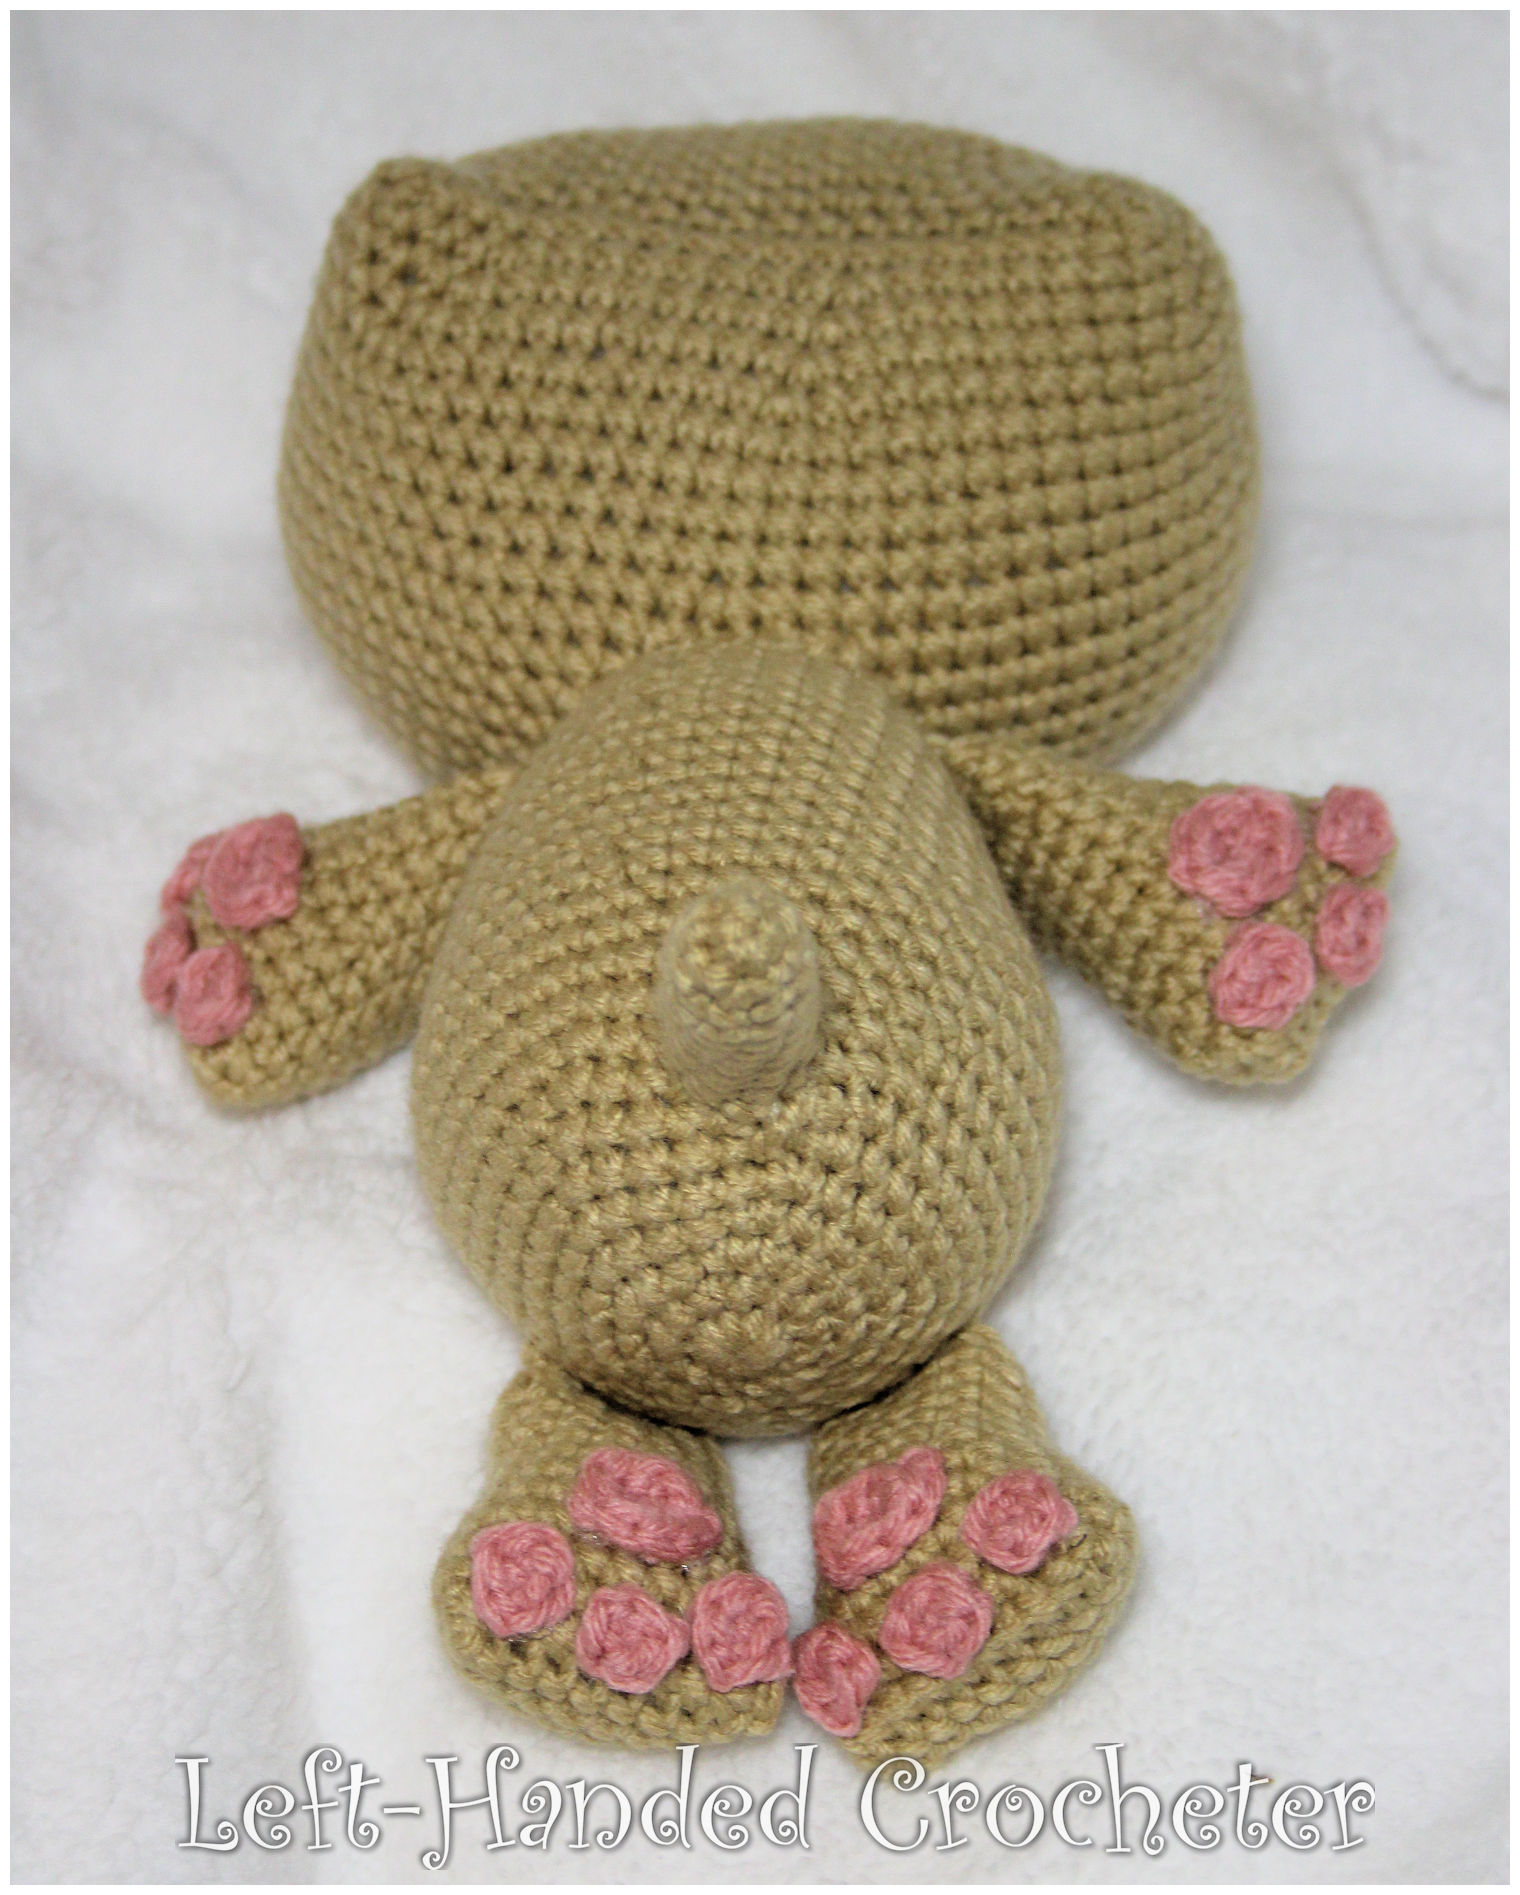
Toe Beans:

With rose, ch 3. Sl st to first ch to create circle. (Instead, you can perform the “magic circle” if you’d like.)

Row 1: ch 1, 4 sc inside of circle. (4 stitches)

Sl st to next stitch. Tie off. Position on feet and sew or hot glue on.

Foot Pad:

With rose, ch 4.

Row 1: Sc in 2nd ch from hook and in each across. Turn and sc across other side of ch. (6 stitches)

Sl st to next stitch. Tie off. Position onto feet and sew or hot glue on.

I hope you enjoy this pattern! You’re welcome to sell items that you make using my patterns, as long as you don’t post the pattern anywhere else, and link back to my page if you’d like to. If there are any mistakes, or something is unclear, please feel free to message me on Facebook.
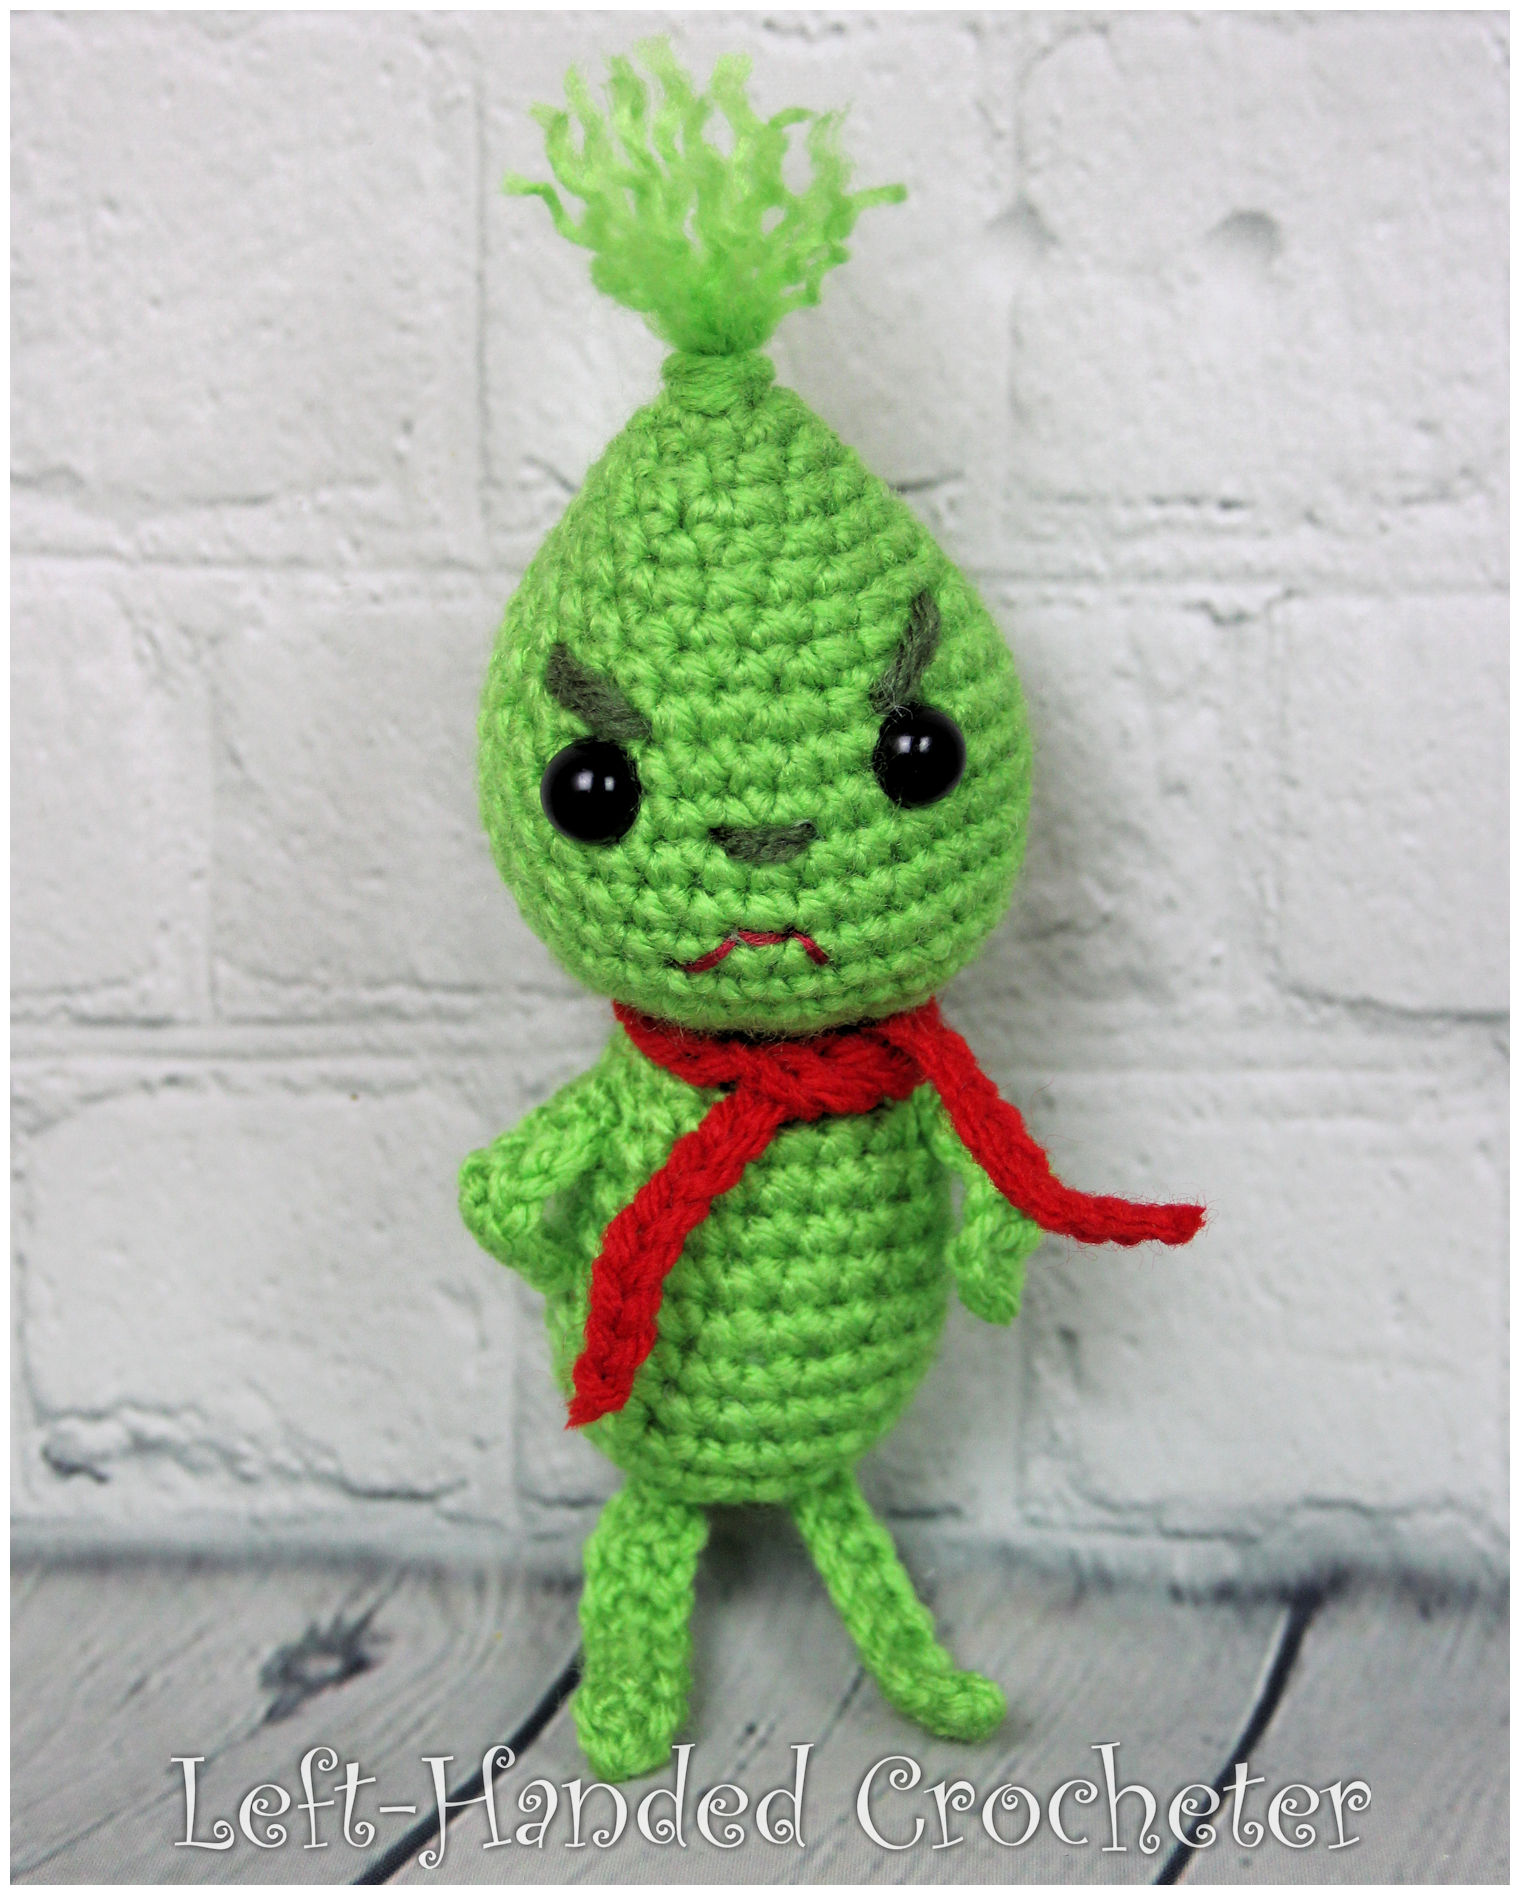
He’s a Mean One

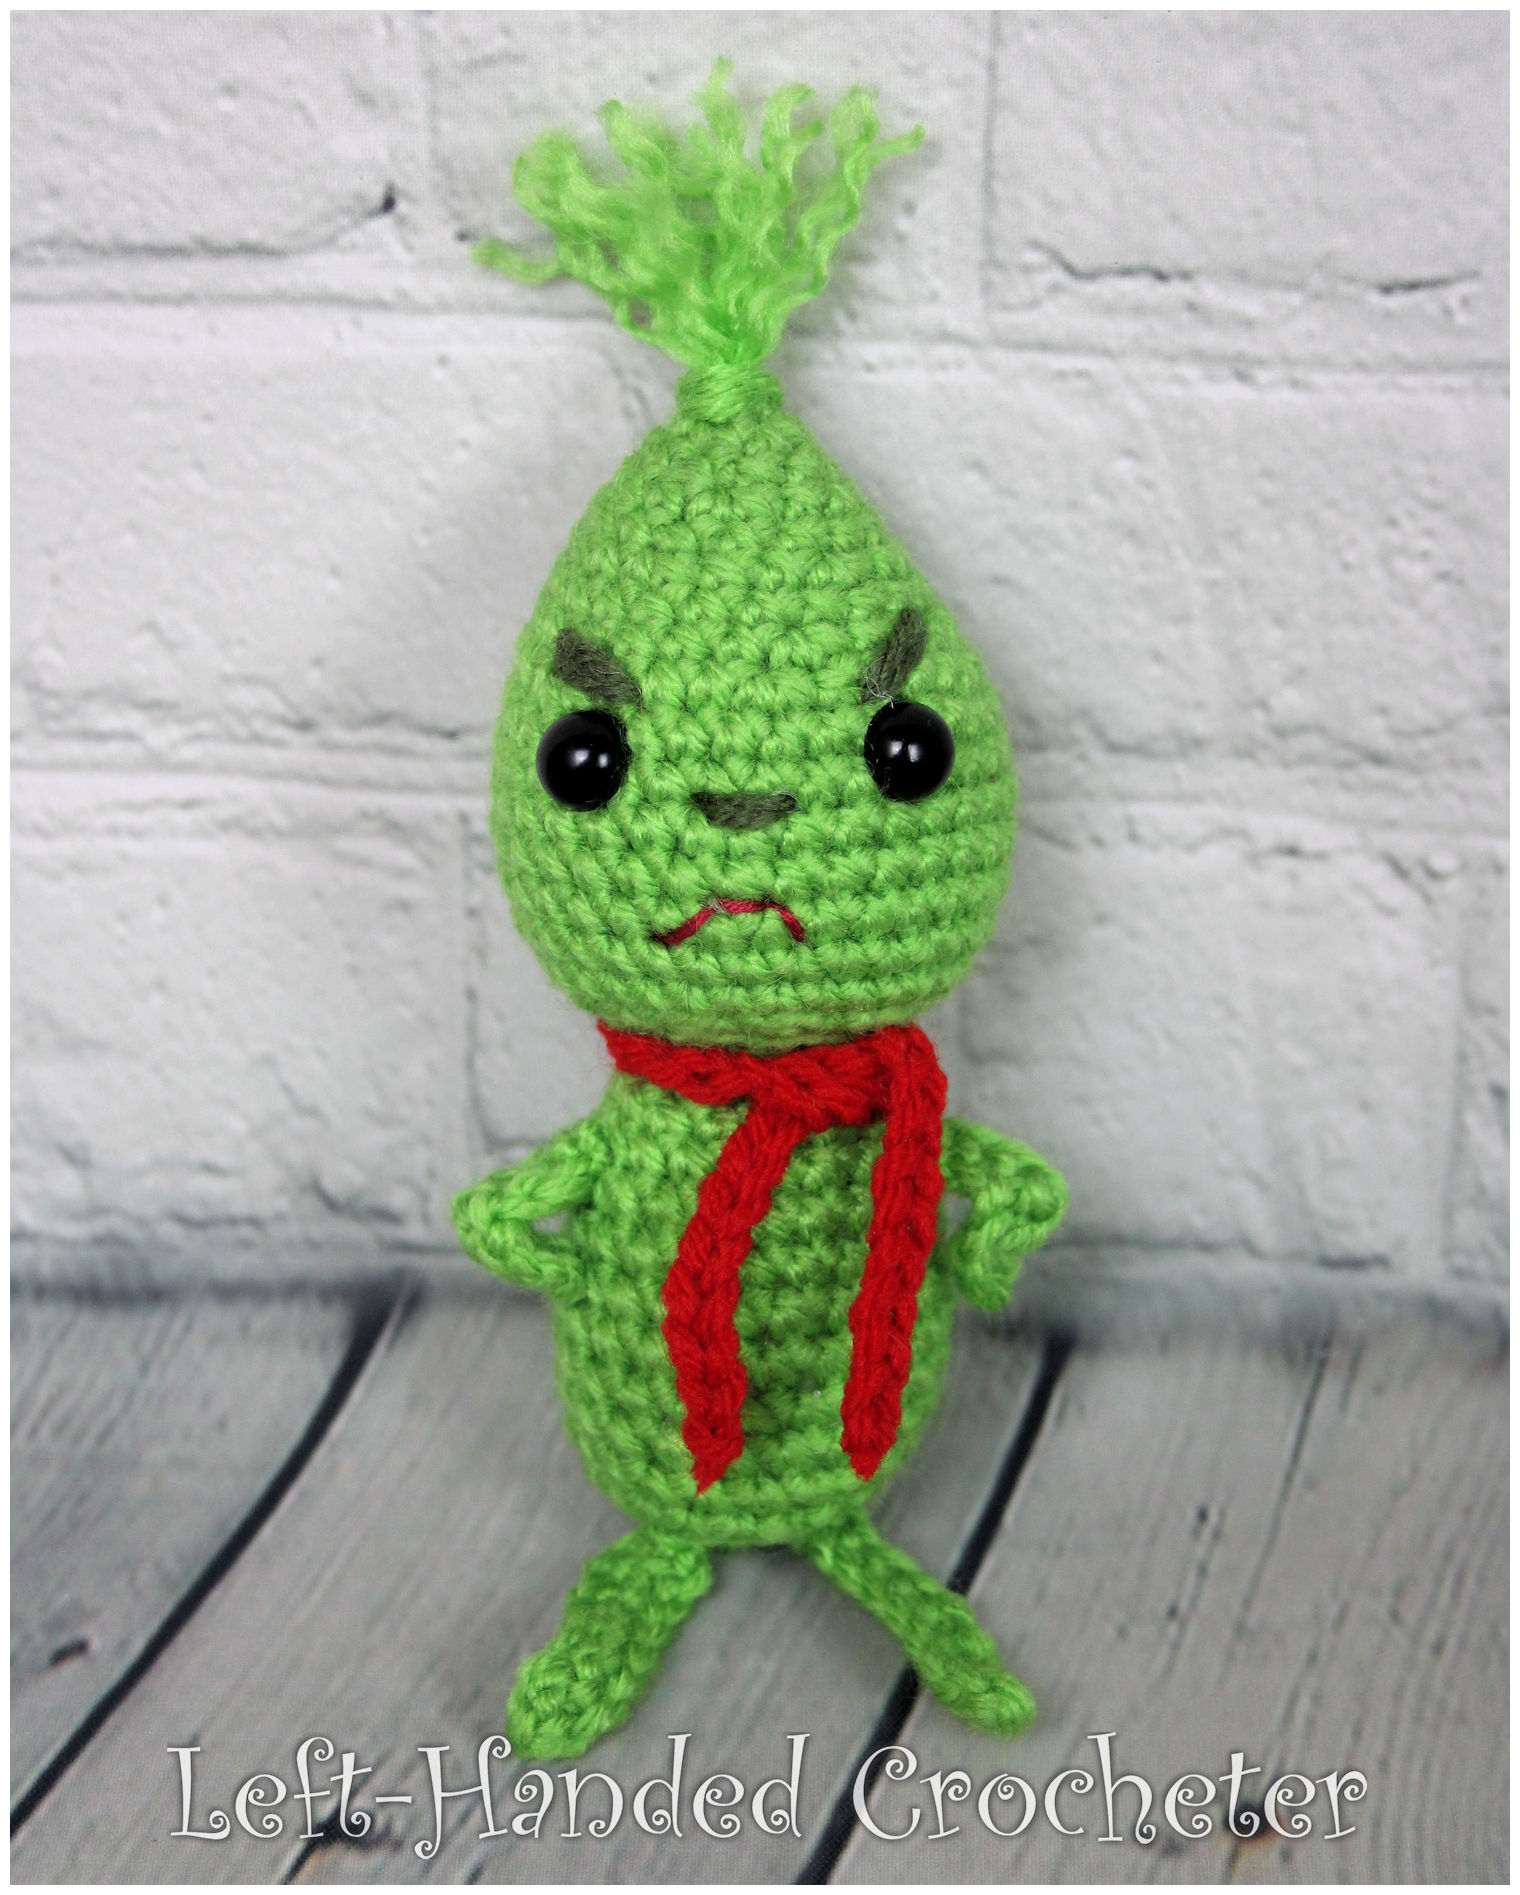
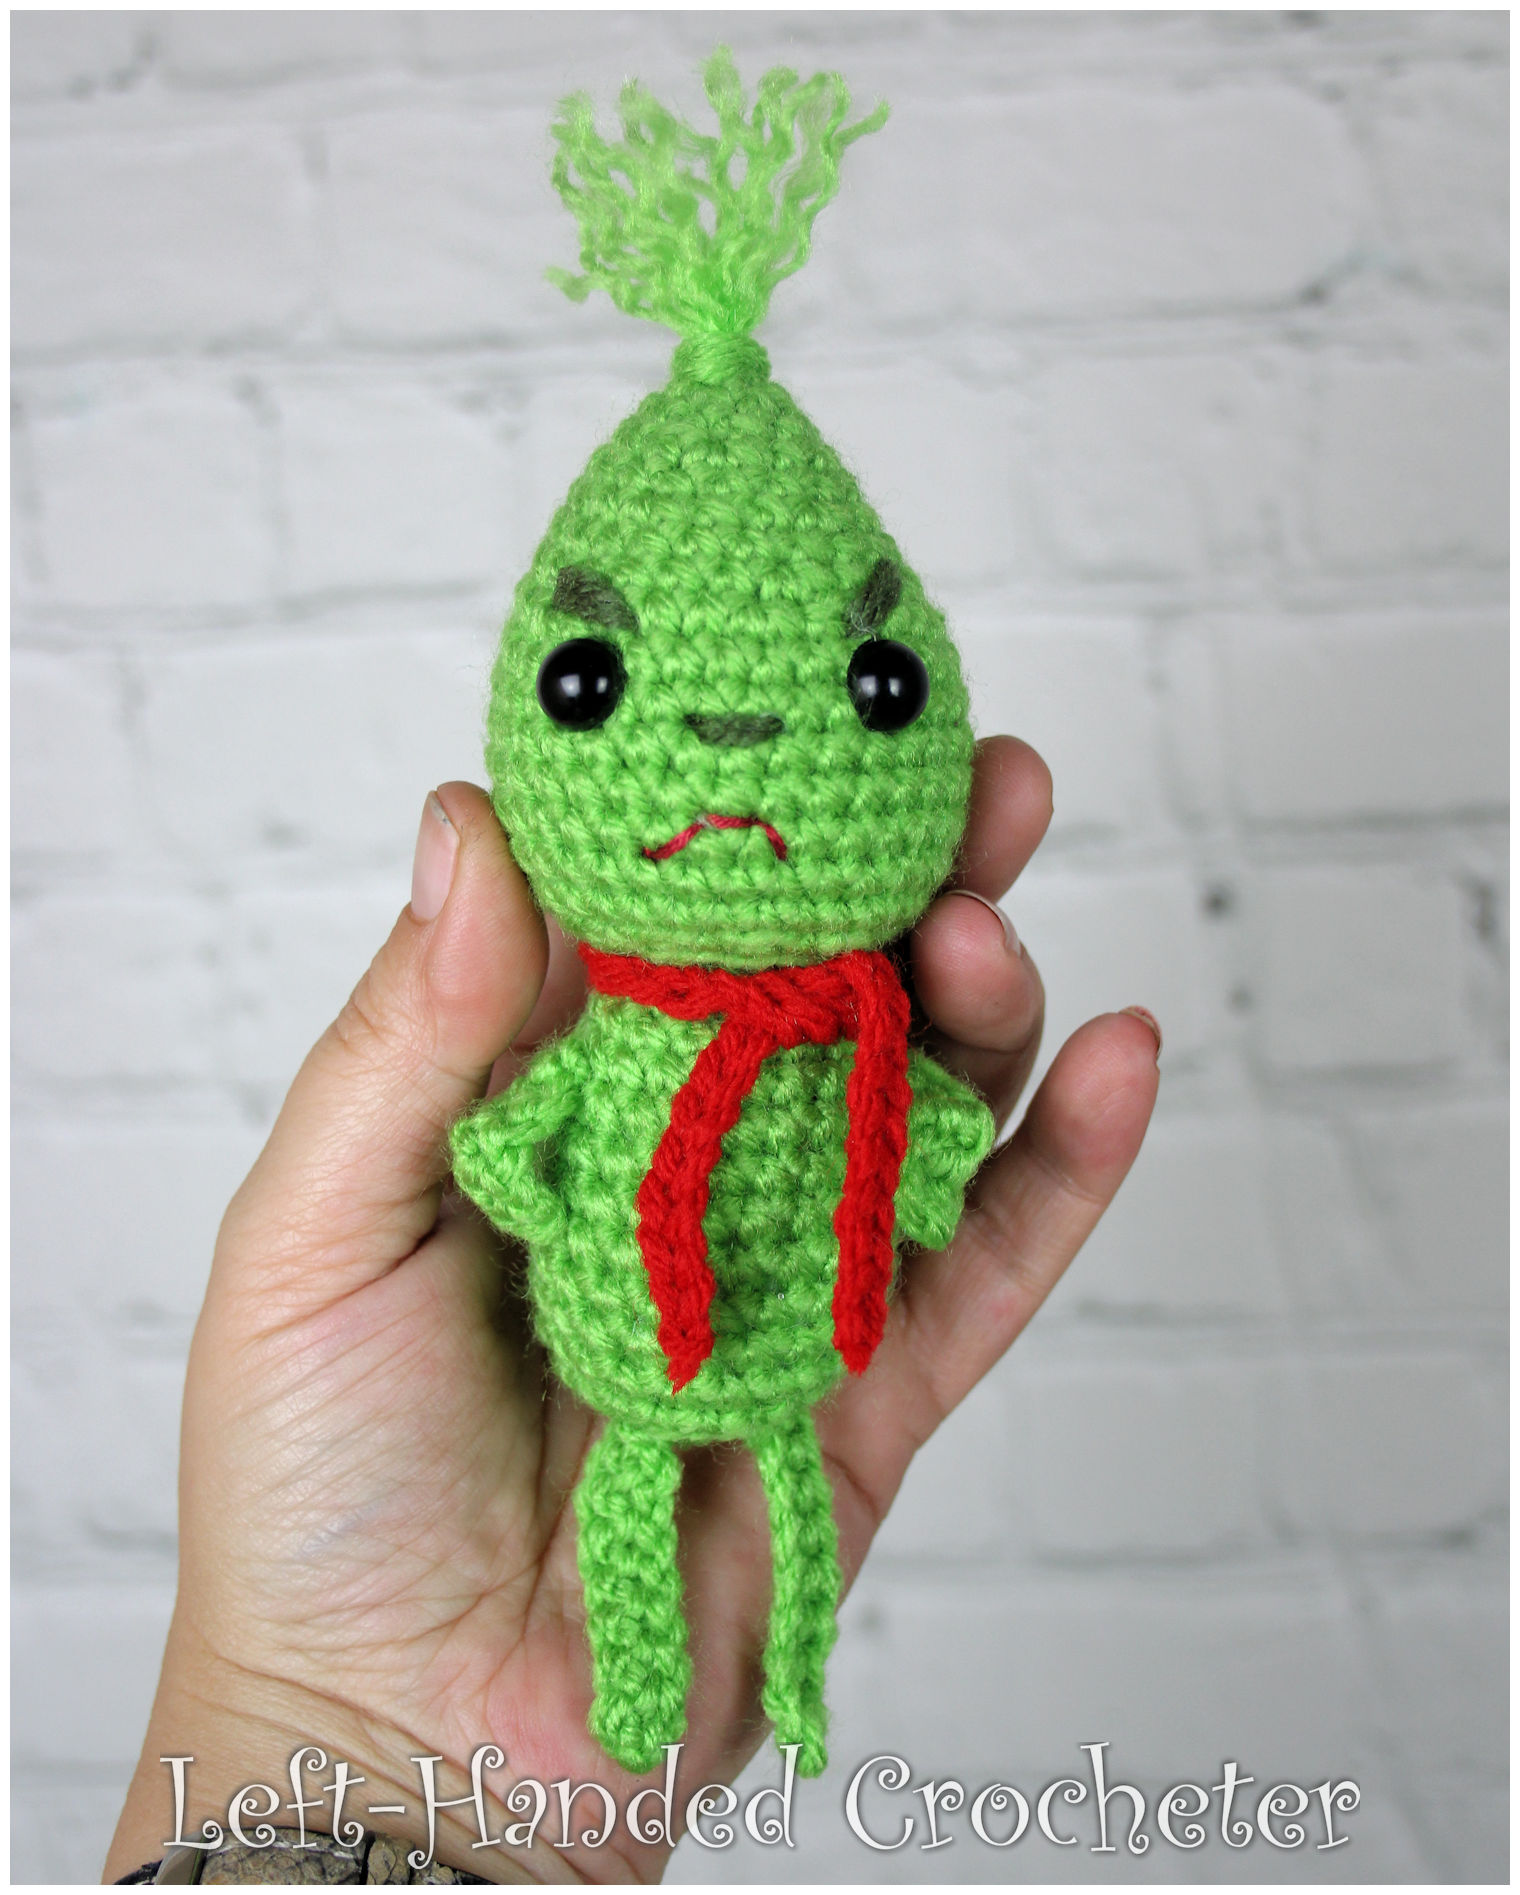
Are you a fan of Christmas? Or are you a Grinchy Grinch? I was inspired by a Grinch design by Angie Ortiz, and decided to create my own little Grinch. This pattern works up super quickly and is perfect for all of the Grinches in your life. Made with worsted weight yarn, this finished doll measures approximately 6 inches tall.

Abbreviations:

ch: chain

sc: single crochet

sl st: slip stitch

inc: increase (2 single crochets in one loop)

dec: decrease (pull yarn through loop, pull yarn through second loop, yarn over and pull through all loops)

Materials needed:

Any worsted weight yarn. I used Red Heart Super Saver in spring green. I also used a little bit of red yarn for his scarf and a little bit of dark green for his nose and eyebrows.

G (4mm) crochet hook

Poly-fil

9mm safety eyes

Yarn needle

Red embroidery thread

This pattern is worked “in-the-round”, and stitches are worked through both loops unless otherwise noted. 

Head and Body:

With spring green, ch 3. Sl st to first ch to create circle. (Instead, you can perform the “magic circle” if you’d like.)

Row 1: ch 1, 5 sc inside of circle. (5 stitches)

Row 2: Inc in each stitch around. (10 stitches)

Row 3: Sc in each stitch around. (10 stitches)

Row 4: *Inc in first stitch, sc in next stitch, repeat from * around. (15 stitches)

Row 5: Sc in each stitch around. (15 stitches)

Row 6: *Inc in first stitch, sc in next 2 stitches, repeat from * around. (20 stitches)

Row 7: Sc in each stitch around. (20 stitches)

Row 8: *Inc in first stitch, sc in next 3 stitches, repeat from * around. (25 stitches)

Row 9: *Inc in first stitch, sc in next 4 stitches, repeat from * around. (30 stitches)

Rows 10-16: Sc in each stitch around. (30 stitches)

Row 17: *Dec in first 2 stitches, sc in next stitch, repeat from * around. (20 stitches)

Stuff tight with poly-fil. Insert safety eyes between rows 10 and 11 with 7 stitches between. Continue stuffing as you work.

Row 18: Dec around. (10 stitches)

Row 19: Sc in each stitch around. (10 stitches)

Row 20: *Inc in first stitch, sc in next stitch, repeat from * around. (15 stitches)

Row 21: Sc in each stitch around. (15 stitches)

Row 22: *Inc in first stitch, sc in next 2 stitches, repeat from * around. (20 stitches)

Rows 23-30: Sc in each stitch around. (20 stitches)

Row 31: Dec around. (10 stitches)

Row 32: Dec around. (5 stitches)

Sew end shut and tie off. Sew eyebrows and nose on with dark green yarn. Sew mouth on with red embroidery thread.

Arms:

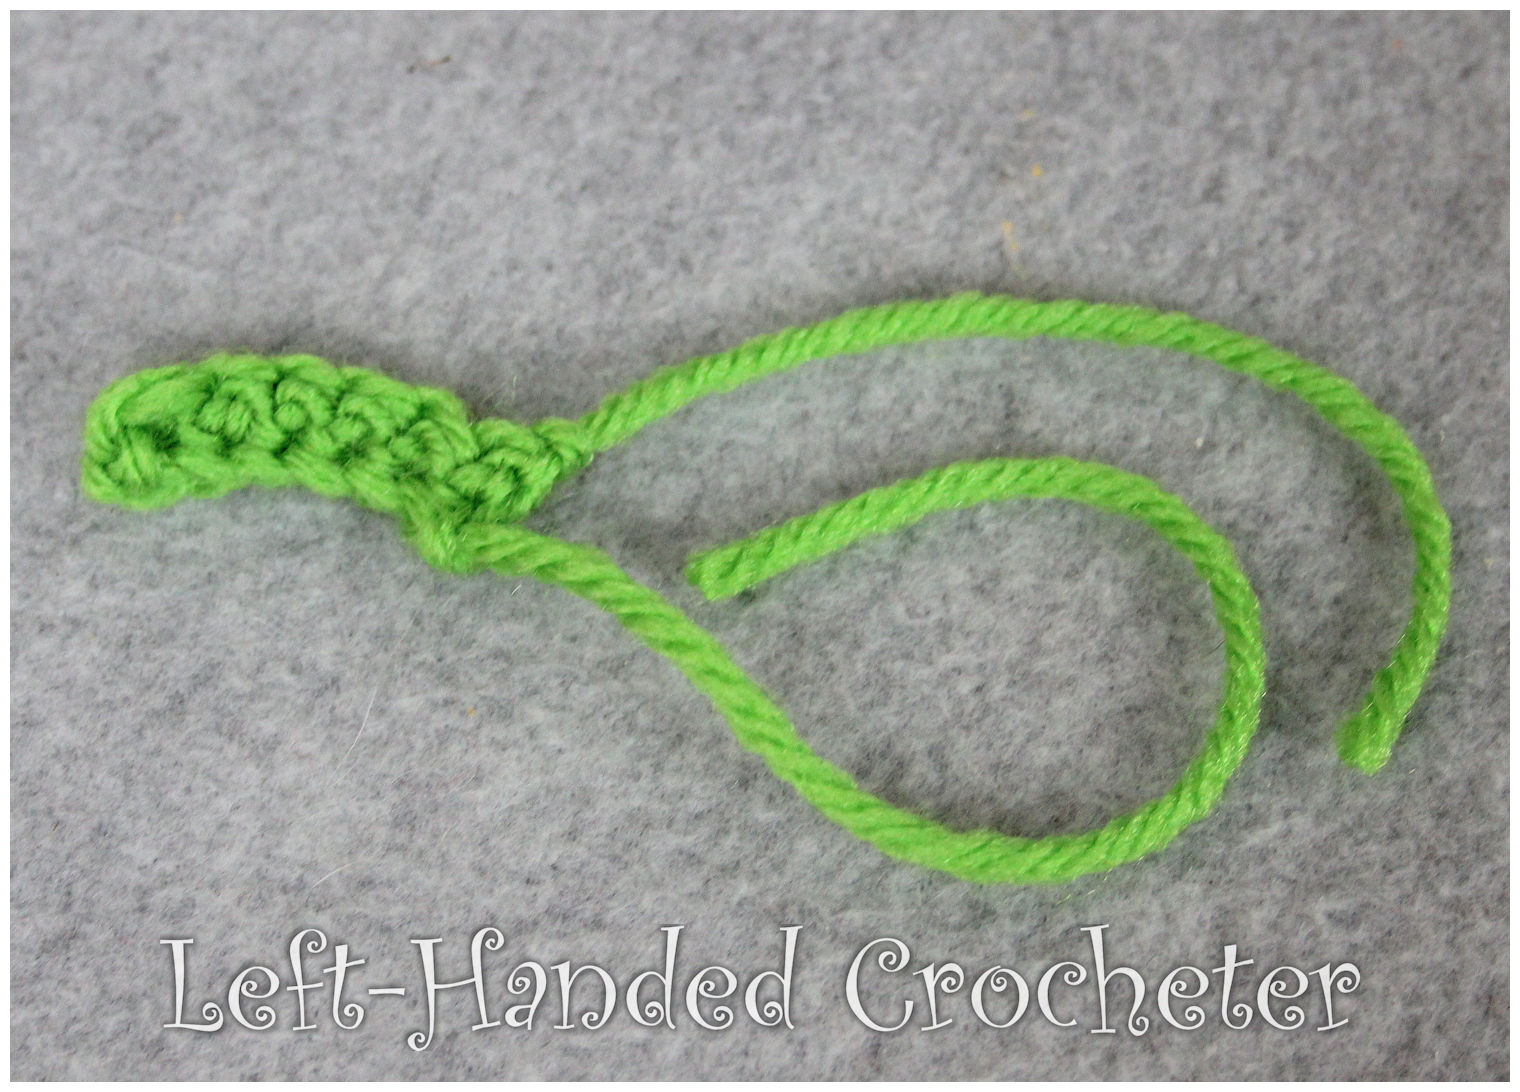
With spring green, ch 7, leaving a long starting tail.

Row 1: Sc into 2nd ch from hook, and in each across. (6 stitches)

Tie off, leaving a long ending tail. Make two. Use tails to attach arms to side of body.

Legs:

With spring green, ch 9, leaving a long starting tail.

Row 1: Sc into 2nd ch from hook, and in each across. (8 stitches)

Tie off, leaving a long ending tail. Make two. Use tails to attach legs to bottom of body.

Scarf:

With red yarn, ch 40. Tie off. Wrap scarf around neck and tie. Attach spring green to the top of his head and pull strands apart to create hair.

I hope you enjoy this pattern! You’re welcome to sell items that you make using my patterns, as long as you don’t post the pattern anywhere else, and link back to my page if you’d like to. If there are any mistakes, or something is unclear, please feel free to message me on Facebook

Tommy the Tooth

IMG_5392

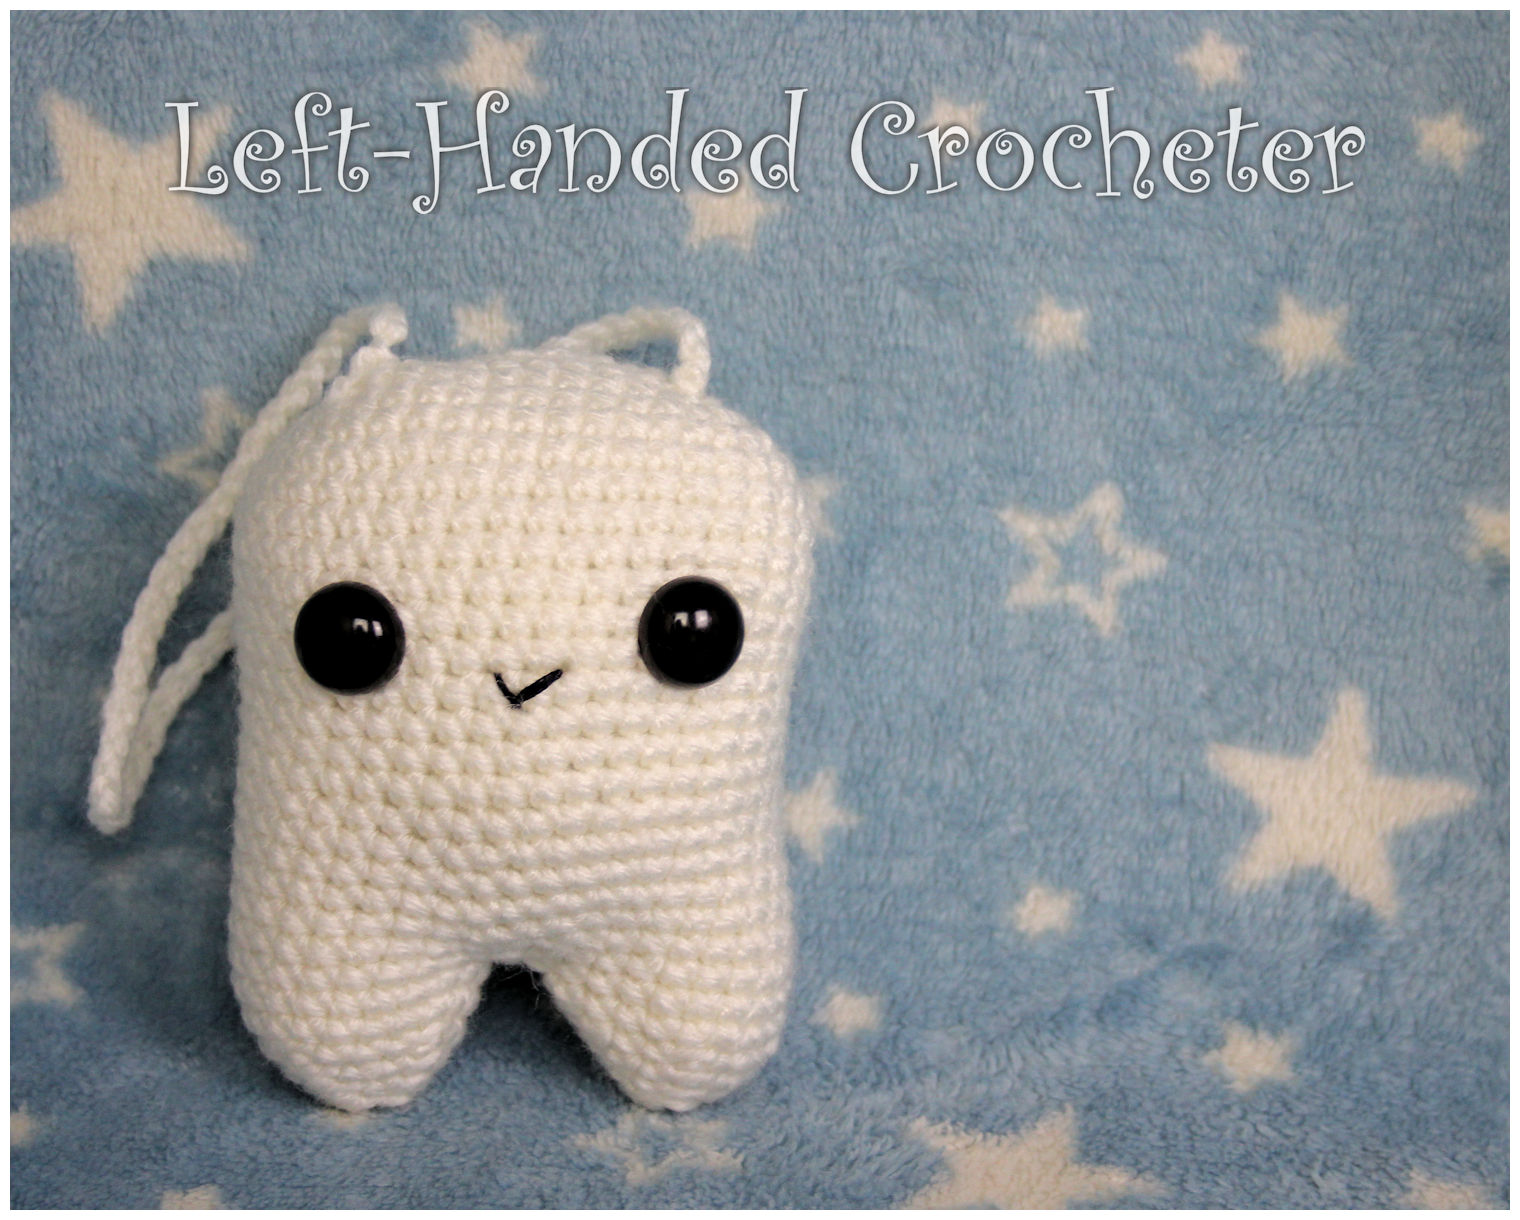
Everybody needs a little tooth for the tooth fairy! Just tuck those lost teeth in the pocket and hang it on the doorknob. The tooth fairy will come by while you’re sleeping and leave you some money. Made with worsted weight yarn, this finished doll measures approximately 4 inches tall.

Abbreviations:

ch: chain

sc: single crochet

sl st: slip stitch

inc: increase (2 single crochets in one loop)

dec: decrease (pull yarn through loop, pull yarn through second loop, yarn over and pull through all loops)

Materials needed:

Any worsted weight yarn. I used Red Heart Super Saver in white.

G (4mm) crochet hook

Poly-fil

15mm safety eyes

Yarn needle

This pattern is worked “in-the-round”, and stitches are worked through both loops unless otherwise noted. 

Body:

With white yarn, ch. 11

Row 1: This is worked around the chain you just made. Sc in 2nd chain from hook and in each across, working 3 sc’s into the last ch. Turn and work in the other loop of the chain and sc across, working 2 sc’s in last ch. (22 total stitches)

Row 2: 2 sc in first st, sc in next 8 st, work 2 sc’s in each of the next 3 st, sc in next 8, work 2 sc’s in each of the next 2. (28 total stitches)

03

Row 3: 2 sc in first st, sc in next 11 st, work 2 sc’s in each of the next 3 st, sc in next 11, work 2 sc’s in each of the next 2. (34 total stitches)

04

Row 4: 2 sc in first st, sc in next 14 st, work 2 sc’s in each of the next 3 st, sc in next 14, work 2 sc’s in each of the next 2. (40 total stitches)

05

Row 5-20: Sc in each st around. (40 total stitches)

Stuff tight with poly-fil. Insert eyes between rows 10 and 11 with 9 stitches between them. Do not tie off. Now that the body is finished, you’ll start working on the first leg.

Leg:

Row 1: Sc in first 12 stitches. Skip 20 stitches and sc in last 8 stitches. (20 total stitches)

Row 2-4: Sc in each st around. (20 total stitches)

Stuff tight with poly-fil. Continue stuffing as you work.

Row 5: Dec, sc in next 3 st. Repeat around. (16 total stitches)

Row 6: Dec, sc in next 2 st. Repeat around. (12 total stitches)

Row 7: Dec, sc in next st. Repeat around. (8 total stitches)

Sew end shut and tie off. Attach white yarn to other side with a sl st and repeat rows 1-9 for the other leg. There will be a hole between the legs. Sew that closed with your yarn and yarn needle. Sew mouth on with embroidery thread.

Pocket:

With white yarn, ch. 13

Row 1: Sc in 2nd ch from hook and in each across, ch 1, turn. (12 stitches)

Rows 2-8: Sc in each stitch across, ch 1, turn. (12 stitches)

Tie off. Position and sew onto back of tooth.

Hanger:

With white yarn, ch. 50, leaving a long starting tail.

Tie off, leaving a long ending tail. Use tails to attach to top of tooth. You can adjust the length of the hanger by chaining more or less.

I hope you enjoy this pattern! You’re welcome to sell items that you make using my patterns, as long as you don’t post the pattern anywhere else, and link back to my page if you’d like to. If there are any mistakes, or something is unclear, please feel free to message me on Facebook.
Sorry to my subscribers

It appears my account was hacked today. If you’re subscribing to this website, then you may have received an email notifying you of an inappropriate post. I apologize for that. The post has been removed, and my password has been changed, so hopefully the problem is taken care of.

Thank you to those of you who notified me about this issue. If you see something like this in the future, please comment and let me know, or send me a message on Facebook. Hopefully nothing like this will happen again, but unfortunately there are a lot of hackers out there who do their best to get into other people’s sites.

Crochet a Weedle

IMG_2581

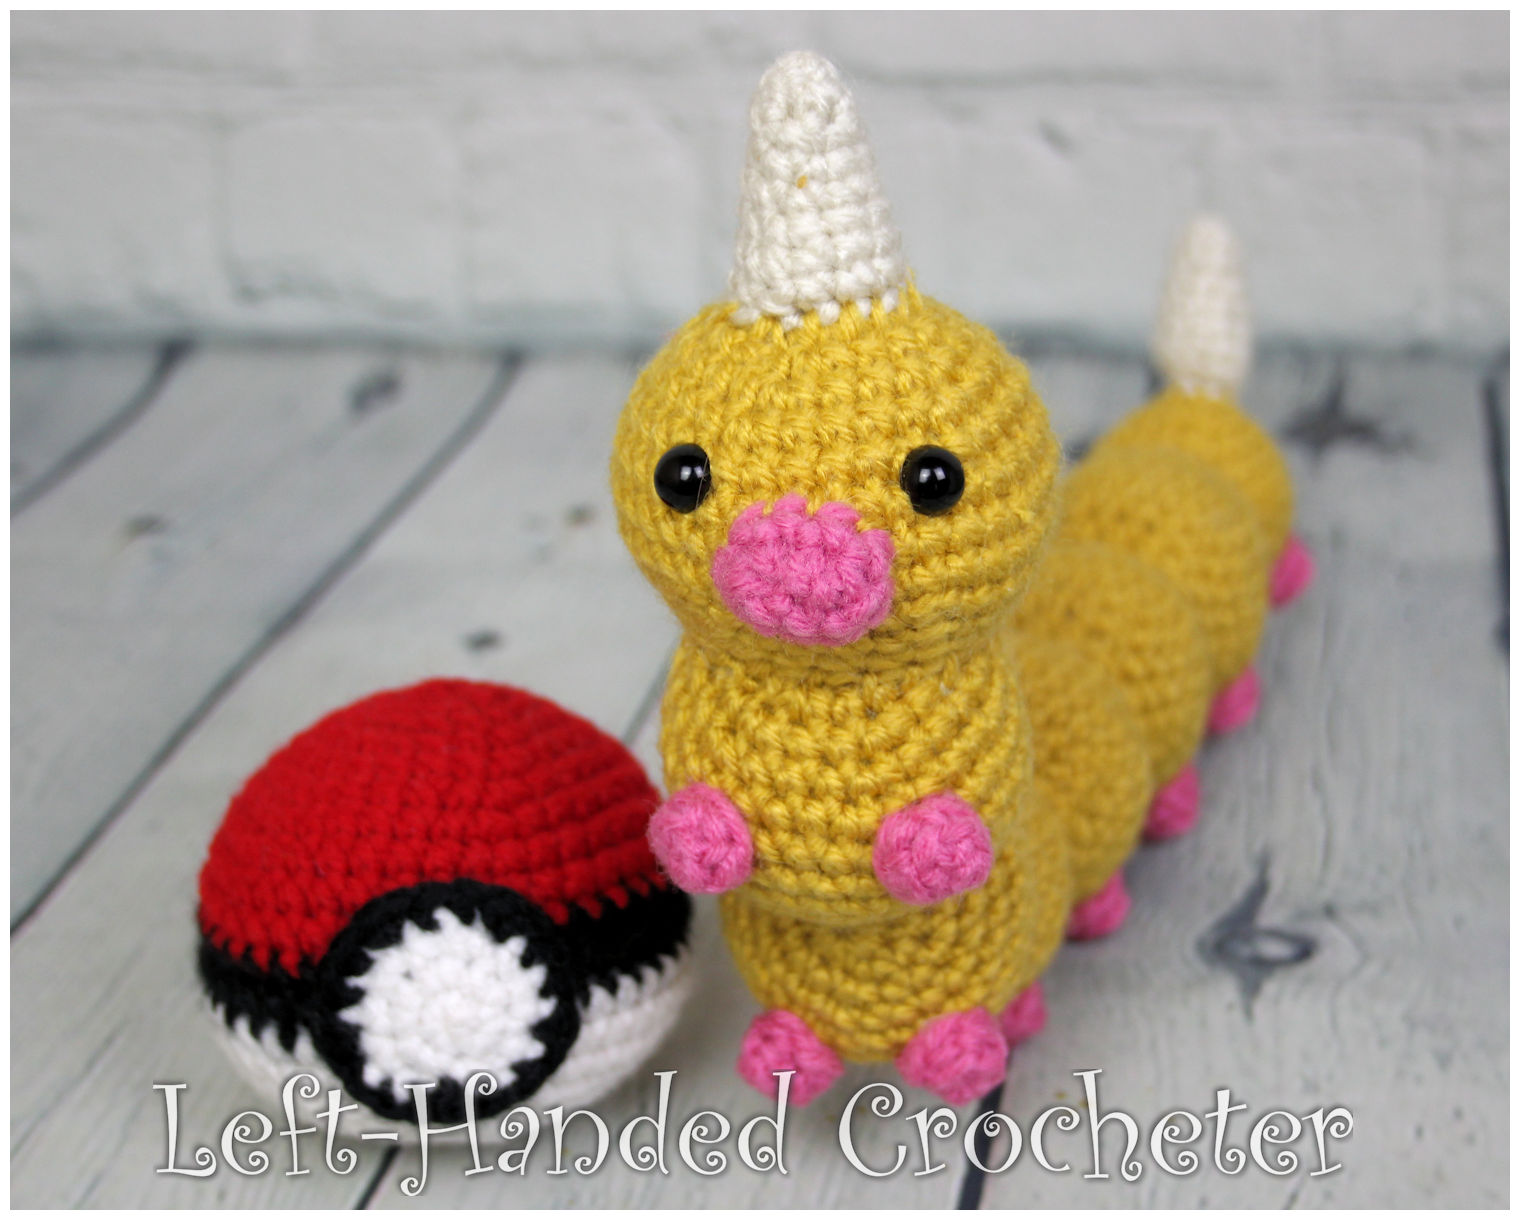
Gotta catch ‘em all! Whip up a crocheted Weedle, and it’s sure to be a hit. Made with worsted weight yarn, this finished doll measures approximately 6½ inches tall.

Find all of my other Pokemon patterns, including the Pokeball, here.

Abbreviations:

ch: chain

sc: single crochet

sl st: slip stitch

inc: increase (2 single crochets in one loop)

dec: decrease (pull yarn through loop, pull yarn through second loop, yarn over and pull through all loops)

Materials needed:

Any worsted weight yarn. I used Red Heart Super Saver in light raspberry and aran. I also used Lion Brand Vanna’s Choice in mustard.

G (4mm) crochet hook

Poly-fil

Yarn needle

9mm safety eyes

This pattern is worked “in-the-round”, and stitches are worked through both loops unless otherwise noted. 

Body:

With mustard, ch 3. Sl st to first ch to create circle. (Instead, you can perform the “magic circle” if you’d like.)

Row 1: ch 1, 10 sc inside of circle. (10 stitches)

Row 2: *Inc in first stitch, sc in next stitch, repeat from * around. (15 stitches)

Row 3: *Inc in first stitch, sc in next 2 stitches, repeat from * around. (20 stitches)

Row 4: *Inc in first stitch, sc in next 3 stitches, repeat from * around. (25 stitches)

Rows 5-6: Sc in each stitch around. (25 stitches)

Row 7: *Dec in first 2 stitches, sc in next 3 stitches, repeat from * around. (20 stitches)

Row 8: *Dec in first 2 stitches, sc in next 2 stitches, repeat from * around. (15 stitches)

Stuff tight with poly-fil.

Row 9: *Inc in first stitch, sc in next 2 stitches, repeat from * around. (20 stitches)

Row 10: *Inc in first stitch, sc in next 3 stitches, repeat from * around. (25 stitches)

Row 11: *Inc in first stitch, sc in next 4 stitches, repeat from * around. (30 stitches)

Rows 12-13: Sc in each stitch around. (30 stitches)

Row 14: *Dec in first 2 stitches, sc in next 4 stitches, repeat from * around. (25 stitches)

Row 15: *Dec in first 2 stitches, sc in next 3 stitches, repeat from * around. (20 stitches)

Row 16: *Dec in first 2 stitches, sc in next 2 stitches, repeat from * around. (15 stitches)

Stuff tight with poly-fil.

Row 17: *Inc in first stitch, sc in next 2 stitches, repeat from * around. (20 stitches)

Row 18: *Inc in first stitch, sc in next 3 stitches, repeat from * around. (25 stitches)

Row 19: *Inc in first stitch, sc in next 4 stitches, repeat from * around. (30 stitches)

Rows 20-21: Sc in each stitch around. (30 stitches)

Row 22: *Dec in first 2 stitches, sc in next 4 stitches, repeat from * around. (25 stitches)

Row 23: *Dec in first 2 stitches, sc in next 3 stitches, repeat from * around. (20 stitches)

Row 24: *Dec in first 2 stitches, sc in next 2 stitches, repeat from * around. (15 stitches)

Stuff tight with poly-fil.

Row 25: *Inc in first stitch, sc in next 2 stitches, repeat from * around. (20 stitches)

Row 26: *Inc in first stitch, sc in next 3 stitches, repeat from * around. (25 stitches)

Row 27: *Inc in first stitch, sc in next 4 stitches, repeat from * around. (30 stitches)

Rows 28-29: Sc in each stitch around. (30 stitches)

Row 30: *Dec in first 2 stitches, sc in next 4 stitches, repeat from * around. (25 stitches)

Row 31: *Dec in first 2 stitches, sc in next 3 stitches, repeat from * around. (20 stitches)

Row 32: *Dec in first 2 stitches, sc in next 2 stitches, repeat from * around. (15 stitches)

Stuff tight with poly-fil.

Row 33: *Inc in first stitch, sc in next 2 stitches, repeat from * around. (20 stitches)

Row 34: *Inc in first stitch, sc in next 3 stitches, repeat from * around. (25 stitches)

Row 35: *Inc in first stitch, sc in next 4 stitches, repeat from * around. (30 stitches)

Rows 36-37: Sc in each stitch around. (30 stitches)

Row 38: *Dec in first 2 stitches, sc in next 4 stitches, repeat from * around. (25 stitches)

Row 39: *Dec in first 2 stitches, sc in next 3 stitches, repeat from * around. (20 stitches)

Row 40: *Dec in first 2 stitches, sc in next 2 stitches, repeat from * around. (15 stitches)

Stuff tight with poly-fil.

Row 41: *Dec in first 2 stitches, sc in next stitch, repeat from * around. (10 stitches)

Row 42: Dec around. (5 stitches)

Sew end shut and tie off.

Ball #1:

With mustard, ch 3. Sl st to first ch to create circle. (Instead, you can perform the “magic circle” if you’d like.)

Row 1: ch 1, 10 sc inside of circle. (10 stitches)

Row 2: *Inc in first stitch, sc in next stitch, repeat from * around. (15 stitches)

Row 3: *Inc in first stitch, sc in next 2 stitches, repeat from * around. (20 stitches)

Row 4: *Inc in first stitch, sc in next 3 stitches, repeat from * around. (25 stitches)

Row 5: *Inc in first stitch, sc in next 4 stitches, repeat from * around. (30 stitches)

Rows 6-7: Sc in each stitch around. (30 stitches)

Row 8: *Dec in first 2 stitches, sc in next 4 stitches, repeat from * around. (25 stitches)

Row 9: *Dec in first 2 stitches, sc in next 3 stitches, repeat from * around. (20 stitches)

Row 10: *Dec in first 2 stitches, sc in next 2 stitches, repeat from * around. (15 stitches)

Tie off. Stuff tight with poly-fil. Position and sew onto body.

IMG_2436

Ball #2:

With mustard, ch 3. Sl st to first ch to create circle. (Instead, you can perform the “magic circle” if you’d like.)

Row 1: ch 1, 10 sc inside of circle. (10 stitches)

Row 2: *Inc in first stitch, sc in next stitch, repeat from * around. (15 stitches)

Row 3: *Inc in first stitch, sc in next 2 stitches, repeat from * around. (20 stitches)

Row 4: *Inc in first stitch, sc in next 3 stitches, repeat from * around. (25 stitches)

Row 5: *Inc in first stitch, sc in next 4 stitches, repeat from * around. (30 stitches)

Rows 6-8: Sc in each stitch around. (30 stitches)

Row 9: *Dec in first 2 stitches, sc in next 4 stitches, repeat from * around. (25 stitches)

Row 10: *Dec in first 2 stitches, sc in next 3 stitches, repeat from * around. (20 stitches)

Row 11: *Dec in first 2 stitches, sc in next 2 stitches, repeat from * around. (15 stitches)

Tie off. Stuff tight with poly-fil. Position and sew onto ball #1.

IMG_2439

Head:

With mustard, ch 3. Sl st to first ch to create circle. (Instead, you can perform the “magic circle” if you’d like.)

Row 1: ch 1, 10 sc inside of circle. (10 stitches)

Row 2: *Inc in first stitch, sc in next stitch, repeat from * around. (15 stitches)

Row 3: *Inc in first stitch, sc in next 2 stitches, repeat from * around. (20 stitches)

Row 4: *Inc in first stitch, sc in next 3 stitches, repeat from * around. (25 stitches)

Row 5: *Inc in first stitch, sc in next 4 stitches, repeat from * around. (30 stitches)

Row 6: *Inc in first stitch, sc in next 5 stitches, repeat from * around. (35 stitches)

Rows 7-9: Sc in each stitch around. (35 stitches)

Row 10: *Dec in first 2 stitches, sc in next 5 stitches, repeat from * around. (30 stitches)

Row 11: *Dec in first 2 stitches, sc in next 4 stitches, repeat from * around. (25 stitches)

Row 12: *Dec in first 2 stitches, sc in next 3 stitches, repeat from * around. (20 stitches)

Tie off. Stuff tight with poly-fil. Insert safety eyes between rows 6 and 7 with 7 stitches between them.

Nose:

With light raspberry, ch 4.

Row 1: Sc in 2nd ch from hook and in next ch. Work 3 sc’s into last ch. Turn and work in other side of ch. Sc in next ch, work 2 sc’s into last ch. (8 stitches)

Row 2: Sc in each stitch around. (8 stitches)

Tie off. Position and sew onto face.

IMG_2444

Cone:

With aran, ch 3. Sl st to first ch to create circle. (Instead, you can perform the “magic circle” if you’d like.)

Row 1: ch 1, 4 sc inside of circle. (4 stitches)

Row 2: *Inc in first stitch, sc in next stitch, repeat from * around. (6 stitches)

Row 3: Sc in each stitch around. (6 stitches)

Row 4: *Inc in first stitch, sc in next 2 stitches, repeat from * around. (8 stitches)

Row 5: Sc in each stitch around. (8 stitches)

Row 6: *Inc in first stitch, sc in next 3 stitches, repeat from * around. (10 stitches)

Row 7: *Inc in first stitch, sc in next 4 stitches, repeat from * around. (12 stitches)

Row 8: Sc in each stitch around. (12 stitches)

Tie off. Stuff tight with poly-fil. Position and sew onto top of head.

IMG_2447

Position head onto ball #2 and sew on.

IMG_2450

Stinger:

With aran, ch 3. Sl st to first ch to create circle. (Instead, you can perform the “magic circle” if you’d like.)

Row 1: ch 1, 4 sc inside of circle. (4 stitches)

Row 2: *Inc in first stitch, sc in next stitch, repeat from * around. (6 stitches)

Row 3: Sc in each stitch around. (6 stitches)

Row 4: *Inc in first stitch, sc in next 2 stitches, repeat from * around. (8 stitches)

Row 5: Sc in each stitch around. (8 stitches)

Row 6: *Inc in first stitch, sc in next 3 stitches, repeat from * around. (10 stitches)

Row 7: Sc in each stitch around. (10 stitches)

Stuff tight with poly-fil.

Row 8: Dec around. (5 stitches)

Tie off. Position and sew onto end of body.

IMG_2456

Feet:

With light raspberry, ch 3. Sl st to first ch to create circle. (Instead, you can perform the “magic circle” if you’d like.)

Row 1: ch 1, 5 sc inside of circle. (5 stitches)

Row 2: In inside loops only, sc in each stitch around. (5 stitches)

Sl st to first stitch. Tie off. Make 14 feet. Position and sew them on each ball of the body.

I hope you enjoy this pattern! You’re welcome to sell items that you make using my patterns, as long as you don’t post the pattern anywhere else, and link back to my page if you’d like to. If there are any mistakes, or something is unclear, please feel free to message me on Facebook.


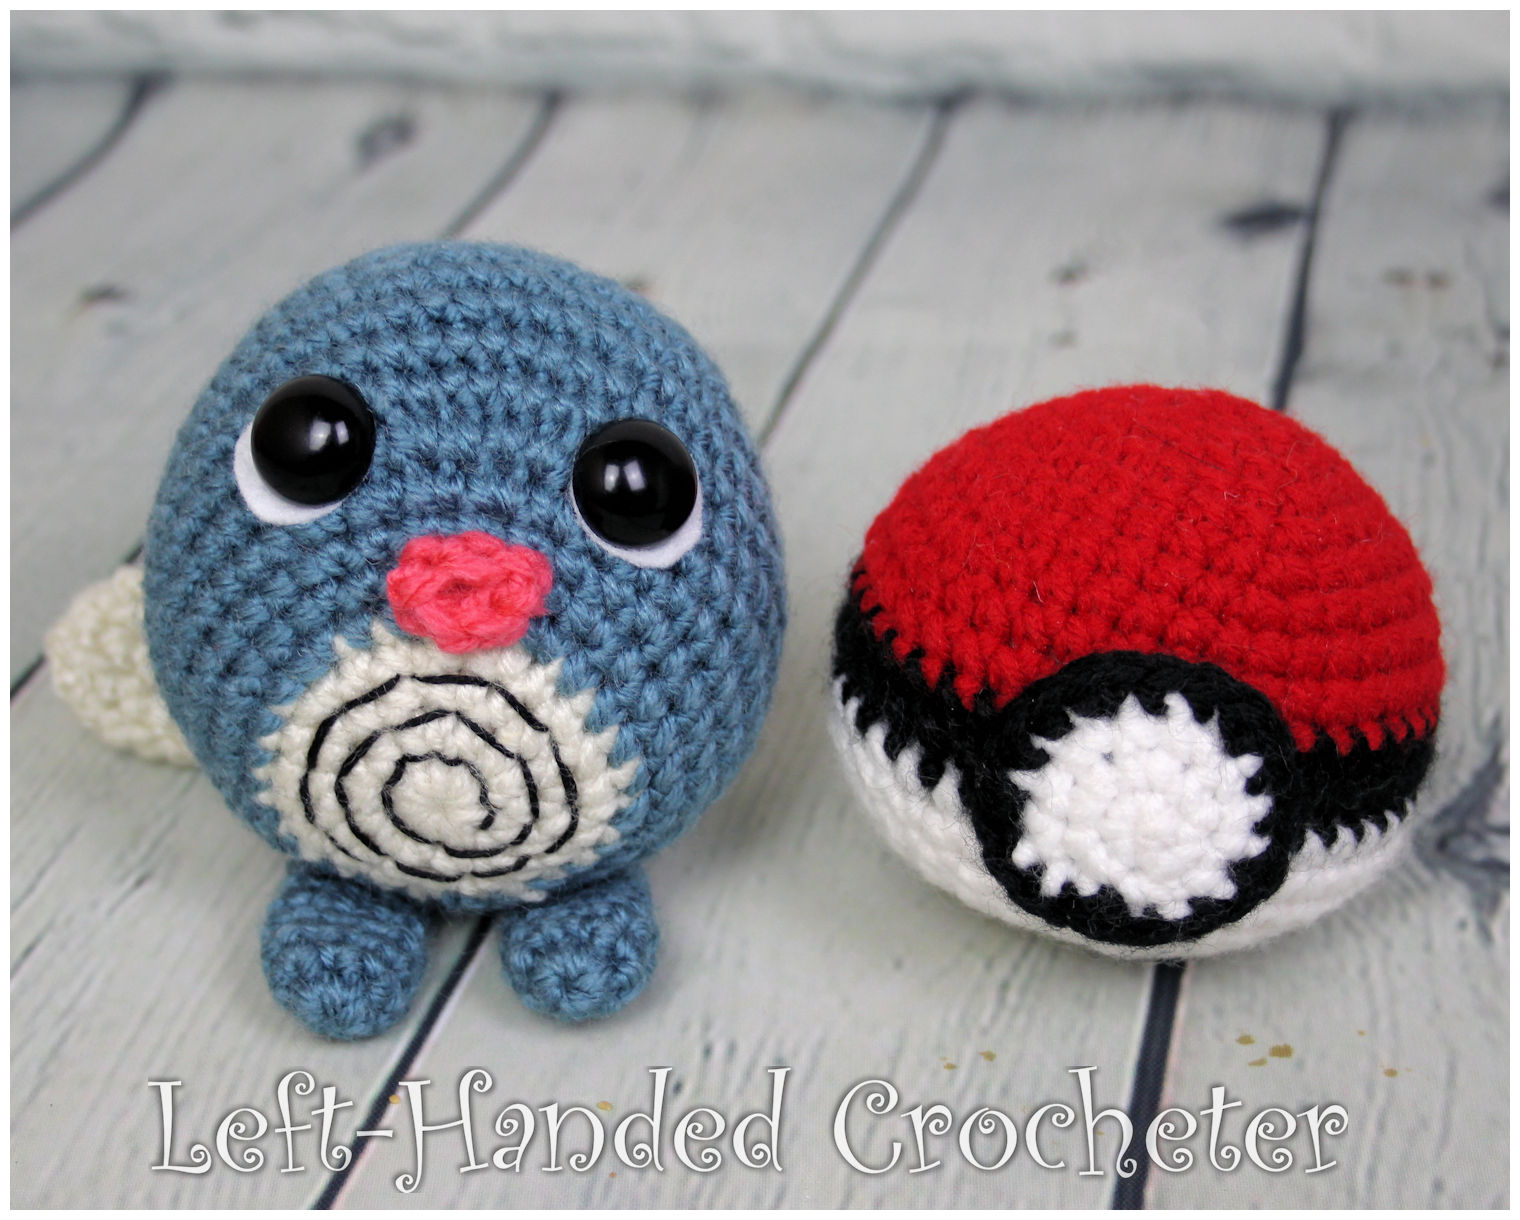
Crochet a Poliwag

IMG_2564

Gotta catch ‘em all! Whip up a crocheted Poliwag, and it’s sure to be a hit. Made with worsted weight yarn, this finished doll measures approximately 3½ inches tall.

Find all of my other Pokemon patterns, including the Pokeball, here.

Abbreviations:

ch: chain

sc: single crochet

sl st: slip stitch

inc: increase (2 single crochets in one loop)

dec: decrease (pull yarn through loop, pull yarn through second loop, yarn over and pull through all loops)

Materials needed:

Any worsted weight yarn. I used Red Heart Super Saver in aran and flamingo. I also used Lion Brand Vanna’s Choice in dusty blue.

G (4mm) crochet hook

Poly-fil

Yarn needle

15mm safety eyes

Embroidery thread

Stitch markers

White felt

This pattern is worked “in-the-round”, and stitches are worked through both loops unless otherwise noted. 

Head and Body:

With aran, ch 3. Sl st to first ch to create circle. (Instead, you can perform the “magic circle” if you’d like.)

Row 1: ch 1, 10 sc inside of circle. (10 stitches)

Row 2: *Inc in first stitch, sc in next stitch, repeat from * around. (15 stitches)

Row 3: *Inc in first stitch, sc in next 2 stitches, repeat from * around. (20 stitches)

Row 4: *Inc in first stitch, sc in next 3 stitches, repeat from * around. (25 stitches)

Switch to dusty blue.

Row 5: *Inc in first stitch, sc in next 4 stitches, repeat from * around. (30 stitches)

Row 6: *Inc in first stitch, sc in next 5 stitches, repeat from * around. (35 stitches)

Row 7: *Inc in first stitch, sc in next 6 stitches, repeat from * around. (40 stitches)

Row 8: Sc in first 19 stitches, inc in next 6 stitches, sc in last 15 stitches. (46 stitches)

*In next row, place stitch markers in first inc and in last inc.

Row 9: Sc in first 23 stitches, inc in next 4 stitches, sc in last 19 stitches. (50 stitches)

Rows 10-13: Sc in each stitch around. (50 stitches)

Row 14: *Dec in first 2 stitches, sc in next 8 stitches, repeat from * around. (45 stitches)

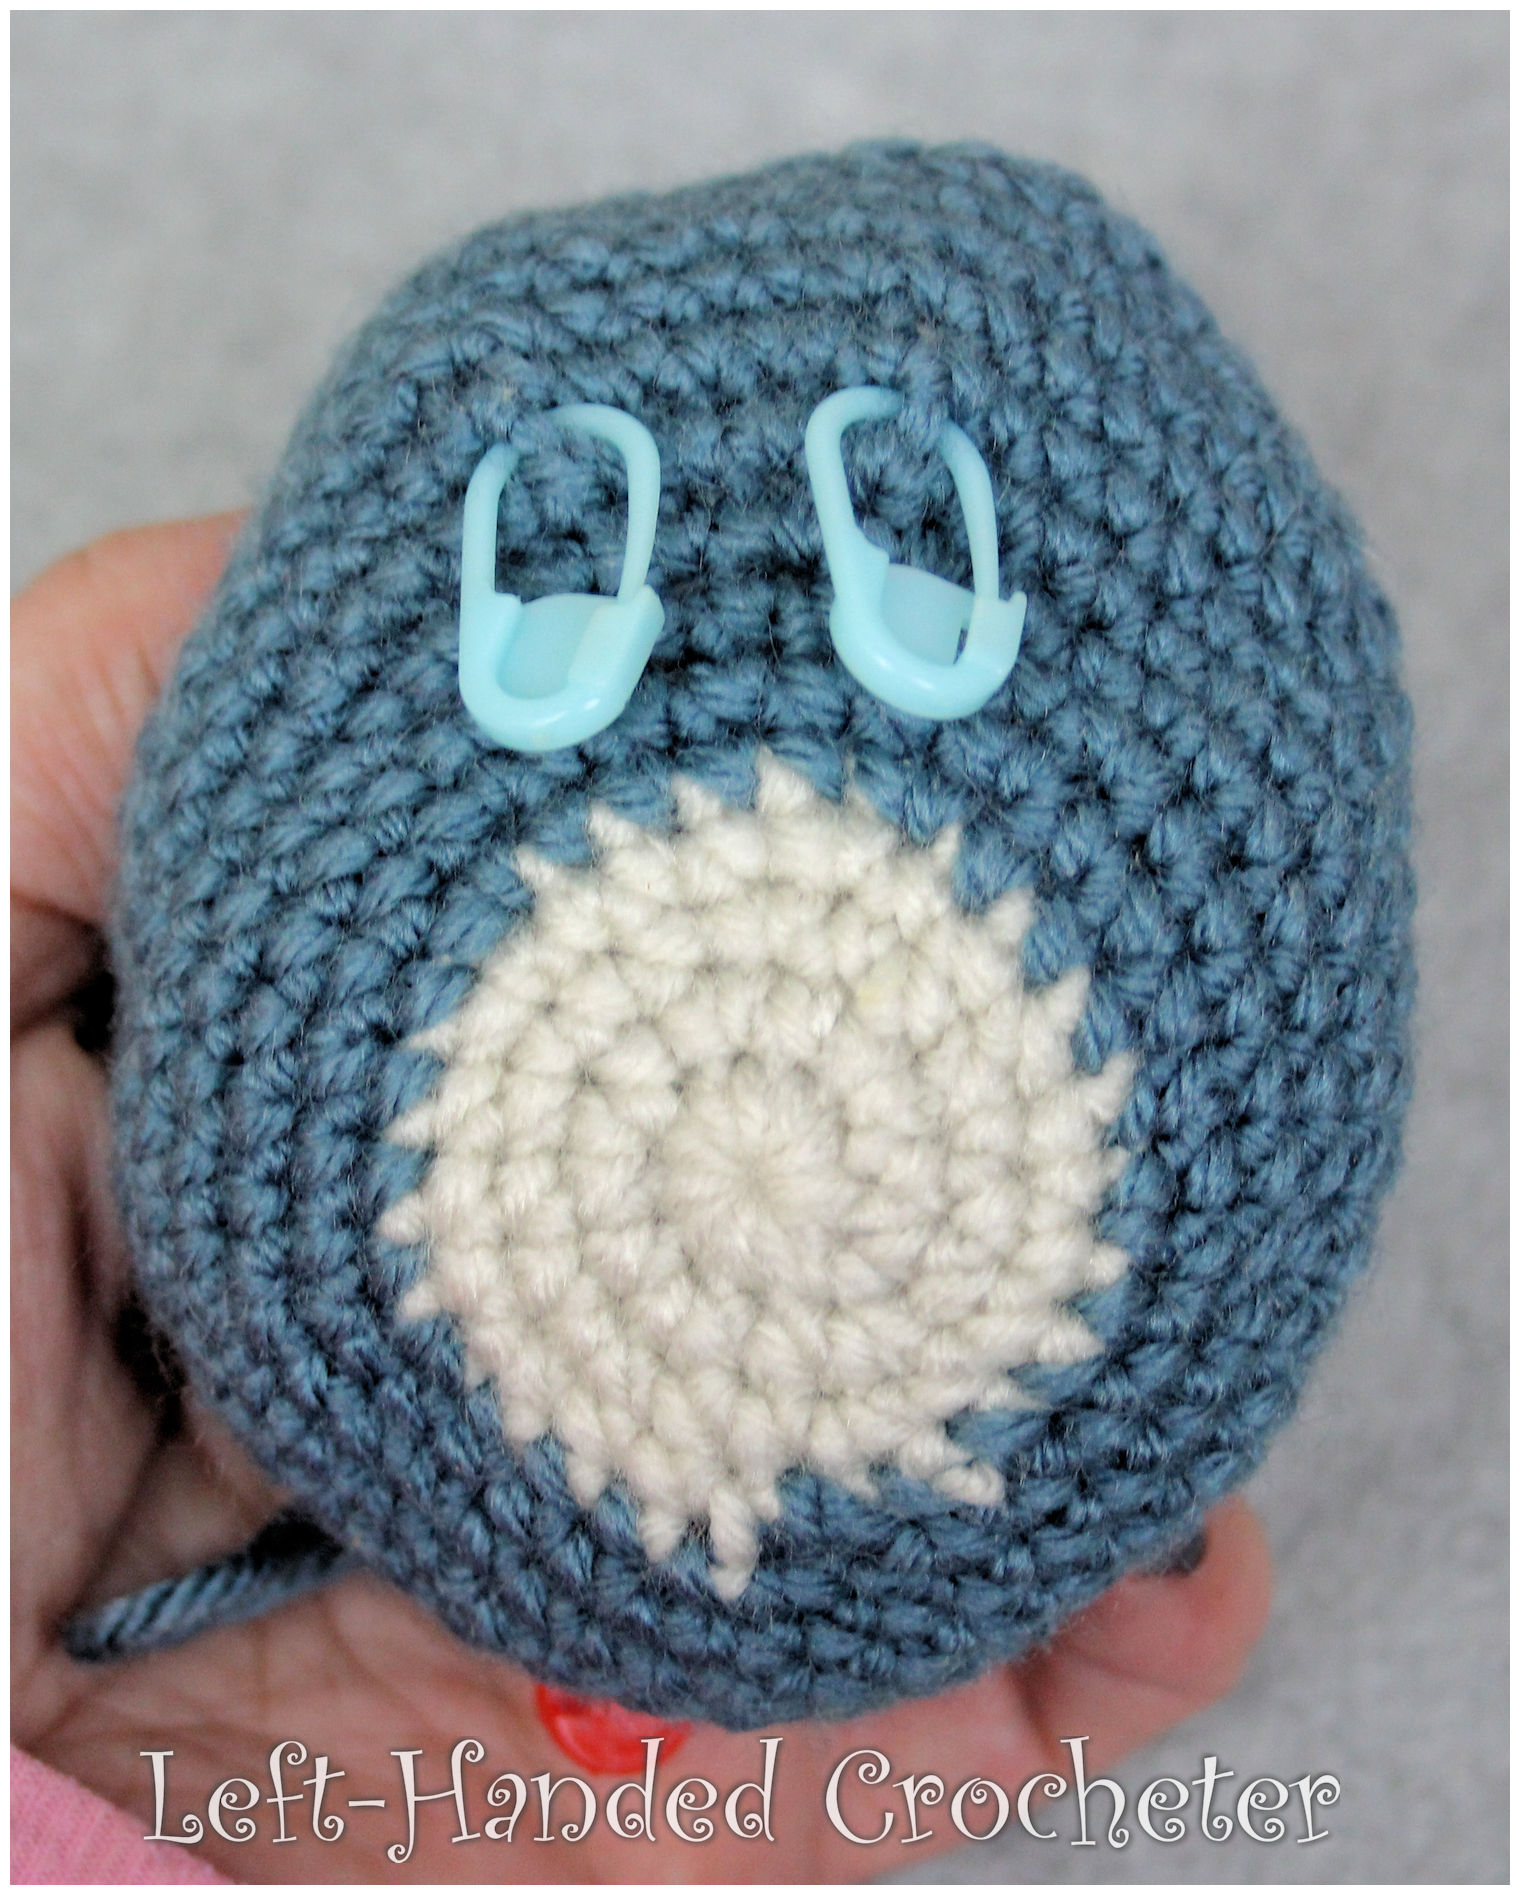
Cut white felt and place behind safety eyes. Using stitch markers to guide you, place safety eyes between rows 9 and 10 with 11 stitches between.

IMG_2393

Row 15: *Dec in first 2 stitches, sc in next 7 stitches, repeat from * around. (40 stitches)

Row 16: *Dec in first 2 stitches, sc in next 6 stitches, repeat from * around. (35 stitches)

Row 17: *Dec in first 2 stitches, sc in next 5 stitches, repeat from * around. (30 stitches)

Row 18: *Dec in first 2 stitches, sc in next 4 stitches, repeat from * around. (25 stitches)

Stuff tight with poly-fil.

Row 19: *Dec in first 2 stitches, sc in next 3 stitches, repeat from * around. (20 stitches)

Row 20: *Dec in first 2 stitches, sc in next 2 stitches, repeat from * around. (15 stitches)

Row 21: *Dec in first 2 stitches, sc in next stitch, repeat from * around. (10 stitches)

Row 22: Dec around. (5 stitches)

Sew end shut and tie off.

Mouth:

With flamingo, ch 3.

Row 1: Sc in 2nd ch from hook and in next one. Turn and sc across other side of ch. (4 stitches)

Row 2: Sc in each stitch around. (4 stitches)

Sl st to first stitch. Tie off. Position and sew onto face. Use embroidery thread to sew circle on stomach.

Legs:

With dusty blue, ch 3. Sl st to first ch to create circle. (Instead, you can perform the “magic circle” if you’d like.)

Row 1: ch 1, 6 sc inside of circle. (6 stitches)

Row 2: *Inc in first stitch, sc in next 2 stitches, repeat from * around. (8 stitches)

Rows 3-6: Sc in each stitch around. (8 stitches)

Row 7: *Dec in first 2 stitches, sc in next 2 stitches, repeat from * around. (6 stitches)

Tie off. Don’t stuff. Position and sew onto bottom of body.

IMG_2396

Tail:

With aran, ch 3. Sl st to first ch to create circle. (Instead, you can perform the “magic circle” if you’d like.)

Row 1: ch 1, 5 sc inside of circle. (5 stitches)

Row 2: Inc in each stitch around. (10 stitches)

Rows 3-8: Sc in each stitch around. (10 stitches)

Row 9: *Dec in first 2 stitches, sc in next 3 stitches, repeat from * around. (8 stitches)

Rows 10: Sc in each stitch around. (8 stitches)

Row 11: *Dec in first 2 stitches, sc in next 2 stitches, repeat from * around. (6 stitches)

Row 12: Sc in each stitch around. (6 stitches)

Switch to dusty blue.

Rows 13-14: Sc in each stitch around. (6 stitches)

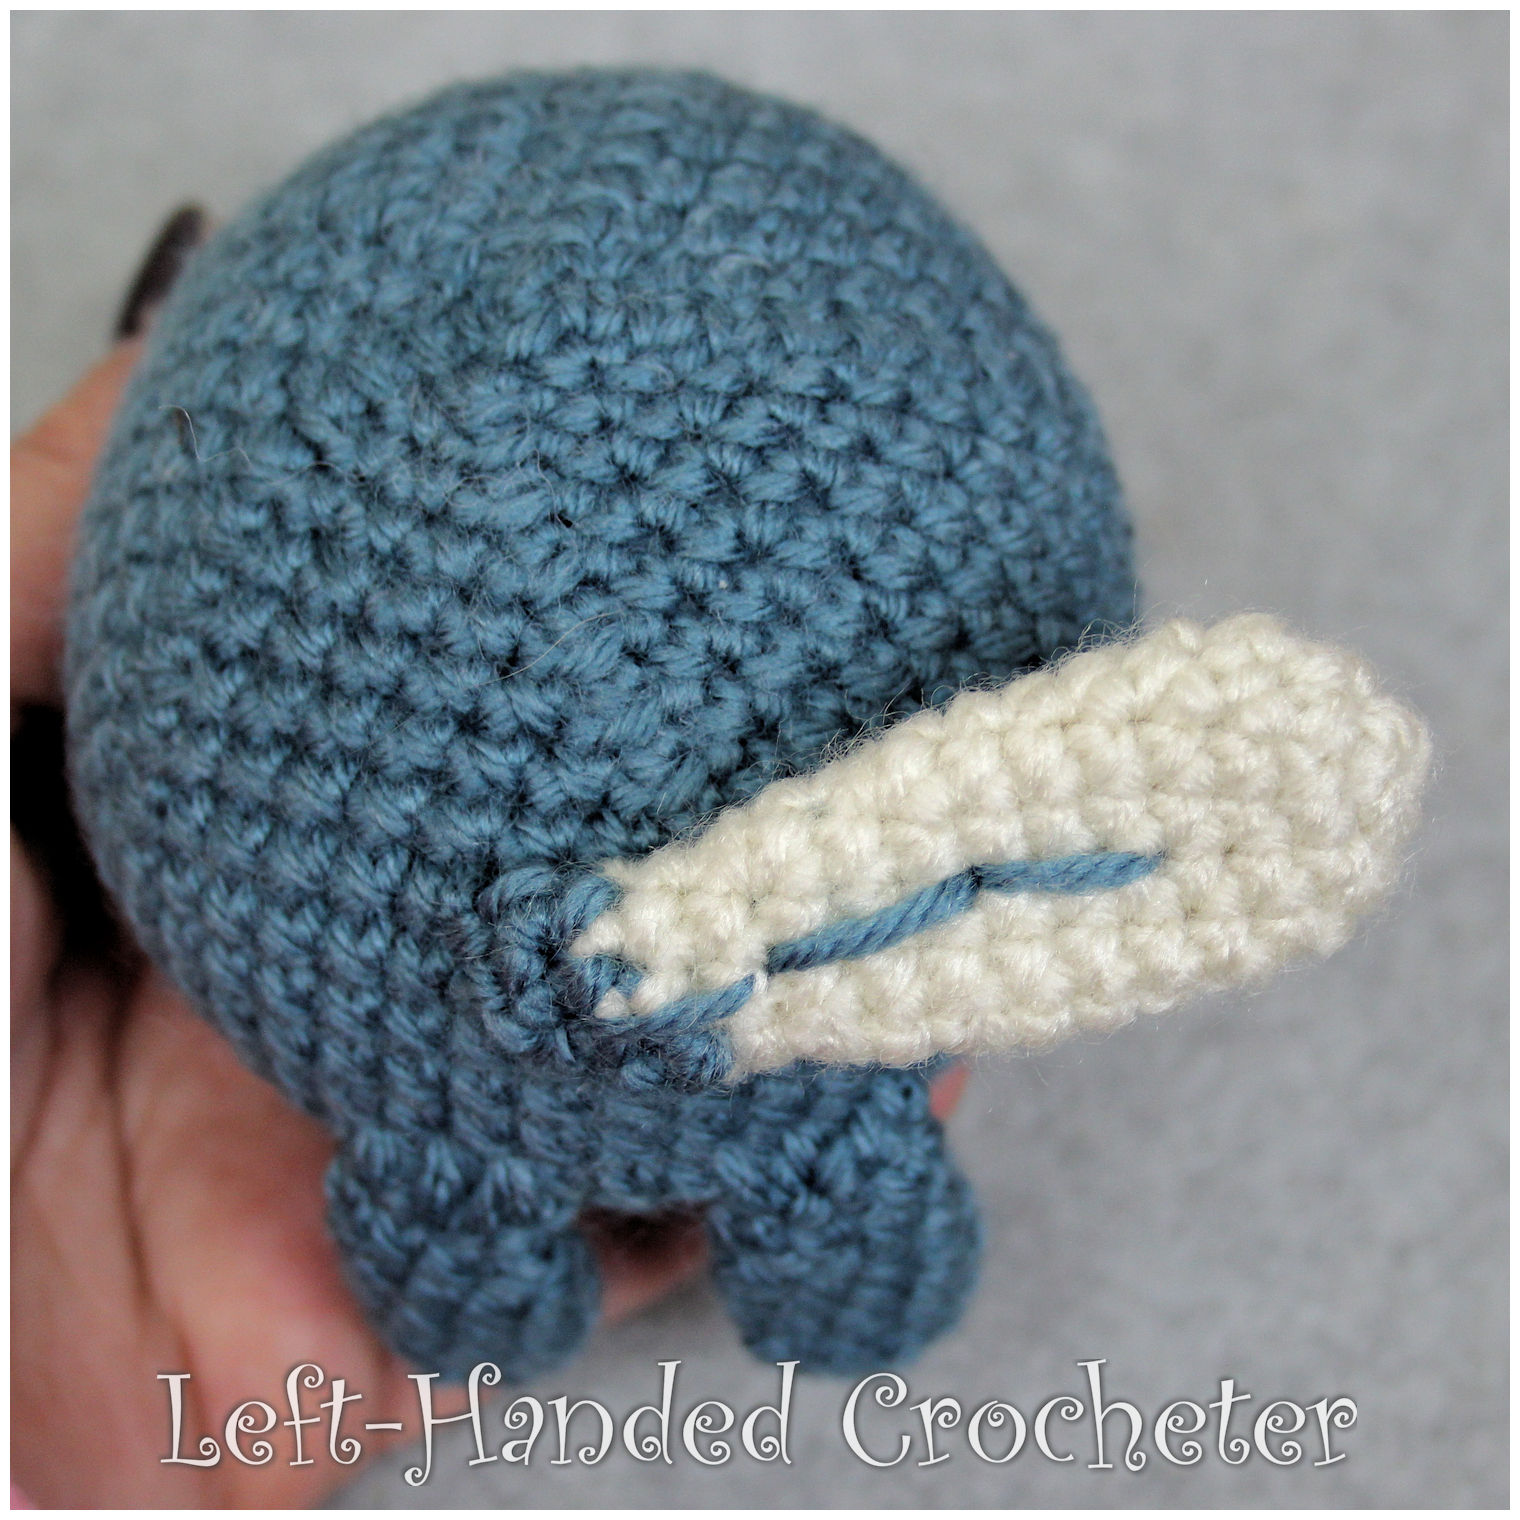
Tie off. Don’t stuff. Sew line down the middle with dusty blue. Position and sew onto back of body.

IMG_2397

I hope you enjoy this pattern! You’re welcome to sell items that you make using my patterns, as long as you don’t post the pattern anywhere else, and link back to my page if you’d like to. If there are any mistakes, or something is unclear, please feel free to message me on Facebook.
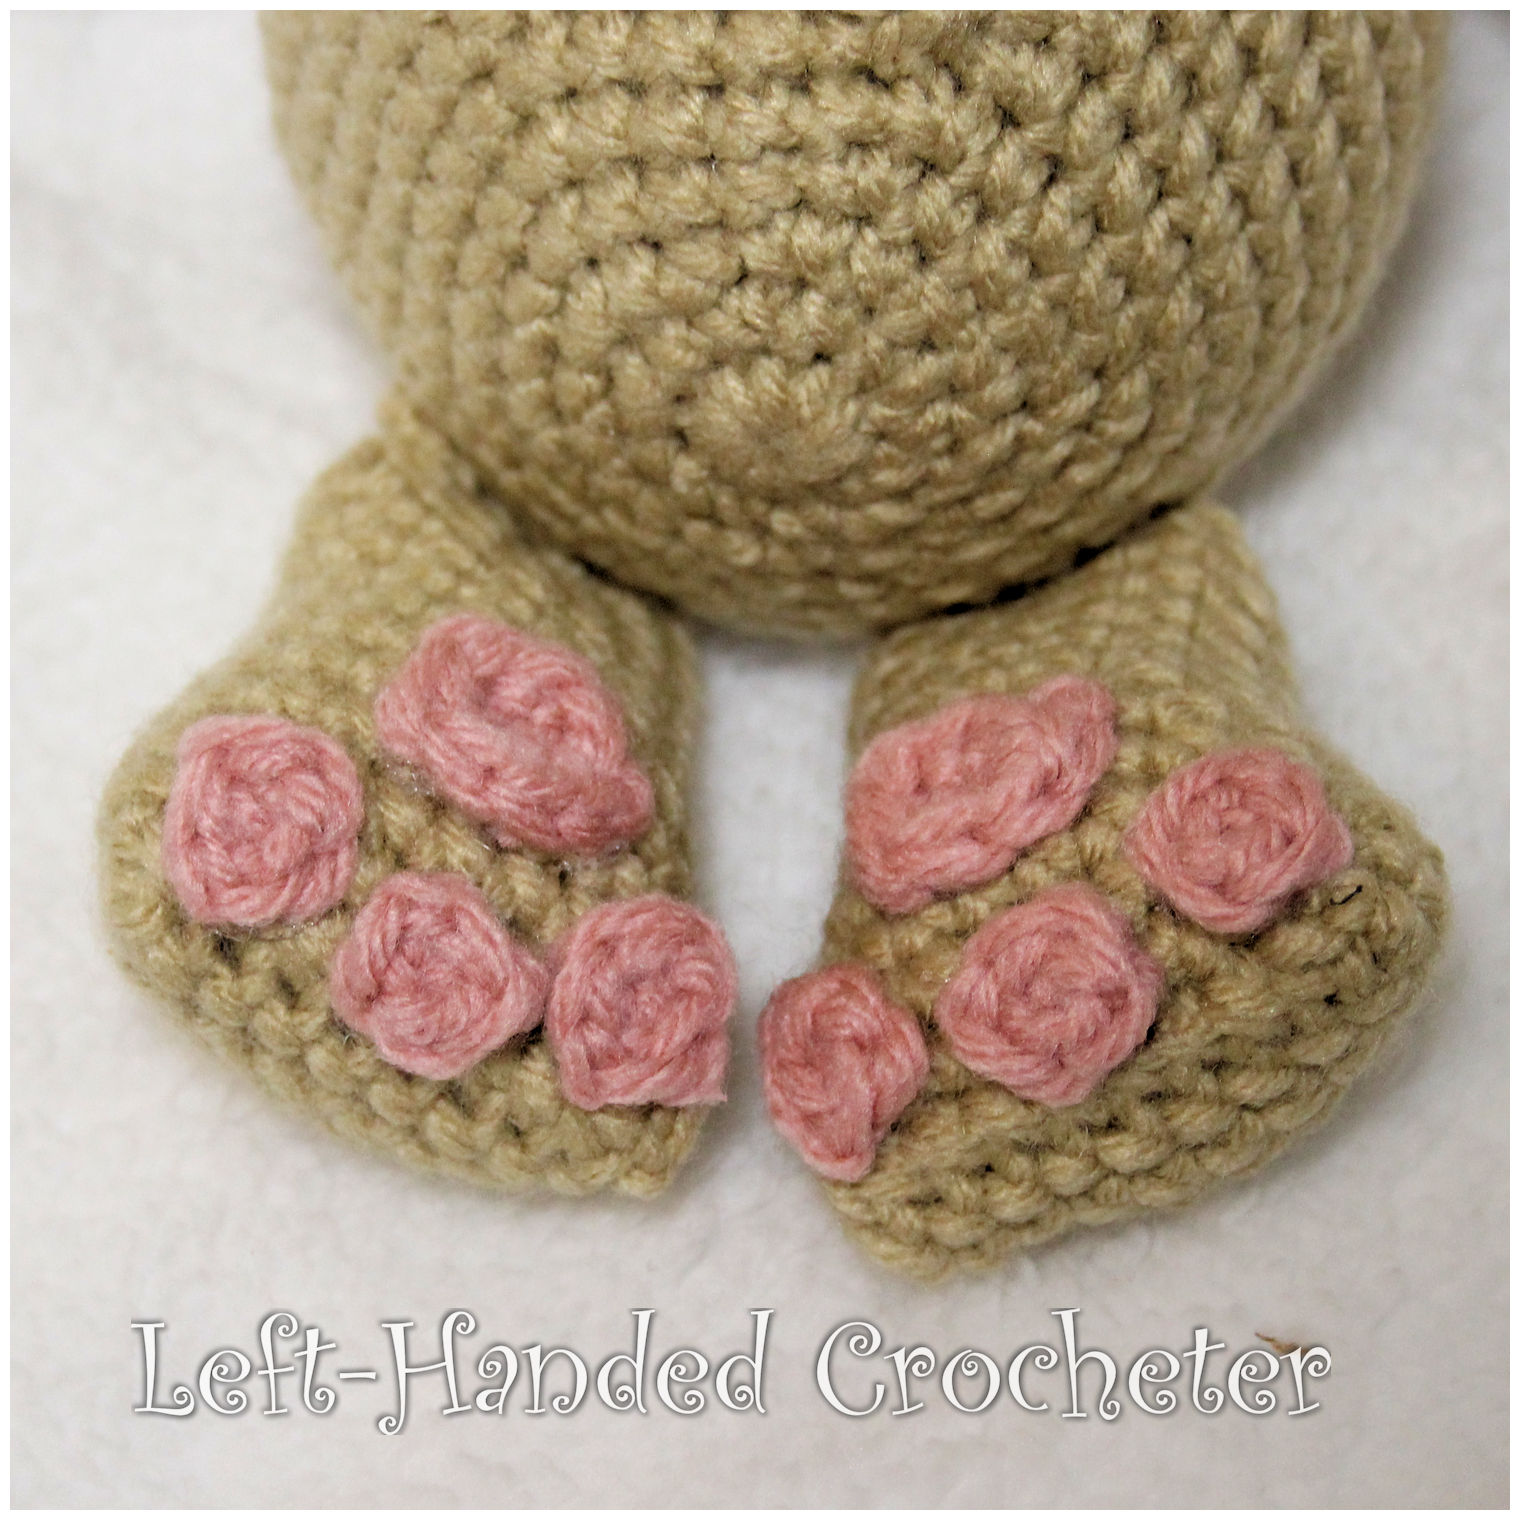
Crochet a Ditto

IMG_2549

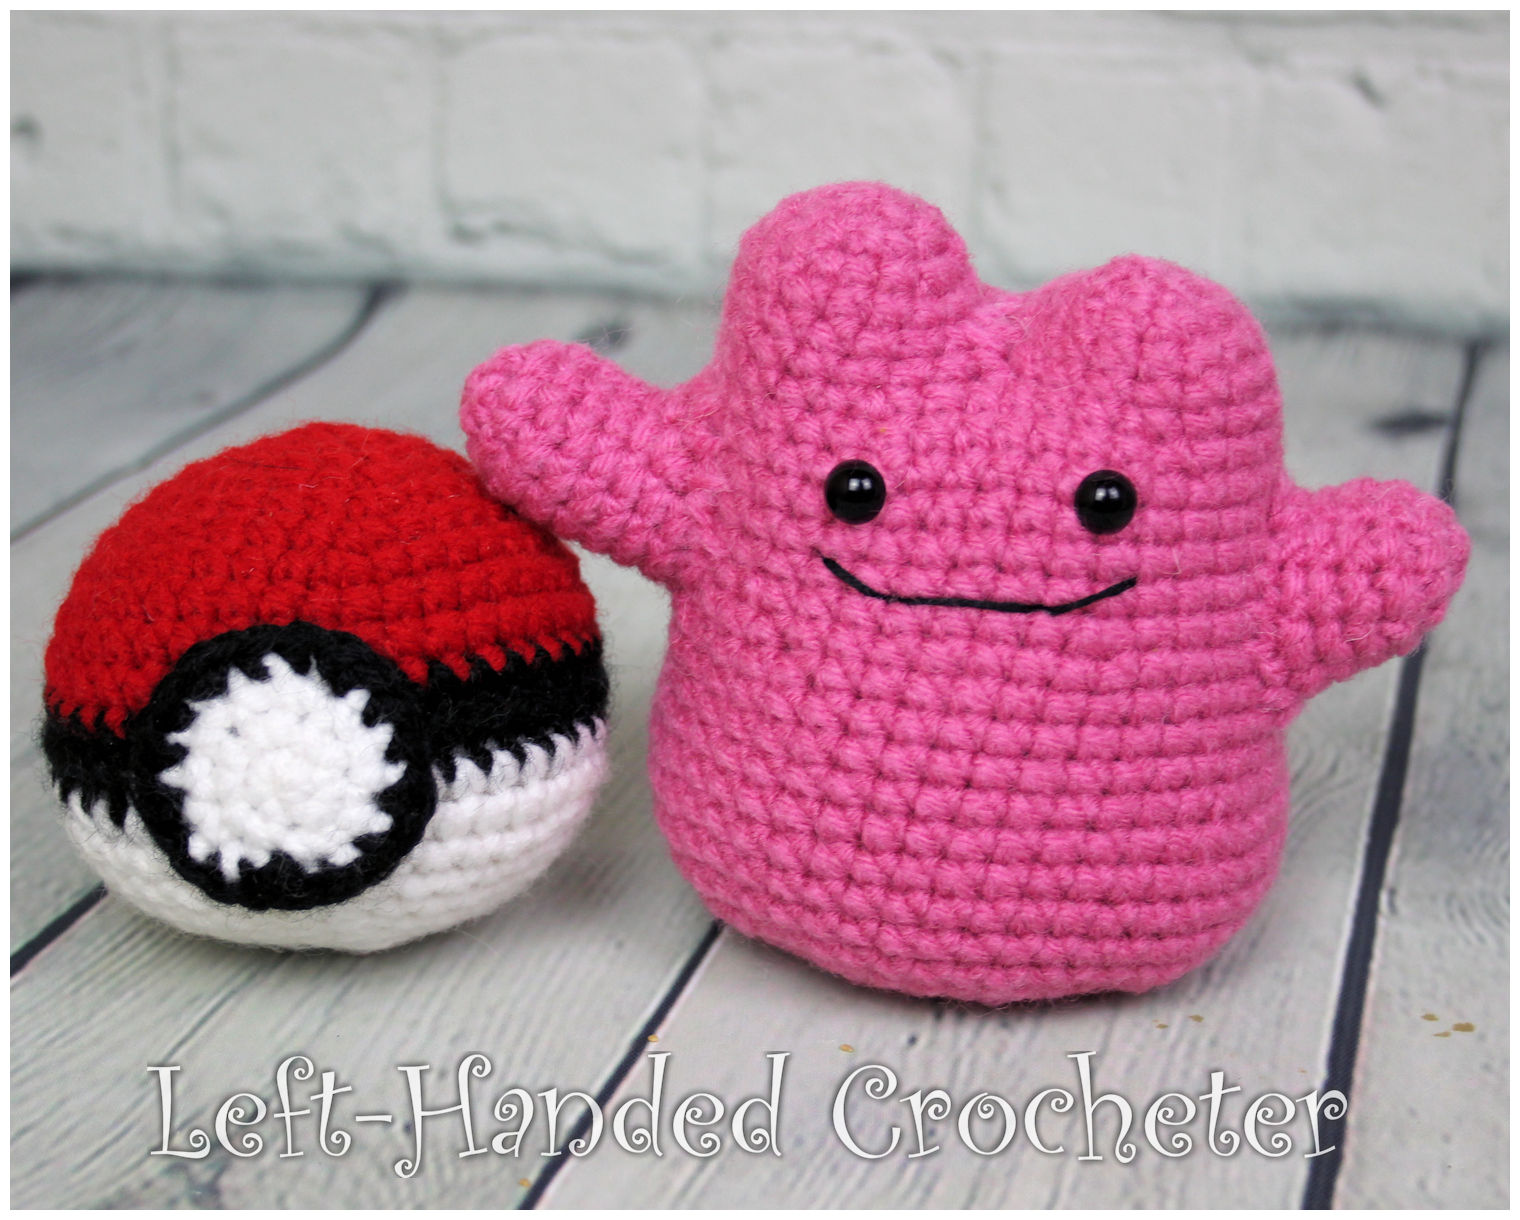
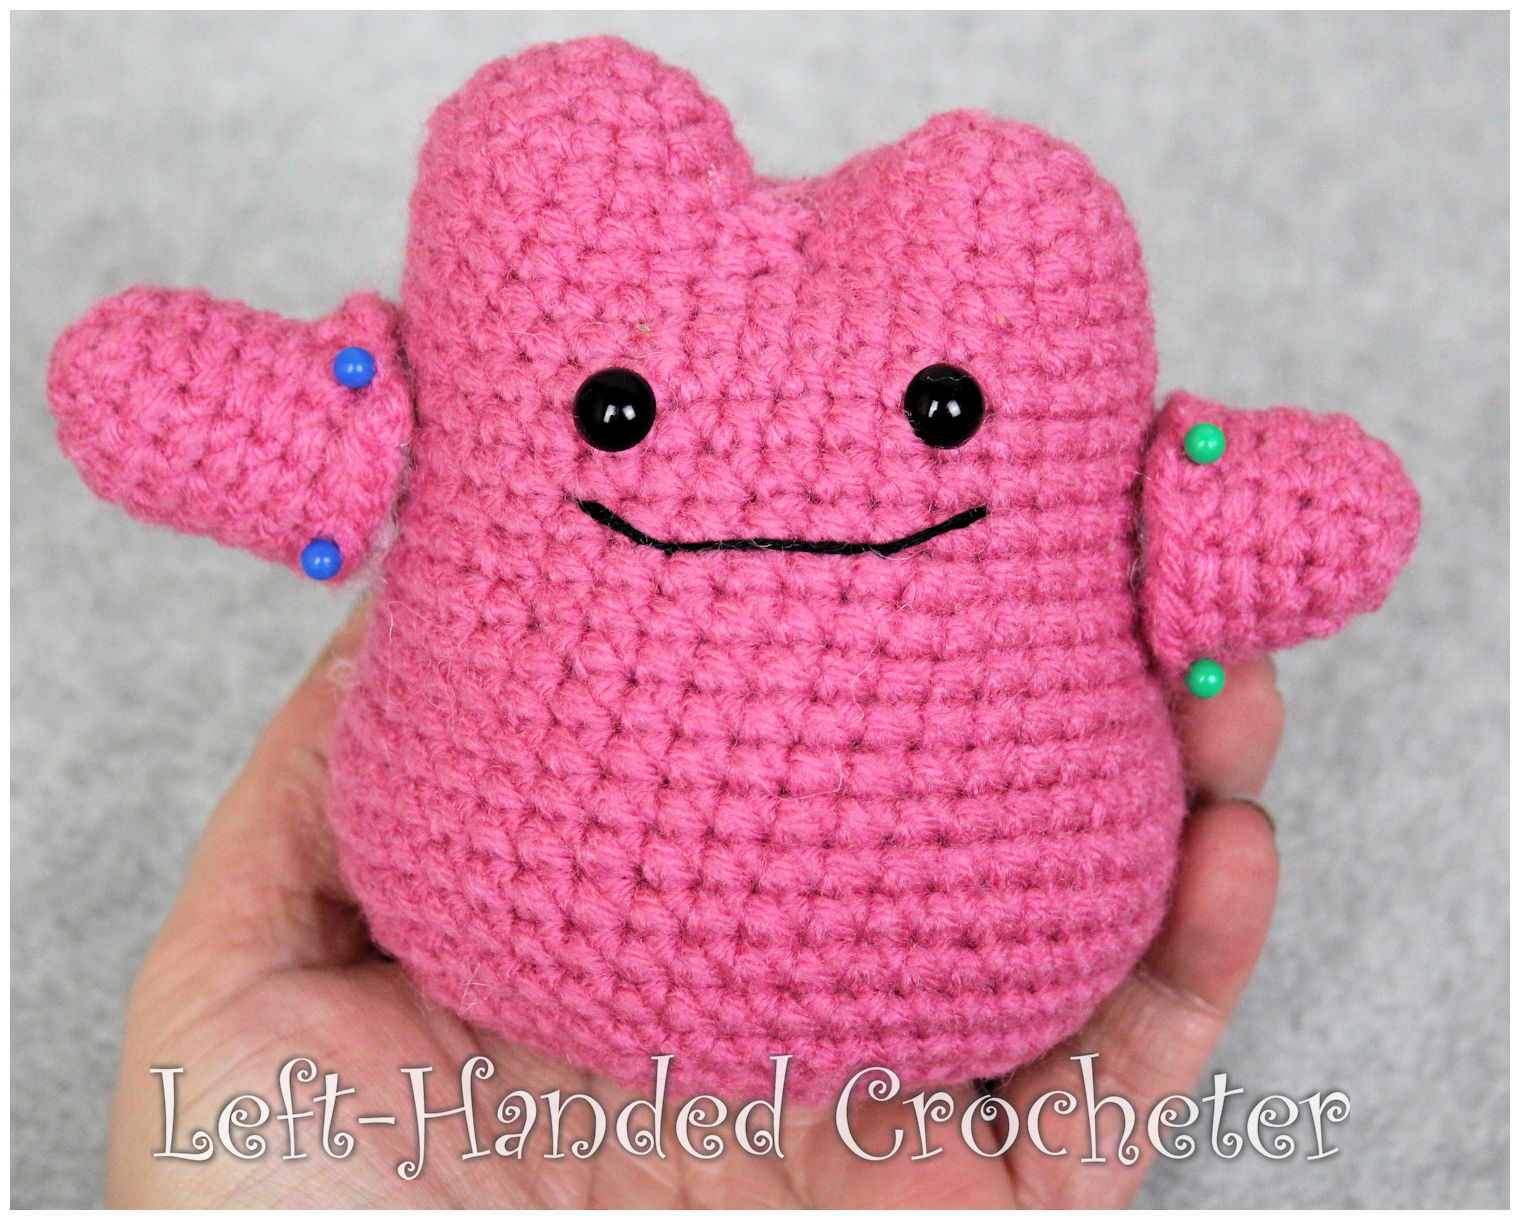
Gotta catch ‘em all! Whip up a crocheted Ditto, and it’s sure to be a hit. Made with worsted weight yarn, this finished doll measures approximately 4 inches tall.

Find all of my other Pokemon patterns, including the Pokeball, here.

Abbreviations:

ch: chain

sc: single crochet

sl st: slip stitch

inc: increase (2 single crochets in one loop)

dec: decrease (pull yarn through loop, pull yarn through second loop, yarn over and pull through all loops)

Materials needed:

Any worsted weight yarn. I used Red Heart Super Saver in light raspberry.

G (4mm) crochet hook

Poly-fil

Yarn needle

8mm safety eyes

Embroidery thread

This pattern is worked “in-the-round”, and stitches are worked through both loops unless otherwise noted. 

Left Lump:

With light raspberry, ch 3. Sl st to first ch to create circle. (Instead, you can perform the “magic circle” if you’d like.)

Row 1: ch 1, 5 sc inside of circle. (5 stitches)

Row 2: Inc in each stitch around. (10 stitches)

Row 3: *Inc in first stitch, sc in next stitch, repeat from * around. (15 stitches)

Rows 4-5: Sc in each stitch around. (15 stitches)

Stuff tight with poly-fil. Tie off.

Right Lump:

With light raspberry, ch 3. Sl st to first ch to create circle. (Instead, you can perform the “magic circle” if you’d like.)

Row 1: ch 1, 5 sc inside of circle. (5 stitches)

Row 2: Inc in each stitch around. (10 stitches)

Row 3: *Inc in first stitch, sc in next stitch, repeat from * around. (15 stitches)

Row 4: Sc in each stitch around. (15 stitches)

Stuff tight with poly-fil. Don’t tie off. Continue on with head and body.

Head and Body:

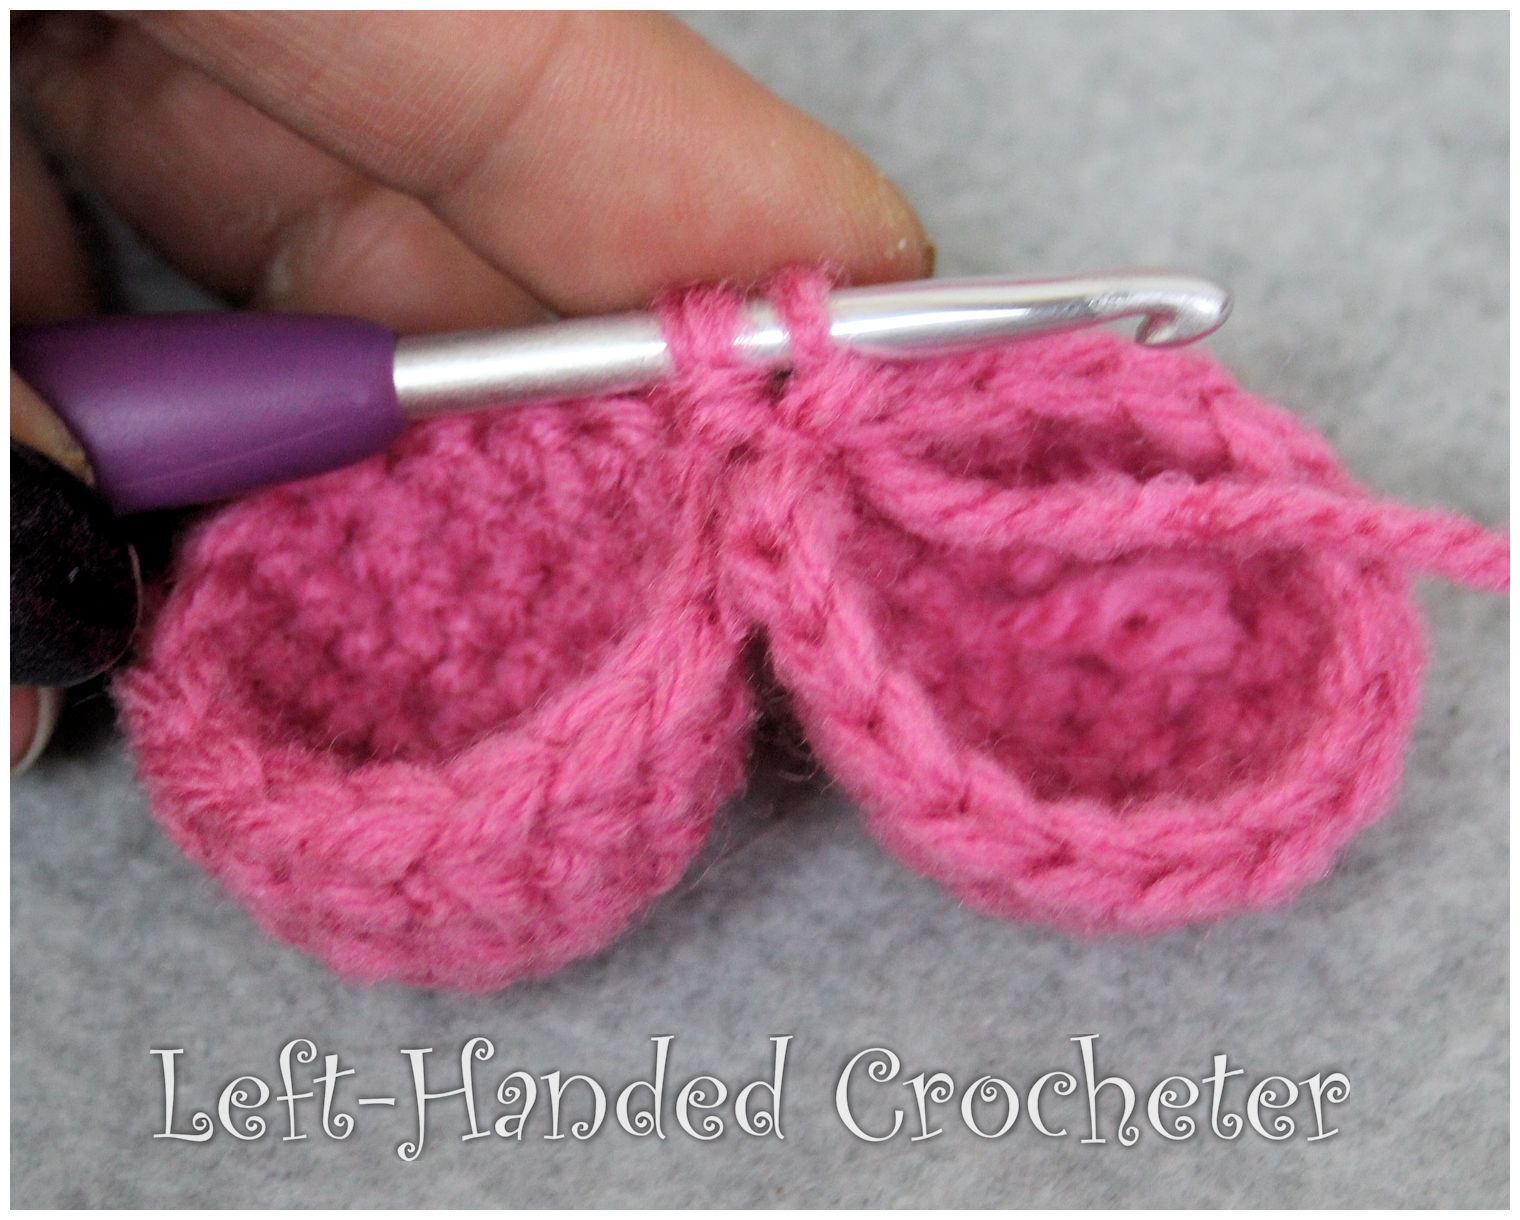
Row 1: With yarn still attached to right lump, pick up left lump and sc around both. (30 stitches)

IMG_2384

Row 2: *Inc in first stitch, sc in next 5 stitches, repeat from * around. (35 stitches)

Rows 3-7: Sc in each stitch around. (35 stitches)

Row 8: *Inc in first stitch, sc in next 6 stitches, repeat from * around. (40 stitches)

Rows 9-12: Sc in each stitch around. (40 stitches)

Row 13: Sc in first 10 stitches, inc in next 5 stitches, sc in next 15 stitches, inc in next 5 stitches, sc in last 5 stitches. (50 stitches)

Rows 14-18: Sc in each stitch around. (50 stitches)

Row 19: *Dec in first 2 stitches, sc in next 3 stitches, repeat from * around. (40 stitches)

Stuff tight with poly-fil. Insert safety eyes between rows 3 and 4 of body with 6 stitches between them.

Row 20: *Dec in first 2 stitches, sc in next 2 stitches, repeat from * around. (30 stitches)

Row 21: *Dec in first 2 stitches, sc in next stitch, repeat from * around. (20 stitches)

Row 22: Dec around. (10 stitches)

Row 23: Dec around. (5 stitches)

Sew end shut and tie off. Sew mouth on with embroidery thread.

Right Arm:

With light raspberry, ch 3. Sl st to first ch to create circle. (Instead, you can perform the “magic circle” if you’d like.)

Row 1: ch 1, 5 sc inside of circle. (5 stitches)

Row 2: Inc in each stitch around. (10 stitches)

Rows 3-5: Sc in each stitch around. (10 stitches)

Row 6: *Inc in first stitch, sc in next stitch, repeat from * around. (15 stitches)

Tie off. Stuff tight with poly-fil. Position and sew onto body.

Left Arm:

With light raspberry, ch 3. Sl st to first ch to create circle. (Instead, you can perform the “magic circle” if you’d like.)

Row 1: ch 1, 5 sc inside of circle. (5 stitches)

Row 2: Inc in each stitch around. (10 stitches)

Rows 3-7: Sc in each stitch around. (10 stitches)

Row 8: Inc in first 5 stitches, sc in last 5 stitches. (20 stitches)

Tie off. Stuff tight with poly-fil. Position and sew onto body.

IMG_2388

I hope you enjoy this pattern! You’re welcome to sell items that you make using my patterns, as long as you don’t post the pattern anywhere else, and link back to my page if you’d like to. If there are any mistakes, or something is unclear, please feel free to message me on Facebook.
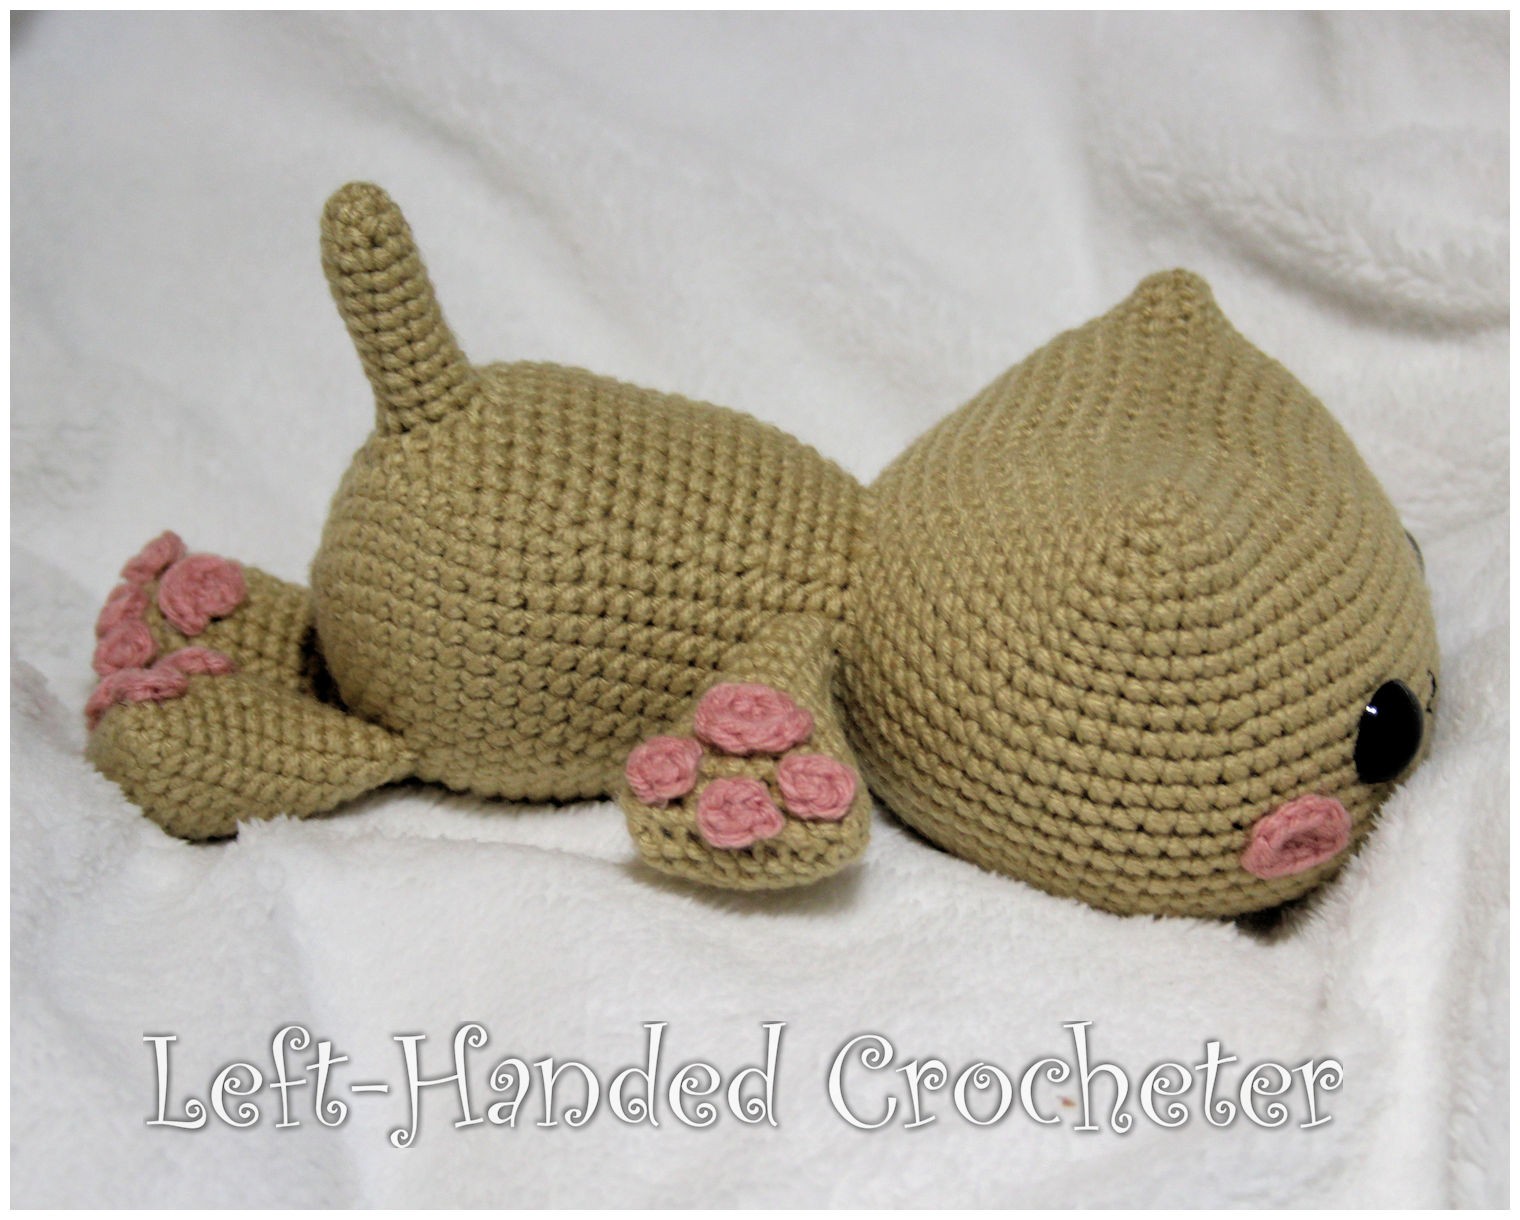


Crochet a Magikarp

IMG_1672

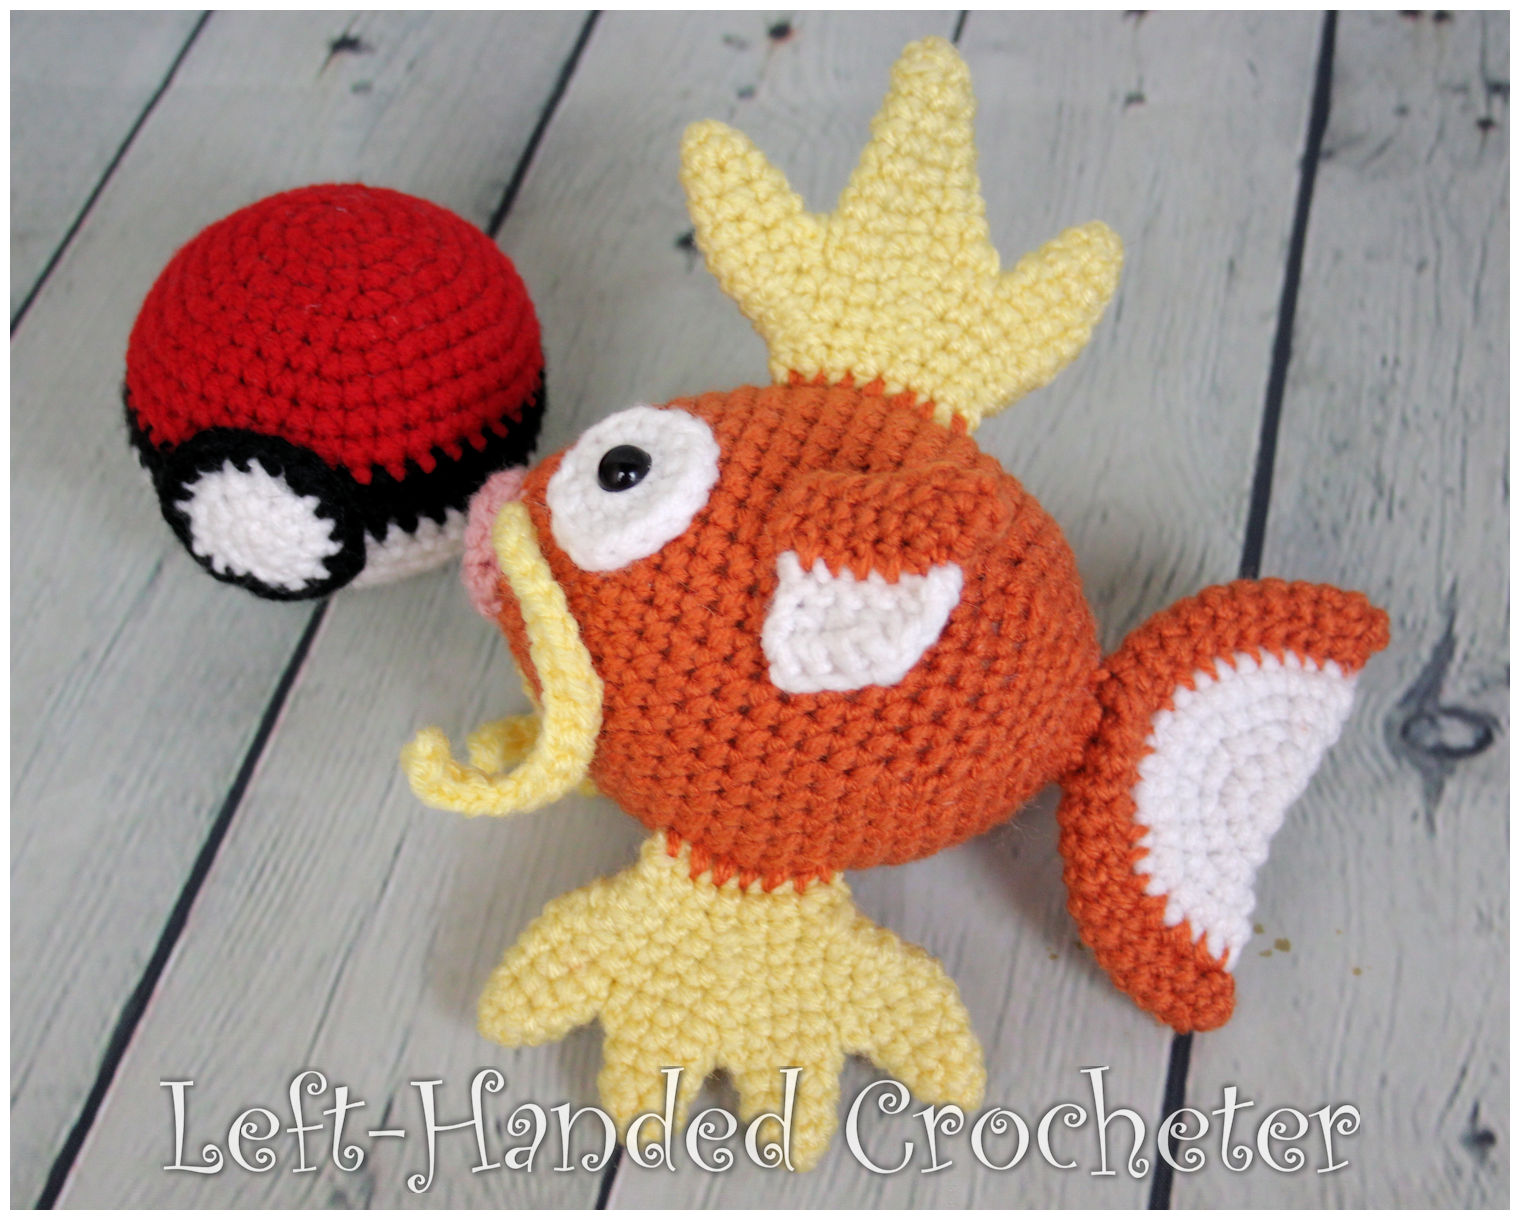
Gotta catch ‘em all! Whip up a crocheted Magikarp, and it’s sure to be a hit. Made with worsted weight yarn, this finished doll measures approximately 6 inches long.

Find all of my other Pokemon patterns, including the Pokeball, here.

Abbreviations:

ch: chain

sc: single crochet

sl st: slip stitch

inc: increase (2 single crochets in one loop)

dec: decrease (pull yarn through loop, pull yarn through second loop, yarn over and pull through all loops)

Materials needed:

Any worsted weight yarn. I used Red Heart Super Saver in charcoal, white, carrot and lemon. I also used Lion Brand Vanna’s Choice in pink.

G (4mm) crochet hook

Poly-fil

Yarn needle

9mm safety eyes

This pattern is worked “in-the-round”, and stitches are worked through both loops unless otherwise noted. 

Head and Body:

With charcoal, ch 3. Sl st to first ch to create circle. (Instead, you can perform the “magic circle” if you’d like.)

Row 1: ch 1, 10 sc inside of circle. (10 stitches)

Switch to pink.

Row 2: Sc in each stitch around. (10 stitches)

Switch to carrot.

Row 3: In inside loops only, *inc in first stitch, sc in next stitch, repeat from * around. (15 stitches)

Row 4: *Inc in first stitch, sc in next 2 stitches, repeat from * around. (20 stitches)

Row 5: Sc in each stitch around. (20 stitches)

Row 6: *Inc in first stitch, sc in next 3 stitches, repeat from * around. (25 stitches)

Row 7: *Inc in first stitch, sc in next 4 stitches, repeat from * around. (30 stitches)

Row 8: *Inc in first stitch, sc in next 5 stitches, repeat from * around. (35 stitches)

Row 9: *Inc in first stitch, sc in next 6 stitches, repeat from * around. (40 stitches)

Rows 10-19: Sc in each stitch around. (40 stitches)

Row 20: *Dec in first 2 stitches, sc in next 6 stitches, repeat from * around. (35 stitches)

Row 21: *Dec in first 2 stitches, sc in next 5 stitches, repeat from * around. (30 stitches)

Row 22: Sc in each stitch around. (30 stitches)

Row 23: *Dec in first 2 stitches, sc in next 4 stitches, repeat from * around. (25 stitches)

Row 24: *Dec in first 2 stitches, sc in next 3 stitches, repeat from * around. (20 stitches)

Row 25: Sc in each stitch around. (20 stitches)

Row 26: *Dec in first 2 stitches, sc in next 2 stitches, repeat from * around. (15 stitches)

Stuff tight with poly-fil. Continue stuffing as you work.

Row 27: *Dec in first 2 stitches, sc in next stitch, repeat from * around. (10 stitches)

Row 28: Dec around. (5 stitches)

Sew end shut and tie off. Find the loops you made on row 3 by working in the inside loops. Attach pink yarn with a sl st and sc around.

IMG_1315

Eyes:

With white, ch 3. Sl st to first ch to create circle. (Instead, you can perform the “magic circle” if you’d like.)

Row 1: ch 1, 10 sc inside of circle. (10 stitches)

Row 2: *Inc in first stitch, sc in next stitch, repeat from * around. (15 stitches)

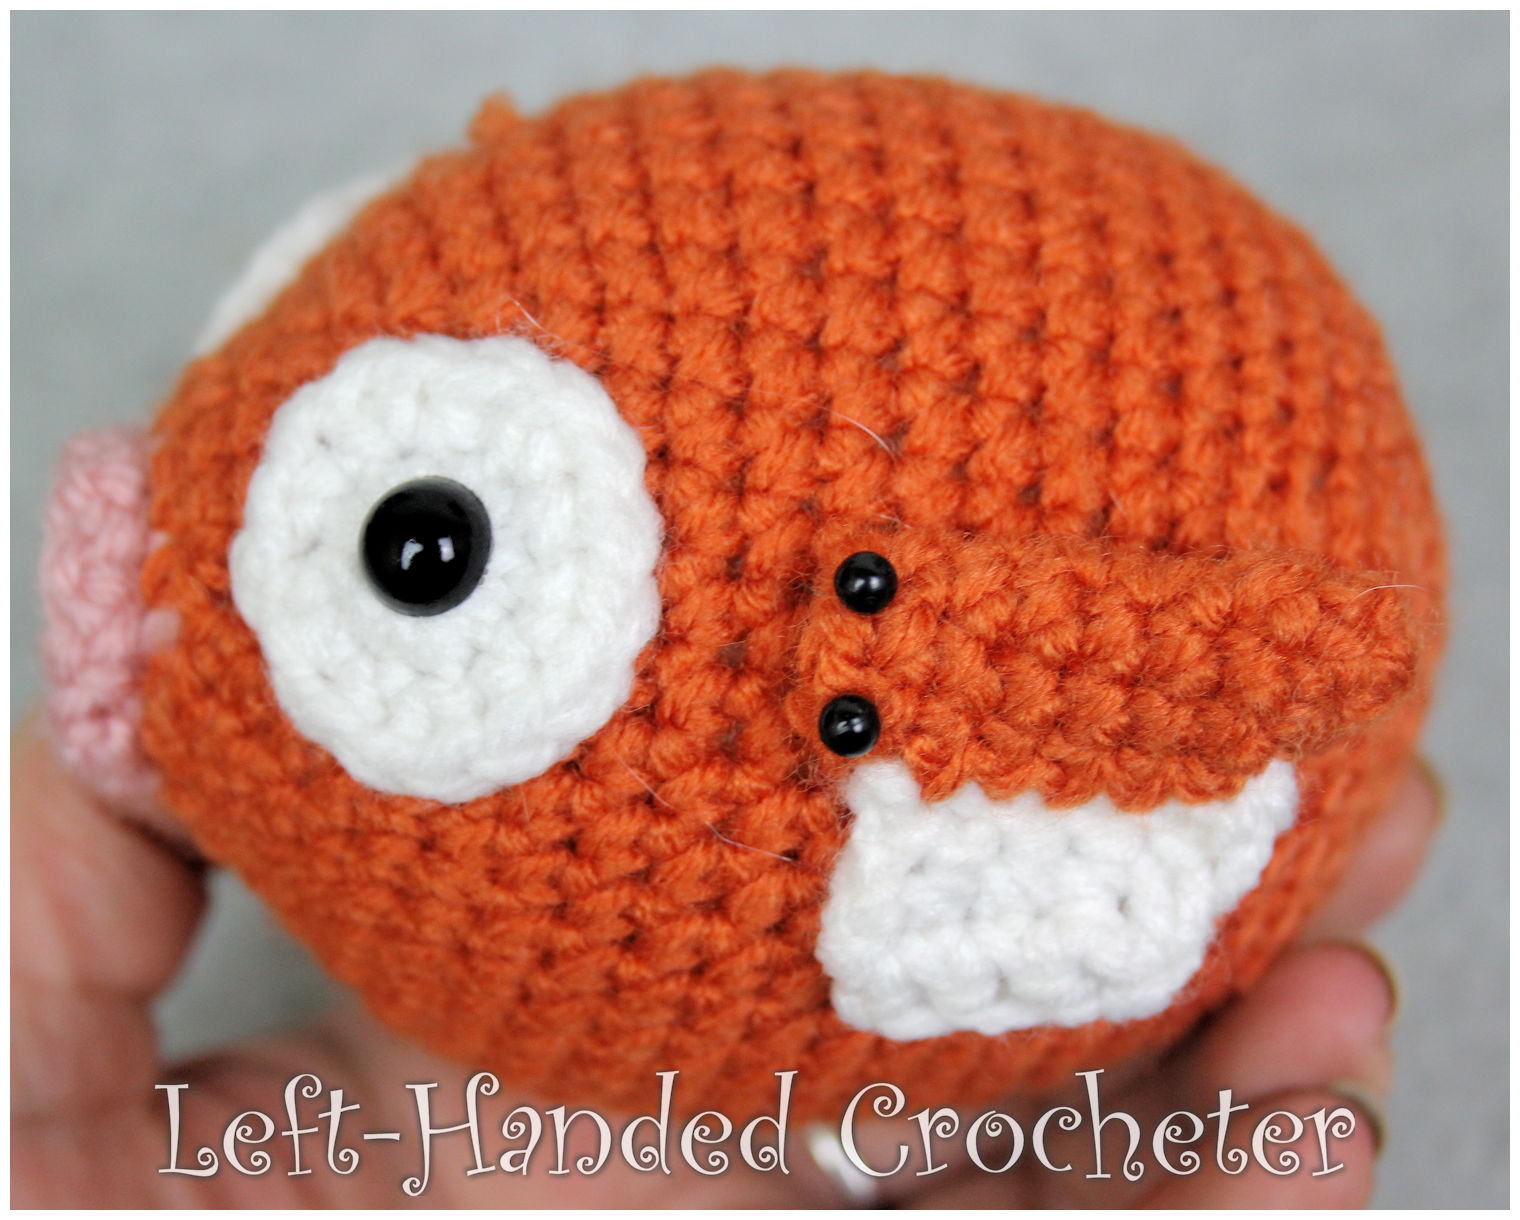
Tie off. Make two. Insert safety eyes through middle. Position and sew onto face.

Side Fins – Orange:

With carrot, ch 3. Sl st to first ch to create circle. (Instead, you can perform the “magic circle” if you’d like.)

Row 1: ch 1, 4 sc inside of circle. (4 stitches)

Row 2: *Inc in first stitch, sc in next stitch, repeat from * around. (6 stitches)

Rows 3-8: Sc in each stitch around. (6 stitches)

Tie off. Don’t stuff.

Side Fins – White:

With white, ch 6.

Row 1: Sc in 2nd ch from hook and in each across, ch 1, turn. (5 stitches)

Row 2: Sc in first 3 stitches, work dec across last 2 stitches, ch 1, turn. (4 stitches)

Row 3: Work dec across first 2 stitches, sc in last 2 stitches. (3 stitches)

Tie off. Position and sew onto orange part of fin.

Make two. Position and sew onto each side of body.

IMG_1384

Tail – Orange:

With carrot, ch 3. Sl st to first ch to create circle. (Instead, you can perform the “magic circle” if you’d like.)

Row 1: ch 1, 4 sc inside of circle. (4 stitches)

Row 2: *Inc in first stitch, sc in next stitch, repeat from * around. (6 stitches)

Rows 3-24: Sc in each stitch around. (6 stitches)

Row 25: *Dec in first 2 stitches, sc in next stitch, repeat from * around. (4 stitches)

Don’t stuff. Sew end shut and tie off.

Tail – White:

With white, ch 3. Sl st to first ch to create circle. (Instead, you can perform the “magic circle” if you’d like.)

Row 1: ch 1, 10 sc inside of circle. (10 stitches)

Row 2: *Inc in first stitch, sc in next stitch, repeat from * around. (15 stitches)

Row 3: *Inc in first stitch, sc in next 2 stitches, repeat from * around. (20 stitches)

Row 4: *Inc in first stitch, sc in next stitch, repeat from * around. (30 stitches)

Row 5: *Inc in first stitch, sc in next 2 stitches, repeat from * around. (40 stitches)

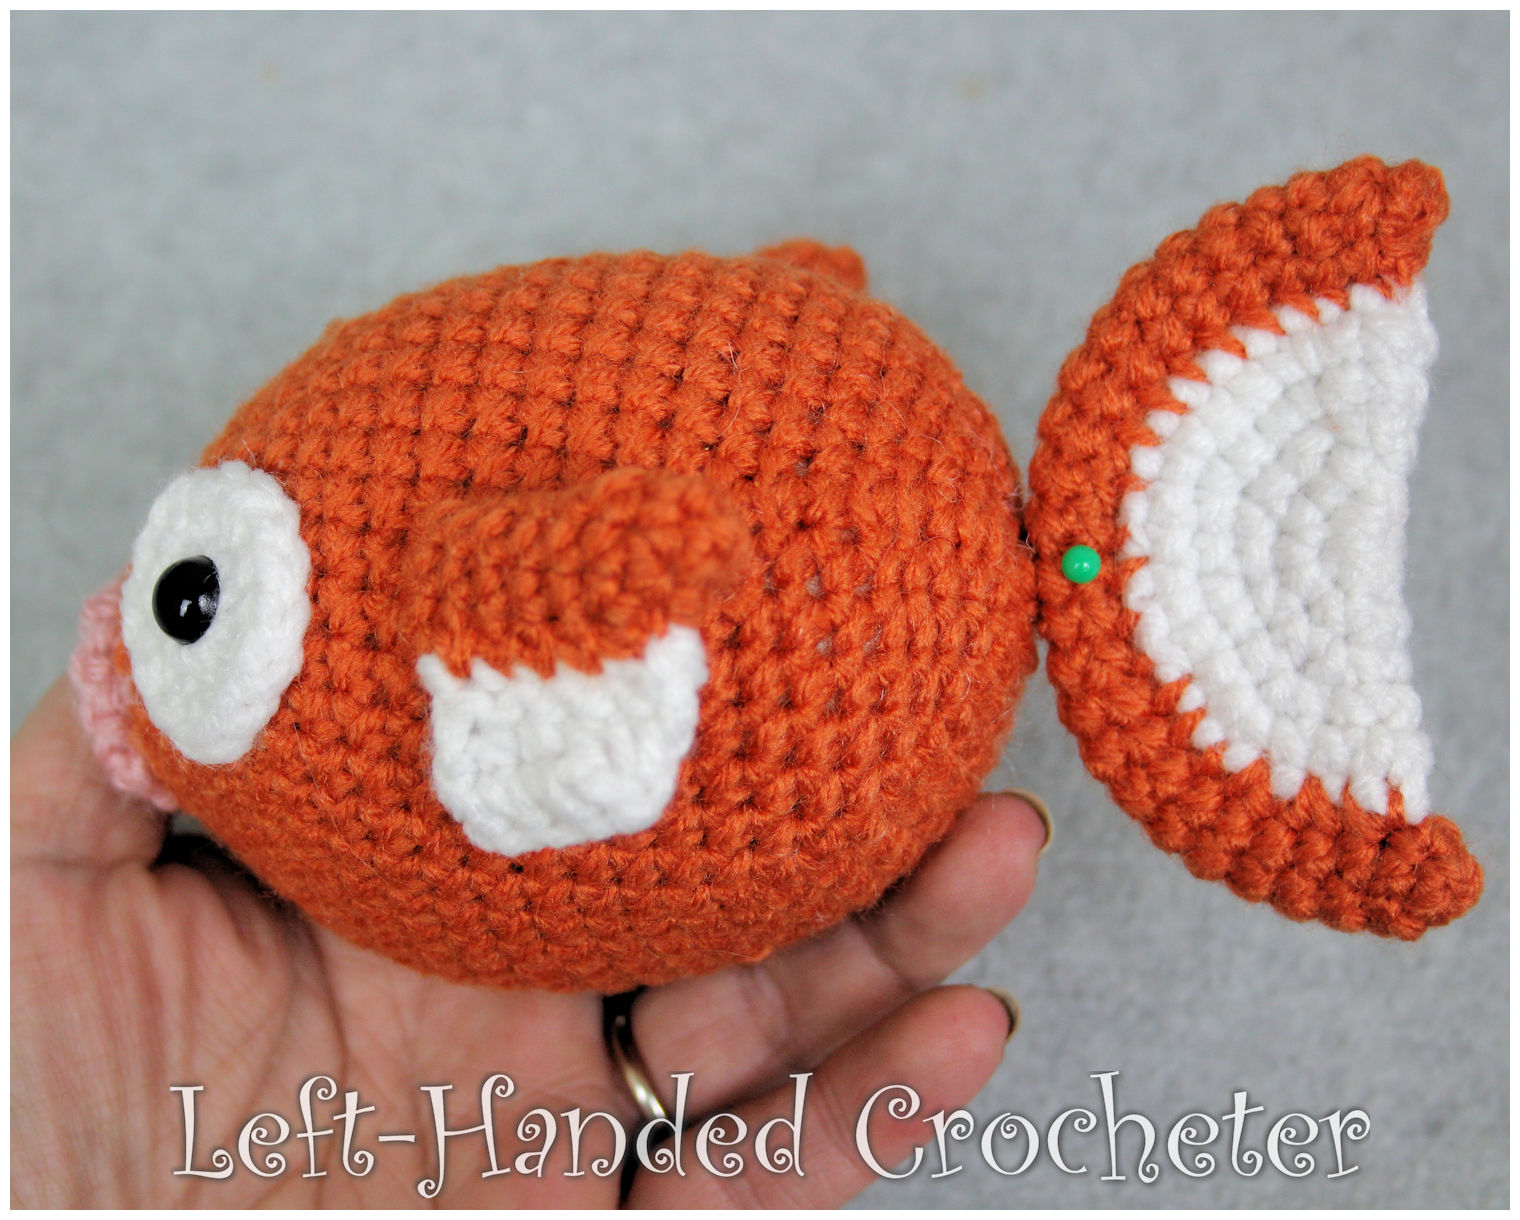
Tie off. Fold in half and sew rounded white sides together. Sew orange part of tail onto rounded white part of tail.

Position tail onto back of body and sew on.

IMG_1387

Top Fin:

Middle Point:

With lemon, ch 3. Sl st to first ch to create circle. (Instead, you can perform the “magic circle” if you’d like.)

Row 1: ch 1, 4 sc inside of circle. (4 stitches)

Row 2: *Inc in first stitch, sc in next stitch, repeat from * around. (6 stitches)

Row 3: Sc in each stitch around. (6 stitches)

Row 4: *Inc in first stitch, sc in next 2 stitches, repeat from * around. (8 stitches)

Row 5: Sc in each stitch around. (8 stitches)

Row 6: *Inc in first stitch, sc in next 3 stitches, repeat from * around. (10 stitches)

Row 7: Sc in each stitch around. (10 stitches)

Row 8: *Inc in first stitch, sc in next 4 stitches, repeat from * around. (12 stitches)

Row 9: *Inc in first stitch, sc in next 5 stitches, repeat from * around. (14 stitches)

Tie off.

Side Points:

With lemon, ch 3. Sl st to first ch to create circle. (Instead, you can perform the “magic circle” if you’d like.)

Row 1: ch 1, 4 sc inside of circle. (4 stitches)

Row 2: *Inc in first stitch, sc in next stitch, repeat from * around. (6 stitches)

Row 3: Sc in each stitch around. (6 stitches)

Row 4: *Inc in first stitch, sc in next 2 stitches, repeat from * around. (8 stitches)

Rows 5-6: Sc in each stitch around. (8 stitches)

Make two. Tie off first one. Don’t tie off second one. Continue on with fin.

Fin:

Row 1: With yarn still attached to last point, pick up middle point and sc in first 7 stitches. Pick up third point and sc around. Sc in other 7 stitches of middle point, sc around last point. (30 stitches)

Row 2: *Dec in first 2 stitches, sc in next 4 stitches, repeat from * around. (25 stitches)

Row 3: *Dec in first 2 stitches, sc in next 3 stitches, repeat from * around. (20 stitches)

Row 4: *Dec in first 2 stitches, sc in next 2 stitches, repeat from * around. (15 stitches)

Row 5: Sc in each stitch around. (15 stitches)

Tie off. Don’t stuff. Position and sew onto top of body.

Bottom Fin:

Points:

With lemon, ch 3. Sl st to first ch to create circle. (Instead, you can perform the “magic circle” if you’d like.)

Row 1: ch 1, 4 sc inside of circle. (4 stitches)

Row 2: *Inc in first stitch, sc in next stitch, repeat from * around. (6 stitches)

Row 3: Sc in each stitch around. (6 stitches)

Row 4: *Inc in first stitch, sc in next 2 stitches, repeat from * around. (8 stitches)

Row 5: Sc in each stitch around. (8 stitches)

Tie off. Make four. Don’t tie off last one. Continue on with fin.

Fin:

Row 1: With yarn still attached to last point, pick up second point and sc in first 4 stitches. Pick up third point and sc in first 4 stitches. Pick up last point and sc around. Sc in other 4 stitches of third point, sc in other 4 stitches of second point and sc around last point. (32 stitches)

Row 2: Sc in first 11 stitches, work dec across next 2 stitches, sc in next 14 stitches, work dec across next 2 stitches, sc in last 3 stitches. (30 stitches)

Row 3: *Dec in first 2 stitches, sc in next 4 stitches, repeat from * around. (25 stitches)

Row 4: *Dec in first 2 stitches, sc in next 3 stitches, repeat from * around. (20 stitches)

Row 5: *Dec in first 2 stitches, sc in next 2 stitches, repeat from * around. (15 stitches)

Row 6: Sc in each stitch around. (15 stitches)

Tie off. Don’t stuff. Position and sew onto bottom of body.

Whiskers:

With lemon yarn, ch 19, leaving a long starting tail.

Row 1: Sc in 2nd ch from hook and in each across. (18 stitches)

Tie off, leaving a long ending tail. Make two. Use tails to attach whiskers to each side of mouth.

IMG_1376

I hope you enjoy this pattern! You’re welcome to sell items that you make using my patterns, as long as you don’t post the pattern anywhere else, and link back to my page if you’d like to. If there are any mistakes, or something is unclear, please feel free to message me on Facebook.
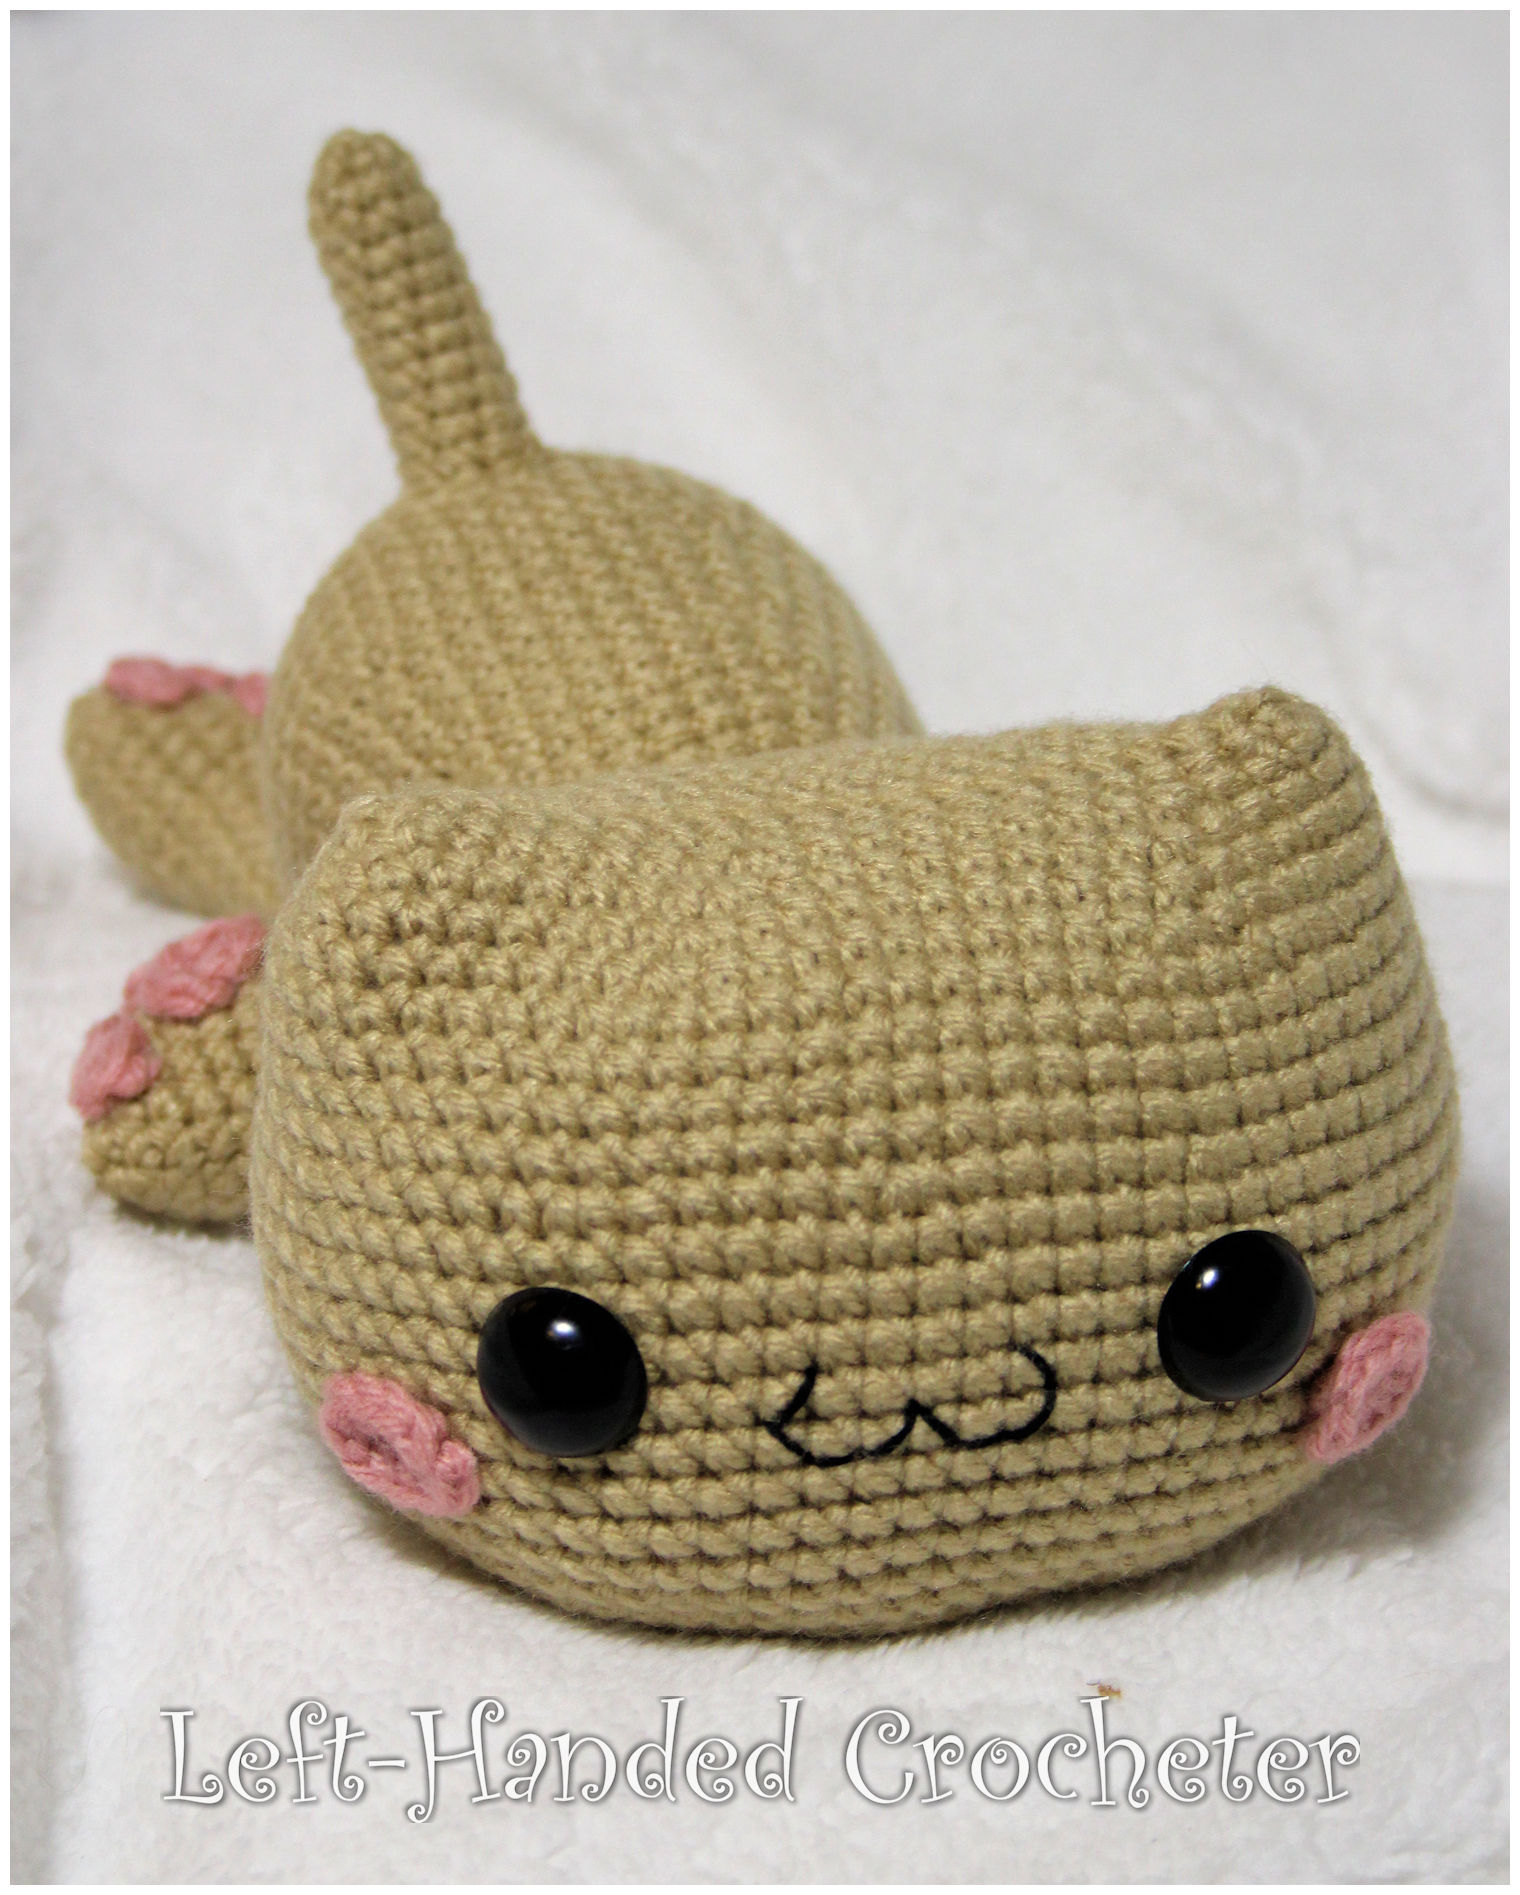


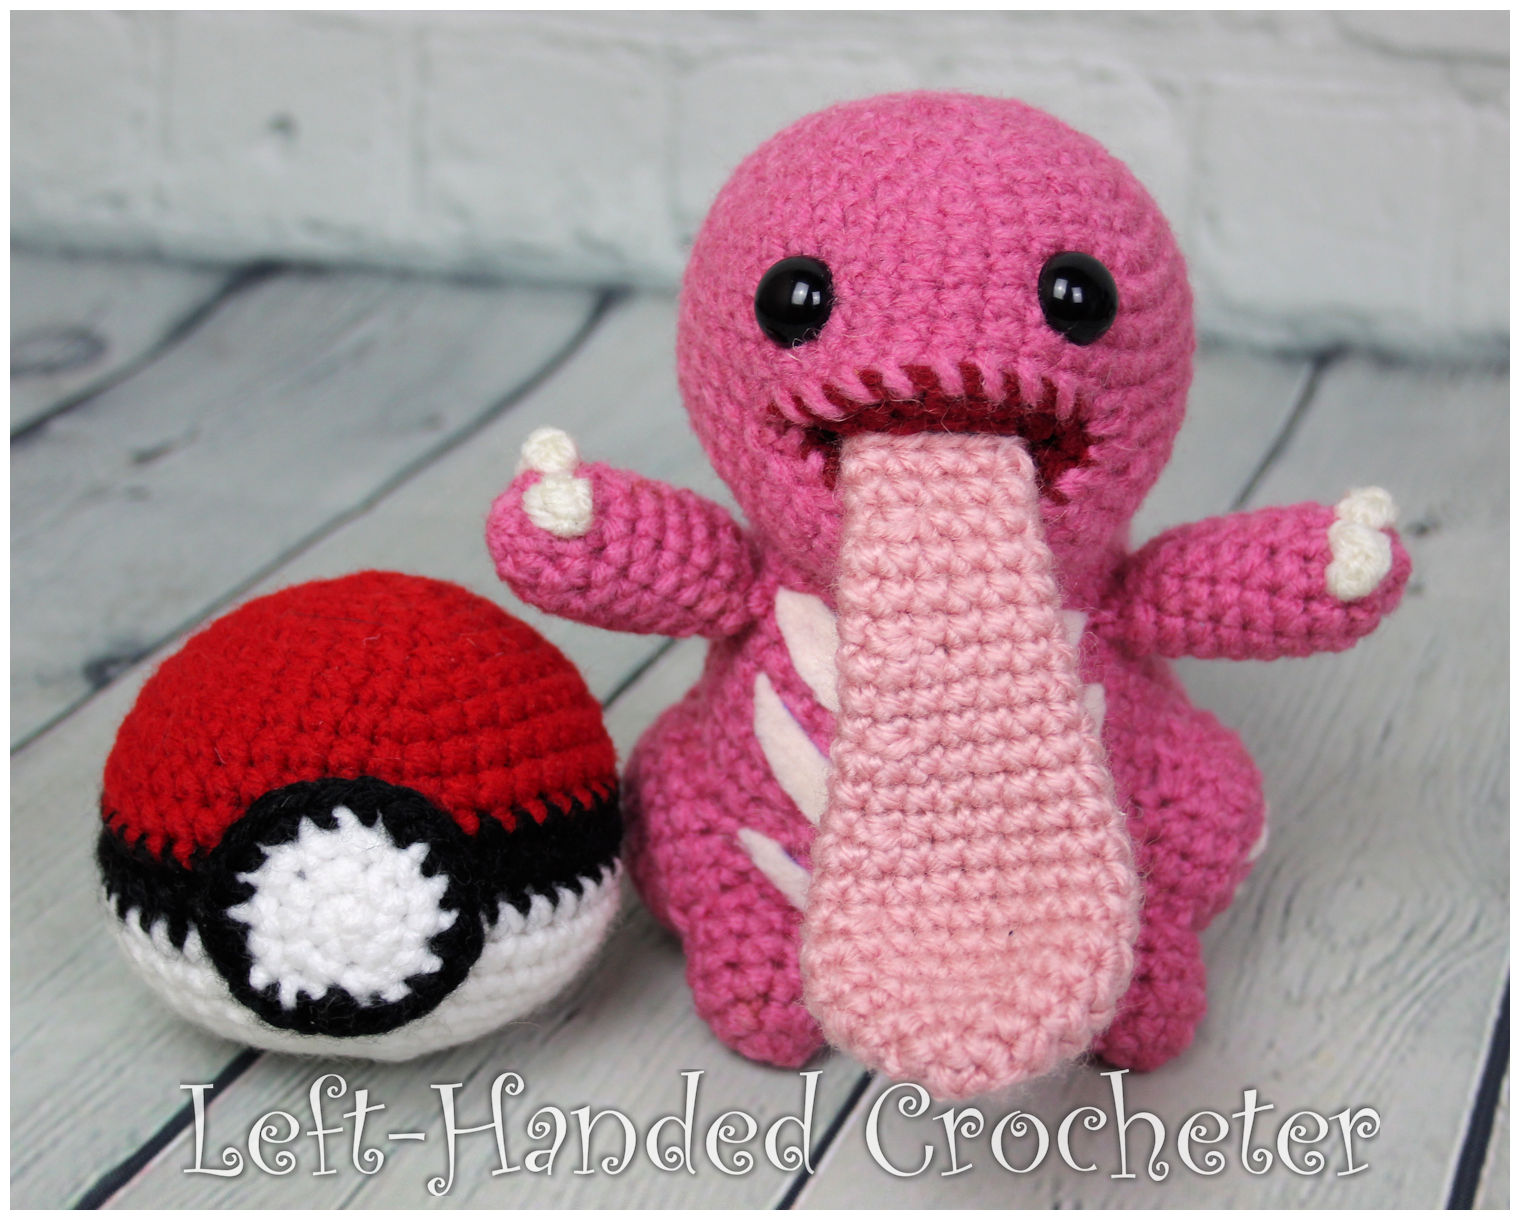
Crochet a Lickitung

IMG_1696

Gotta catch ‘em all! Whip up a crocheted Lickitung, and it’s sure to be a hit. Made with worsted weight yarn, this finished doll measures approximately 5 inches tall.

Find all of my other Pokemon patterns, including the Pokeball, here.

Abbreviations:

ch: chain

sc: single crochet

sl st: slip stitch

inc: increase (2 single crochets in one loop)

dec: decrease (pull yarn through loop, pull yarn through second loop, yarn over and pull through all loops)

Materials needed:

Any worsted weight yarn. I used Red Heart Super Saver in light raspberry, aran and burgundy. I also used Lion Brand Vanna’s Choice in pink.

G (4mm) crochet hook

12mm safety eyes

Poly-fil

Yarn needle

Stitch markers

Cream colored felt

This pattern is worked “in-the-round”, and stitches are worked through both loops unless otherwise noted. 

Head:

With light raspberry, ch 3. Sl st to first ch to create circle. (Instead, you can perform the “magic circle” if you’d like.)

Row 1: ch 1, 10 sc inside of circle. (10 stitches)

Row 2: *Inc in first stitch, sc in next stitch, repeat from * around. (15 stitches)

Row 3: *Inc in first stitch, sc in next 2 stitches, repeat from * around. (20 stitches)

Row 4: *Inc in first stitch, sc in next 3 stitches, repeat from * around. (25 stitches)

Row 5: *Inc in first stitch, sc in next 4 stitches, repeat from * around. (30 stitches)

Row 6: *Inc in first stitch, sc in next 5 stitches, repeat from * around. (35 stitches)

Row 7: *Inc in first stitch, sc in next 6 stitches, repeat from * around. (40 stitches)

Rows 8-10: Sc in each stitch around. (40 stitches)

Row 11: Sc in first 15 stitches, ch 10. Skip next 10 stitches. Sc in last 15 stitches. (30 stitches)

IMG_1428

Row 12: Sc in first 15 stitches. Sc in each ch of your ch 10. Sc in last 15 stitches. (40 stitches)

IMG_1431

Rows 13-14: Sc in each stitch around. (40 stitches)

Row 15: *Dec in first 2 stitches, sc in next 2 stitches, repeat from * around. (30 stitches)

Row 16: *Dec in first 2 stitches, sc in next 4 stitches, repeat from * around. (25 stitches)

Tie off. Insert safety eyes between rows 8 and 9 with 8 stitches between them.

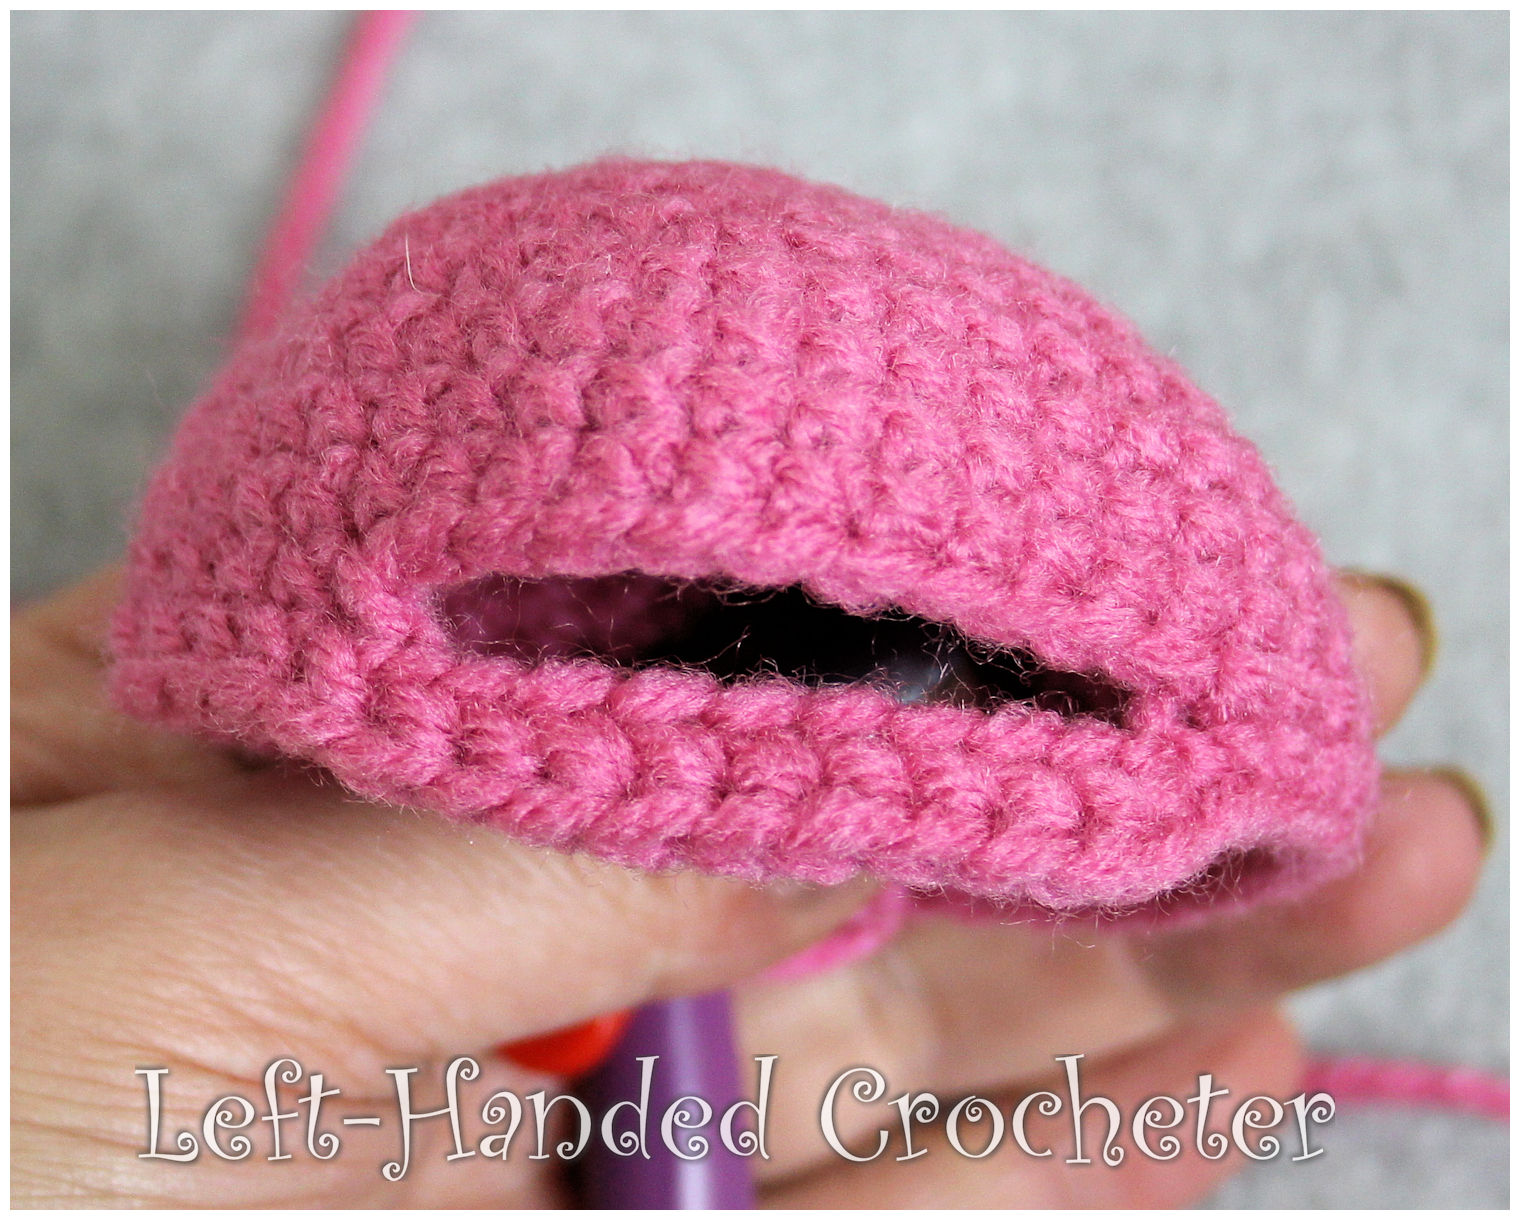
Mouth:

With burgundy, ch 3. Sl st to first ch to create circle. (Instead, you can perform the “magic circle” if you’d like.)

Row 1: ch 1, 10 sc inside of circle. (10 stitches)

Row 2: *Inc in first stitch, sc in next stitch, repeat from * around. (15 stitches)

Row 3: *Inc in first stitch, sc in next 2 stitches, repeat from * around. (20 stitches)

Fold in half and sc across back to create a bend.

Tie off. Hold mouth inside of opening on head and sew on.

Stuff head with poly-fil, being sure not to push mouth out with your stuffing.

Body:

With light raspberry, ch 3. Sl st to first ch to create circle. (Instead, you can perform the “magic circle” if you’d like.)

Row 1: ch 1, 10 sc inside of circle. (10 stitches)

Row 2: *Inc in first stitch, sc in next stitch, repeat from * around. (15 stitches)

Row 3: *Inc in first stitch, sc in next 2 stitches, repeat from * around. (20 stitches)

Row 4: *Inc in first stitch, sc in next 3 stitches, repeat from * around. (25 stitches)

Row 5: *Inc in first stitch, sc in next 4 stitches, repeat from * around. (30 stitches)

Row 6: *Inc in first stitch, sc in next 5 stitches, repeat from * around. (35 stitches)

Row 7: *Inc in first stitch, sc in next 6 stitches, repeat from * around. (40 stitches)

Row 8: *Inc in first stitch, sc in next 7 stitches, repeat from * around. (45 stitches)

Row 9: *Dec in first 2 stitches, sc in next 7 stitches, repeat from * around. (40 stitches)

Row 10: Sc in each stitch around. (40 stitches)

Row 11: *Dec in first 2 stitches, sc in next 6 stitches, repeat from * around. (35 stitches)

Row 12-13: Sc in each stitch around. (35 stitches)

Row 14: *Dec in first 2 stitches, sc in next 5 stitches, repeat from * around. (30 stitches)

Rows 15-16: Sc in each stitch around. (30 stitches)

Row 17: *Dec in first 2 stitches, sc in next 4 stitches, repeat from * around. (25 stitches)

Row 18-19: Sc in each stitch around. (25 stitches)

Tie off. Stuff tight with poly-fil. Position and sew head onto body.

Legs:

With light raspberry, ch 3. Sl st to first ch to create circle. (Instead, you can perform the “magic circle” if you’d like.)

Row 1: ch 1, 10 sc inside of circle. (10 stitches)

Row 2: *Inc in first stitch, sc in next stitch, repeat from * around. (15 stitches)

Row 3: *Inc in first stitch, sc in next 2 stitches, repeat from * around. (20 stitches)

Rows 4-5: Sc in each stitch around. (20 stitches)

Tie off. Stuff with poly-fil. Position and sew onto body, making sure they’re even before sewing on. Before closing it up completely, stuff more poly-fil inside.

Feet:

With light raspberry, ch 3. Sl st to first ch to create circle. (Instead, you can perform the “magic circle” if you’d like.)

Row 1: ch 1, 5 sc inside of circle. (5 stitches)

Row 2: Inc in each stitch around. (10 stitches)

Rows 3-5: Sc in each stitch around. (10 stitches)

Tie off. Stuff tight with poly-fil. Positon and sew onto legs, making sure he stands before sewing them on.

IMG_1459

Arms:

With light raspberry, ch 3. Sl st to first ch to create circle. (Instead, you can perform the “magic circle” if you’d like.)

Row 1: ch 1, 5 sc inside of circle. (5 stitches)

Row 2: Inc in each stitch around. (10 stitches)

Rows 3-8: Sc in each stitch around. (10 stitches)

Row 9: *Dec in first 2 stitches, sc in next 3 stitches, repeat from * around. (8 stitches)

Tie off. Stuff with poly-fil, leaving the top 2-3 rows unstuffed. Position and sew onto body. Cut cream colored felt and sew or hot glue onto body.

IMG_1462

Using aran yarn, sew circles onto his legs.

IMG_1465

Claws:

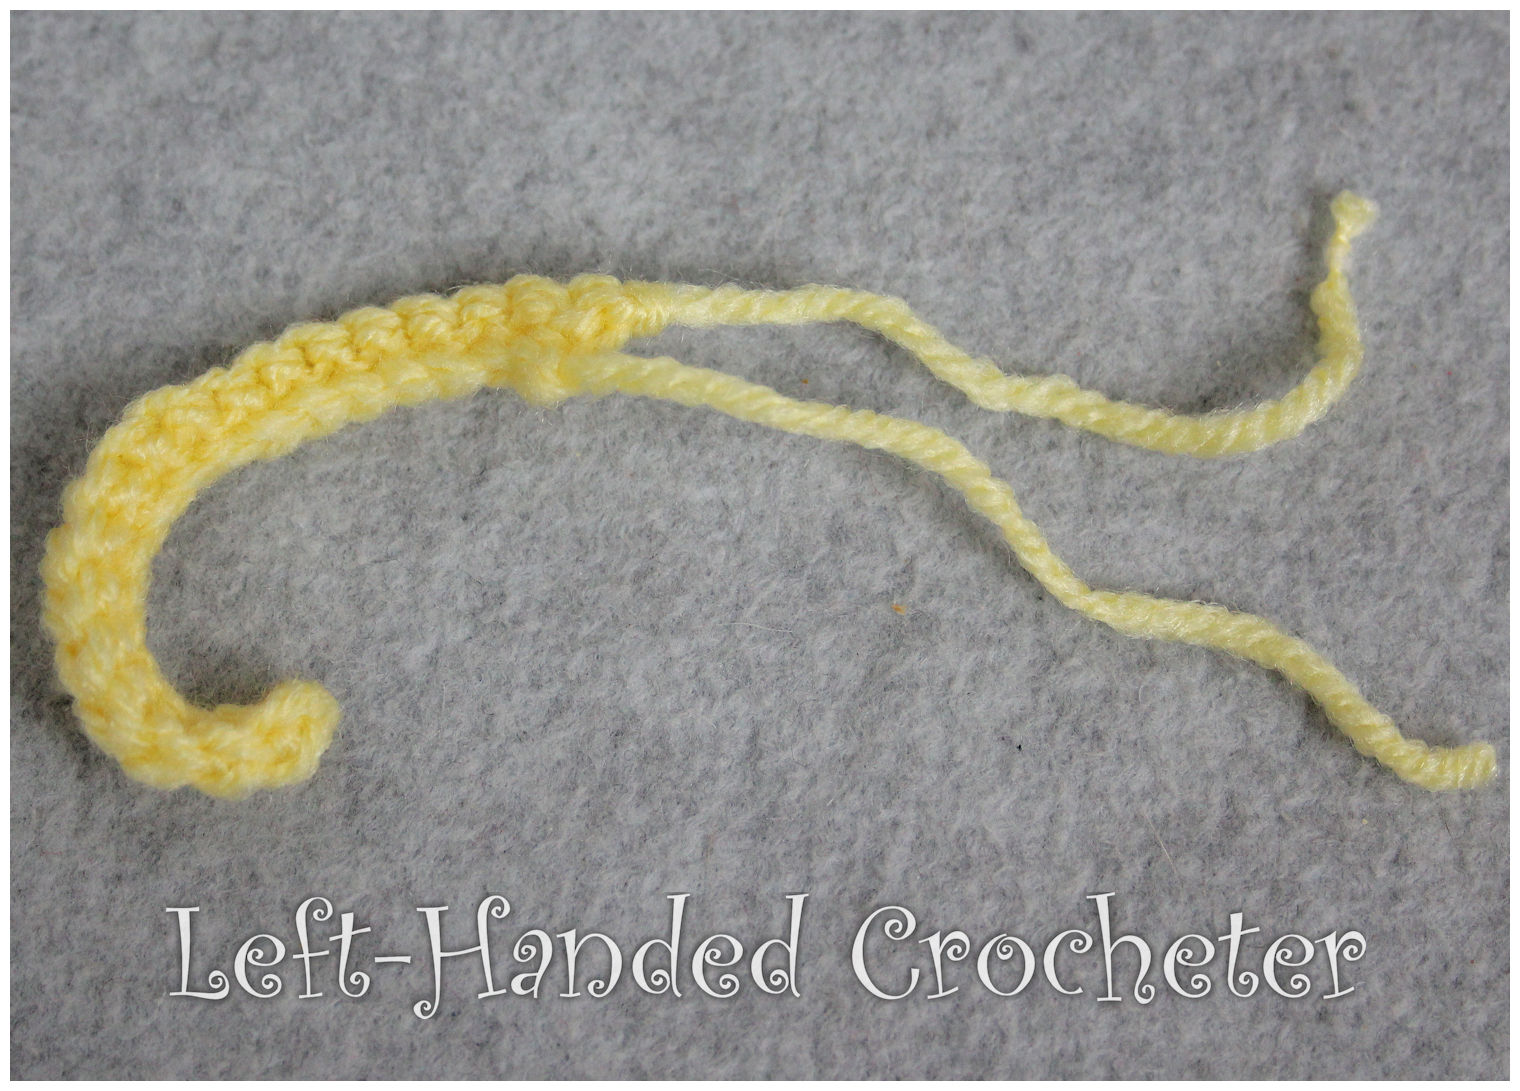
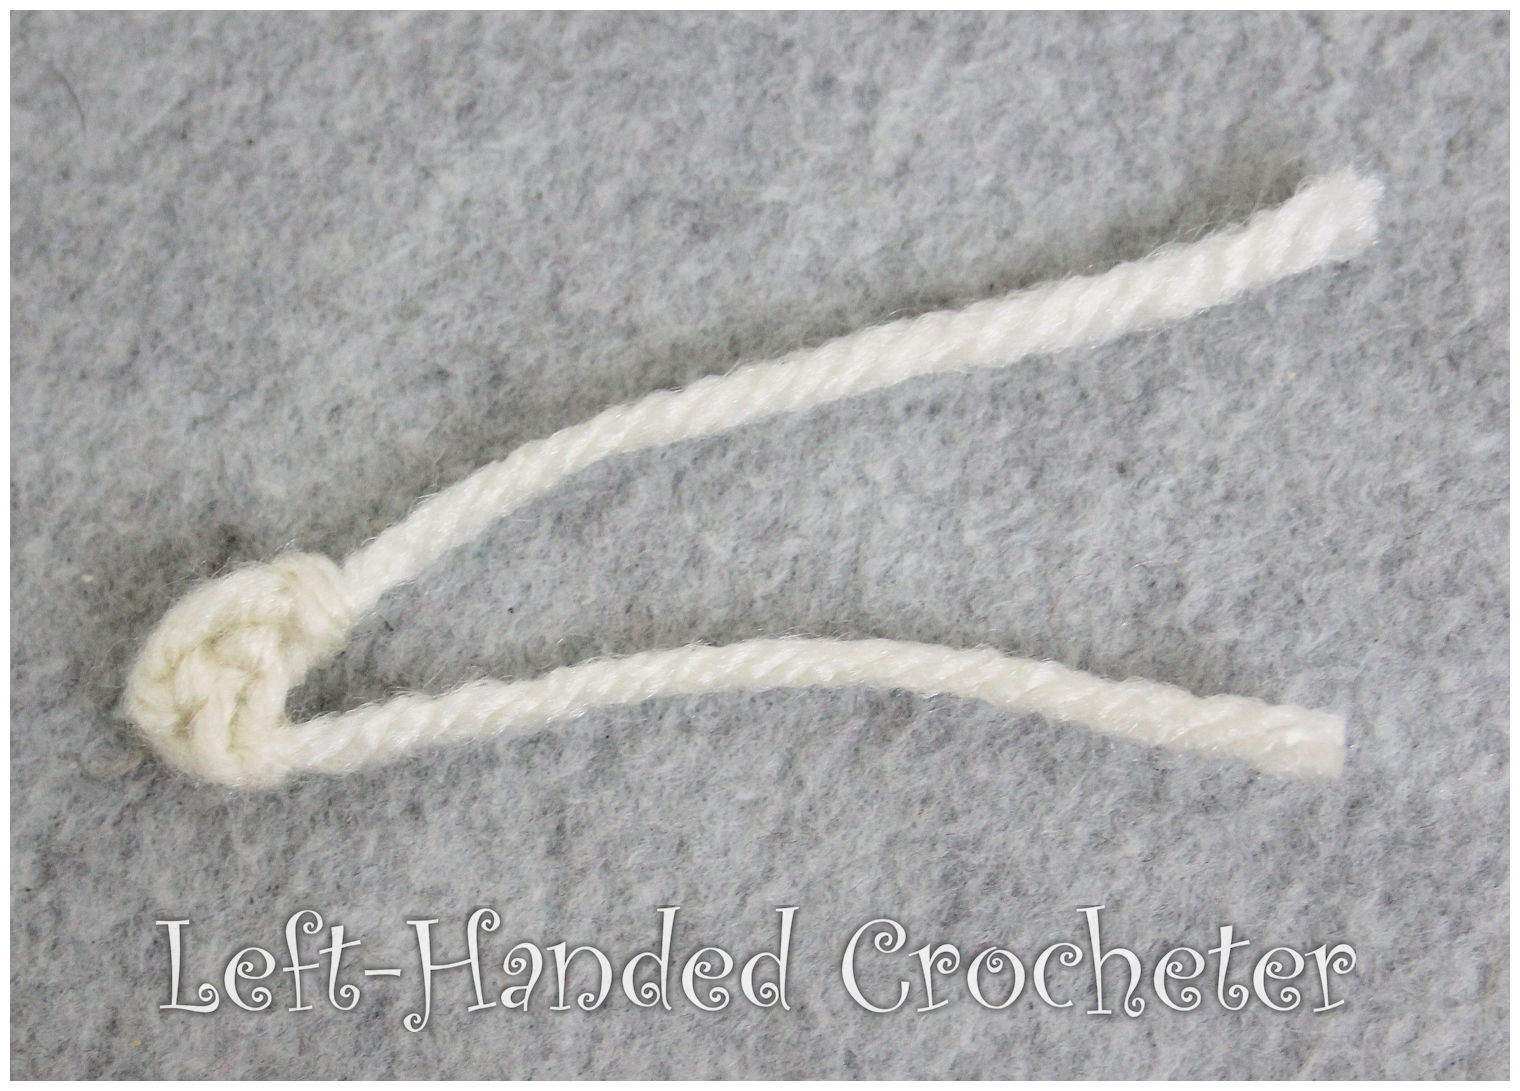
With aran, ch 2, leaving a long starting tail.

Row 1: Sc in 2nd ch from hook. (1 stitch)
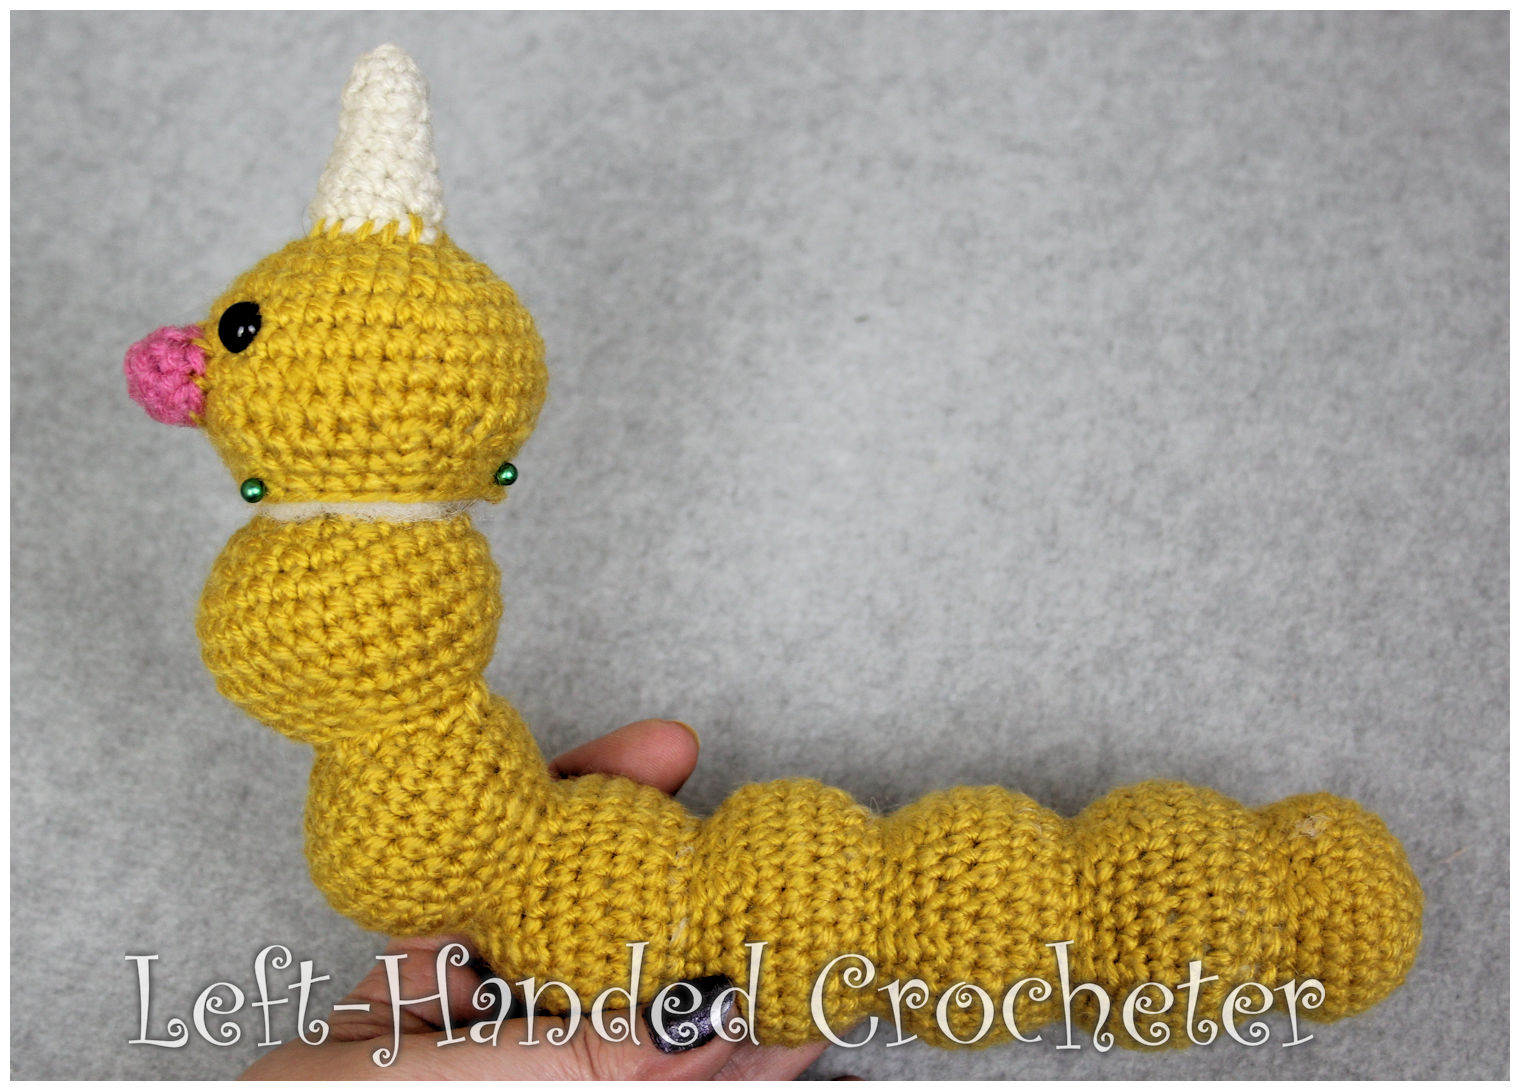
Tie off, leaving a long ending tail. Use tails to attach to arms. Make 3 for each arm.

IMG_1468

Tail:

With light raspberry, ch 3. Sl st to first ch to create circle. (Instead, you can perform the “magic circle” if you’d like.)

Row 1: ch 1, 4 sc inside of circle. (4 stitches)

Row 2: *Inc in first stitch, sc in next stitch, repeat from * around. (6 stitches)

Row 3: Sc in each stitch around. (6 stitches)

Row 4: *Inc in first stitch, sc in next 2 stitches, repeat from * around. (8 stitches)

Row 5: Sc in each stitch around. (8 stitches)

Row 6: *Inc in first stitch, sc in next 3 stitches, repeat from * around. (10 stitches)

Row 7: Sc in each stitch around. (10 stitches)

Row 8: *Inc in first stitch, sc in next 4 stitches, repeat from * around. (12 stitches)

Row 9: *Inc in first stitch, sc in next 5 stitches, repeat from * around. (14 stitches)

Row 10: *Inc in first stitch, sc in next 6 stitches, repeat from * around. (16 stitches)

Row 11: *Inc in first stitch, sc in next 7 stitches, repeat from * around. (18 stitches)

Row 12: *Inc in first stitch, sc in next 8 stitches, repeat from * around. (20 stitches)

Rows 13-17: Sc in each stitch around. (20 stitches)

Row 18: *Inc in first stitch, sc in next 3 stitches, repeat from * around. (25 stitches)

Row 19: Sc in each stitch around. (25 stitches)

Row 20: *Inc in first stitch, sc in next 4 stitches, repeat from * around. (30 stitches)

Rows 21-25: Sc in each stitch around. (30 stitches)

Row 26: *Dec in first 2 stitches, sc in next 4 stitches, repeat from * around. (25 stitches)

Row 27: *Dec in first 2 stitches, sc in next 3 stitches, repeat from * around. (20 stitches)

Row 28: *Dec in first 2 stitches, sc in next 2 stitches, repeat from * around. (15 stitches)

Rows 29-30: Sc in each stitch around. (15 stitches)

Tie off. Fold end over and sew.

Stuff with poly-fil. Position and sew onto back of body.

IMG_1479

Sew the big part of the tail further up on the body to keep it from flopping down.

IMG_1483

Tongue:

With pink, ch 3. Sl st to first ch to create circle. (Instead, you can perform the “magic circle” if you’d like.)

Row 1: ch 1, 5 sc inside of circle. (5 stitches)

Row 2: Inc in each stitch around. (10 stitches)

Row 3: *Inc in first stitch, sc in next stitch, repeat from * around. (15 stitches)

Row 4: *Inc in first stitch, sc in next 2 stitches, repeat from * around. (20 stitches)

Rows 5-6: Sc in each stitch around. (20 stitches)

Row 7: *Dec in first 2 stitches, sc in next 8 stitches, repeat from * around. (18 stitches)

Rows 8-9: Sc in each stitch around. (18 stitches)

Row 10: *Dec in first 2 stitches, sc in next 7 stitches, repeat from * around. (16 stitches)

Rows 11-12: Sc in each stitch around. (16 stitches)

Row 13: *Dec in first 2 stitches, sc in next 6 stitches, repeat from * around. (14 stitches)

Rows 14-15: Sc in each stitch around. (14 stitches)

Row 16: *Dec in first 2 stitches, sc in next 5 stitches, repeat from * around. (12 stitches)

Rows 17-18: Sc in each stitch around. (12 stitches)

Row 19: *Dec in first 2 stitches, sc in next 4 stitches, repeat from * around. (10 stitches)

Rows 20-21: Sc in each stitch around. (10 stitches)

Tie off. Don’t stuff. Position and sew inside of mouth.

I hope you enjoy this pattern! You’re welcome to sell items that you make using my patterns, as long as you don’t post the pattern anywhere else, and link back to my page if you’d like to. If there are any mistakes, or something is unclear, please feel free to message me on Facebook.