Category Archives: patterns

Giant Narwhal and Shark

IMG_8661a

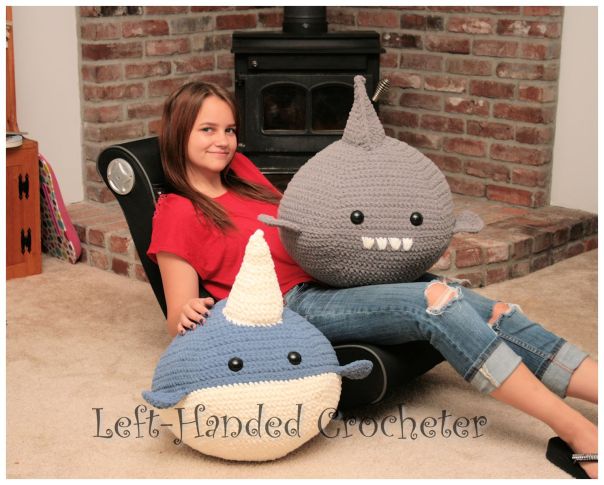
We love narwhals. They are the unicorn of the sea. This giant, squishy narwhal and his friend the shark are soft and cuddly, and make great pillows. They use a lot of stuffing, but they’re so worth it. With my free pattern, now everybody can have their own narwhal or shark friend.

If you want a pattern that you can save on your computer and easily print, this pattern is available in my Ravelry shop for only $3.00. I love printing patterns and saving them in a binder to keep track of the ones I’ve done and the ones I still plan to do.

Abbreviations:

ch: chain

sc: single crochet

sl st: slip stitch

inc: increase (2 single crochets in one loop)

dec: decrease (pull yarn through loop, pull yarn through second loop, yarn over and pull through all loops)

Materials needed (with affiliate links):

L (8mm) crochet hook

Bernat Blanket yarn – 10.5 ounce size (2 balls of dark grey for the shark, or 1 ball of country blue and 1 ball of vintage white for the narwhal)

30mm safety eyes

White worsted weight yarn (for shark teeth)

Yarn needle

Poly-fil (I used a little more than half of a 50 oz bag for each of them)

**A couple of notes before you begin**

  1. If you tend to crochet with loose stitches, you may want to use a smaller crochet hook to reduce the amount of yarn that you use and tighten up your stitches.
  2. As you crochet the body, you’ll notice it doesn’t really look all that round. Once you stuff it with the poly-fil, it will round out. If it’s not as round as you’d like it to be, put more poly-fil in and force it into the places you want it to shape it. Stuffing it extra full will help form its shape, but it will also ensure that it keeps its shape after all of the hugging and squishing it is sure to get.
  3. This pattern is worked “in-the-round”, and stitches are worked through both loops unless otherwise noted. At the end of each row, I slip stitch then chain 1 and turn it, working the next row in the opposite direction. If you’d like, you can skip turning it and continue working in the same direction throughout the pattern.

Body:

ch 3. Sl st to first ch to create circle. (Instead, you can perform the “magic circle” if you’d like.)

Row 1: ch 1, 10 sc inside of circle. Sl st to first sc, ch 1, turn.

Row 2: *Inc in first stitch, sc in next stitch , repeat from * around. Sl st to first sc, ch 1, turn.

Row 3: *Inc in first stitch, sc in next 2 stitches, repeat from * around. Sl st to first sc, ch 1, turn.

Row 4: *Inc in first stitch, sc in next 3 stitches, repeat from * around. Sl st to first sc, ch 1, turn.

Row 5: *Inc in first stitch, sc in next 4 stitches, repeat from * around. Sl st to first sc, ch 1, turn.

Row 6: *Inc in first stitch, sc in next 5 stitches, repeat from * around. Sl st to first sc, ch 1, turn.

Row 7: *Inc in first stitch, sc in next 6 stitches, repeat from * around. Sl st to first sc, ch 1, turn.

Row 8: *Inc in first stitch, sc in next 7 stitches, repeat from * around. Sl st to first sc, ch 1, turn.

Row 9: *Inc in first stitch, sc in next 8 stitches, repeat from * around. Sl st to first sc, ch 1, turn.

Row 10: *Inc in first stitch, sc in next 9 stitches, repeat from * around. Sl st to first sc, ch 1, turn.

Row 11: *Inc in first stitch, sc in next 10 stitches, repeat from * around. Sl st to first sc, ch 1, turn.

Row 12: *Inc in first stitch, sc in next 11 stitches, repeat from * around. Sl st to first sc, ch 1, turn.

Row 13: *Inc in first stitch, sc in next 12 stitches, repeat from * around. Sl st to first sc, ch 1, turn.

Row 14: *Inc in first stitch, sc in next 13 stitches, repeat from * around. Sl st to first sc, ch 1, turn.

Row 15: *Inc in first stitch, sc in next 14 stitches, repeat from * around. Sl st to first sc, ch 1, turn.

Row 16: *Inc in first stitch, sc in next 15 stitches, repeat from * around. Sl st to first sc, ch 1, turn.

Row 17: *Inc in first stitch, sc in next 16 stitches, repeat from * around. Sl st to first sc, ch 1, turn.

Row 18: *Inc in first stitch, sc in next 17 stitches, repeat from * around. Sl st to first sc, ch 1, turn.

Row 19: *Inc in first stitch, sc in next 18 stitches, repeat from * around. Sl st to first sc, ch 1, turn.

Row 20: *Inc in first stitch, sc in next 19 stitches, repeat from * around. Sl st to first sc, ch 1, turn.

Row 21: *Inc in first stitch, sc in next 20 stitches, repeat from * around. Sl st to first sc, ch 1, turn.

Row 22: *Inc in first stitch, sc in next 21 stitches, repeat from * around. Sl st to first sc, ch 1, turn.

Row 23: *Inc in first stitch, sc in next 22 stitches, repeat from * around. Sl st to first sc, ch 1, turn.

Rows 24-29: Sc in each stitch around. Sl st to first sc, ch 1, turn. (If you’re working on the narwhal, switch to vintage white before row 28.)

Row 30: *Dec in first 2 stitches, sc in next 22 stitches, repeat from * around. Sl st to first sc, ch 1, turn.

Row 31: *Dec in first 2 stitches, sc in next 21 stitches, repeat from * around. Sl st to first sc, ch 1, turn.

Row 32: *Dec in first 2 stitches, sc in next 20 stitches, repeat from * around. Sl st to first sc, ch 1, turn.

Row 33: *Dec in first 2 stitches, sc in next 19 stitches, repeat from * around. Sl st to first sc, ch 1, turn.

Row 34: *Dec in first 2 stitches, sc in next 18 stitches, repeat from * around. Sl st to first sc, ch 1, turn.

Row 35: *Dec in first 2 stitches, sc in next 17 stitches, repeat from * around. Sl st to first sc, ch 1, turn.

Row 36: *Dec in first 2 stitches, sc in next 16 stitches, repeat from * around. Sl st to first sc, ch 1, turn.

Row 37: *Dec in first 2 stitches, sc in next 15 stitches, repeat from * around. Sl st to first sc, ch 1, turn.

Row 38: *Dec in first 2 stitches, sc in next 14 stitches, repeat from * around. Sl st to first sc, ch 1, turn.

Row 39: *Dec in first 2 stitches, sc in next 13 stitches, repeat from * around. Sl st to first sc, ch 1, turn.

Row 40: *Dec in first 2 stitches, sc in next 12 stitches, repeat from * around. Sl st to first sc, ch 1, turn.

Row 41: *Dec in first 2 stitches, sc in next 11 stitches, repeat from * around. Sl st to first sc, ch 1, turn.

Row 42: *Dec in first 2 stitches, sc in next 10 stitches, repeat from * around. Sl st to first sc, ch 1, turn.

Row 43: *Dec in first 2 stitches, sc in next 9 stitches, repeat from * around. Sl st to first sc, ch 1, turn.

Row 44: *Dec in first 2 stitches, sc in next 8 stitches, repeat from * around. Sl st to first sc, ch 1, turn.

Row 45: *Dec in first 2 stitches, sc in next 7 stitches, repeat from * around. Sl st to first sc, ch 1, turn.

Row 46: *Dec in first 2 stitches, sc in next 6 stitches, repeat from * around. Sl st to first sc, ch 1, turn.

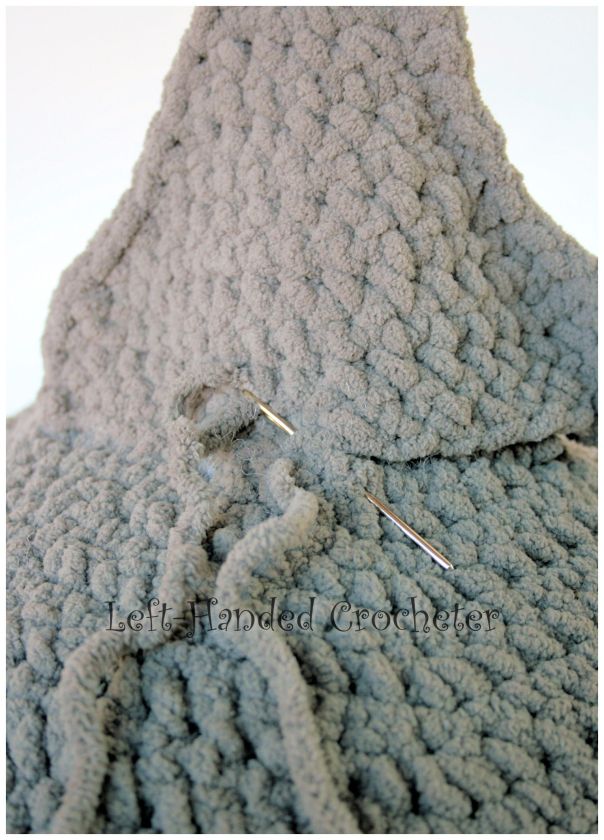
Stuff the body as full as you can, shaping it as you stuff. Position the eyes between rows 24 and 25 with a space of 12 sc’s between them. For the shark, sew the teeth on starting around row 28. Continue stuffing the body as you go.

Row 47: *Dec in first 2 stitches, sc in next 5 stitches, repeat from * around. Sl st to first sc, ch 1, turn.

Row 48: *Dec in first 2 stitches, sc in next 4 stitches, repeat from * around. Sl st to first sc, ch 1, turn.

Row 49: *Dec in first 2 stitches, sc in next 3 stitches, repeat from * around. Sl st to first sc, ch 1, turn.

Row 50: *Dec in first 2 stitches, sc in next 2 stitches, repeat from * around. Sl st to first sc, ch 1, turn.

Row 51: *Dec in first 2 stitches, sc in next stitch, repeat from * around. Sl st to first sc, ch 1, turn.

Row 52: *Dec in first 2 stitches, repeat from * around. Sl st to first sc, ch 1, turn.

If there’s still an opening at the bottom, you can use a slip stitch to close. Tie off.

Fins (make 2):

ch 3. Sl st to first ch to create circle. (Instead, you can perform the “magic circle” if you’d like.)

Row 1: ch 1, 10 sc inside of circle. Sl st to first sc, ch 1, turn.

Row 2: *Inc in first stitch, sc in next stitch , repeat from * around, but leave the last 2 stitches unworked, ch 1, turn.

Row 3: *Inc in first stitch, sc in next 2 stitches, repeat from * around, ch 1, turn.

Row 4: Sc in each stitch around. Tie off, leaving a tail long enough for sewing. Position fins on each side and sew on around row 27.

Narwhal Horn:

Leaving a long starting tail for sewing, ch. 30, sl st to first ch to form a ring. Ch 1.

Rows 1-2: Sc in each stitch around. Sl st to first sc, ch 1, turn.

Row 3: *Dec in first 2 stitches, sc in next 4 stitches, repeat from * around. Sl st to first sc, ch 1, turn.

Rows 4-5: Sc in each stitch around. Sl st to first sc, ch 1, turn.

Row 6: *Dec in first 2 stitches, sc in next 3 stitches, repeat from * around. Sl st to first sc, ch 1, turn.

Rows 7-8: Sc in each stitch around. Sl st to first sc, ch 1, turn.

Row 9: *Dec in first 2 stitches, sc in next 2 stitches, repeat from * around. Sl st to first sc, ch 1, turn.

Rows 10-11: Sc in each stitch around. Sl st to first sc, ch 1, turn.

Row 12: *Dec in first 2 stitches, sc in next stitch, repeat from * around. Sl st to first sc, ch 1, turn.

Rows 13-14: Sc in each stitch around. Sl st to first sc, ch 1, turn.

Row 15: *Dec in first 2 stitches, repeat from * around. Sl st to first sc, ch 1, turn.

If there’s still an opening at the top, you can use a slip stitch to close. Tie off. Stuff horn, center on head and sew on.

Shark Fin (make 2):

Ch. 17

Rows 1-2: Starting in 2nd ch from hook, sc in each stitch across, ch 1, turn.

Row 3: Dec in first 2 stitches, sc in next 12 stitches, dec in last 2 stitches, ch 1, turn.

Row 4: Dec in first 2 stitches, sc in next 10 stitches, dec in last 2 stitches, ch 1, turn.

Row 5: Dec in first 2 stitches, sc in next 8 stitches, dec in last 2 stitches, ch 1, turn.

Row 6: Dec in first 2 stitches, sc in next 6 stitches, dec in last 2 stitches, ch 1, turn.

Row 7: Sc in each stitch across, ch 1, turn.

Row 8: Dec in first 2 stitches, sc in next 4 stitches, dec in last 2 stitches, ch 1, turn.

Row 9: Sc in each stitch across, ch 1, turn.

Row 10: Dec in first 2 stitches, sc in next 2 stitches, dec in last 2 stitches, ch 1, turn.

Row 11: Sc in each stitch across, ch 1, turn.

Row 12: Dec in first 2 stitches, dec in last 2 stitches, ch 1, turn.

Row 13: Sc in each stitch across. Tie off with first one. With second one, put 2 fins together and sc around the sides and top, leaving an opening at the bottom. Tie off, leaving a tail long enough for sewing. Lightly stuff fin, center on shark head, and sew on.

IMG_8618

IMG_8621

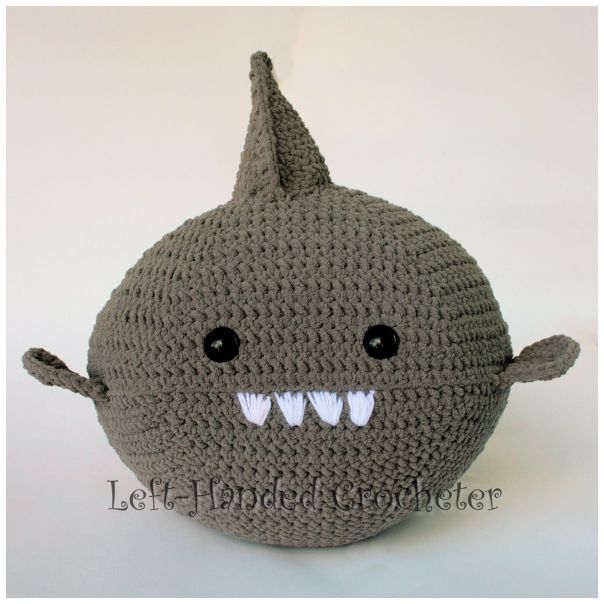
Here is the finished shark…

IMG_8626a

And the finished narwhal…

IMG_8632a

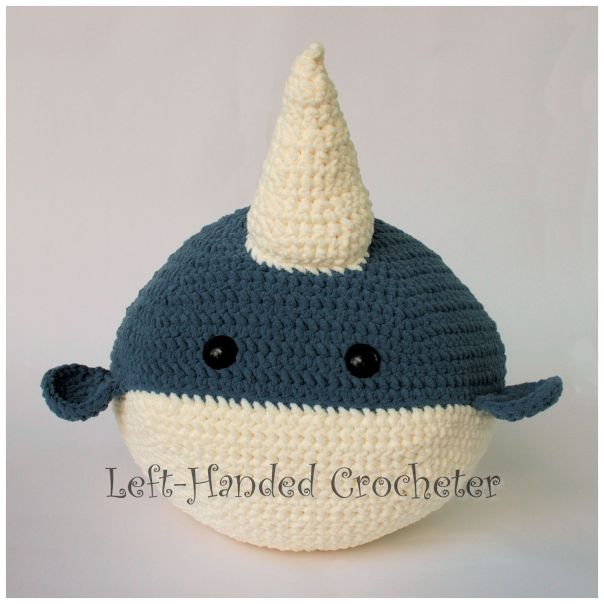
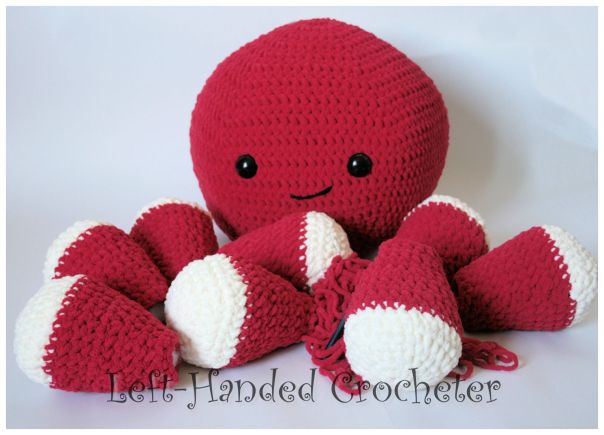
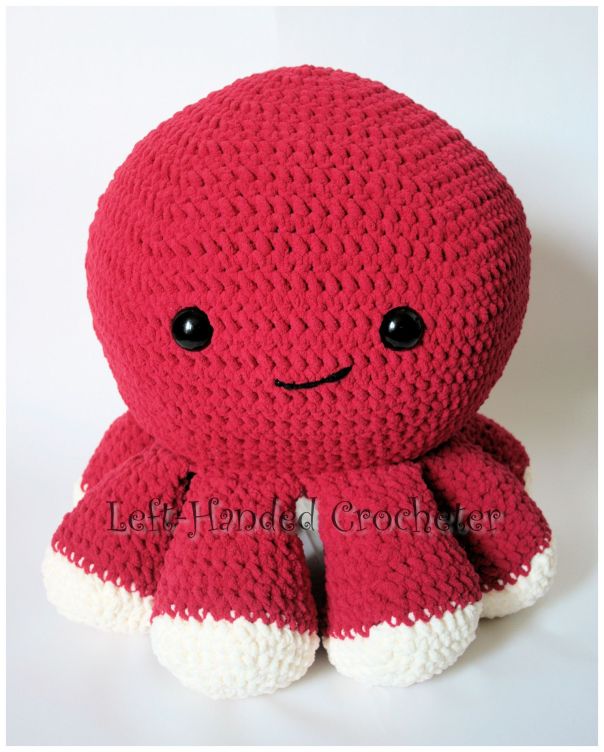
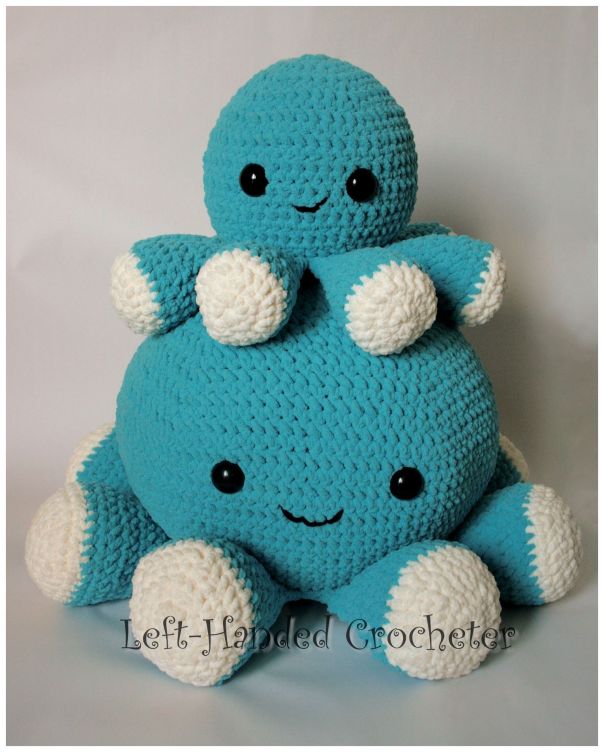
I hope you enjoy your new underwater friends. This is a fun pattern, and I love how adorable they are. They team up quite well with my giant octopus pattern.

11

If there are any mistakes in this pattern, or something is unclear, please feel free to leave me a comment and let me know. Or message me on Facebook. If you create any sea creatures of your own, be sure to post a photo on my Facebook page so I can see.


Giant, squishy, octopus

11

I absolutely love Bernat Blanket Yarn, and the new brights are so beautiful, I wanted to make something with them. Since I was already having fun with my smaller octopus pattern, I decided a giant octopus would be perfect. My daughter wanted me to make her one too, so I got to play around with the pattern a bit and came up with these soft, squishy friends.

If you want a pattern that you can save on your computer and easily print, this pattern is available in my Ravelry shop for only $3.00. I love printing patterns and saving them in a binder to keep track of the ones I’ve done and the ones I still plan to do.

Abbreviations:

ch: chain

sc: single crochet

sl st: slip stitch

inc: increase (2 single crochets in one loop)

dec: decrease (pull yarn through loop, pull yarn through second loop, yarn over and pull through all loops)

Materials needed (with affiliate links provided):

L (8mm) crochet hook 

Bernat Blanket yarn – 10.5 ounce size (2 balls of main color, 1 ball of vintage white) *You may be able to do this with a smaller ball of the vintage white*

30mm safety eyes

Black worsted weight yarn

Yarn needle

Poly-fil (I used a full 50 oz bag for each of them)

**A couple of notes before you begin**

  1. If you tend to crochet with loose stitches, you may want to use a smaller crochet hook to reduce the amount of yarn that you use and tighten up your stitches.
  2. As you crochet the octopus head, you’ll notice it doesn’t really look all that round. Once you stuff it with the poly-fil, it will round out. If it’s not as round as you’d like it to be, put more poly-fil in and force it into the places you want it to shape it. Stuffing it extra full will help form its shape, but it will also ensure that it keeps its shape after all of the hugging and squishing your octopus is sure to get.
  3. This pattern is worked “in-the-round”, and stitches are worked through both loops unless otherwise noted. At the end of each row, I slip stitch then chain 1 and turn it, working the next row in the opposite direction. If you’d like, you can skip turning it and continue working in the same direction throughout the pattern.

Body:

ch 3. Sl st to first ch to create circle. (Instead, you can perform the “magic circle” if you’d like.)

Row 1: ch 1, 10 sc inside of circle. Sl st to first sc, ch 1, turn.

Row 2: *Inc in first stitch, sc in next stitch , repeat from * around. Sl st to first sc, ch 1, turn.

Row 3: *Inc in first stitch, sc in next 2 stitches, repeat from * around. Sl st to first sc, ch 1, turn.

Row 4: *Inc in first stitch, sc in next 3 stitches, repeat from * around. Sl st to first sc, ch 1, turn.

Row 5: *Inc in first stitch, sc in next 4 stitches, repeat from * around. Sl st to first sc, ch 1, turn.

Row 6: *Inc in first stitch, sc in next 5 stitches, repeat from * around. Sl st to first sc, ch 1, turn.

Row 7: *Inc in first stitch, sc in next 6 stitches, repeat from * around. Sl st to first sc, ch 1, turn.

Row 8: *Inc in first stitch, sc in next 7 stitches, repeat from * around. Sl st to first sc, ch 1, turn.

Row 9: *Inc in first stitch, sc in next 8 stitches, repeat from * around. Sl st to first sc, ch 1, turn.

Row 10: *Inc in first stitch, sc in next 9 stitches, repeat from * around. Sl st to first sc, ch 1, turn.

Row 11: *Inc in first stitch, sc in next 10 stitches, repeat from * around. Sl st to first sc, ch 1, turn.

Row 12: *Inc in first stitch, sc in next 11 stitches, repeat from * around. Sl st to first sc, ch 1, turn.

Row 13: *Inc in first stitch, sc in next 12 stitches, repeat from * around. Sl st to first sc, ch 1, turn.

Row 14: *Inc in first stitch, sc in next 13 stitches, repeat from * around. Sl st to first sc, ch 1, turn.

Row 15: *Inc in first stitch, sc in next 14 stitches, repeat from * around. Sl st to first sc, ch 1, turn.

Row 16: *Inc in first stitch, sc in next 15 stitches, repeat from * around. Sl st to first sc, ch 1, turn.

Row 17: *Inc in first stitch, sc in next 16 stitches, repeat from * around. Sl st to first sc, ch 1, turn.

Row 18: *Inc in first stitch, sc in next 17 stitches, repeat from * around. Sl st to first sc, ch 1, turn.

Row 19: *Inc in first stitch, sc in next 18 stitches, repeat from * around. Sl st to first sc, ch 1, turn.

Rows 20-26: Sc in each stitch around. Sl st to first sc, ch 1, turn.

Row 27: *Dec in first 2 stitches, sc in next 18 stitches, repeat from * around. Sl st to first sc, ch 1, turn.

Row 28: *Dec in first 2 stitches, sc in next 17 stitches, repeat from * around. Sl st to first sc, ch 1, turn.

Row 29: *Dec in first 2 stitches, sc in next 16 stitches, repeat from * around. Sl st to first sc, ch 1, turn.

Row 30: *Dec in first 2 stitches, sc in next 15 stitches, repeat from * around. Sl st to first sc, ch 1, turn.

Row 31: *Dec in first 2 stitches, sc in next 14 stitches, repeat from * around. Sl st to first sc, ch 1, turn.

Row 32: *Dec in first 2 stitches, sc in next 13 stitches, repeat from * around. Sl st to first sc, ch 1, turn.

Row 33: *Dec in first 2 stitches, sc in next 12 stitches, repeat from * around. Sl st to first sc, ch 1, turn.

Row 34: *Dec in first 2 stitches, sc in next 11 stitches, repeat from * around. Sl st to first sc, ch 1, turn.

Row 35: *Dec in first 2 stitches, sc in next 10 stitches, repeat from * around. Sl st to first sc, ch 1, turn.

Row 36: *Dec in first 2 stitches, sc in next 9 stitches, repeat from * around. Sl st to first sc, ch 1, turn.

Row 37: *Dec in first 2 stitches, sc in next 8 stitches, repeat from * around. Sl st to first sc, ch 1, turn.

Row 38: *Dec in first 2 stitches, sc in next 7 stitches, repeat from * around. Sl st to first sc, ch 1, turn.

Row 39: *Dec in first 2 stitches, sc in next 6 stitches, repeat from * around. Sl st to first sc, ch 1, turn.

Stuff the body as full as you can, shaping it as you stuff. Position the eyes between rows 21 and 22 with a space of 13 sc’s between them. Center the mouth between the eyes, sewing it on 2 rows down. Continue stuffing the body as you go.

Row 40: *Dec in first 2 stitches, sc in next 5 stitches, repeat from * around. Sl st to first sc, ch 1, turn.

Row 41: *Dec in first 2 stitches, sc in next 4 stitches, repeat from * around. Sl st to first sc, ch 1, turn.

Row 42: *Dec in first 2 stitches, sc in next 3 stitches, repeat from * around. Sl st to first sc, ch 1, turn.

Row 43: *Dec in first 2 stitches, sc in next 2 stitches, repeat from * around. Sl st to first sc, ch 1, turn.

Row 44: *Dec in first 2 stitches, sc in next stitch, repeat from * around. Sl st to first sc, ch 1, turn.

Row 45: *Dec in first 2 stitches, repeat from * around. Sl st to first sc, ch 1, turn.

If there’s still an opening at the bottom, you can use a slip stitch to close. Tie off.

Legs (make 8):

Starting with white, ch 3. Sl st to first ch to create circle. (Instead, you can perform the “magic circle” if you’d like.)

Row 1: ch 1, 10 sc inside of circle. Sl st to first sc, ch 1, turn.

Row 2: *Inc in first stitch, sc in next stitch , repeat from * around. Sl st to first sc, ch 1, turn.

Row 3: *Inc in first stitch, sc in next 2 stitches, repeat from * around. Sl st to first sc, ch 1, turn.

Row 4: *Inc in first stitch, sc in next 3 stitches, repeat from * around. Sl st to first sc, ch 1, turn.

Row 5: *Inc in first stitch, sc in next 4 stitches, repeat from * around. Sl st to first sc, ch 1, turn.

Row 6: *Inc in first stitch, sc in next 5 stitches, repeat from * around. Sl st to first sc, ch 1, turn.

Row 7: *Dec in first 2 stitches, sc in next 5 stitches, repeat from * around. Sl st to first sc, ch 1, turn.

Change to main color.

Rows 8-9: Sc around. Sl st to first sc, ch 1, turn.

Row 10: *Dec in first 2 stitches, sc in next 4 stitches, repeat from * around. Sl st to first sc, ch 1, turn.

Rows 11-12: Sc around. Sl st to first sc, ch 1, turn.

Row 13: *Dec in first 2 stitches, sc in next 3 stitches, repeat from * around. Sl st to first sc, ch 1, turn.

Rows 14-15: Sc around. Sl st to first sc, ch 1, turn.

Row 16: *Dec in first 2 stitches, sc in next 2 stitches, repeat from * around. Sl st to first sc, ch 1, turn.

Rows 17-18: Sc around. Sl st to first sc, ch 1, turn.

For the first 7 legs, tie off. Stuff the legs a little more than halfway, pushing the stuffing towards the foot.

01

With the 8th leg, instead of tying off, ch 1 and sc across the top of each leg, connecting them and closing the opening up.

02

Once they’re all connected, they should look like this:

03

Slip stitch to the first sc across the top to form a ring:

04

Tie off, leaving a long tail for sewing. Flip the octopus body upside down and center the leg ring on it.

05

Using your yarn needle, sew the legs to the body all the way around.

06

Now flip your octopus over and check out how cute he is!

08

07

My daughter loves hers, and it matches her hair.

12

They’re perfect for snuggling, or for using as a pillow. Be sure to check out my other octopus pattern and you can make a smaller version using the Bernat Blanket yarn.

13

This is a fun pattern, and I love how adorable they are. They team up quite well with my giant narwhal and shark pattern.

IMG_8661a

If there are any mistakes in this pattern, or something is unclear, please feel free to leave me a comment and let me know. Or message me on Facebook. If you create any octopus of your own, be sure to post a photo on my Facebook page so I can see.


A pencil for the teacher

IMG_5649

This pencil scarf was really easy to make. It makes a perfect gift for a teacher, writer, artist, or pretty much anybody who uses a pencil. When finished, it measure about 6.5 feet long, so it’s great for wrapping around your neck to keep warm.

If you want a pattern that you can save on your computer and easily print, this pattern is available in my Ravelry shop for only $2.00. I love printing patterns and saving them in a binder to keep track of the ones I’ve done and the ones I still plan to do.

Abbreviations:

ch: chain

sc: single crochet

dec: decrease (pull yarn through loop, pull yarn through second loop, yarn over and pull through all loops)

Materials Needed (with affiliate links):

Red Heart yarn in light raspberry, grey heather, gold, buff and black

5.75 mm (J) crochet hook

Instructions:

With light raspberry yarn, ch 21

Row 1: sc in second chain from hook and across, ch 1, turn (20 sc)

Row 2-16: sc across, ch 1, turn (20 sc)

Row 17-20: With grey heather, sc across, ch 1, turn (20 sc)

Row 21-276: With gold, sc across, ch 1, turn (20 sc)

*Note* You can adjust the length of the scarf here by crocheting less or more rows in gold.

Row 277-282: With buff, sc across, ch 1, turn (20 sc)

Row 283: dec in first 2 sc, sc across until last 2, dec, ch 1, turn (18 sc)

Row 284: sc across, ch 1, turn (18 sc)

Row 285: dec in first 2 sc, sc across until last 2, dec, ch 1, turn (16 sc)

Row 286:  sc across, ch 1, turn (16 sc)

Row 287: dec in first 2 sc, sc across until last 2, dec, ch 1, turn (14 sc)

Row 288: sc across, ch 1, turn (14 sc)

Row 289: dec in first 2 sc, sc across until last 2, dec, ch 1, turn (12 sc)

Row 290: With black, sc across, ch 1, turn (12 sc)

Row 291: dec in first 2 sc, sc across until last 2, dec, ch 1, turn (10 sc)

Row 292: sc across, ch 1, turn (10 sc)

Row 293: dec in first 2 sc, sc across until last 2, dec, ch 1, turn (8 sc)

Row 294: sc across, ch 1, turn (8 sc)

Row 295: dec in first 2 sc, sc across until last 2, dec, ch 1, turn (6 sc)

Row 296: sc across, ch 1, turn (6 sc)

Row 297:  dec in first 2 sc, sc across until last 2, dec, ch 1, turn (4 sc)

Row 298:  sc across, ch 1, turn (4 sc)

Row 299: dec in first 2 sc, dec in last 2 sc, ch 1, turn (2 sc)

Row 300: sc across, tie off

IMG_5641

If there are any mistakes in this pattern, or something is unclear, please feel free to leave me a comment and let me know. Or message me on Facebook.

You may sell items that you make with my patterns, but please don’t post my patterns anywhere without linking back to my page.

Do you wanna build a snowman?

IMG_5567

It’s November, and I’m waiting for the snow to hit. In the meantime, I decided to build my own snowman from the comfort of my couch. This snowman is about 9 inches tall and is perfect for cuddling or displaying on a shelf for your winter decor. This pattern is worked in both loops, and should work for both left-handed and right-handed crocheters.

If you want a pattern that you can save on your computer and easily print, this pattern is available in my Ravelry shop for only $2.00. I love printing patterns and saving them in a binder to keep track of the ones I’ve done and the ones I still plan to do.

Abbreviations:

ch: chain

sc: single crochet

sl st: slip stitch

inc: increase (2 single crochets in one loop)

dec: decrease (pull yarn through loop, pull yarn through second loop, yarn over and pull through all loops)

Materials needed (with affiliate links):

5.25 MM (I) crochet hook

Red Heart yarns in soft white, red, and green

12mm safety eyes

Black embroidery thread

Yarn needle

This pattern is worked “in-the-round”, and stitches are worked through both loops unless otherwise noted. 

Body:

With white yarn ch 3. Sl st to first ch to create circle. (Instead, you can perform the “magic circle” if you’d like.)

Row 1: ch 1, 10 sc inside of circle. (10 stitches)

Row 2: *Inc in first stitch, sc in next stitch , repeat from * around. (15 stitches)

Row 3: *Inc in first stitch, sc in next 2 stitches, repeat from * around. (20 stitches)

Row 4: *Inc in first stitch, sc in next 3 stitches, repeat from * around. (25 stitches)

Row 5: *Inc in first stitch, sc in next 4 stitches, repeat from * around. (30 stitches)

Row 6: *Inc in first stitch, sc in next 5 stitches, repeat from * around. (35 stitches)

Row 7: *Inc in first stitch, sc in next 6 stitches, repeat from * around. (40 stitches)

Row 8: *Inc in first stitch, sc in next 7 stitches, repeat from * around. (45 stitches)

Row 9: *Inc in first stitch, sc in next 8 stitches, repeat from * around. (50 stitches)

Rows 10-16: Sc in each stitch around. (50 stitches)

Row 17: *Dec in first 2 stitches, sc in next 8 stitches, repeat from * around. (45 stitches)

Row 18: Sc in each stitch around. (45 stitches)

Row 19: *Dec in first 2 stitches, sc in next 7 stitches, repeat from * around. (40 stitches)

Row 20: Sc in each stitch around. (40 stitches)

Row 21: *Dec in first 2 stitches, sc in next 6 stitches, repeat from * around. (35 stitches)

Row 22: Sc in each stitch around. (35 stitches)

Tie off.

Head:

With white yarn ch 3. Sl st to first ch to create circle. (Instead, you can perform the “magic circle” if you’d like.)

Row 1: ch 1, 10 sc inside of circle. (10 stitches)

Row 2: *Inc in first stitch, sc in next stitch , repeat from * around. (15 stitches)

Row 3: *Inc in first stitch, sc in next 2 stitches, repeat from * around. (20 stitches)

Row 4: *Inc in first stitch, sc in next 3 stitches, repeat from * around. (25 stitches)

Row 5: *Inc in first stitch, sc in next 4 stitches, repeat from * around. (30 stitches)

Row 6: *Inc in first stitch, sc in next 5 stitches, repeat from * around. (35 stitches)

Row 7: *Inc in first stitch, sc in next 6 stitches, repeat from * around. (40 stitches)

Row 8: *Inc in first stitch, sc in next 7 stitches, repeat from * around. (45 stitches)

Rows 9-15: Sc in each stitch around. (45 stitches)

Row 16: *Dec in first 2 stitches, sc in next 7 stitches, repeat from * around. (40 stitches)

Row 17:  Sc in each stitch around. (40 stitches)

Row 18: *Dec in first 2 stitches, sc in next 6 stitches, repeat from * around. (35 stitches)

Tie off.

Hat:

With red yarn ch 3. Sl st to first ch to create circle. (Instead, you can perform the “magic circle” if you’d like.)

Row 1: ch 1, 10 sc inside of circle. (10 stitches)

Row 2: *Inc in first stitch, sc in next stitch , repeat from * around. (15 stitches)

Row 3: *Inc in first stitch, sc in next 2 stitches, repeat from * around. (20 stitches)

Row 4: *Inc in first stitch, sc in next 3 stitches, repeat from * around. (25 stitches)

Row 5: *Inc in first stitch, sc in next 4 stitches, repeat from * around. (30 stitches)

Row 6: *Inc in first stitch, sc in next 5 stitches, repeat from * around. (35 stitches)

Row 7: *Inc in first stitch, sc in next 6 stitches, repeat from * around. (40 stitches)

Row 8: *Inc in first stitch, sc in next 7 stitches, repeat from * around. (45 stitches)

Rows 9-14: Sc in each stitch around. (45 stitches)

Switch to green yarn.

Row 15: Sc in each stitch around. (45 stitches)

Tie off.

Scarf:

With red yarn ch 81

Row 1: sc in 2nd ch from hook and in each ch across. (80 stitches) Tie off.

Make pom-pom and attach to top of hat. Stuff the head of the snowman, then pull the hat on. You can sew the hat on, or do like I did and just attach it in a few places to hold it on. Once the hat is on, position the eyes and sew on the mouth. Sew the head to the body, then wrap the scarf around the neck and tie it on. I created my own army of snowmen, in many different colors.

IMG_5563

My patterns are always free. But if you’d like to help support me being able to list them for free, or just want a pattern that you can save and print, you can purchase the snowman pattern on ravelry.

If there are any mistakes in this pattern, or something is unclear, please feel free to leave me a comment and let me know. Or message me on Facebook. Happy November!

You may sell items that you make with my patterns, but please don’t post my patterns anywhere without linking back to my page.