
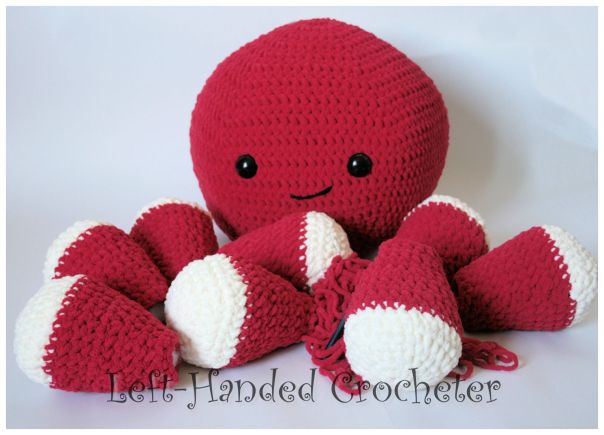
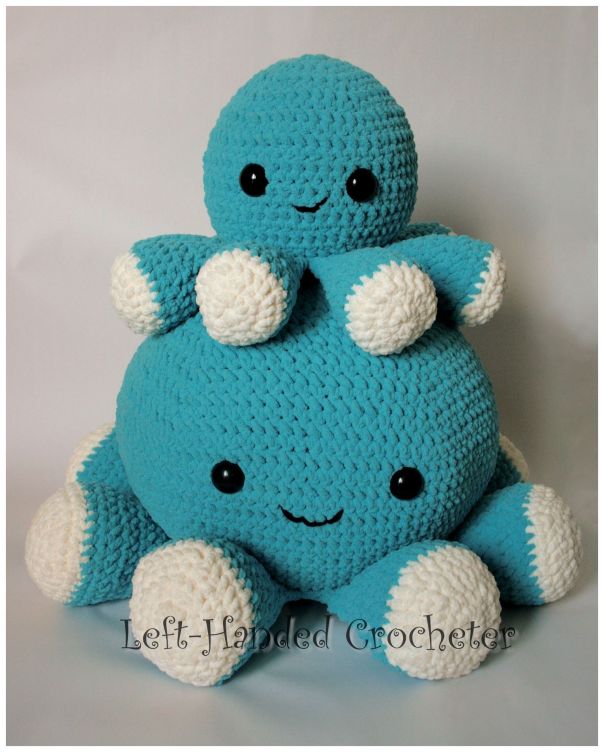
I absolutely love Bernat Blanket Yarn, and the new brights are so beautiful, I wanted to make something with them. Since I was already having fun with my smaller octopus pattern, I decided a giant octopus would be perfect. My daughter wanted me to make her one too, so I got to play around with the pattern a bit and came up with these soft, squishy friends.
If you want a pattern that you can save on your computer and easily print, this pattern is available in my Ravelry shop for only $3.00. I love printing patterns and saving them in a binder to keep track of the ones I’ve done and the ones I still plan to do.
Abbreviations:
ch: chain
sc: single crochet
sl st: slip stitch
inc: increase (2 single crochets in one loop)
dec: decrease (pull yarn through loop, pull yarn through second loop, yarn over and pull through all loops)
Materials needed (with affiliate links provided):
Bernat Blanket yarn – 10.5 ounce size (2 balls of main color, 1 ball of vintage white) *You may be able to do this with a smaller ball of the vintage white*
Poly-fil (I used a full 50 oz bag for each of them)
**A couple of notes before you begin**
- If you tend to crochet with loose stitches, you may want to use a smaller crochet hook to reduce the amount of yarn that you use and tighten up your stitches.
- As you crochet the octopus head, you’ll notice it doesn’t really look all that round. Once you stuff it with the poly-fil, it will round out. If it’s not as round as you’d like it to be, put more poly-fil in and force it into the places you want it to shape it. Stuffing it extra full will help form its shape, but it will also ensure that it keeps its shape after all of the hugging and squishing your octopus is sure to get.
- This pattern is worked “in-the-round”, and stitches are worked through both loops unless otherwise noted. At the end of each row, I slip stitch then chain 1 and turn it, working the next row in the opposite direction. If you’d like, you can skip turning it and continue working in the same direction throughout the pattern.
Body:
ch 3. Sl st to first ch to create circle. (Instead, you can perform the “magic circle” if you’d like.)
Row 1: ch 1, 10 sc inside of circle. Sl st to first sc, ch 1, turn.
Row 2: *Inc in first stitch, sc in next stitch , repeat from * around. Sl st to first sc, ch 1, turn.
Row 3: *Inc in first stitch, sc in next 2 stitches, repeat from * around. Sl st to first sc, ch 1, turn.
Row 4: *Inc in first stitch, sc in next 3 stitches, repeat from * around. Sl st to first sc, ch 1, turn.
Row 5: *Inc in first stitch, sc in next 4 stitches, repeat from * around. Sl st to first sc, ch 1, turn.
Row 6: *Inc in first stitch, sc in next 5 stitches, repeat from * around. Sl st to first sc, ch 1, turn.
Row 7: *Inc in first stitch, sc in next 6 stitches, repeat from * around. Sl st to first sc, ch 1, turn.
Row 8: *Inc in first stitch, sc in next 7 stitches, repeat from * around. Sl st to first sc, ch 1, turn.
Row 9: *Inc in first stitch, sc in next 8 stitches, repeat from * around. Sl st to first sc, ch 1, turn.
Row 10: *Inc in first stitch, sc in next 9 stitches, repeat from * around. Sl st to first sc, ch 1, turn.
Row 11: *Inc in first stitch, sc in next 10 stitches, repeat from * around. Sl st to first sc, ch 1, turn.
Row 12: *Inc in first stitch, sc in next 11 stitches, repeat from * around. Sl st to first sc, ch 1, turn.
Row 13: *Inc in first stitch, sc in next 12 stitches, repeat from * around. Sl st to first sc, ch 1, turn.
Row 14: *Inc in first stitch, sc in next 13 stitches, repeat from * around. Sl st to first sc, ch 1, turn.
Row 15: *Inc in first stitch, sc in next 14 stitches, repeat from * around. Sl st to first sc, ch 1, turn.
Row 16: *Inc in first stitch, sc in next 15 stitches, repeat from * around. Sl st to first sc, ch 1, turn.
Row 17: *Inc in first stitch, sc in next 16 stitches, repeat from * around. Sl st to first sc, ch 1, turn.
Row 18: *Inc in first stitch, sc in next 17 stitches, repeat from * around. Sl st to first sc, ch 1, turn.
Row 19: *Inc in first stitch, sc in next 18 stitches, repeat from * around. Sl st to first sc, ch 1, turn.
Rows 20-26: Sc in each stitch around. Sl st to first sc, ch 1, turn.
Row 27: *Dec in first 2 stitches, sc in next 18 stitches, repeat from * around. Sl st to first sc, ch 1, turn.
Row 28: *Dec in first 2 stitches, sc in next 17 stitches, repeat from * around. Sl st to first sc, ch 1, turn.
Row 29: *Dec in first 2 stitches, sc in next 16 stitches, repeat from * around. Sl st to first sc, ch 1, turn.
Row 30: *Dec in first 2 stitches, sc in next 15 stitches, repeat from * around. Sl st to first sc, ch 1, turn.
Row 31: *Dec in first 2 stitches, sc in next 14 stitches, repeat from * around. Sl st to first sc, ch 1, turn.
Row 32: *Dec in first 2 stitches, sc in next 13 stitches, repeat from * around. Sl st to first sc, ch 1, turn.
Row 33: *Dec in first 2 stitches, sc in next 12 stitches, repeat from * around. Sl st to first sc, ch 1, turn.
Row 34: *Dec in first 2 stitches, sc in next 11 stitches, repeat from * around. Sl st to first sc, ch 1, turn.
Row 35: *Dec in first 2 stitches, sc in next 10 stitches, repeat from * around. Sl st to first sc, ch 1, turn.
Row 36: *Dec in first 2 stitches, sc in next 9 stitches, repeat from * around. Sl st to first sc, ch 1, turn.
Row 37: *Dec in first 2 stitches, sc in next 8 stitches, repeat from * around. Sl st to first sc, ch 1, turn.
Row 38: *Dec in first 2 stitches, sc in next 7 stitches, repeat from * around. Sl st to first sc, ch 1, turn.
Row 39: *Dec in first 2 stitches, sc in next 6 stitches, repeat from * around. Sl st to first sc, ch 1, turn.
Stuff the body as full as you can, shaping it as you stuff. Position the eyes between rows 21 and 22 with a space of 13 sc’s between them. Center the mouth between the eyes, sewing it on 2 rows down. Continue stuffing the body as you go.
Row 40: *Dec in first 2 stitches, sc in next 5 stitches, repeat from * around. Sl st to first sc, ch 1, turn.
Row 41: *Dec in first 2 stitches, sc in next 4 stitches, repeat from * around. Sl st to first sc, ch 1, turn.
Row 42: *Dec in first 2 stitches, sc in next 3 stitches, repeat from * around. Sl st to first sc, ch 1, turn.
Row 43: *Dec in first 2 stitches, sc in next 2 stitches, repeat from * around. Sl st to first sc, ch 1, turn.
Row 44: *Dec in first 2 stitches, sc in next stitch, repeat from * around. Sl st to first sc, ch 1, turn.
Row 45: *Dec in first 2 stitches, repeat from * around. Sl st to first sc, ch 1, turn.
If there’s still an opening at the bottom, you can use a slip stitch to close. Tie off.
Legs (make 8):
Starting with white, ch 3. Sl st to first ch to create circle. (Instead, you can perform the “magic circle” if you’d like.)
Row 1: ch 1, 10 sc inside of circle. Sl st to first sc, ch 1, turn.
Row 2: *Inc in first stitch, sc in next stitch , repeat from * around. Sl st to first sc, ch 1, turn.
Row 3: *Inc in first stitch, sc in next 2 stitches, repeat from * around. Sl st to first sc, ch 1, turn.
Row 4: *Inc in first stitch, sc in next 3 stitches, repeat from * around. Sl st to first sc, ch 1, turn.
Row 5: *Inc in first stitch, sc in next 4 stitches, repeat from * around. Sl st to first sc, ch 1, turn.
Row 6: *Inc in first stitch, sc in next 5 stitches, repeat from * around. Sl st to first sc, ch 1, turn.
Row 7: *Dec in first 2 stitches, sc in next 5 stitches, repeat from * around. Sl st to first sc, ch 1, turn.
Change to main color.
Rows 8-9: Sc around. Sl st to first sc, ch 1, turn.
Row 10: *Dec in first 2 stitches, sc in next 4 stitches, repeat from * around. Sl st to first sc, ch 1, turn.
Rows 11-12: Sc around. Sl st to first sc, ch 1, turn.
Row 13: *Dec in first 2 stitches, sc in next 3 stitches, repeat from * around. Sl st to first sc, ch 1, turn.
Rows 14-15: Sc around. Sl st to first sc, ch 1, turn.
Row 16: *Dec in first 2 stitches, sc in next 2 stitches, repeat from * around. Sl st to first sc, ch 1, turn.
Rows 17-18: Sc around. Sl st to first sc, ch 1, turn.
For the first 7 legs, tie off. Stuff the legs a little more than halfway, pushing the stuffing towards the foot.
With the 8th leg, instead of tying off, ch 1 and sc across the top of each leg, connecting them and closing the opening up.
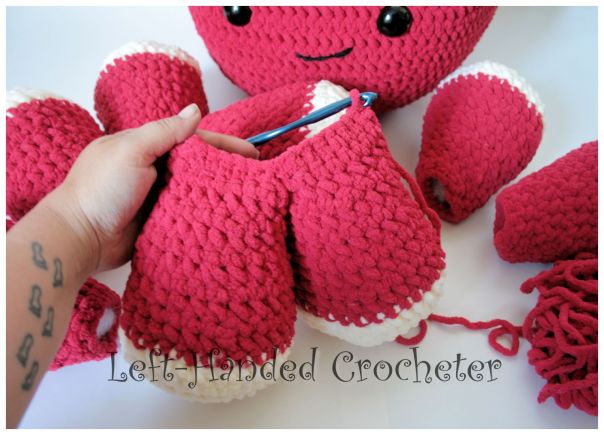
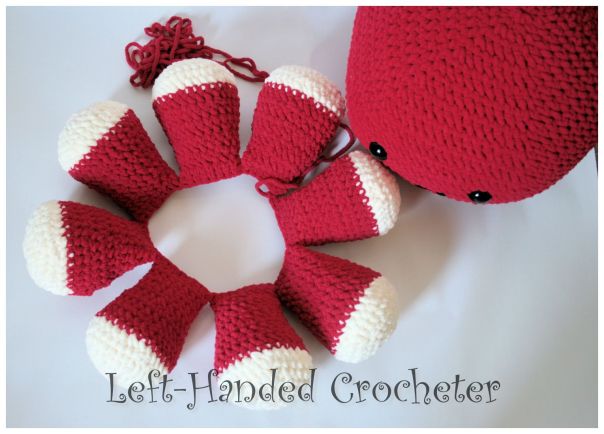
Once they’re all connected, they should look like this:

Slip stitch to the first sc across the top to form a ring:
Tie off, leaving a long tail for sewing. Flip the octopus body upside down and center the leg ring on it.
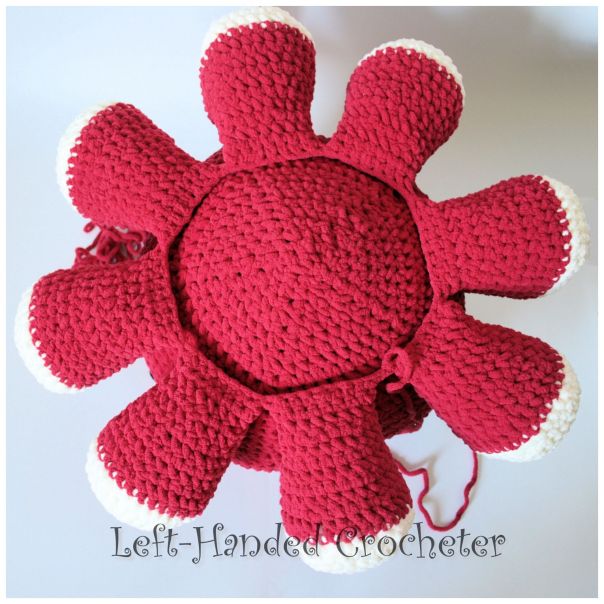
Using your yarn needle, sew the legs to the body all the way around.

Now flip your octopus over and check out how cute he is!

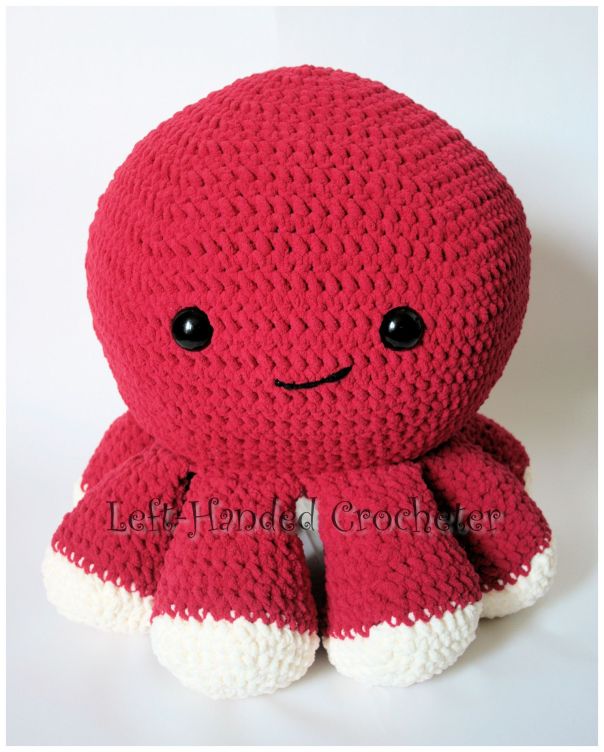
My daughter loves hers, and it matches her hair.

They’re perfect for snuggling, or for using as a pillow. Be sure to check out my other octopus pattern and you can make a smaller version using the Bernat Blanket yarn.
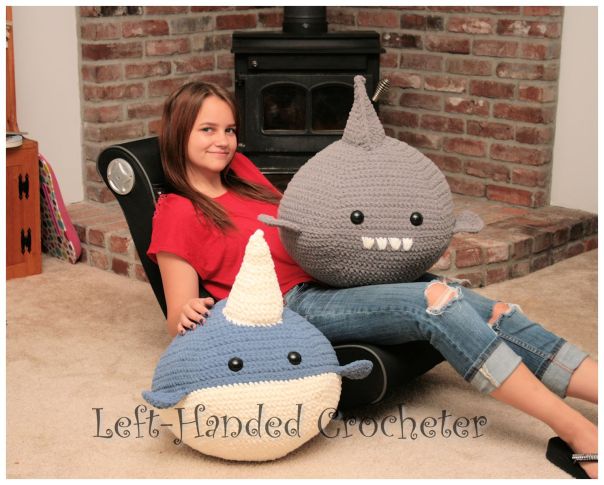
This is a fun pattern, and I love how adorable they are. They team up quite well with my giant narwhal and shark pattern.
If there are any mistakes in this pattern, or something is unclear, please feel free to leave me a comment and let me know. Or message me on Facebook. If you create any octopus of your own, be sure to post a photo on my Facebook page so I can see.


Cute! I cant wait to make one!
This is super cute! When you say one ball of the Bernat do you mean the big 10 oz size or the smaller ones? Thank you
I love them! Thanks for sharing and including how much fiber-fill you used.
I am in love with Mr. Octopus! Thank you for sharing his cuteness!
These are soooo cute I can’t wait to make one! Thank you so much for sharing the pattern.
Can i use this patten for right handed? ?
Do you have the pattern for the med size?
You mean the smaller blue one? I just used the pattern for my smaller octopus. The link is in the post.
Yes, the pattern should work just fine for right or left handed crocheters.
I used the 10.5 ounce ones. I’ll change my post to reflect that.
I don’t crochet. Can I buy one of yours??
Thanks so much for the pattern! You just saved my bacon, I’ve been trying to figure out what to start on for Christmas gifts (man, I love being a crafter, I start christmas in July!) and this is perfect for three of the babies.
Can you tell me dimensions of these making 2 but house isn’t enormous thanks if i used smaller hook would that take size down and still be size enought for 1 1/2 year old and 4 year old
Thank you
Love this was looking for a fun Xmas gift now just found it you are the best,keep up the good work thanks
Awesome! This looks like a fun project to start. Thanks for sharing.
So cute!! Thank you for the pattern!!
Super cute! Thanks for the pattern. Is there a print friendly option?
Reblogged this on Gráficos e Receitas and commented:
Almofada Polvo… ❤
Thank you so much for the pattern. I need instructions for the Kindergarten Crocheter….so sorry, I am still pretty new. I am trying to figure out the increase and decrease rows. Would you be able to expand a little as in how many stitches should there be at the end of each row.
I edited the post today and added a few notes. I also expanded on the directions a bit to make it clearer for those who were having a hard time. Hope this helps!
I love, love, love these! Thank you so much! I am working on the large octopus right now. I also love this yarn.
I have one question to ask, could this be done in the round instead of slst, ch1, then turn? I like to crochet in the round if possible. Was just wondering if there is a reason this would not work.
I am also crocheting the Crochet Crowd’s shark snuggle sack so I was super excited to see your shark pillow to go with the sack!
Again thanks!
Yes, it can be worked in the round. The ch 1 and turn is just something that I do, but any of my round patterns can be worked without doing that.
How about right hand, does pattern work for rh? Tia love the octpy.
Do add a little more weight to the bottom, would it be possible to add sand or something to the feet?
Is there any way to get the stitch counts? When I am increasing I am getting a ruffle in my edge because my stitch count seems to be off.
So I an in the middle of making this one, have already made a small one…but i have noticed that even though Im using a smaller hook (a K) to bring my stitching in a little, I have already gone through 2 skeins on the yarn and I have only just finished row 26…. Not sure if I am doing something wrong or what is going on with this….any advice?
It’s hard to say what causes a person to use more or less yarn than another person does. I tend to crochet very tight stitches, but some people crochet them very loose. Going down a hook size was good, but without actually seeing and feeling your work, I can’t be sure if it’s just because your stitches are loose, or if there’s something wrong. If you get finished and stuff it, and it looks fine, then it’s probably just that your stitches are looser than mine. Remember, though, you have to stuff it really full and push the stuffing around to get the shape the way that you want it. If you’re on Facebook, post a photo on my wall when you finish.
You probably could. I’ve never used sand, but I’ve added uncooked rice into a stuffy before for weight. My suggestion, if you want to add weight, would be to use sand, uncooked rice, or pellets (you can find pellets in most craft stores by the poly-fil), and put it inside of a stocking (nylons), tie it at the top and insert it right in the middle of the poly-fil so that you can’t feel it from the outside.
The pattern should work just fine for right-handed or left-handed crocheters.
Hello I have a quick question, when you ch1 & turn, do you work the 1st stitch in the join stitch (sm stitch) or the next stitch? Thank you and thank you for the great patters they are awesome!!!
I have made one in Harvest with Black/Harvest feet. It is absolutely adorable!! It will be a Christmas present for a great grandson. I am now making a smaller one for a granddaughter. There are 3 girls in that family, and they will all receive one. (The only reason I’m doing the smaller one for them is that they have to be mailed from Wisconsin to Portland, Oregon. The shipping would have broken me!!) I am a 70 year old great grandma!! Thanks for the patterns!!
I made one already. Love it, by the way! How do you stuff of to make it looks round? Mine is a little off. Thank you
How do you fill it so it looks round? My is lopsided. Thank you for the pattern. Its awesome!
You work it into the joined stitch, and when you join it you join into that first stitch, not into the ch 1. You really don’t have to even turn it if you don’t want to. You can just keep crocheting around. I just like turning it because it helps me keep track of my stitches better.
You have to use a lot of stuffing, and push it in there where you want it until it rounds out. By stuffing it so full, it will keep its shape a lot longer.
My giant octopus developed a cone-shaped head because of the super quick increase at the beginning. Has anyone else experienced this?
I love these, they are so adorable. Would you be able to tell us how big they are?
Shouldn’t Row 2 be 2 sc in each stitch around?
Thanks for the pattern, it looks really cute, cant wait to make it.
Hi! Just wondering where you got your safety eyes. I can’t really find the 30mm size. I found 24mm size, do you think that would work or would it just go through the stitches?
Is there a chance you could put the stitch count for each row, that would be so helpful?! Thank you so so much for the cute pattern!!
This pattern is adorable. I am right handed and had no problem. I used almost to the very last of the main color but have lots of the foot color left for another octopus. I’m so in love and everyone wants one now. I added a flower to my first one to make it more girly and my daughter wants one with a mustache and a top hat. Thank you for the pattern.
Would love a stitch count! This is so cute.
Thanks so much for the awesome pattern. My daughter loves her new stuffie pal😁.
do you have instructions fir righthanded crohet it is gorgeous
These patterns should work just fine for right-handed crocheters.
This would be perfect for the childrens at our library!
Working on one now and LOVING it! THANK YOU!
Are you on Ravelry?
I’m not on Ravelry, but I’ve been planning to get my patterns on there so people can save them easier. It’s on my list of things to do. 🙂
For anyone that got this to come out other than looking like the Coneheads from Saturday Night Live, any advice would be appreciated. I’m fairly new and have only done blankets EVER, so I’ve made several attempts at this and no amount of stuffing makes it look anything like even a semi-round character. Maybe even a hint at how many stitches are in each row?
This looks awesome !! I need to try it ! how long does it take you to make one (even though i’m assuming you’re a crochet-expert)? 😉 thanks again !
Hello, this pattern is awesome thank you so much I’m getting started on it today! I just have a question, if I start with a magic circle, should I chain 10 in the magic circle..? I didn’t get the first step (I’m still quite new at crocheting..). I’m not sure what you meant by “sc 10 in the cercle”. thanks a lot!!
Shout out to your pattern. I took the body only, did three colors (red/black/white) and turned this into a giant pokeball for my niece for Christmas. Turned out amazing!!!!
Thanks for sharing. God bless you dear.I will surely try this later.
Read the notes and heed them!! This will save you from redoing and buying more yarn! Working through both loops makes for a more homogeneous and clean look. Adorable pattern.