
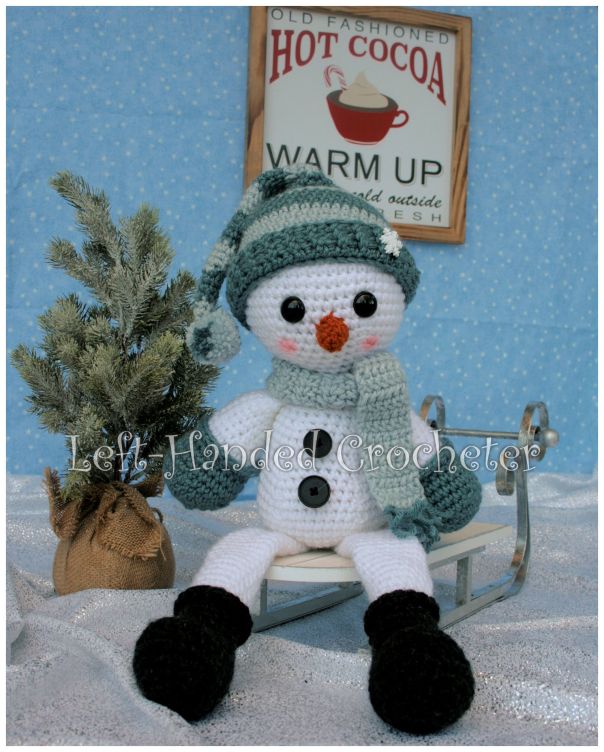
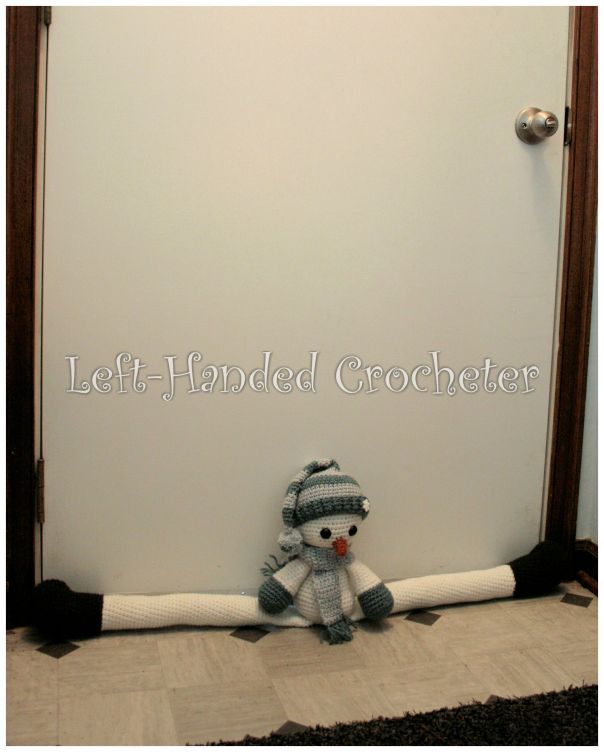
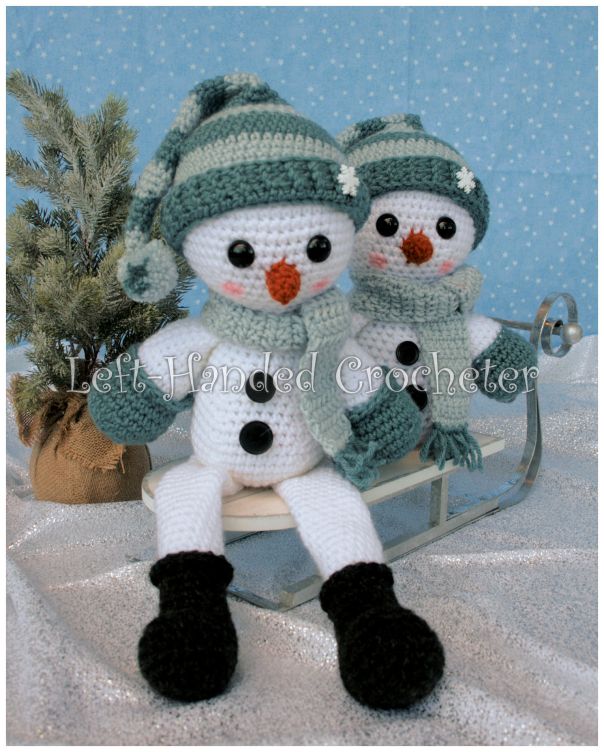
Winter is here and so is the cold. Do you have cold air that leaks under your door? We certainly do, so I decided I needed to create some draft stoppers. This snowman is cute and functional. Just push him up against your door and his legs will stop that cold air from coming in.
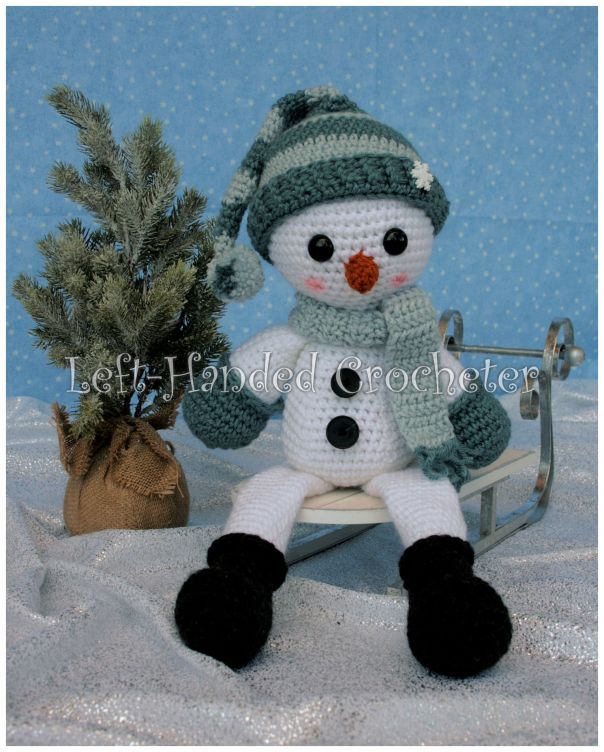
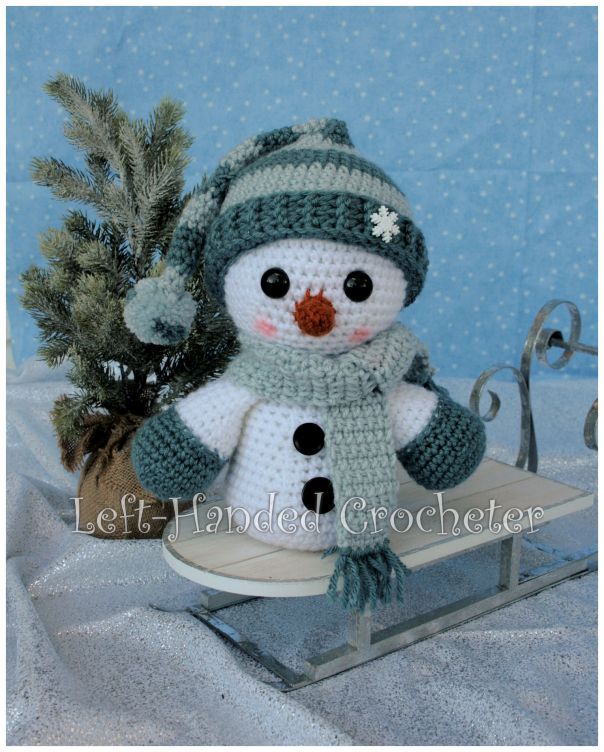
I loved him so much, I wanted to create a matching one that I could put on a shelf in my living room. So I created one pattern, with different legs, that can be used to make the matching set.
If you want a pattern that you can save on your computer and easily print, this pattern is available in my Ravelry shop for only $3.00. Or you can get my whole Christmas 2017 Collection for only $8.00. I love printing patterns and saving them in a binder to keep track of the ones I’ve done and the ones I still plan to do.
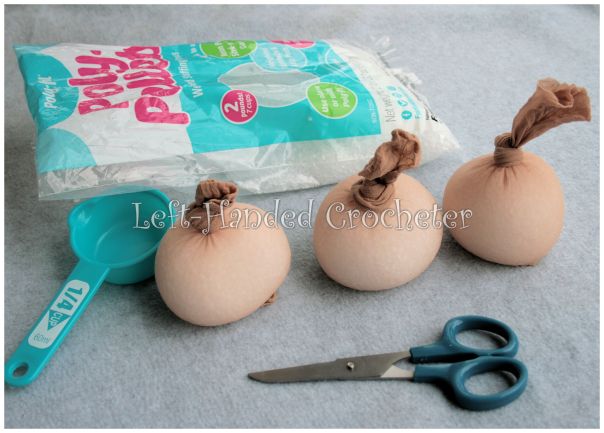
These patterns work best if you put a bit of weight in their bottoms. It will help them to sit up and stay put. I used polly pellets and some cheap nylons, and the weight on them ended up perfect.
Abbreviations:
ch: chain
sc: single crochet
sl st: slip stitch
inc: increase (2 single crochets in one loop)
dec: decrease (pull yarn through loop, pull yarn through second loop, yarn over and pull through all loops)
hdc: half double crochet
fphdc: front post half double crochet
bphdc: back post half double crochet
Materials needed (with affiliate links):
Lion Brand Vanna’s Choice yarn in white, black, rust, silver blue and dusty blue.
Making the weighted pouch
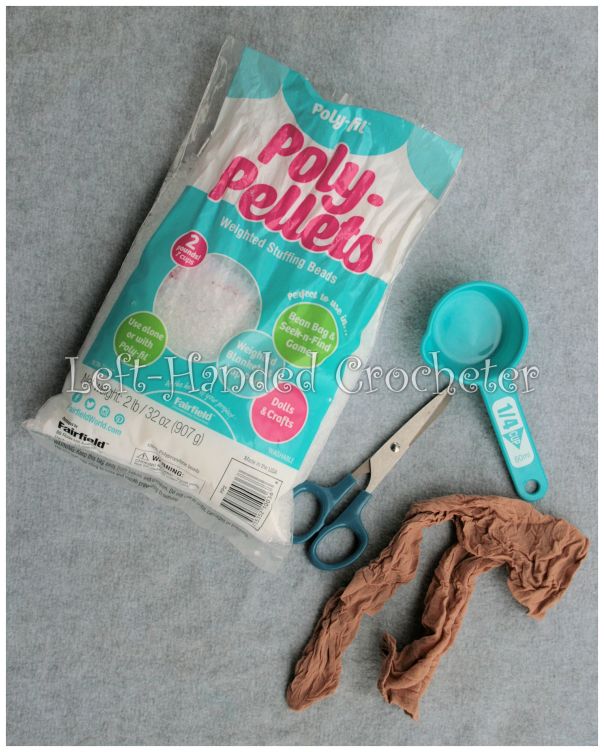
I got the nylon stockings so they were already 2 individual pieces. By cutting them in half, I was able to make 4 bodies using 1 set of nylons.
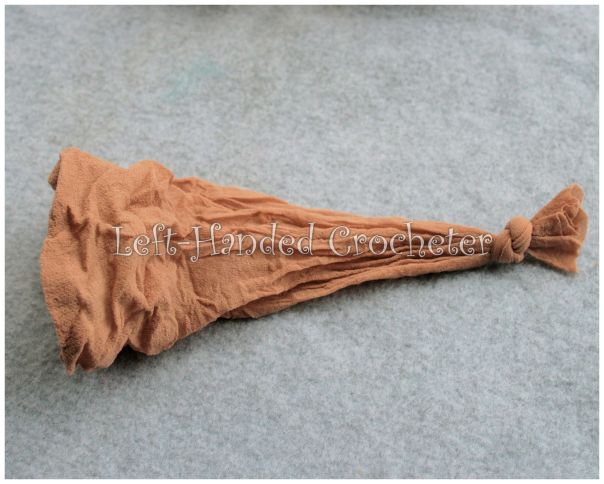
With the toe part, you just fill it and tie the end. With the other half, tie a knot at one end first. Fill each of them with 1/2-3/4 cup of polly pellets. Tie a knot in the top to close it.
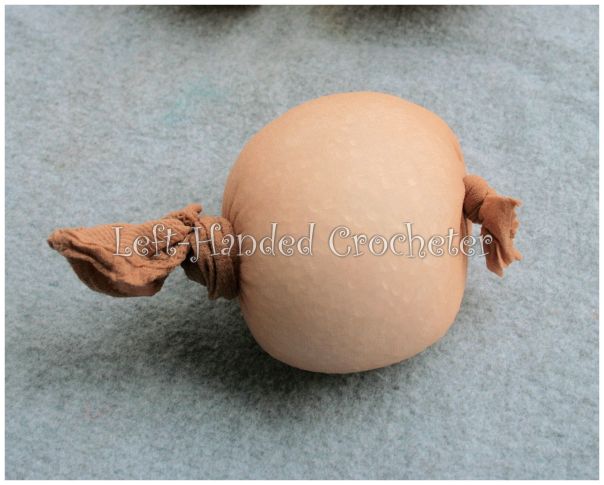
This extra bit of weight really does help them to sit up without making them too heavy. You can get quite a few of these made using 1 bag of polly pellets. I believe I made 7 or 8 of them with 1 bag.
This pattern is worked “in-the-round”, and stitches are worked through both loops unless otherwise noted.
Head:
With white, ch 3. Sl st to first ch to create circle. (Instead, you can perform the “magic circle” if you’d like.)
Row 1: ch 1, 10 sc inside of circle. (10 stitches)
Row 2: *Inc in first stitch, sc in next stitch, repeat from * around. (15 stitches)
Row 3: *Inc in first stitch, sc in next 2 stitches, repeat from * around. (20 stitches)
Row 4: *Inc in first stitch, sc in next 3 stitches, repeat from * around. (25 stitches)
Row 5: *Inc in first stitch, sc in next 4 stitches, repeat from * around. (30 stitches)
Row 6: *Inc in first stitch, sc in next 5 stitches, repeat from * around. (35 stitches)
Row 7: *Inc in first stitch, sc in next 6 stitches, repeat from * around. (40 stitches)
Row 8: *Inc in first stitch, sc in next 7 stitches, repeat from * around. (45 stitches)
Row 9: *Inc in first stitch, sc in next 8 stitches, repeat from * around. (50 stitches)
Rows 10-17: Sc in each stitch around. (50 stitches)
Row 18: *Dec in first 2 stitches, sc in next 8 stitches, repeat from * around. (45 stitches)
Row 19: *Dec in first 2 stitches, sc in next 7 stitches, repeat from * around. (40 stitches)
Row 20: *Dec in first 2 stitches, sc in next 6 stitches, repeat from * around. (35 stitches)
Row 21: *Dec in first 2 stitches, sc in next 5 stitches, repeat from * around. (30 stitches)
Row 22: *Dec in first 2 stitches, sc in next 4 stitches, repeat from * around. (25 stitches)
Row 23: *Dec in first 2 stitches, sc in next 3 stitches, repeat from * around. (20 stitches)
Tie off. Stuff with poly-fil.
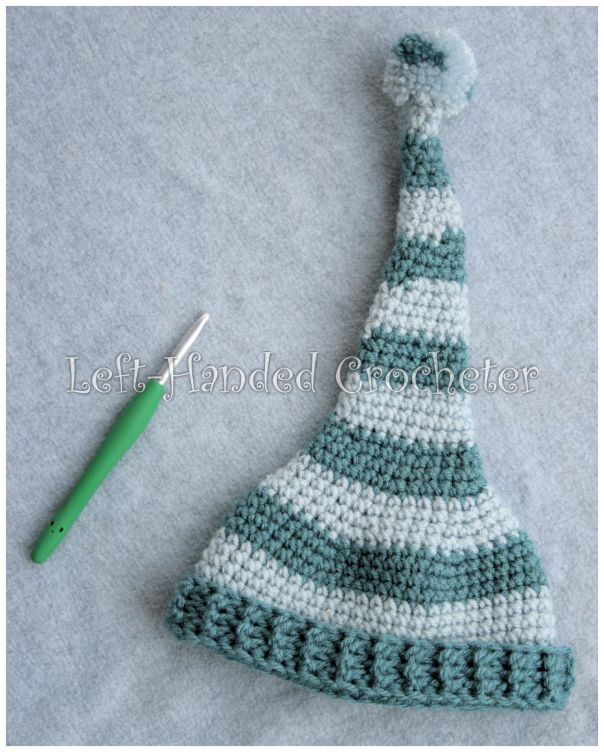
Hat:
With silver blue, ch 3. Sl st to first ch to create circle. (Instead, you can perform the “magic circle” if you’d like.)
Row 1: ch 1, 4 sc inside of circle. (4 stitches)
Rows 2-3: Sc in each stitch around. (4 stitches)
Switch to dusty blue.
Row 4: *Inc in first stitch, sc in next stitch, repeat from * around. (6 stitches)
Rows 5-6: Sc in each stitch around. (6 stitches)
Row 7: *Inc in first stitch, sc in next 2 stitches, repeat from * around. (8 stitches)
Switch to silver blue.
Rows 8-9: Sc in each stitch around. (8 stitches)
Row 10: *Inc in first stitch, sc in next 3 stitches, repeat from * around. (10 stitches)
Row 11: Sc in each stitch around. (10 stitches)
Switch to dusty blue.
Row 12: Sc in each stitch around. (10 stitches)
Row 13: *Inc in first stitch, sc in next 4 stitches, repeat from * around. (12 stitches)
Rows 14-15: Sc in each stitch around. (12 stitches)
Switch to silver blue.
Row 16: *Inc in first stitch, sc in next 5 stitches, repeat from * around. (14 stitches)
Rows 17-18: Sc in each stitch around. (14 stitches)
Row 19: *Inc in first stitch, sc in next 6 stitches, repeat from * around. (16 stitches)
Switch to dusty blue.
Rows 20-21: Sc in each stitch around. (16 stitches)
Row 22: *Inc in first stitch, sc in next 7 stitches, repeat from * around. (18 stitches)
Row 23: Sc in each stitch around. (18 stitches)
Switch to silver blue.
Row 24: Sc in each stitch around. (18 stitches)
Row 25: *Inc in first stitch, sc in next 8 stitches, repeat from * around. (20 stitches)
Rows 26-27: Sc in each stitch around. (20 stitches)
Switch to dusty blue.
Row 28: *Inc in first stitch, sc in next 3 stitches, repeat from * around. (25 stitches)
Rows 29-30: Sc in each stitch around. (25 stitches)
Row 31: *Inc in first stitch, sc in next 4 stitches, repeat from * around. (30 stitches)
Switch to silver blue.
Rows 32-33: Sc in each stitch around. (30 stitches)
Row 34: *Inc in first stitch, sc in next 5 stitches, repeat from * around. (35 stitches)
Row 35: *Inc in first stitch, sc in next 6 stitches, repeat from * around. (40 stitches)
Switch to dusty blue.
Row 36: *Inc in first stitch, sc in next 7 stitches, repeat from * around. (45 stitches)
Row 37: *Inc in first stitch, sc in next 8 stitches, repeat from * around. (50 stitches)
Rows 38-39: Sc in each stitch around. (50 stitches)
Switch to silver blue.
Rows 40-43: Sc in each stitch around. (50 stitches)
Switch to dusty blue.
Rows 44-47: Sc in each stitch around. (50 stitches)
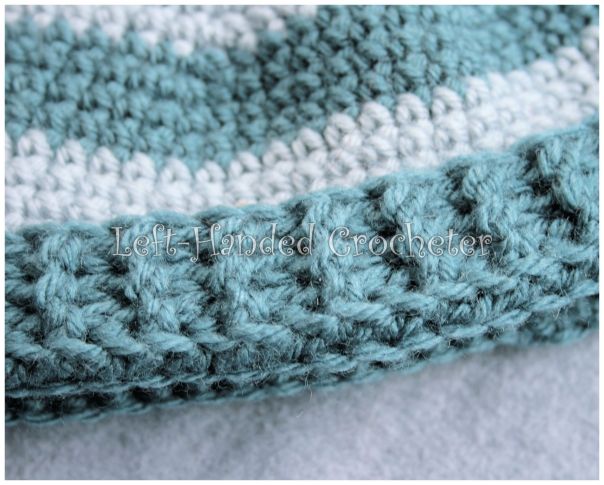
Row 48: Working in back loops only, hdc in each stitch around. (50 stitches)
Rows 49-51: Alternate fphdc and bphdc around. (50 stitches)
For front post half double crochet (fphdc), instead of working through the loop, you’ll go through the post in the front.
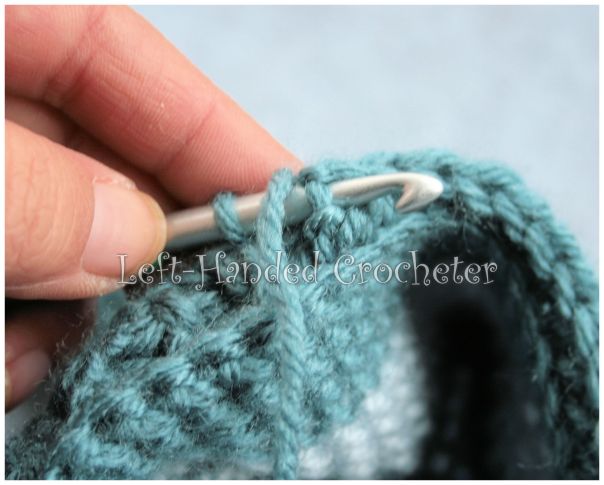
For back post half double crochet (bphdc), you’ll go through the post in the back.
This creates a ribbing on the end of the hat.
If you have a hard time with the front post and back post stitches, you can always just do half double crochets instead.
Tie off. Attach pom pom to top.
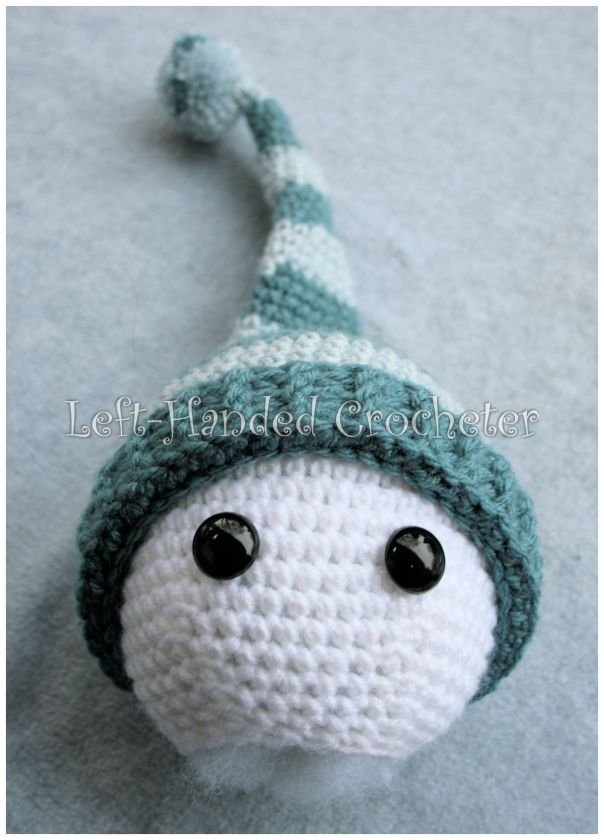
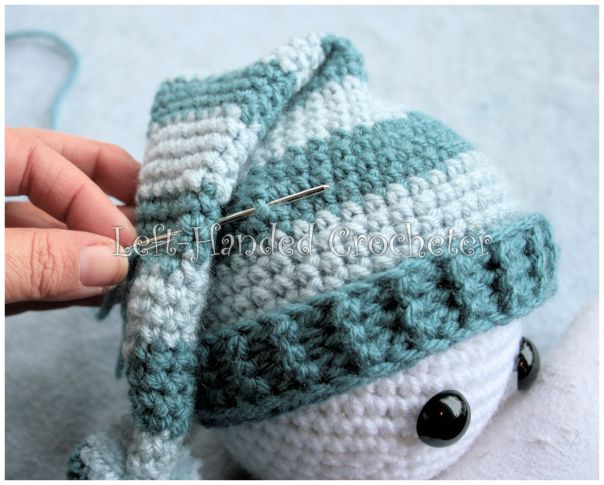
Decide where you want to place the eyes, but don’t put the backs on them yet. Once the backs are on, you can’t move them. Put the hat on and get it positioned where you want it. Sew the hat onto the head.
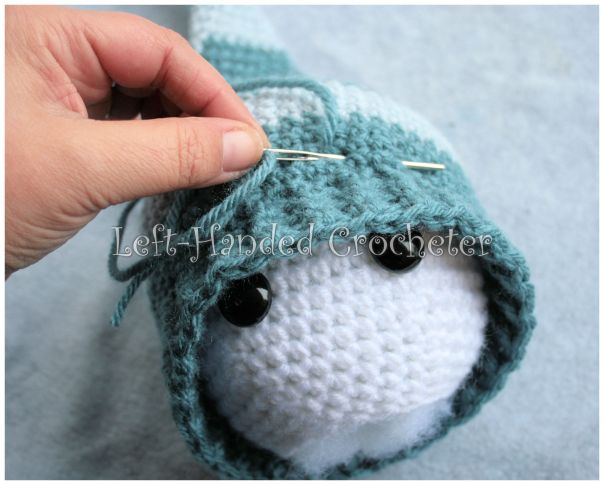
Once the hat is in place, flip the ribbed part up. Adjust the eyes if you need to and place the backs on.
Use a bit of yarn to attach the hat to the side.
Nose:
With rust, ch 3. Sl st to first ch to create circle. (Instead, you can perform the “magic circle” if you’d like.)
Row 1: ch 1, 4 sc inside of circle. (4 stitches)
Row 2: Sc in each stitch around. (4 stitches)
Row 3: *Inc in first stitch, sc in next stitch, repeat from * around. (6 stitches)
Row 4: Sc in each stitch around. (6 stitches)
Tie off. Stuff with poly-fil. Position on face and sew on.


Body:
With white, ch 3. Sl st to first ch to create circle. (Instead, you can perform the “magic circle” if you’d like.)
Row 1: ch 1, 10 sc inside of circle. (10 stitches)
Row 2: *Inc in first stitch, sc in next stitch, repeat from * around. (15 stitches)
Row 3: *Inc in first stitch, sc in next 2 stitches, repeat from * around. (20 stitches)
Row 4: *Inc in first stitch, sc in next 3 stitches, repeat from * around. (25 stitches)
Row 5: *Inc in first stitch, sc in next 4 stitches, repeat from * around. (30 stitches)
Row 6: *Inc in first stitch, sc in next 5 stitches, repeat from * around. (35 stitches)
Row 7: *Inc in first stitch, sc in next 6 stitches, repeat from * around. (40 stitches)
Row 8: *Inc in first stitch, sc in next 7 stitches, repeat from * around. (45 stitches)
Row 9: *Inc in first stitch, sc in next 8 stitches, repeat from * around. (50 stitches)
Row 10: *Dec in first 2 stitches, sc in next 8 stitches, repeat from * around. (45 stitches)
Row 11: Sc in each stitch around. (45 stitches)
Row 12: *Dec in first 2 stitches, sc in next 7 stitches, repeat from * around. (40 stitches)
Row 13: Sc in each stitch around. (40 stitches)
Row 14: *Dec in first 2 stitches, sc in next 6 stitches, repeat from * around. (35 stitches)
Row 15: Sc in each stitch around. (35 stitches)
Row 16: *Dec in first 2 stitches, sc in next 5 stitches, repeat from * around. (30 stitches)
Rows 17-18: Sc in each stitch around. (30 stitches)
Row 19: *Dec in first 2 stitches, sc in next 4 stitches, repeat from * around. (25 stitches)
Rows 20-21: Sc in each stitch around. (25 stitches)
Row 22: *Dec in first 2 stitches, sc in next 3 stitches, repeat from * around. (20 stitches)
Rows 23-24: Sc in each stitch around. (20 stitches)
Tie off. Insert polly pellet weight. Stuff the rest of the way with poly-fil. Attach black buttons. Sew head onto body.
Arms:
With dusty blue, ch 3. Sl st to first ch to create circle. (Instead, you can perform the “magic circle” if you’d like.)
Row 1: ch 1, 10 sc inside of circle. (10 stitches)
Row 2: *Inc in first stitch, sc in next stitch, repeat from * around. (15 stitches)
Row 3: *Inc in first stitch, sc in next 2 stitches, repeat from * around. (20 stitches)
Row 4: *Inc in first stitch, sc in next 3 stitches, repeat from * around. (25 stitches)
Row 5: *Inc in first stitch, sc in next 4 stitches, repeat from * around. (30 stitches)
Row 6: *Dec in first 2 stitches, sc in next 4 stitches, repeat from * around. (25 stitches)
Rows 7-8: Sc in each stitch around. (25 stitches)
Row 9: *Dec in first 2 stitches, sc in next 3 stitches, repeat from * around. (20 stitches)
Switch to white.
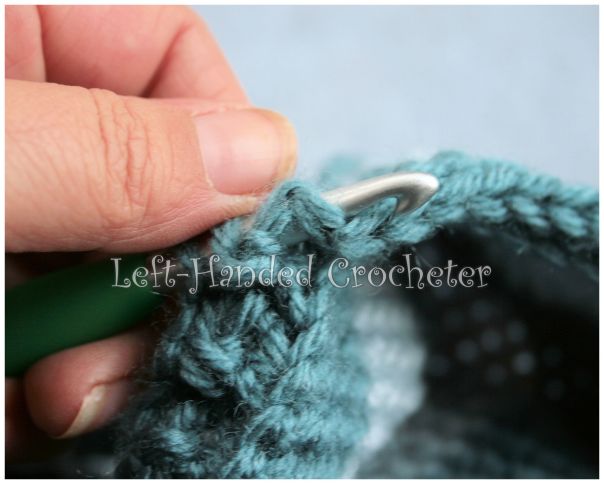
Row 10: Working in front post only, sc in each stitch around. (20 stitches)

Rows 11-12: Sc in each stitch around. (20 stitches)
Row 13: *Dec in first 2 stitches, sc in next 2 stitches, repeat from * around. (15 stitches)
Rows 14-21: Sc in each stitch around. (15 stitches)
Tie off. Stuff halfway with poly-fil.
By working in the front posts of row 10, you should have created a line line this.
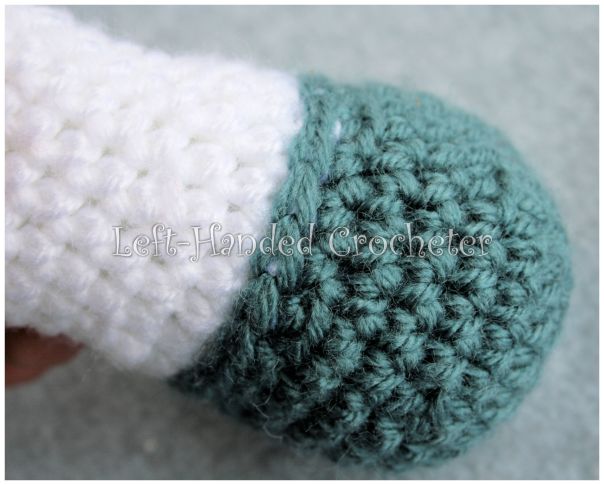
You can leave it like that if you want, or you can sl st into the post and work a hdc around.
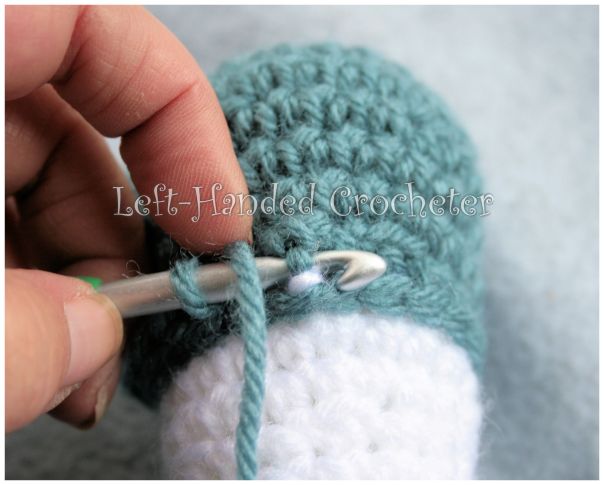
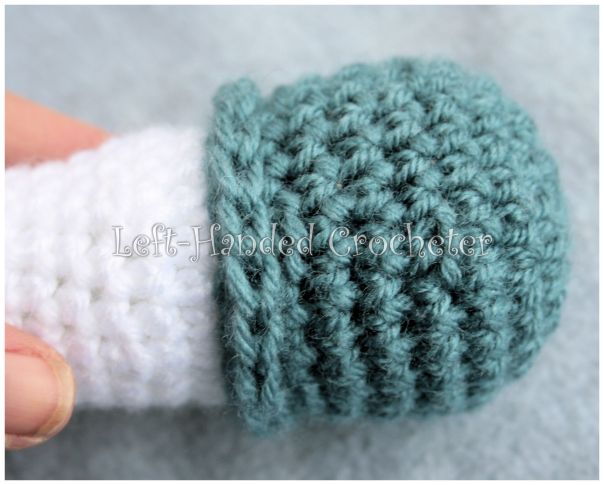
This just makes the gloves stand out a bit more, and makes them look more like they’re separate from the arm.
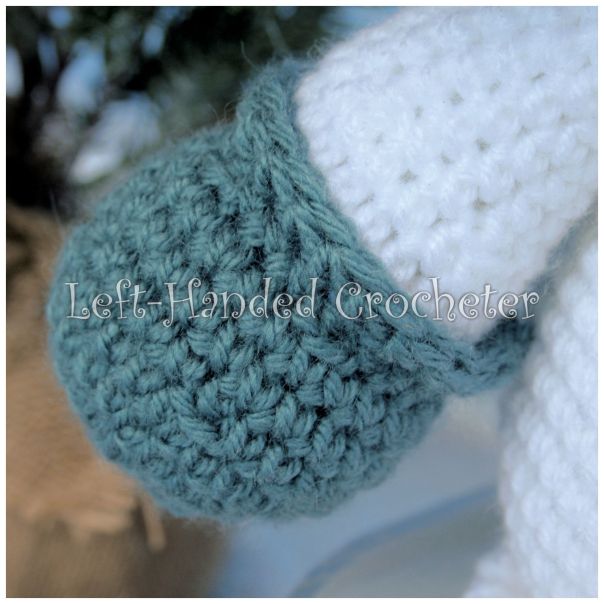
Sew arms onto body.
Scarf:
With silver blue, ch 7.
Row 1: Hdc in 2nd ch from hook and in each ch across, ch 1, turn. (6 stitches)
Rows 2-60: Hdc in each stitch across, ch 1, turn. (6 stitches)
Tie off. Attach fringe. Tie around neck.
Legs (for shelf sitter):
With black, ch 3. Sl st to first ch to create circle. (Instead, you can perform the “magic circle” if you’d like.)
Row 1: ch 1, 10 sc inside of circle. (10 stitches)
Row 2: *Inc in first stitch, sc in next stitch, repeat from * around. (15 stitches)
Row 3: *Inc in first stitch, sc in next 2 stitches, repeat from * around. (20 stitches)
Row 4: *Inc in first stitch, sc in next 3 stitches, repeat from * around. (25 stitches)
Row 5: *Inc in first stitch, sc in next 4 stitches, repeat from * around. (30 stitches)
Row 6: *Dec in first 2 stitches, sc in next 4 stitches, repeat from * around. (25 stitches)
Rows 7-8: Sc in each stitch around. (25 stitches)
Row 9: Sc in first 7 stitches, dec in next 10 stitches (5 dec’s), sc in next 8 stitches. (20 stitches)
Row 10: Sc in first 5 stitches, dec in next 10 stitches (5 dec’s), sc in next 5 stitches. (15 stitches)
Rows 11-15: Sc in each stitch around. (15 stitches)
Switch to white.
Row 16: Working in front post only, sc in each stitch around. (15 stitches)
Stuff the foot with poly-fil.
Rows 17-41: Sc in each stitch around. (15 stitches)
Tie off. Stuff to just above the boot, leaving the rest of the leg unstuffed. Sew onto bottom of body.
Legs (for draft stopper):
With black, ch 3. Sl st to first ch to create circle. (Instead, you can perform the “magic circle” if you’d like.)
Row 1: ch 1, 10 sc inside of circle. (10 stitches)
Row 2: *Inc in first stitch, sc in next stitch, repeat from * around. (15 stitches)
Row 3: *Inc in first stitch, sc in next 2 stitches, repeat from * around. (20 stitches)
Row 4: *Inc in first stitch, sc in next 3 stitches, repeat from * around. (25 stitches)
Row 5: *Inc in first stitch, sc in next 4 stitches, repeat from * around. (30 stitches)
Row 6: *Inc in first stitch, sc in next 5 stitches, repeat from * around. (35 stitches)
Row 7: *Inc in first stitch, sc in next 6 stitches, repeat from * around. (40 stitches)
Row 8: *Dec in first 2 stitches, sc in next 6 stitches, repeat from * around. (35 stitches)
Rows 9-11: Sc in each stitch around. (35 stitches)
Row 12: Sc in first 13 stitches, dec in next 10 stitches (5 dec’s), sc in next 12 stitches. (30 stitches)
Row 13: Sc in first 10 stitches, dec in next 10 stitches (5 dec’s), sc in next 10 stitches. (25 stitches)
Rows 14-21: Sc in each stitch around. (25 stitches)
Switch to white.
Row 22: Working in front post only, sc in each stitch around. (25 stitches)
Row 23: *Dec in first 2 stitches, sc in next 3 stitches, repeat from * around. (20 stitches)
Stuff the foot with poly-fil. Be sure to stuff it tight. You want the feet and legs to be really firm.
Rows 24-81: Sc in each stitch around. (20 stitches)
Every 10 rows or so, stuff more poly-fil into the leg, remembering to keep it stuffed firm. Leave the last 10-12 rows unstuffed.
Tie off. Sew onto bottom of body. Be sure to sew them sideways, so they go to the side of the body, and keep them both close to the middle.

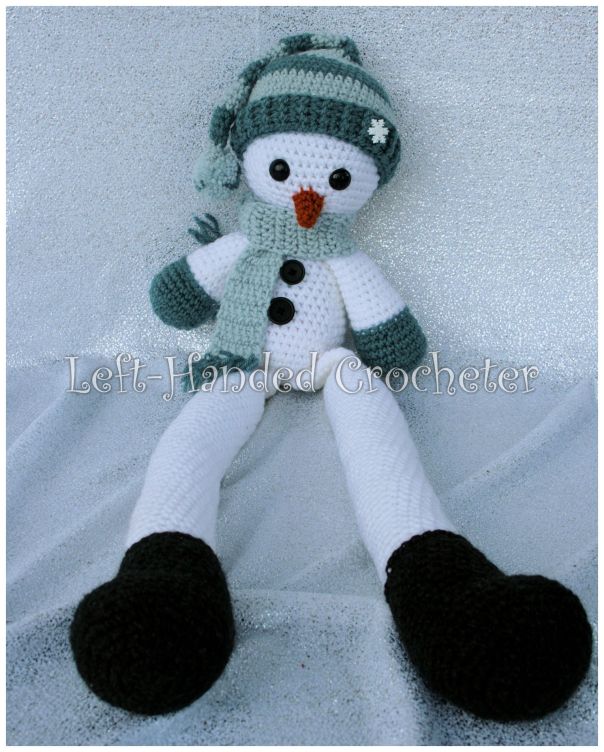

You can also leave the legs off of the snowman if you want.
If you leave the legs off and stuff the body with poly-fil without the weighted polly pellets, it will make a great toy for a child too.

I hope you enjoy this pattern! You’re welcome to sell items that you make using my patterns, as long as you don’t post the pattern anywhere else, and link back to my page if you’d like to. If there are any mistakes, or something is unclear, please feel free to leave me a comment and let me know. Or message me on Facebook. If you create any snowmen of your own, be sure to post a photo on my Facebook page so I can see. I love seeing all of the things people are creating.


Thank you for sharing this pattern.
I really liked your blog.
Hugs!
Love this! The snowman is my favorite as you can use it all winter!