
There are many different ways you can add hair to your crocheted dolls. I’m going to talk about three methods that I use often, and then show a couple of combination methods that also work well for me.
Looped Hair


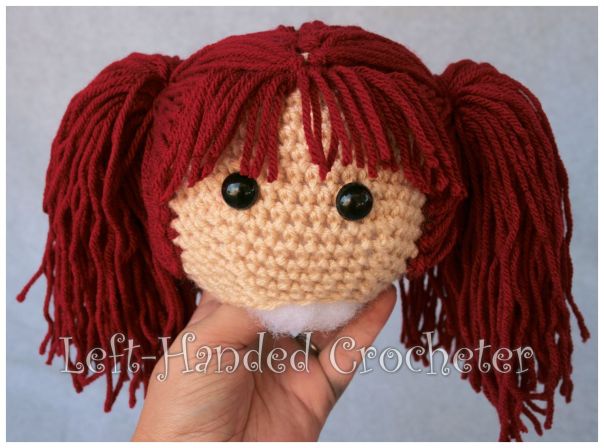
This is the method I use the most. Cut the yarn twice as long as the length you want, but make it longer so you can trim it afterward to get it all even. Put the hook through the loop where you want the hair, grab a strand or two of your yarn and pull it through. Grab the end of the yarn and pull that through the loop.
You can cover a doll’s head in hair like this, but it would end up being way too much hair. When I use this method, I generally put the hair in ponytails or braids. Then you can just add the loops around the edges, leaving a bald spot in the middle.

Seamed Hair
This method is a bit more complicated, but also takes less yarn and looks a bit cleaner.


Cut your yarn the length you want it, but as always leave it longer so you can trim it and make it even. Starting at the top of the head, hold a couple of strands of yarn on there and use your yarn needle and yarn of a matching color to sew it in place. Continue placing strands and sewing all the way down the back of the head.
This is a pretty quick method of putting on hair, but it will also leave a bald spot on their head.

When I use this method, I put their hair in ponytails or braids to cover that bald spot.


While I think this method is quick and looks nice, it’s not a very good method to use if a child is going to be playing with the doll since it’s possible they could pull those strands out.
Wig Cap
This is the method that I use the most if I’m making a doll that’s going to be played with. A wig cap doesn’t look as natural, but it stays on better and is pretty easy to do.

Wig caps are easy to make. You can do this by following the pattern for the dolls head, but instead of decreasing, add a few more rows. When I make caps, I keep testing it on my dolls head until it’s the size I want it.


You can sew the wig cap on and extend your stitches down a bit to make it look more like hair, or you can make a scalloped or shaped wig cap.
Combinations
There are many ways you can combine these methods to get the hair that you want. Here are a few combinations that I use.
Adding a Hat
This is my absolute favorite because, like using a wig cap, it stays in place well and will hold up to play. By adding hair under the hat, though, you also get the real look of hair.


Just add looped hair under the brim of the hat, or add some curls. Speaking of curls, they’re pretty easy to make too. You just crochet a chain longer than you want, then work two or three sc’s into each chain. Play around with it until you get the length you want, and leave a long tail at the beginning and end to attach it to the head.
With a hat, you can do different hair styles too. Leave the hair loose, or put it in braids or pigtails.


Adding Hair to a Wig Cap


If the wig cap is just too plain, you can always add hair to it. Try looping hair at the back to create a ponytail, or attach curls on each side to create curly pigtails.
Using a Wig Cap Under Looped Hair


Sometimes, looped hair will still leave gaps and bald spots, especially if you’re only looping one strand to keep the weight of the hair down. In this case, you can use a wig cap underneath the hair to disguise those spots.
These are just a few methods you can use to add hair to your crocheted dolls. There are so many different ways, it’s good to try a few and find what you like the best. You can totally change the look of a doll just by doing their hair differently, so you may find that you like to use many different methods like I do.
I hope this helps you to add hair to your crocheted dolls. If you have other neat methods that you use, go visit me on Facebook and tell me about it.


Thank you for sharing!!