
Fall is my favorite time of the year. I love when it starts getting colder out, and all of the leaves start changing and falling on the ground. But my favorite part of fall is the anticipation of winter. I get sick of winter, and I often dread it, but I always love that anticipation, especially waiting for the first snowfall. It always reminds me of my dad. He loved winter, and he would anxiously wait for snow to fall, and get excited when it did.
The colder weather makes me want to curl up under a blanket with some hot cocoa and yarn, and watch movies all day. If only I didn’t have to go out in that snow, I would want winter all year. But for those times when I have to be an actual adult, it’s nice to have a warm (and cute!) hat and scarf set to wear.
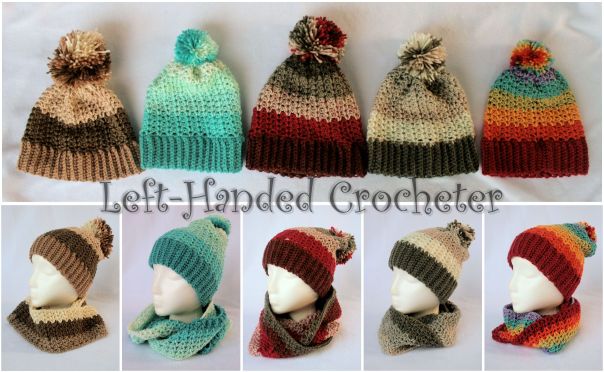
I love the v-stitch, especially for infinity scarves. It works up so quickly, and it looks nice. I make v-stitch infinity scarves for me and my girls every year, but this year I decided we needed a v-stitch slouch hat to go with it. Since I bought a lot of the Caron Cakes last time my Michaels had them in stock, I thought it would work well with these patterns. Oh, and in case you didn’t hear, Caron Cakes are coming back into stock this weekend, and they’ve extended them for a year. If you have a different yarn you’d rather use, this pattern will work for any of it really.
If you want a pattern that you can save on your computer and easily print, this pattern is available in my Ravelry shop for only $2.00. I love printing patterns and saving them in a binder to keep track of the ones I’ve done and the ones I still plan to do.
Abbreviations:
ch: chain
sc: single crochet
dc: double crochet
sl st: slip stitch
Materials needed (with affiliate links):
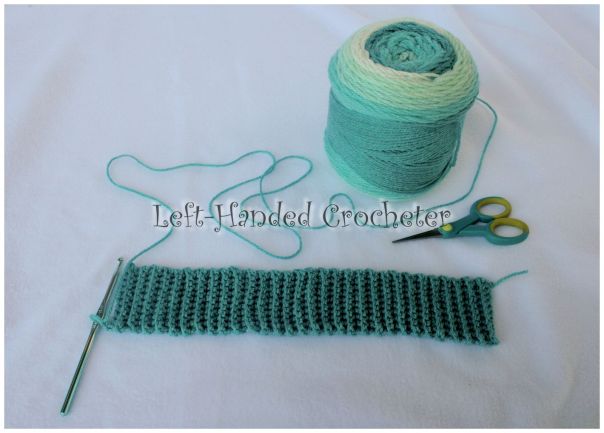
2 balls of Caron cakes (or whatever yarn you’ve chosen to use) You may be able to finish the whole set using just 1 ball of the Caron Cakes, but I wanted all of the colors in mine, so I used 2 of them and switched colors when needed.
6 mm (J) hook (or size needed for the type of yarn you’re using)
Buttons (if you’re making an ear warmer and you choose to use them)
Infinity Scarf/Ear Warmer:
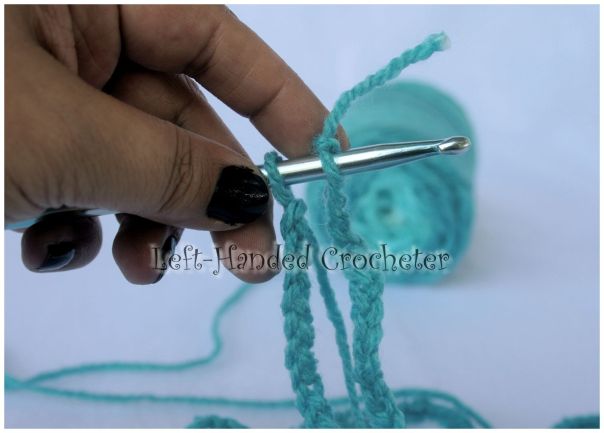
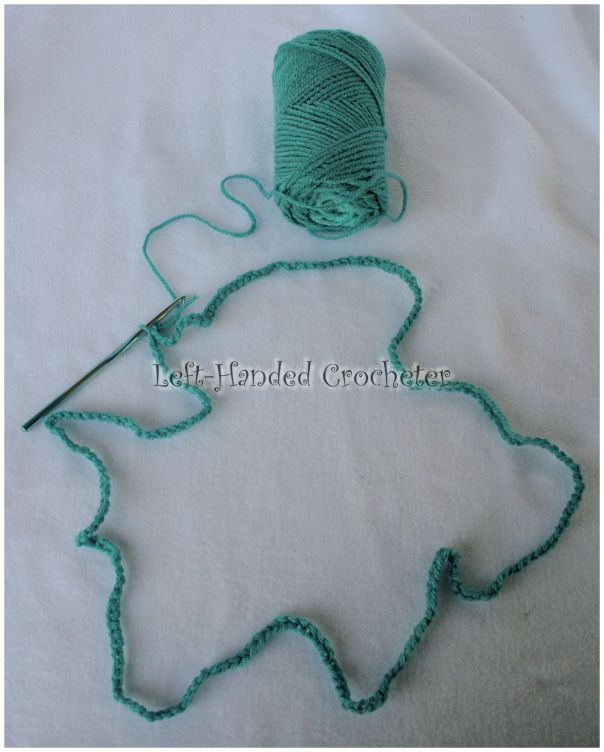
Ch 225 for the scarf, or ch 74 for the ear warmer. You can chain more or less to adjust the size.
Keeping the chain straight, sl st into first ch.
Now you should have a circle:
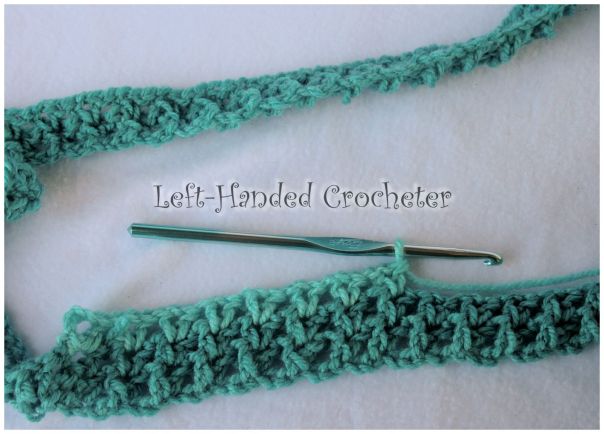
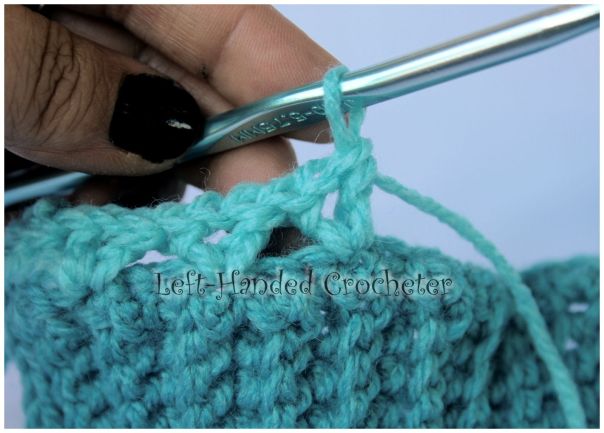
Round 1: Ch 4 (this is your first dc plus a ch 1), dc in same space you slip stitched into. *Skip 2 ch, in next ch dc, ch 1, dc. Repeat from * around.
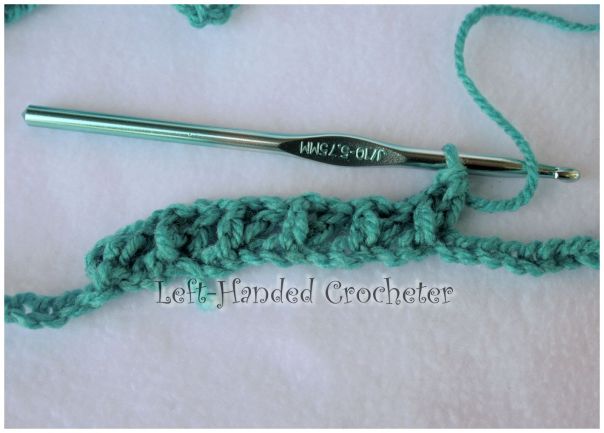
If you get to the end and you have an extra ch, you can skip 3. This is a very forgiving stitch, and it won’t effect the outcome of the project. At the end, sl st to the 3rd ch in your ch 4.
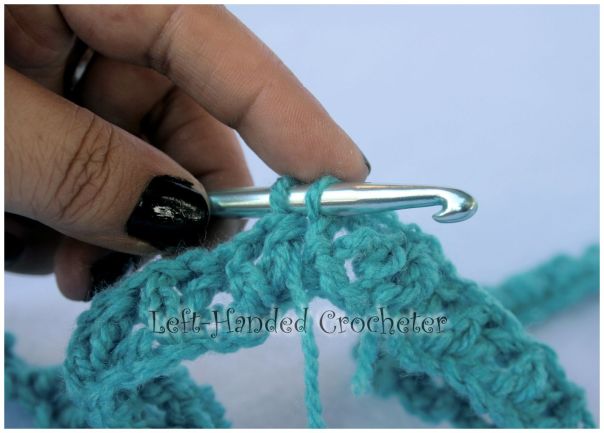
Round 2: Continuing around in the same direction, sl st into the first ch 1 space. Ch 4, dc into space. In each ch 1 space around, dc, ch 1, dc.

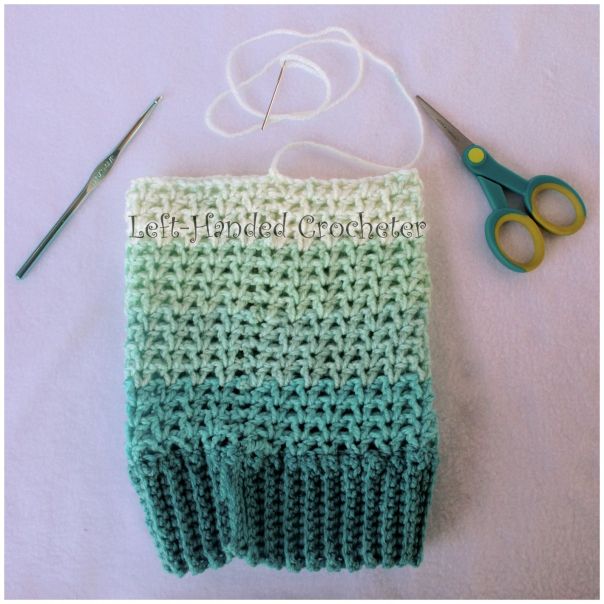
As you can see, this stitch makes a “v” and looks quite nice together. Using the Caron Cakes, I changed colors every 2 rows so I could control the colors that were in my scarf.
Continue until it reaches the width that you want it. For scarves, I usually do 9 or 10 rows:

For ear warmers/headbands, I stick to 8 rows:
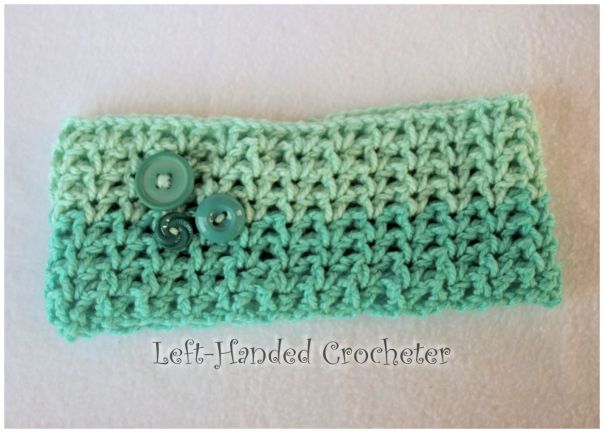
When it gets to the width you want it, tie off and weave in any loose ends. If you’re adding buttons to the ear warmer, I use the same yarn to attach them.

Hat:
Starting with your base color (the color you want at the bottom of the hat), ch 11.
Ribbing row 1: sc in 2nd ch from hook and in each ch across, ch 1, turn.
Ribbing rows 2-60: Working in 1 loop only, sc across, ch 1, turn. By working in only 1 loop, you created a textured ribbing for your hat.
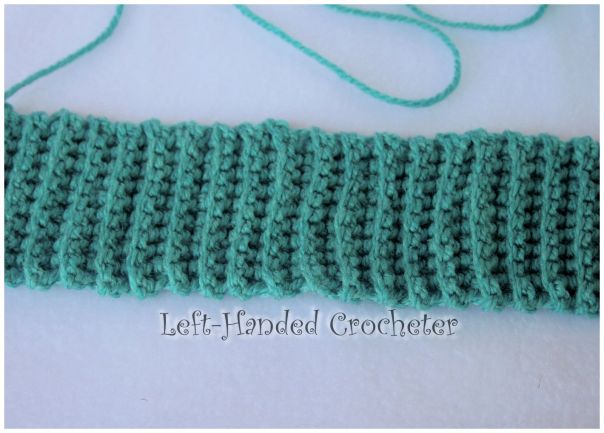
With the Caron Cakes, I did 60 rows for the ribbing to go around our heads. You can make the hat bigger or smaller by crocheting more or less rows, but remember that you want some stretch to this so it stays on.
Holding both ends together, ch 1, sc across to close up hat.

This creates a seam in your hat so this will be the inside when you’re finished.

Round 1: Ch 1. Working across the top of the hat, evenly space 66 sc around.

I find it’s helpful to make sure you’re working with the same color that you did the ribbing in so that this row doesn’t stand out too much. From this point, the hat will be working “in the round.”
Round 2: Sl st to first sc. Ch 4 (this is your first dc plus a ch 1), dc in same space you slip stitched into. *Skip 2 ch, in next ch dc, ch 1, dc. Repeat from * around.

At the end, sl st to the 3rd ch in your ch 4.
Round 3: Continuing around in the same direction, sl st into the first ch 1 space. Ch 4, dc into space. In each ch 1 space around, dc, ch 1, dc.

Continue until your hat reaches the length that you want it. I did 14-16 rows on all of the hats that I made. Making it longer will make it slouch more, but remember that if you’re attaching a ball at the end, it may pull it off of your head if it slouches too much.
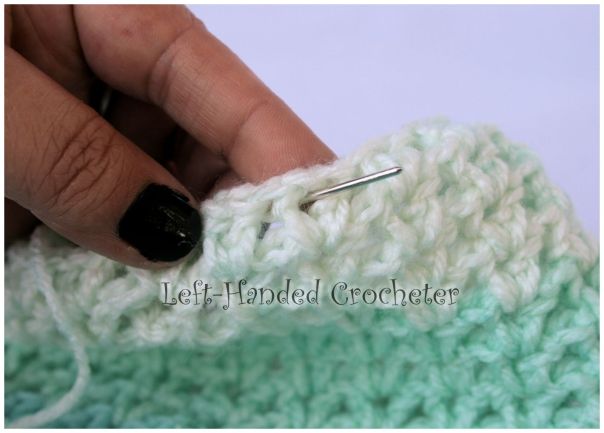
When you get to the end, tie off, leaving a long tail for sewing.
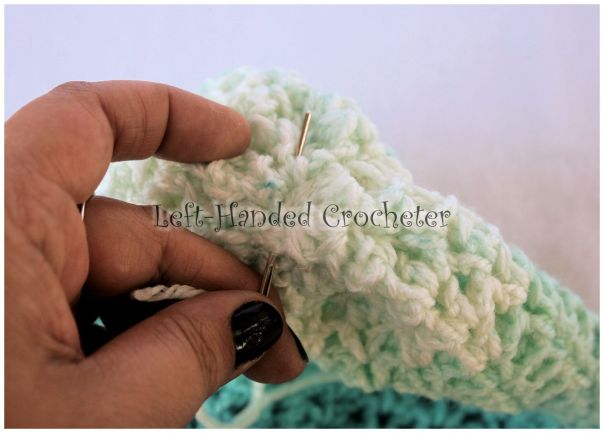
Using your yarn needle, weave the yarn in and out of each v-stitch:
When you get back to the beginning, pull the yarn tight to close up the top. You can put a few stitches into the top to close it tighter if you’d like to. Tie the yarn to one of the stitches to finish it.
Weave in any loose ends, and flip the hat around.

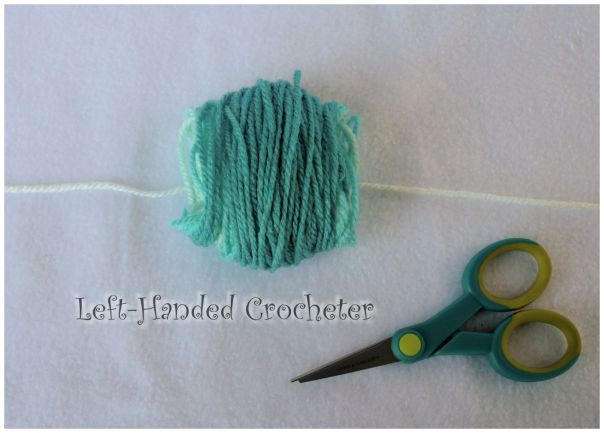
You can leave the hat like this if you’d like, but I really felt like it needed a pom-pom at the top of it. I love making pom-poms. I don’t have any of the pom-pom makers that you can buy, though. I just use whatever round object I have nearby that is the right size to make the pom-pom the size that I want it.

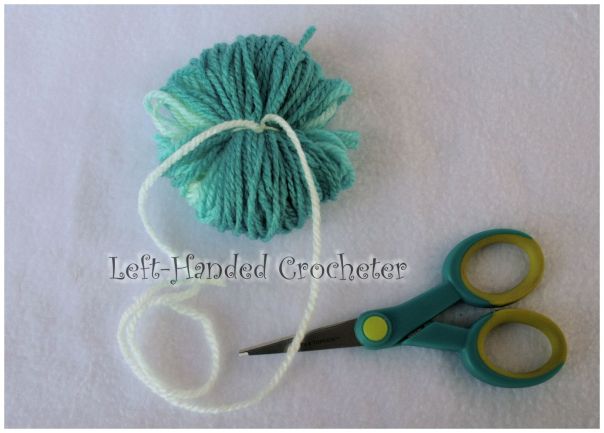
In this case, I used my Yoda kaleidoscope. I used each color from my Caron Cakes and wrapped it around until it was as thick as I wanted it. Then, I slipped the yarn off of the kaleidoscope and onto a piece of yarn.
Centering the yarn around the ball, I tied it tight.
Then I cut the loops on each side.
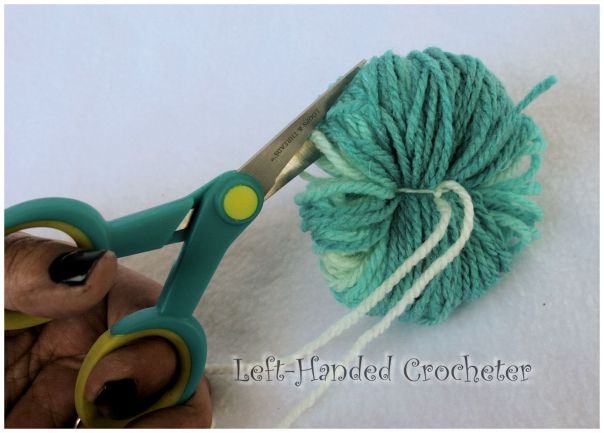

Once all of the loops were cut, I trimmed it all (making sure not to cut the piece I tied it with) until it was a fluffy ball, perfect for the top of my hat.

I used that long piece and pulled it through the top, then tied it on the inside and trimmed it. And voila, my hat was finished.
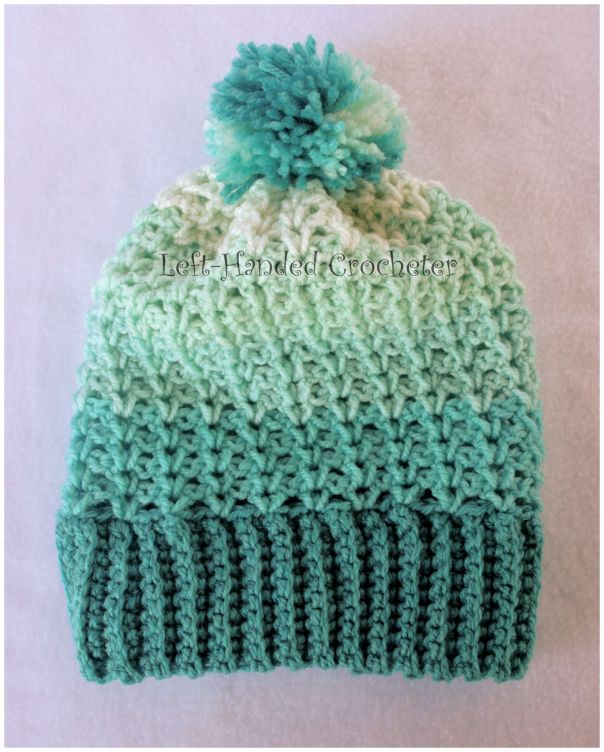
I made quite a few of these sets to test out my pattern, and so that each of us girls would have one to wear. Plus, I just couldn’t resist all of these colors that the Caron Cakes come in.
And because I couldn’t resist, I made myself an extra warm set using this yummy Loops and Threads Alpaca yarn.

I hope you love this v-stitch set as much as I do. If there are any mistakes in this pattern, or something is unclear, please feel free to leave me a comment and let me know. Or message me on Facebook. If you create any of these, be sure to post a photo on my Facebook page so I can see.

