
It is my opinion that everybody should have a cuddly teddy bear to hug at night. Who doesn’t love teddy bears, right? I wanted to design a cuddly bear to make for my little Peanut for Christmas. Yes, that’s him up there hugging his teddy bear. No, it’s not Christmas yet. It’s ok. He just turned 1 last month. I put the bear in a bag, and he’ll forget about it by Christmas. He loves every single stuffie that I crochet, and lately he thinks he has to hug and kiss each of them whenever he sees them.
These make a great gift for pretty much anybody, at any age. I designed him using Loops and Threads Charisma yarn because it’s a nice, soft, chunky yarn, which means it works up pretty quickly, but also because it goes on sale quite often at Michaels so I like to stock up on it.


If you want a pattern that you can save on your computer and easily print, this pattern is available in my Ravelry shop for only $2.00. I love printing patterns and saving them in a binder to keep track of the ones I’ve done and the ones I still plan to do.
With the Charisma yarn, it’s a pretty good sized bear, the perfect size for cuddling. You don’t have to limit yourself to Charisma yarn, though. I actually made this bear with a few different kinds of yarn, and I’ll post pictures after the pattern so you can see how it looks. Also, I’ve altered this base pattern to make a few other animals as well, which I’ll share with you in a later post. For now, here’s my Bailey the Bear pattern.
Abbreviations:
ch: chain
sc: single crochet
sl st: slip stitch
inc: increase (2 single crochets in one loop)
dec: decrease (pull yarn through loop, pull yarn through second loop, yarn over and pull through all loops)
Materials needed (with affiliate links):
Loops and Threads Charisma yarn (or any yarn, really)
L (8mm) crochet hook (or whatever size your yarn recommends)
20mm safety nose (you can sew a nose on if need be)
This pattern is worked “in-the-round”, and stitches are worked through both loops unless otherwise noted.
Head:
ch 3. Sl st to first ch to create circle. (Instead, you can perform the “magic circle” if you’d like.)
Row 1: ch 1, 10 sc inside of circle. (10 stitches)
Row 2: *Inc in first stitch, sc in next stitch , repeat from * around. (15 stitches)
Row 3: *Inc in first stitch, sc in next 2 stitches, repeat from * around. (20 stitches)
Row 4: *Inc in first stitch, sc in next 3 stitches, repeat from * around. (25 stitches)
Row 5: *Inc in first stitch, sc in next 4 stitches, repeat from * around. (30 stitches)
Row 6: *Inc in first stitch, sc in next 5 stitches, repeat from * around. (35 stitches)
Row 7: *Inc in first stitch, sc in next 6 stitches, repeat from * around. (40 stitches)
Rows 8-13: Sc in each stitch around. (40 stitches)
Row 14: *Dec in first 2 stitches, sc in next 6 stitches, repeat from * around. (35 stitches)
Row 15: *Dec in first 2 stitches, sc in next 5 stitches, repeat from * around. (30 stitches)
Row 16: *Dec in first 2 stitches, sc in next 4 stitches, repeat from * around. (25 stitches)
Row 17: *Dec in first 2 stitches, sc in next 3 stitches, repeat from * around. (20 stitches)
Tie off. Stuff tight with poly-fil.
Body:
ch 3. Sl st to first ch to create circle. (Instead, you can perform the “magic circle” if you’d like.)
Row 1: ch 1, 10 sc inside of circle. (10 stitches)
Row 2: *Inc in first stitch, sc in next stitch , repeat from * around. (15 stitches)
Row 3: *Inc in first stitch, sc in next 2 stitches, repeat from * around. (20 stitches)
Row 4: *Inc in first stitch, sc in next 3 stitches, repeat from * around. (25 stitches)
Row 5: *Inc in first stitch, sc in next 4 stitches, repeat from * around. (30 stitches)
Row 6: *Inc in first stitch, sc in next 5 stitches, repeat from * around. (35 stitches)
Rows 7-9: Sc in each stitch around. (35 stitches)
Row 10: *Dec in first 2 stitches, sc in next 5 stitches, repeat from * around. (30 stitches)
Row 11: Sc in each stitch around. (30 stitches)
Row 12: *Dec in first 2 stitches, sc in next 4 stitches, repeat from * around. (25 stitches)
Row 13: Sc in each stitch around. (25 stitches)
Row 14: *Dec in first 2 stitches, sc in next 3 stitches, repeat from * around. (20 stitches)
Row 15: Sc in each stitch around. (20 stitches)
Tie off. Stuff tight with poly-fil.
Arms:
ch 3. Sl st to first ch to create circle. (Instead, you can perform the “magic circle” if you’d like.)
Row 1: ch 1, 10 sc inside of circle. (10 stitches)
Row 2: *Inc in first stitch, sc in next stitch , repeat from * around. (15 stitches)
Rows 3-7: Sc in each stitch around. (15 stitches)
Row 8: *Dec in first 2 stitches, sc in next stitch, repeat from * around. (10 stitches)
Rows 9-14: Sc in each stitch around. (10 stitches)
Tie off. Stuff halfway with poly-fil, pushing it to the bottom of the arms.
Legs:
ch 3. Sl st to first ch to create circle. (Instead, you can perform the “magic circle” if you’d like.)
Row 1: ch 1, 10 sc inside of circle. (10 stitches)
Row 2: *Inc in first stitch, sc in next stitch , repeat from * around. (15 stitches)
Row 3: *Inc in first stitch, sc in next 2 stitches, repeat from * around. (20 stitches)
Rows 4-8: Sc in each stitch around. (20 stitches)
Row 9: *Dec in first 2 stitches, sc in next 2 stitches, repeat from * around. (15 stitches)
Rows 10-13: Sc in each stitch around. (15 stitches)
Row 14: *Dec in first 2 stitches, sc in next stitch, repeat from * around. (10 stitches)
Rows 15-17: Sc in each stitch around. (10 stitches)
Tie off. Stuff halfway with poly-fil, pushing it to the bottom of the legs.
Ears:
ch 3. Sl st to first ch to create circle. (Instead, you can perform the “magic circle” if you’d like.)
Row 1: ch 1, 10 sc inside of circle. (10 stitches)
Row 2: *Inc in first stitch, sc in next stitch , repeat from * around. (15 stitches)
Rows 3-5: Sc in each stitch around. (15 stitches)
Tie off. Flatten circles before sewing onto head.
Tail:
ch 3. Sl st to first ch to create circle. (Instead, you can perform the “magic circle” if you’d like.)
Row 1: ch 1, 10 sc inside of circle. (10 stitches)
Rows 2-3: Sc in each stitch around. (10 stitches)
Tie off. Sew to back of body and stuff lightly with poly-fil before the last couple of stitches.
Use your yarn needle and yarn to sew the pieces together. I like to sew the ears onto the head first. Then I put the face on and center it between the ears. I also like to stuff the head before sewing anything on, and before deciding where to place the face. Once you attach the back to the safety eyes and nose, you can’t move them, so be sure you have them where you want them. I also like to take a bit of felt and put it behind the eyes to give them a “sad” look. Next, I sew the head onto the body. Then I sew the arms on, then the legs, and I sew the tail on last. Sewing the pieces on can be tricky when you’re trying to make them even, but remember that you can always remove one if you need to and reattach it. It can also help to use straight pins to pin both ears, arms, legs, etc. in place before actually sewing them on.
I love the Charisma tweed yarns the best, but I also wanted to try this bear with some other chunky, soft yarn. This one was made with Loops and Threads Country Loom yarn, which is a super bulky size 6 yarn.


It’s a bit bigger, but it’s so soft and squishy.
I also made a small bear using baby yarn. This one is actually an accessory for something else that I made, but I think it’s adorable. Baby yarn makes a bear the perfect size for stuffing in stockings this Christmas.
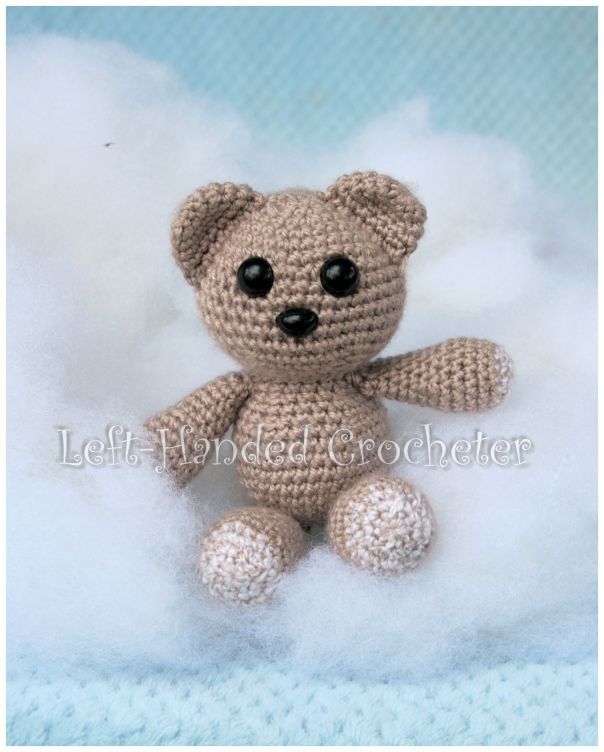
I found this super soft Buttercream Angel Hair yarn at Joann’s the other day, and decided it would make a great teddy bear for my new granddaughter.


And then there’s my favorite bear. This last one I actually made for me. I need something soft and squishy to hug at night too, you know.


That one was made with Red Heart Buttercup yarn. If you’ve never worked with this yarn, I honestly recommend that you don’t. lol Personally, I love this yarn and the Bernat Pipsqueak, but they’re really hard to work with. You can’t see your stitches at all, so it’s tough to keep track of where you’re at, and to avoid making mistakes. The one big plus to this yarn (besides the fact that it is heavenly soft) is that it also hides mistakes pretty well. So if you’re experienced with crocheting and with working with a lot of different kinds of yarn, then definitely make a bear with Buttercup yarn. You’ll love the way it turns out.
And here’s my whole family of bears that I’ve made in the last week or so.
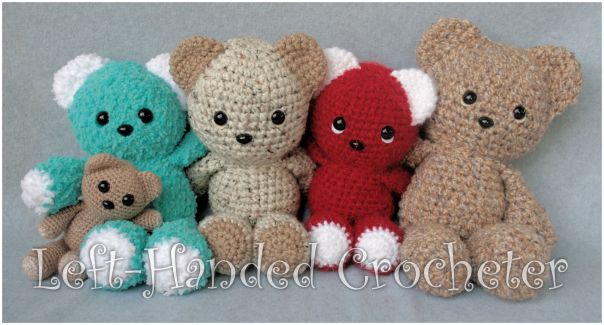
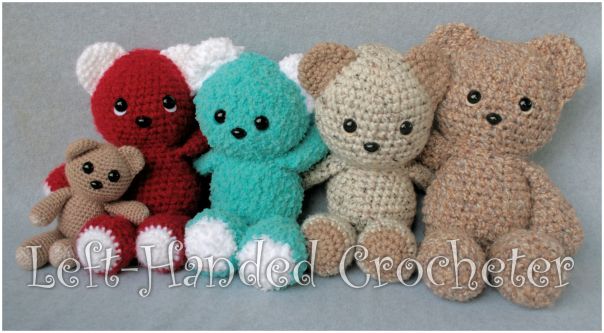
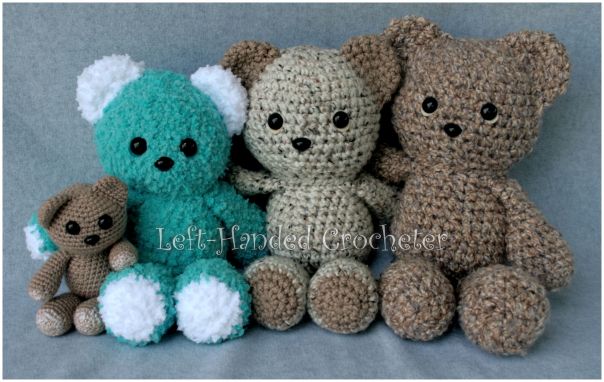
Side note: It didn’t take me more than 2 skeins of yarn for each of these, and they were normal, smaller skeins of yarn.
Bears aren’t your thing? Next week, I’ll be posting some other animals that you can make using this base pattern, so stay tuned. **EDIT: NEW ANIMALS POSTED. YOU CAN FIND THEM HERE.**
I hope you enjoy this pattern! If there are any mistakes, or something is unclear, please feel free to leave me a comment and let me know. Or message me on Facebook. If you create any teddy bears of your own, be sure to post a photo on my Facebook page so I can see. I love seeing all of the things people are creating, and I’d love to see the different variations that people make of these.


Wow, beautiful
Kinda looks like Pooky, Garfield’s bear…
That’s so funny, Heidi. When I made the first one, which was the little one, that’s exactly what I said. I always loved his teddy bear, so it made me happy that it looked so much like him.