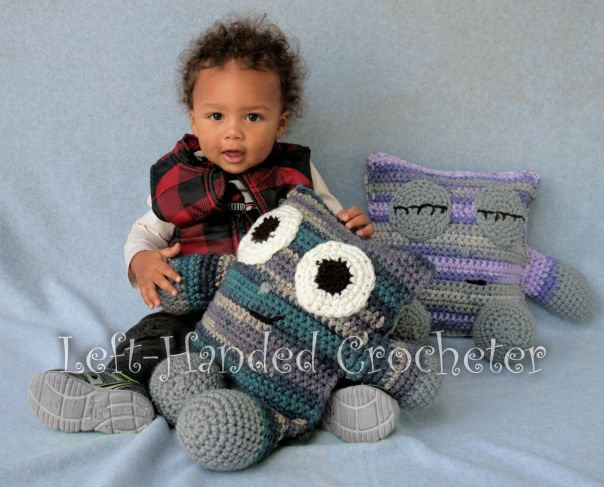
Do you remember DJ Tanner’s pillow person on Full House? That’s what these remind me of. Funny story, but when I got the idea to make these, I was actually making it for me. A long time ago, I was in a car accident where I injured my neck and shoulders. Lately, I’ve been having problems with my shoulders hurting and being tense when I wake up in the morning. I’m a side-sleeper, so I decided what I needed was a pillow to hug at night to keep my shoulder straighter while I sleep. So I picked up a pillow form for myself, then decided it was too boring, and I needed to do something with it. This started the idea to make my pillow into a pillow person.
If you want a pattern that you can save on your computer and easily print, this pattern is available in my Ravelry shop for only $2.00. I love printing patterns and saving them in a binder to keep track of the ones I’ve done and the ones I still plan to do.
My pillow was 12 x 16 inch, but I decided some cute 12 x 12 pillows would be perfect for the grandbabies for Christmas. So here’s how I made my pillow people.
Abbreviations:
ch: chain
sc: single crochet
sl st: slip stitch
inc: increase (2 single crochets in one loop)
dec: decrease (pull yarn through loop, pull yarn through second loop, yarn over and pull through all loops)
Materials needed (with affiliate links):
Loops and Threads Charisma yarn. Color A will be your main, variegated color. Color B will be your secondary, solid color. If you want to do open eyes on one side, you’ll also need some black and white.
Black yarn for the mouth and eyelashes. If you’re doing open eyes, you can just use the black charisma yarn that you bought for them. If not, you could use pretty much any black yarn to sew on the mouth and eyelashes.
L (8mm) crochet hook (or whatever size your yarn recommends)
Body
With color A, ch. 31
Row 1: Sc in 2nd ch from hook and in each ch across, ch 1, turn. (30 stitches)
Rows 2-35: Sc in each row across, ch 1, turn. (30 stitches)
Make 2 of these, one for each side of the pillow. Since everybody stitches differently, be sure to check your work as you go by laying it across your pillow form to be sure it will fit right.
Arms
With color B, ch 3. Sl st to first ch to create circle. (Instead, you can perform the “magic circle” if you’d like.)
Row 1: ch 1, 10 sc inside of circle. (10 stitches)
Row 2: *Inc in first stitch, sc in next stitch , repeat from * around. (15 stitches)
Row 3: *Inc in first stitch, sc in next 2 stitches, repeat from * around. (20 stitches)
Rows 4-7: Sc in each stitch around. (20 stitches)
Switch to color A
Rows 8-11: Sc in each stitch around. (20 stitches)
Row 12: *Dec in first 2 stitches, sc in next 2 stitches, repeat from * around. (15 stitches)
Rows 13-16: Sc in each stitch around. (15 stitches)
Tie off. Stuff halfway.
Legs
With color B, ch 3. Sl st to first ch to create circle. (Instead, you can perform the “magic circle” if you’d like.)
Row 1: ch 1, 10 sc inside of circle. (10 stitches)
Row 2: *Inc in first stitch, sc in next stitch , repeat from * around. (15 stitches)
Row 3: *Inc in first stitch, sc in next 2 stitches, repeat from * around. (20 stitches)
Row 4: *Inc in first stitch, sc in next 3 stitches, repeat from * around. (25 stitches)
Rows 5-9: Sc in each stitch around. (25 stitches)
Switch to color A
Row 10: Sc in each stitch around. (25 stitches)
Row 11: *Dec in first 2 stitches, sc in next 3 stitches, repeat from * around. (20 stitches)
Rows 12-14: Sc in each stitch around. (20 stitches)
Row 15: *Dec in first 2 stitches, sc in next 2 stitches, repeat from * around. (15 stitches)
Rows 16-19: Sc in each stitch around. (15 stitches)
Tie off. Stuff halfway.
Eyes (Closed)
With color B, ch 3. Sl st to first ch to create circle. (Instead, you can perform the “magic circle” if you’d like.)
Row 1: ch 1, 10 sc inside of circle. (10 stitches)
Row 2: *Inc in first stitch, sc in next stitch , repeat from * around. (15 stitches)
Row 3: *Inc in first stitch, sc in next 2 stitches, repeat from * around. (20 stitches)
Row 4: *Inc in first stitch, sc in next 3 stitches, repeat from * around. (25 stitches)
Row 5: Sc in each stitch around. (25 stitches)
Tie off. Use black yarn to stitch on eyelashes.
Eyes (Open)
With black, ch 3. Sl st to first ch to create circle. (Instead, you can perform the “magic circle” if you’d like.)
Row 1: ch 1, 10 sc inside of circle. (10 stitches)
Row 2: *Inc in first stitch, sc in next stitch , repeat from * around. (15 stitches)
Switch to white
Row 3: *Inc in first stitch, sc in next 2 stitches, repeat from * around. (20 stitches)
Row 4: *Inc in first stitch, sc in next 3 stitches, repeat from * around. (25 stitches)
Row 5: Sc in each stitch around. (25 stitches)
Tie off.
Now that you have all of your pieces finished, it’s time to sew it all together.

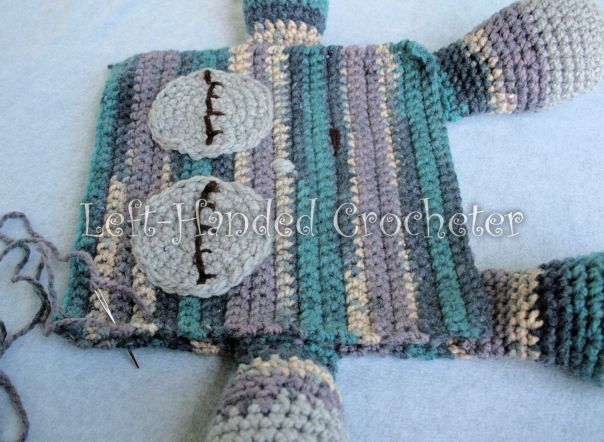
To put the eyes on, I first used a little bit of hot glue in the center and put them in place. Then I used matching yarn to sew around them and attach them to the main pieces. Once the eyes are in place, stitch a mouth on using black yarn, and stitch a nose on using color B.
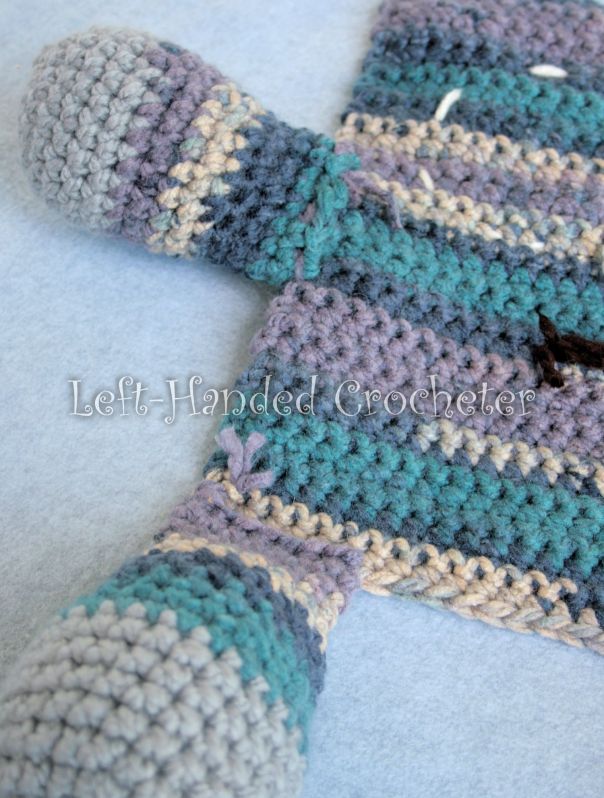
You can just sew the main pieces together, and sew the arm and legs to them, but I was worried that would make the arms and legs more flimsy and easier to stretch or break off. I decided to do them differently. First, I sewed the arms and legs to the wrong side of just one of the main pieces.

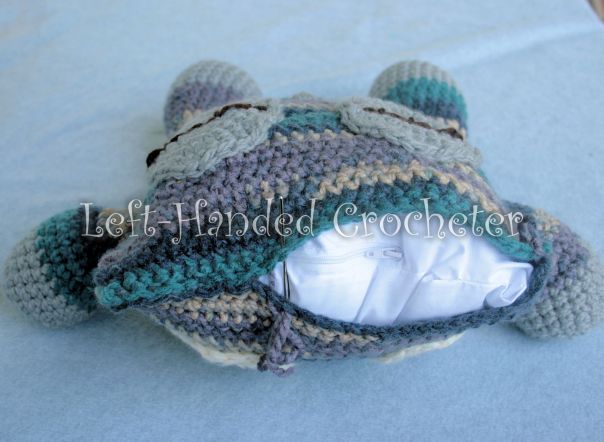
Next, I laid the other piece on top and sewed around them, down one side, across the bottom, then back up the other side.
Be sure when you get to the arms and legs that you sew through all of the layers.

Once you get back to the top, insert the pillow form.

Squeeze it tight and sew across the top.
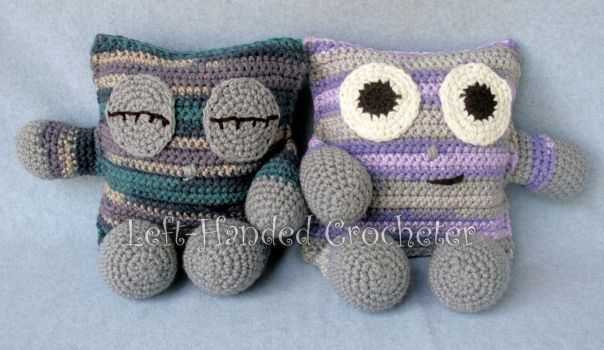
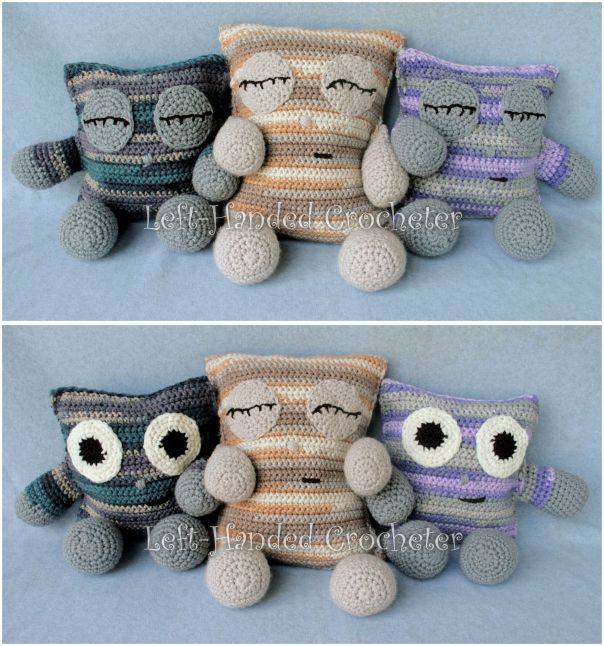
And your pillow person is finished. I made 2 of them for my 2 grandsons, with closed eyes on one side and opened eyes on the other side.


I think they’re really cute, and the Charisma yarn makes them so soft and cuddly.
You can also do different sizes, like I did with my 12 x 16 inch pillow, you just have to adjust the amount of stitches in your main pieces.
I hope you enjoy this pattern! If there are any mistakes, or something is unclear, please feel free to leave me a comment and let me know. Or message me on Facebook. If you create any pillow people of your own, be sure to post a photo on my Facebook page so I can see. I love seeing all of the things people are creating, and I’d love to see the different variations that people make of these.

