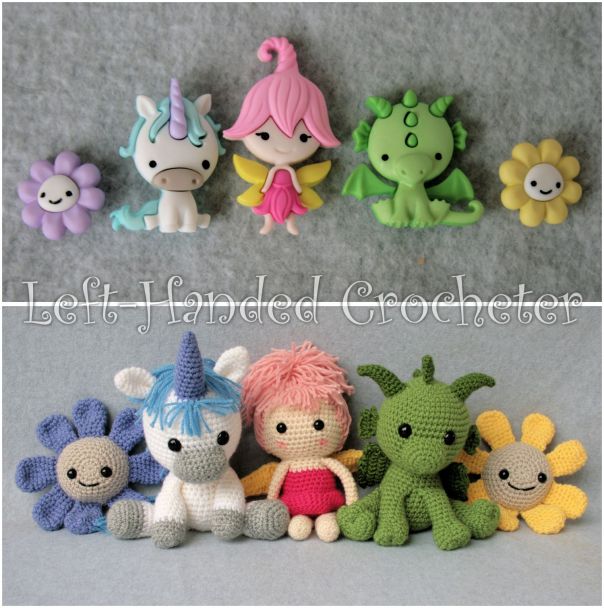
Up next in my fairytale series is Philip the Dragon. If you missed the first post for this series, Stanley the Unicorn, go check it out. And be sure to check out Poppy the Fairy and the fairytale Flowers.
If you want a pattern that you can save on your computer and easily print, this pattern is available in my Ravelry shop for only $2.00. Or you can get my whole Fairytale Series for only $5.00. I love printing patterns and saving them in a binder to keep track of the ones I’ve done and the ones I still plan to do.
*SIDE NOTE* I have horrible lighting in my house, so I don’t usually take pictures of my work “in progress.” There were a few pieces of each of these patterns, though, that I knew would benefit from in progress pictures. So I took some in my bedroom with my cell phone, using the terrible lighting that I have in there. They aren’t the best pictures, but I figured that they’re better than nothing.
Abbreviations:
ch: chain
sc: single crochet
sl st: slip stitch
dc: double crochet
inc: increase (2 single crochets in one loop)
dec: decrease (pull yarn through loop, pull yarn through second loop, yarn over and pull through all loops)
Materials needed (with affiliate links):
Lion Brand Vanna’s Choice yarn in fern and kelly green.
This pattern is worked “in-the-round”, and stitches are worked through both loops unless otherwise noted.
Head:
With fern, ch 3. Sl st to first ch to create circle. (Instead, you can perform the “magic circle” if you’d like.)
Row 1: ch 1, 10 sc inside of circle. (10 stitches)
Row 2: *Inc in first stitch, sc in next stitch , repeat from * around. (15 stitches)
Row 3: *Inc in first stitch, sc in next 2 stitches, repeat from * around. (20 stitches)
Row 4: *Inc in first stitch, sc in next 3 stitches, repeat from * around. (25 stitches)
Row 5: *Inc in first stitch, sc in next 4 stitches, repeat from * around. (30 stitches)
Row 6: *Inc in first stitch, sc in next 5 stitches, repeat from * around. (35 stitches)
Row 7: *Inc in first stitch, sc in next 6 stitches, repeat from * around. (40 stitches)
Row 8: *Inc in first stitch, sc in next 7 stitches, repeat from * around. (45 stitches)
Row 9: *Inc in first stitch, sc in next 8 stitches, repeat from * around. (50 stitches)
Rows 10-15: Sc in each stitch around. (50 stitches)
Row 16: *Dec in first 2 stitches, sc in next 8 stitches, repeat from * around. (45 stitches)
Row 17: *Dec in first 2 stitches, sc in next 7 stitches, repeat from * around. (40 stitches)
Row 18: *Dec in first 2 stitches, sc in next 6 stitches, repeat from * around. (35 stitches)
Row 19: *Dec in first 2 stitches, sc in next 5 stitches, repeat from * around. (30 stitches)
Row 20: *Dec in first 2 stitches, sc in next 4 stitches, repeat from * around. (25 stitches)
Row 21: *Dec in first 2 stitches, sc in next 3 stitches, repeat from * around. (20 stitches)
Tie off. Stuff with poly-fil.
Snout:
With fern, ch 3. Sl st to first ch to create circle. (Instead, you can perform the “magic circle” if you’d like.)
Row 1: ch 1, 10 sc inside of circle. (10 stitches)
Row 2: *Inc in first stitch, sc in next stitch , repeat from * around. (15 stitches)
Row 3: *Inc in first stitch, sc in next 2 stitches, repeat from * around. (20 stitches)
Rows 4-5: Sc in each stitch around. (20 stitches)
Tie off.
Horns:
With kelly green, ch 3. Sl st to first ch to create circle. (Instead, you can perform the “magic circle” if you’d like.)
Row 1: ch 1, 4 sc inside of circle. (4 stitches)
Row 2: Sc in each stitch around. (4 stitches)
Row 3: *Inc in first stitch, sc in next stitch , repeat from * around. (6 stitches)
Row 4: Sc in each stitch around. (6 stitches)
Row 5: *Inc in first stitch, sc in next 2 stitches, repeat from * around. (8 stitches)
Rows 6-8: Sc in each stitch around. (8 stitches)
Row 9: *Inc in first stitch, sc in next 3 stitches, repeat from * around. (10 stitches)
Rows 10-11: Sc in each stitch around. (10 stitches)
Tie off. Stuff with poly-fil.
Ear Flaps:
With kelly green, ch. 5.
Row 1: Sc in 2nd ch from hook and in each ch across, ch 1, turn. (4 stitches)
Row 2: Inc in first stitch, sc in next 2 stitches, inc in last stitch, ch 3, turn. (6 stitches)
Row 3: Sl st in 2nd stitch, dc in next 2 stitches, sl st in next stitch, dc in last stitch. (6 stitches, counting ch 3 as first dc)
Tie off. Make 4.

Sew 2 together, but only sew the first 2 rows. leaving the last row unstitched.
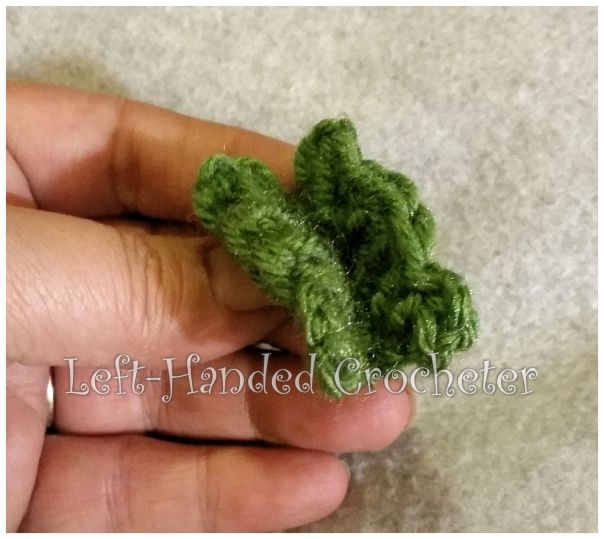
Scales:
With kelly green, ch 3. Sl st to first ch to create circle. (Instead, you can perform the “magic circle” if you’d like.)
Row 1: ch 1, 4 sc inside of circle. (4 stitches)
Row 2: Sc in each stitch around. (4 stitches)
Row 3: *Inc in first stitch, sc in next stitch , repeat from * around. (6 stitches)
Row 4: *Inc in first stitch, sc in next 2 stitches, repeat from * around. (8 stitches)
Row 5: *Inc in first stitch, sc in next 3 stitches, repeat from * around. (10 stitches)
Row 6: Sc in each stitch around. (10 stitches)
Tie off. Make 3. Lay flat.

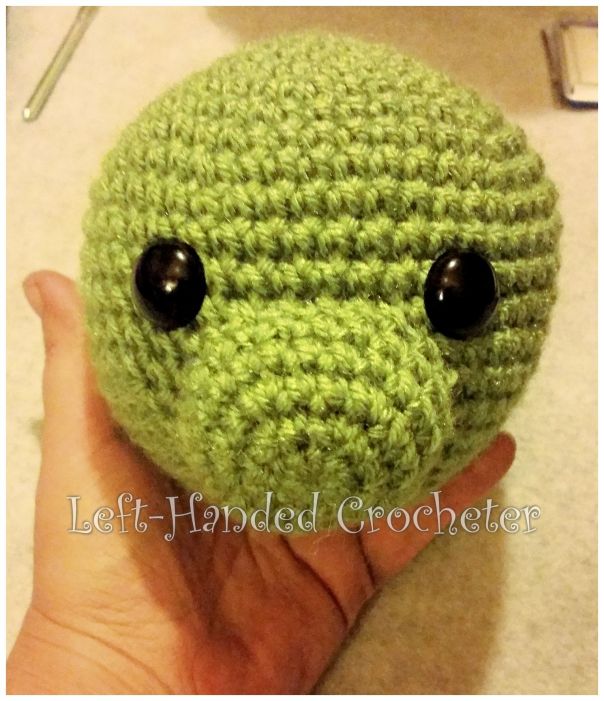
Gather up all of the pieces to assemble your dragon head. Center the snout, and use straight pins to hold it in place as you sew.
Stop periodically to make sure it’s not shifting or going on crooked. Before you sew up the last few stitches, stuff with poly-fil.
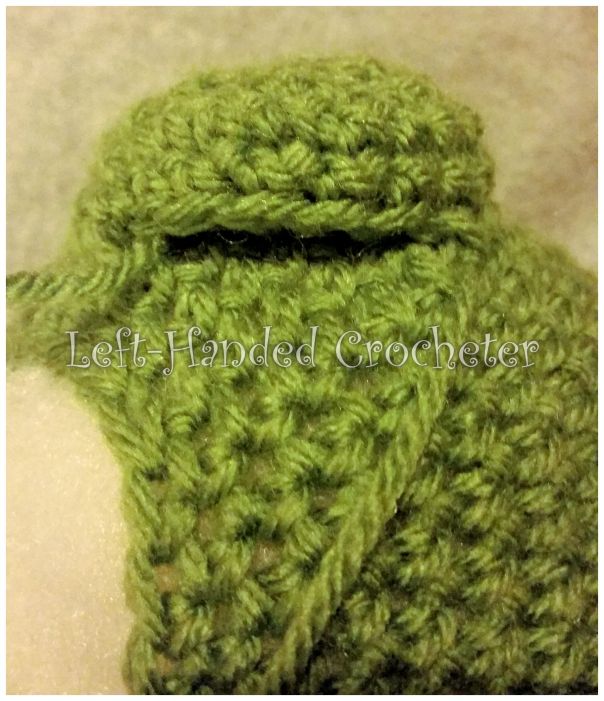
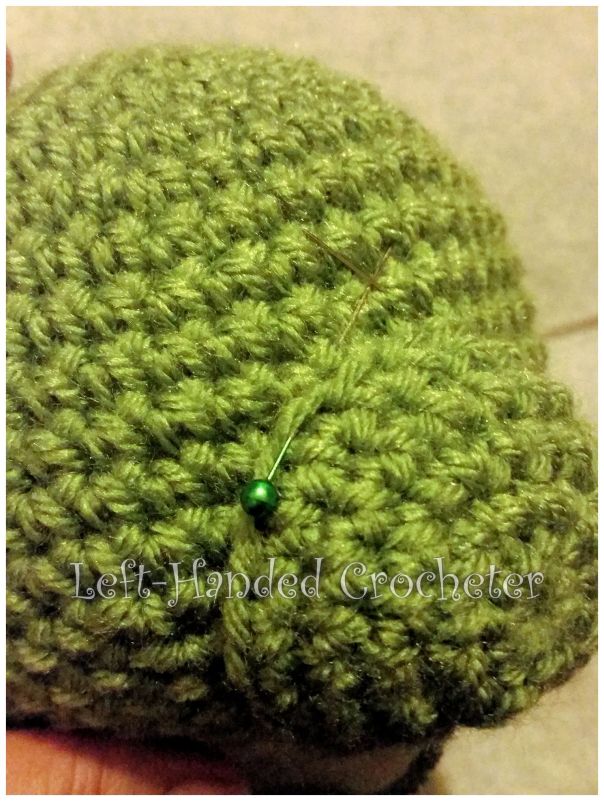
Figure out your placement for the safety eyes. I don’t put the backs on until I’m completely done with the head, because once those backs are on, you can’t take them off.
Sew the horns onto the top of the head, making sure they’re even. Sew the ear flaps underneath the horns. Sew the 3 scales on, placing one on top of the head between the horns, and spacing the other 2 along the back of the head.


Body:
With fern, ch 3. Sl st to first ch to create circle. (Instead, you can perform the “magic circle” if you’d like.)
Row 1: ch 1, 10 sc inside of circle. (10 stitches)
Row 2: *Inc in first stitch, sc in next stitch, repeat from * around. (15 stitches)
Row 3: *Inc in first stitch, sc in next 2 stitches, repeat from * around. (20 stitches)
Row 4: *Inc in first stitch, sc in next 3 stitches, repeat from * around. (25 stitches)
Row 5: *Inc in first stitch, sc in next 4 stitches, repeat from * around. (30 stitches)
Row 6: *Inc in first stitch, sc in next 5 stitches, repeat from * around. (35 stitches)
Row 7: *Inc in first stitch, sc in next 6 stitches, repeat from * around. (40 stitches)
Row 8: *Dec in first 2 stitches, sc in next 6 stitches, repeat from * around. (35 stitches)
Rows 9-11: Sc in each stitch around. (35 stitches)
Row 12: *Dec in first 2 stitches, sc in next 5 stitches, repeat from * around. (30 stitches)
Row 13: Sc in each stitch around. (30 stitches)
Row 14: *Dec in first 2 stitches, sc in next 4 stitches, repeat from * around. (25 stitches)
Row 15: Sc in each stitch around. (25 stitches)
Row 16: *Dec in first 2 stitches, sc in next 3 stitches, repeat from * around. (20 stitches)
Row 17: Sc in each stitch around. (20 stitches)
Tie off. Stuff with poly-fil.
Back Legs:
With fern, ch 3. Sl st to first ch to create circle. (Instead, you can perform the “magic circle” if you’d like.)
Row 1: ch 1, 10 sc inside of circle. (10 stitches)
Row 2: *Inc in first stitch, sc in next stitch, repeat from * around. (15 stitches)
Row 3: *Inc in first stitch, sc in next 2 stitches, repeat from * around. (20 stitches)
Row 4: *Inc in first stitch, sc in next 3 stitches, repeat from * around. (25 stitches)
Row 5: *Dec in first 2 stitches, sc in next 3 stitches, repeat from * around. (20 stitches)
Rows 6-7: Sc in each stitch around. (20 stitches)
Row 8: Sc in first 5 stitches, dec in next 10 stitches (5 dec’s), sc in last 5 stitches. (15 stitches)
Rows 9-13: Sc in each stitch around. (15 stitches)
Row 14: *Dec in first 2 stitches, sc in next stitch, repeat from * around. (10 stitches)
Rows 15-16: Sc in each stitch around. (10 stitches)
Tie off. Stuff with poly-fil. Leave last few rows unstuffed and fold flat.
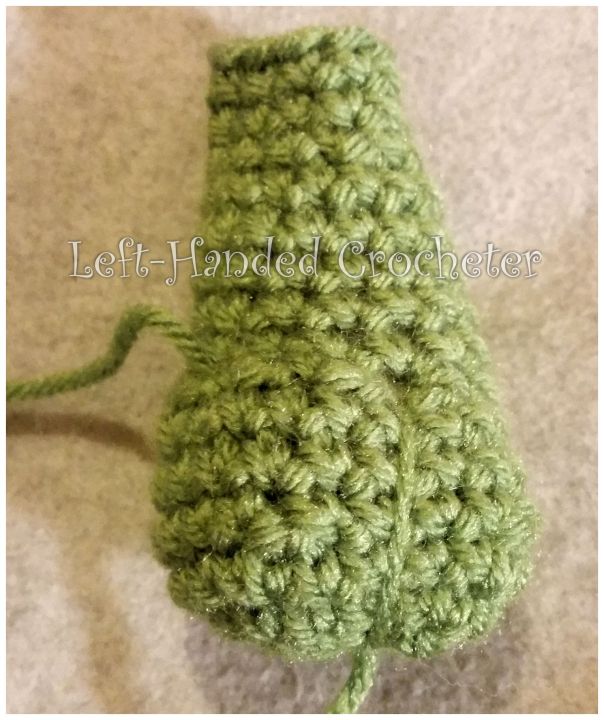
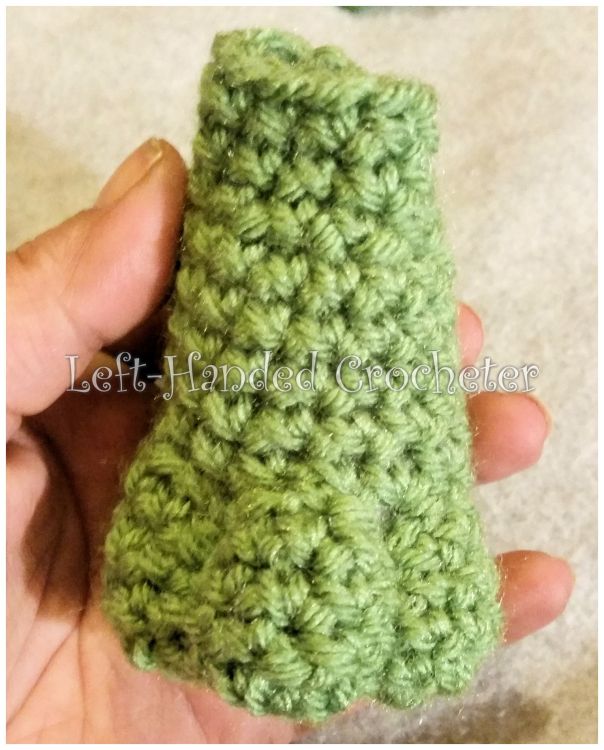
Front Legs:
With fern, ch 3. Sl st to first ch to create circle. (Instead, you can perform the “magic circle” if you’d like.)
Row 1: ch 1, 10 sc inside of circle. (10 stitches)
Row 2: *Inc in first stitch, sc in next stitch , repeat from * around. (15 stitches)
Row 3: *Inc in first stitch, sc in next 2 stitches, repeat from * around. (20 stitches)
Row 4: *Dec in first 2 stitches, sc in next 2 stitches, repeat from * around. (15 stitches)
Rows 5-6: Sc in each stitch around. (15 stitches)
Row 7: Sc in first 3 stitches, dec in next 10 stitches (5 dec’s), sc in last 2 stitches. (10 stitches)
Rows 8-15: Sc in each stitch around. (10 stitches)
Tie off. Stuff with poly-fil. Leave last few rows unstuffed and fold flat.
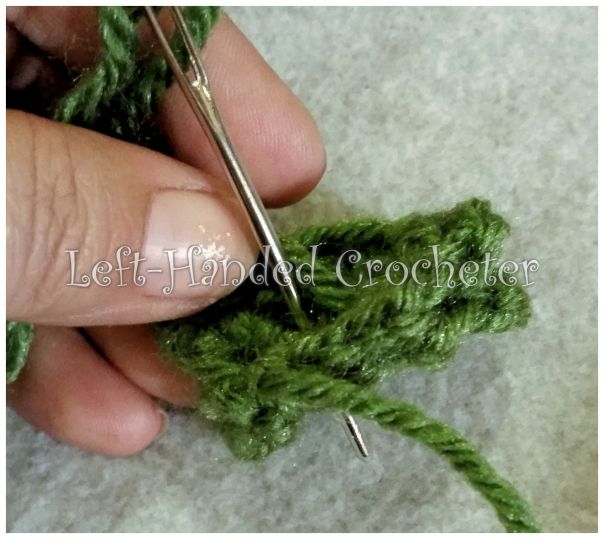
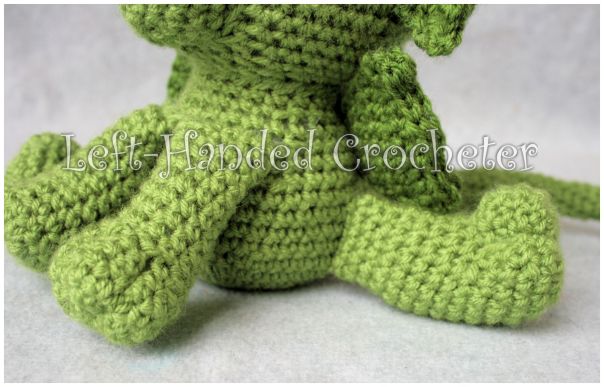
To make toes, use a piece of fern yarn and the yarn needle. Stick your needle through the bottom of the foot…

Then come up by your decrease row. Insert back through the bottom, then come up by the decrease row again…
Pull the yarn tight. You can adjust where the yarn goes to make the toes more even. Tie the end and weave them in.

If you have a hard time with this step, you can always skip making the toes and just leave the feet as is.
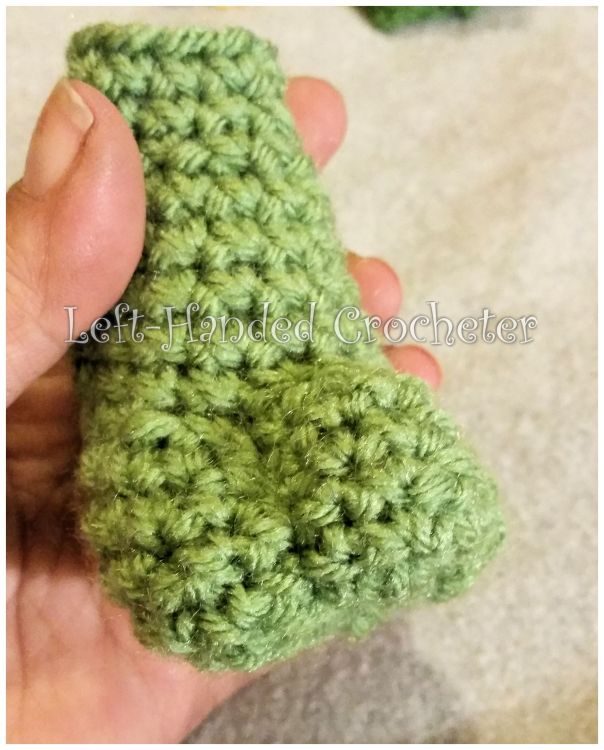
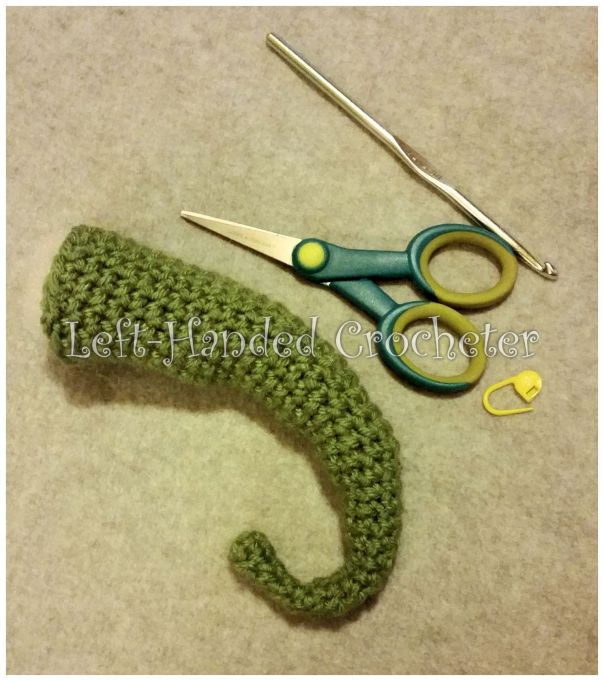
Tail:
With fern, ch 3. Sl st to first ch to create circle. (Instead, you can perform the “magic circle” if you’d like.)
Row 1: ch 1, 4 sc inside of circle. (4 stitches)
Rows 2-5: Sc in each stitch around. (4 stitches)
Row 6: *Inc in first stitch, sc in next stitch , repeat from * around. (6 stitches)
Rows 7-10: Sc in each stitch around. (6 stitches)
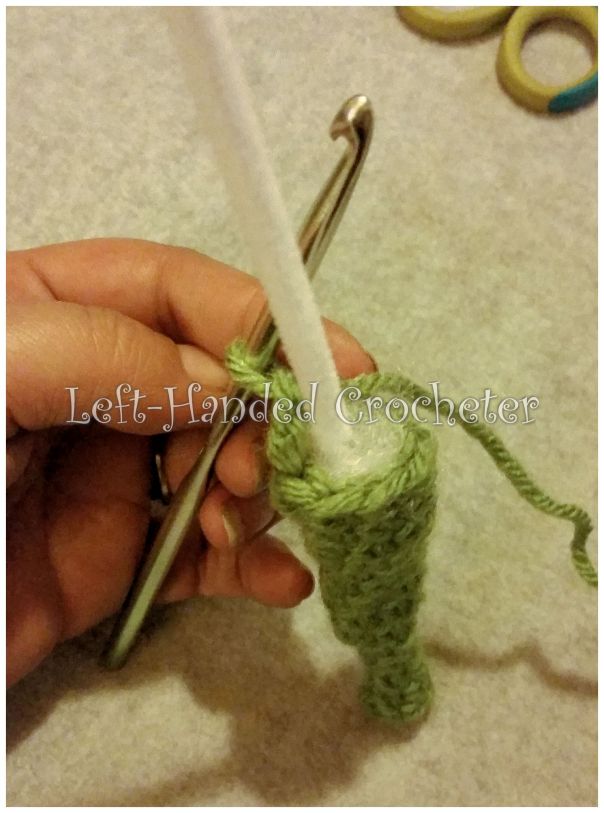
Insert your pipe cleaner at this point, and crochet around it.

Row 11: *Inc in first stitch, sc in next 2 stitches, repeat from * around. (8 stitches)
Rows 12-15: Sc in each stitch around. (8 stitches)
Start pushing poly-fil in around the pipe cleaner.
Row 16: *Inc in first stitch, sc in next 3 stitches, repeat from * around. (10 stitches)
Rows 17-20: Sc in each stitch around. (10 stitches)
Continue stuffing with poly-fil around the pipe cleaner as you go.

Row 21: *Inc in first stitch, sc in next 4 stitches, repeat from * around. (12 stitches)
Rows 22-23: Sc in each stitch around. (12 stitches)
Row 24: *Inc in first stitch, sc in next 5 stitches, repeat from * around. (14 stitches)
Rows 25-26: Sc in each stitch around. (14 stitches)
Row 27: *Inc in first stitch, sc in next 6 stitches, repeat from * around. (16 stitches)
Rows 28-29: Sc in each stitch around. (16 stitches)
Row 30: *Inc in first stitch, sc in next 7 stitches, repeat from * around. (18 stitches)
Rows 31-32: Sc in each stitch around. (18 stitches)
Row 33: *Inc in first stitch, sc in next 8 stitches, repeat from * around. (20 stitches)
Rows 34-35: Sc in each stitch around. (20 stitches)
Tie off. Cut off the end of the pipe cleaner.

The pipe cleaner will really only curl the end of the tail, but that’s all of the curl that you need.
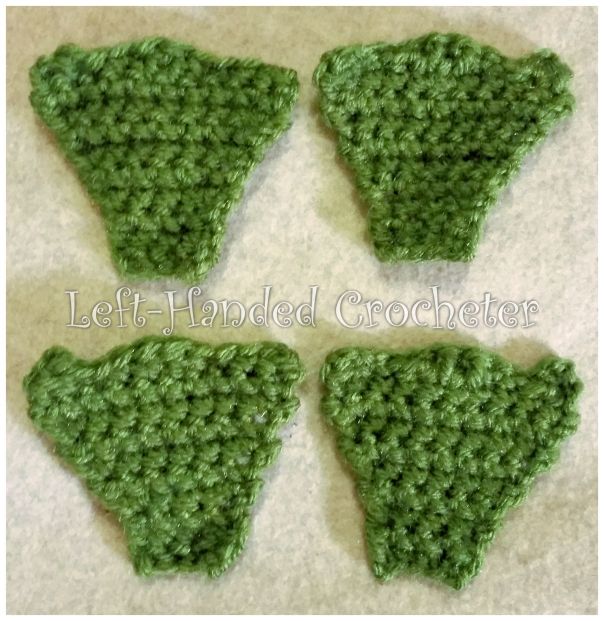
Wings:
With kelly green, ch 5.
Row 1: Sc in 2nd ch from hook and in each ch across, ch 1, turn. (4 stitches)
Row 2: Sc in each stitch across, ch 1, turn. (4 stitches)
Row 3: Inc in first stitch, sc in next 2 stitches, inc in last stitch, ch 1, turn. (6 stitches)
Row 4: Sc in each stitch across, ch 1, turn. (6 stitches)
Row 5: Inc in first stitch, sc in next 4 stitches, inc in last stitch, ch 1, turn. (8 stitches)
Row 6: Sc in each stitch across, ch 1, turn. (8 stitches)
Row 7: Inc in first stitch, sc in next 6 stitches, inc in last stitch, ch 1, turn. (10 stitches)
Row 8: Sc in each stitch across, ch 3, turn. (10 stitches)
Row 9: Sc in 2nd stitch, sl st in next stitch, sc in next stitch, dc in next 2 stitches, sc in next stitch, sl st in next stitch, sc in next stitch, dc in last stitch. (10 stitches, counting the ch 3 as the first dc.)
Tie off. Make 4.
Sew 2 together, but at the top, sew along row 8, leaving row 9 separate a bit.

Now you have all of the pieces of your dragon, ready to sew together.
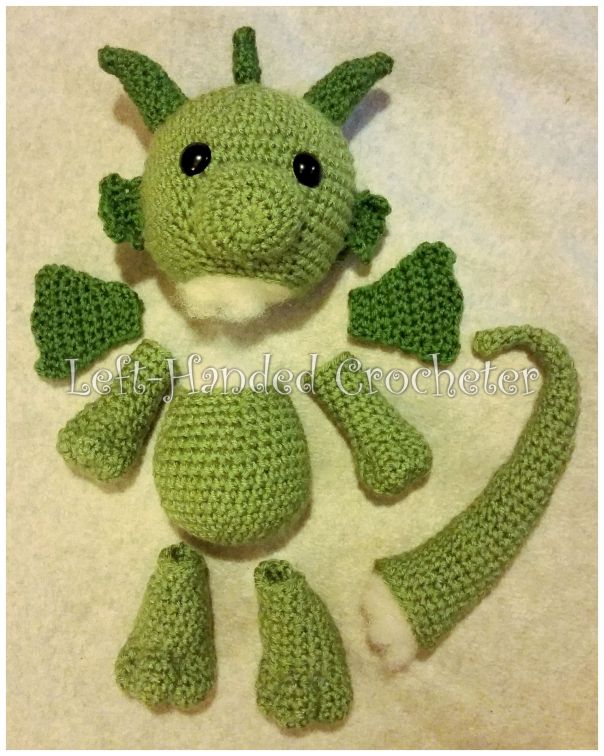
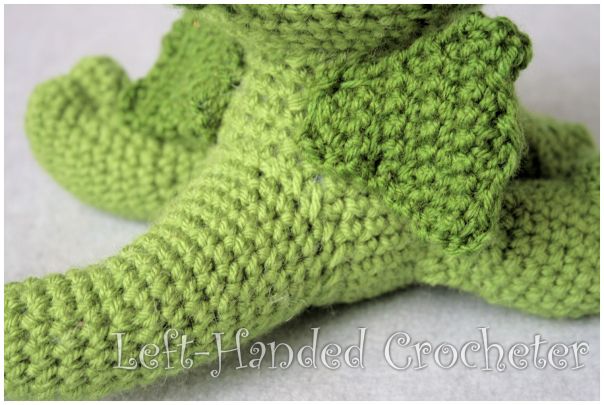
Sew the body and the head together. Sew the back legs on. I sewed them up to the side a bit, and I sewed them so that they hang to the side, not from the bottom, so that they would sit the way I wanted them to.
Sew the front legs on, but sew them down a bit so that he doesn’t lean too far forward. Center the tail on the back and sew it on, then sew the wings on above it.

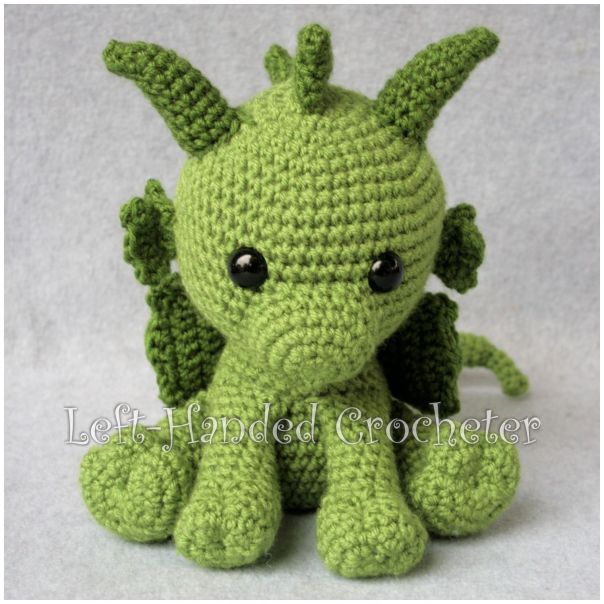
And you have your finished Philip the Dragon.


Be sure to stay tuned for the other patterns in this series.
I hope you enjoy this pattern! You’re welcome to sell items that you make using my patterns, as long as you don’t post the pattern anywhere else, and link back to my page if you’d like to. If there are any mistakes, or something is unclear, please feel free to leave me a comment and let me know. Or message me on Facebook. If you create any dragons of your own, be sure to post a photo on my Facebook page so I can see. I love seeing all of the things people are creating, and I’d love to see the different variations that people make of these.


I’m really full of awe of what you can do, this look amazing!