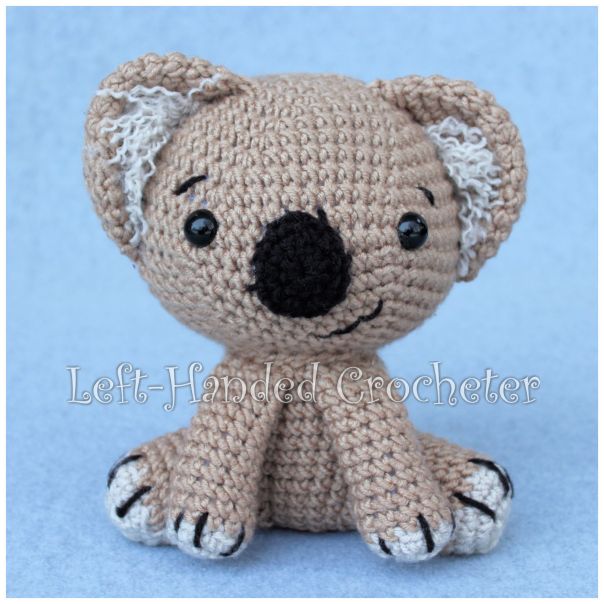
My middle daughter collects teddy bears, but she likes koalas the best. I decided I needed to make a koala for her.
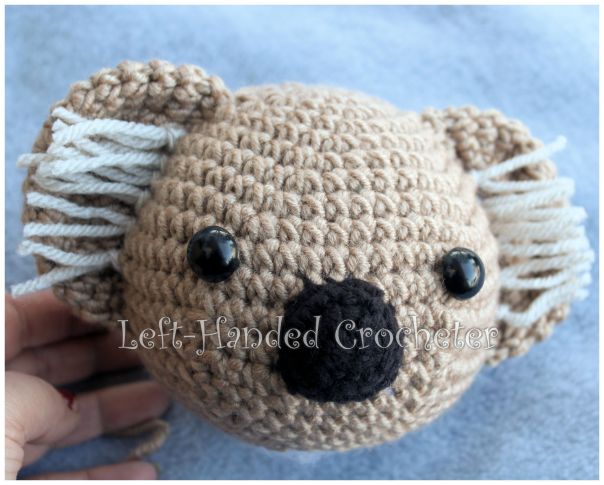
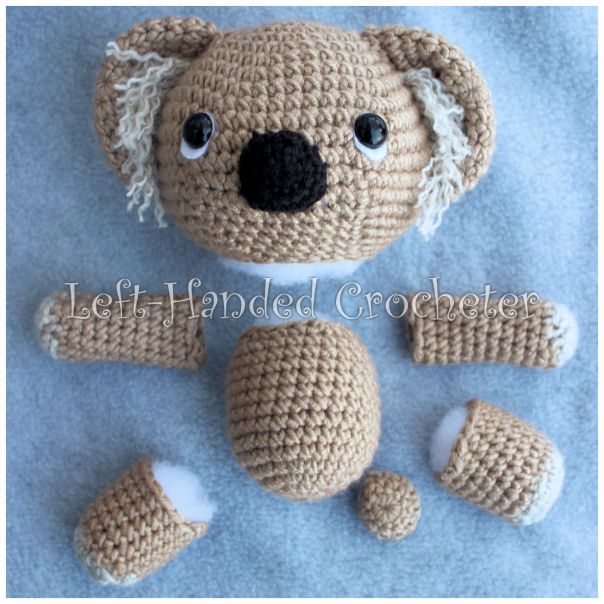
I really like using Lion Brand Vanna’s Choice yarn for stuffies. It holds up well to being stuffed, and it’s a decent price. Plus there are so many color choices, which makes it easy to find what I’m looking for. Unfortunately, I couldn’t find the right color for my koala with the Vanna yarn, so I started looking at other brands. I found the perfect color in the Big Twist yarn, which is a Joann brand yarn. When finished, Kevin is about 8 inches tall and he’s cute as can be.
If you want a pattern that you can save on your computer and easily print, this pattern is available in my Ravelry shop for only $2.00. I love printing patterns and saving them in a binder to keep track of the ones I’ve done and the ones I still plan to do.
Abbreviations:
ch: chain
sc: single crochet
sl st: slip stitch
inc: increase (2 single crochets in one loop)
dec: decrease (pull yarn through loop, pull yarn through second loop, yarn over and pull through all loops)
Materials needed (with affiliate links):
Big Twist yarn in chinchilla.
Lion Brand Vanna yarn in linen and black.
This pattern is worked “in-the-round”, and stitches are worked through both loops unless otherwise noted.
Head:
With chincilla, ch 3. Sl st to first ch to create circle. (Instead, you can perform the “magic circle” if you’d like.)
Row 1: ch 1, 10 sc inside of circle. (10 stitches)
Row 2: *Inc in first stitch, sc in next stitch, repeat from * around. (15 stitches)
Row 3: *Inc in first stitch, sc in next 2 stitches, repeat from * around. (20 stitches)
Row 4: *Inc in first stitch, sc in next 3 stitches, repeat from * around. (25 stitches)
Row 5: *Inc in first stitch, sc in next 4 stitches, repeat from * around. (30 stitches)
Row 6: *Inc in first stitch, sc in next 5 stitches, repeat from * around. (35 stitches)
Row 7: *Inc in first stitch, sc in next 6 stitches, repeat from * around. (40 stitches)
Row 8: *Inc in first stitch, sc in next 7 stitches, repeat from * around. (45 stitches)
Row 9: *Inc in first stitch, sc in next 8 stitches, repeat from * around. (50 stitches)
Row 10: *Inc in first stitch, sc in next 9 stitches, repeat from * around. (55 stitches)
Row 11: *Inc in first stitch, sc in next 10 stitches, repeat from * around. (60 stitches)
Rows 12-13: Sc in each stitch around. (60 stitches)
Row 14: *Dec in first 2 stitches, sc in next 10 stitches, repeat from * around. (55 stitches)
Row 15: *Dec in first 2 stitches, sc in next 9 stitches, repeat from * around. (50 stitches)
Row 16: *Dec in first 2 stitches, sc in next 8 stitches, repeat from * around. (45 stitches)
Row 17: *Dec in first 2 stitches, sc in next 7 stitches, repeat from * around. (40 stitches)
Row 18: *Dec in first 2 stitches, sc in next 6 stitches, repeat from * around. (35 stitches)
Row 19: *Dec in first 2 stitches, sc in next 5 stitches, repeat from * around. (30 stitches)
Row 20: *Dec in first 2 stitches, sc in next 4 stitches, repeat from * around. (25 stitches)
Row 21: *Dec in first 2 stitches, sc in next 3 stitches, repeat from * around. (20 stitches)
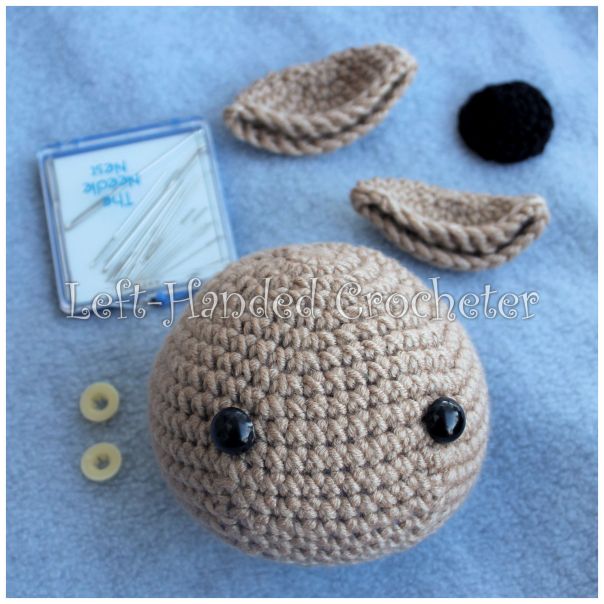
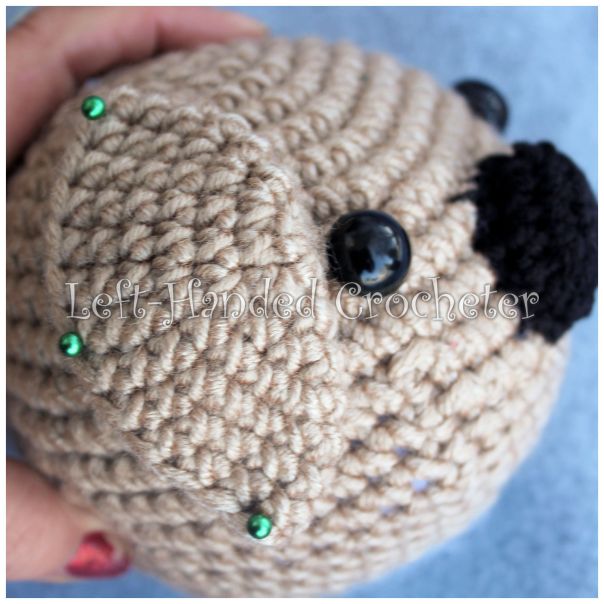
Tie off. Stuff with polyfil. Insert eyes between rows 11 and 12 with 13 stitches in between them. I like to wait to put the backs on the safety eyes until I have the nose sewn on, just in case I want to adjust their placement.
Nose:
With black, ch 3. Sl st to first ch to create circle. (Instead, you can perform the “magic circle” if you’d like.)
Row 1: ch 1, 10 sc inside of circle. (10 stitches)
Row 2: Sc in first 3 stitches, inc in next 4 stitches, sc in last 3 stitches. (14 stitches)
Row 3: Sc in each stitch around. (14 stitches)
Tie off. Position on face in between eyes and sew on. You can use straight pins to hold it in place if you’d like.
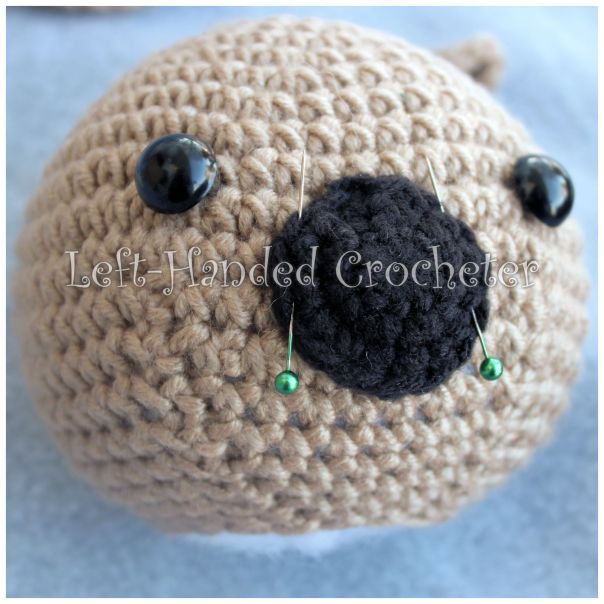
Before closing, stuff some polyfil into the nose.
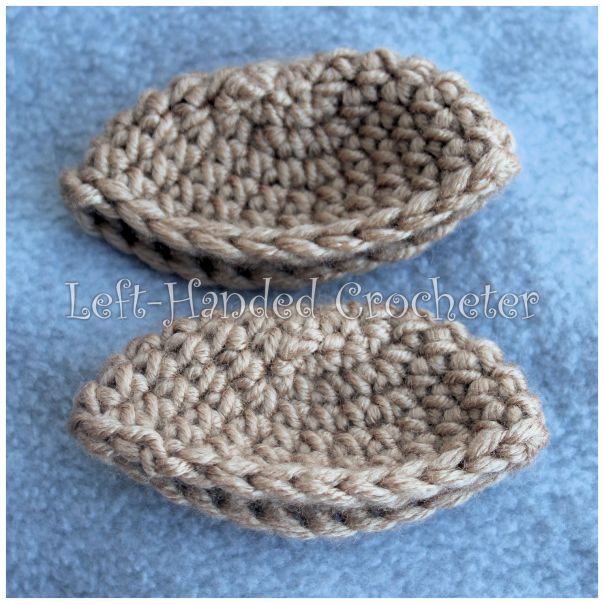
Ears:
With chincilla, ch 3. Sl st to first ch to create circle. (Instead, you can perform the “magic circle” if you’d like.)
Row 1: ch 1, 10 sc inside of circle. (10 stitches)
Row 2: *Inc in first stitch, sc in next stitch, repeat from * around. (15 stitches)
Row 3: *Inc in first stitch, sc in next 2 stitches, repeat from * around. (20 stitches)
Row 4: *Inc in first stitch, sc in next 3 stitches, repeat from * around. (25 stitches)
Rows 5-7: Sc in each stitch around. (25 stitches)
Tie off. Fold flat. The ears will have a slight curve to them.
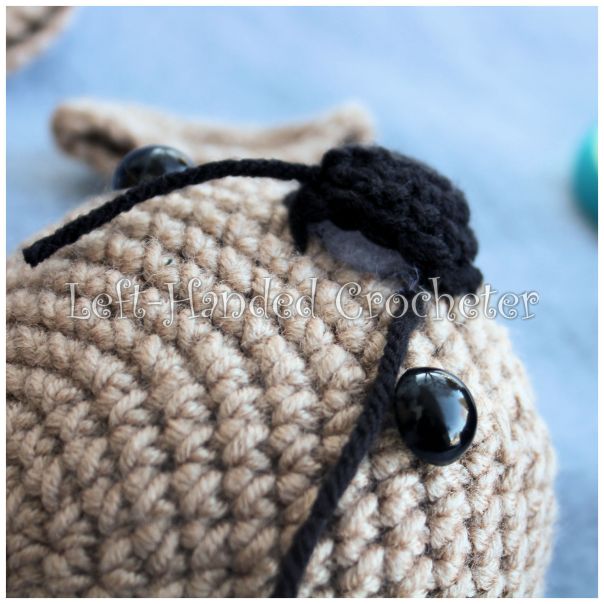
Lay ears on face so that they almost touch the eyes. You can use straight pins to hold them in place if you’d like.
Sew on, following the curve of the ear.

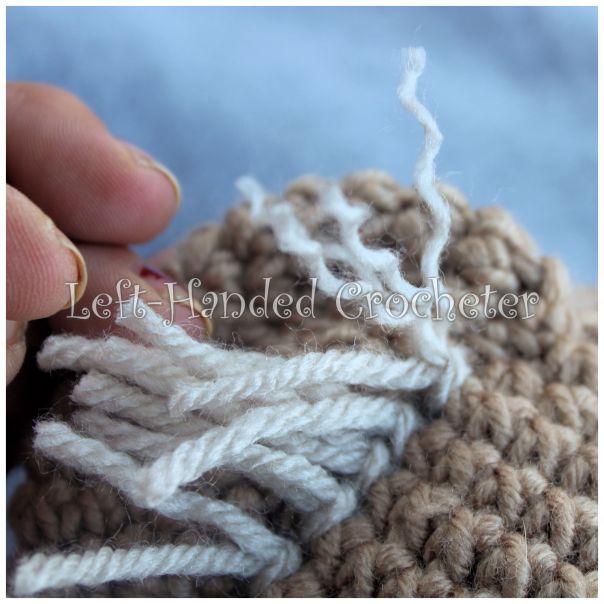
Cut pieces of linen yarn and attach them close to the ear to create the hair.
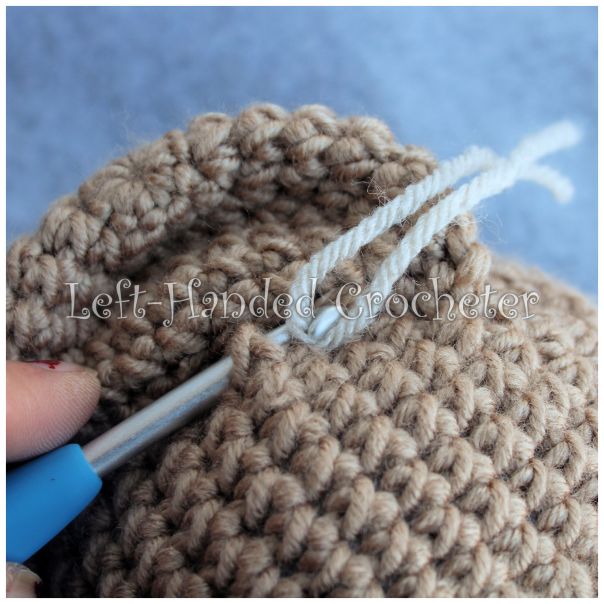
Trim them to the size you want.
Pull each strand apart to make them fuzzier.

Body:
With chincilla, ch 3. Sl st to first ch to create circle. (Instead, you can perform the “magic circle” if you’d like.)
Row 1: ch 1, 10 sc inside of circle. (10 stitches)
Row 2: *Inc in first stitch, sc in next stitch, repeat from * around. (15 stitches)
Row 3: *Inc in first stitch, sc in next 2 stitches, repeat from * around. (20 stitches)
Row 4: *Inc in first stitch, sc in next 3 stitches, repeat from * around. (25 stitches)
Rows 5-13: Sc in each stitch around. (25 stitches)
Row 14: *Dec in first 2 stitches, sc in next 3 stitches, repeat from * around. (20 stitches)
Tie off. Stuff tight with polyfil.
Arms:
With linen, ch 3. Sl st to first ch to create circle. (Instead, you can perform the “magic circle” if you’d like.)
Row 1: ch 1, 10 sc inside of circle. (10 stitches)
Row 2: *Inc in first stitch, sc in next stitch, repeat from * around. (15 stitches)
Switch to chinchilla.
Row 3: *Dec in first 2 stitches, sc in next stitch, repeat from * around. (10 stitches)
Rows 4-13: Sc in each stitch around. (10 stitches)
Tie off. Stuff halfway with polyfil.
Legs:
With linen, ch 3. Sl st to first ch to create circle. (Instead, you can perform the “magic circle” if you’d like.)
Row 1: ch 1, 10 sc inside of circle. (10 stitches)
Row 2: *Inc in first stitch, sc in next stitch, repeat from * around. (15 stitches)
Row 3: *Inc in first stitch, sc in next 2 stitches, repeat from * around. (20 stitches)
Switch to chinchilla.
Row 4: *Dec in first 2 stitches, sc in next 2 stitches, repeat from * around. (15 stitches)
Rows 5-10: Sc in each stitch around. (15 stitches)
Tie off. Stuff tight with polyfil.
Tail:
With chinchilla, ch 3. Sl st to first ch to create circle. (Instead, you can perform the “magic circle” if you’d like.)
Row 1: ch 1, 10 sc inside of circle. (10 stitches)
Row 2: Sc in each stitch around. (10 stitches)
Tie off.
Sew body onto head. Sew legs onto body, making sure to keep them even. You want them slightly towards the front, but mostly facing the sides. Using straight pins to put them in place will help you to get them even.

Sew arms on. Sew tail on back, making sure to position it low enough that it will help balance the koala. Stuff some polyfil into the tail before closing off. You can also add more linen yarn to the tail to make it fluffier.
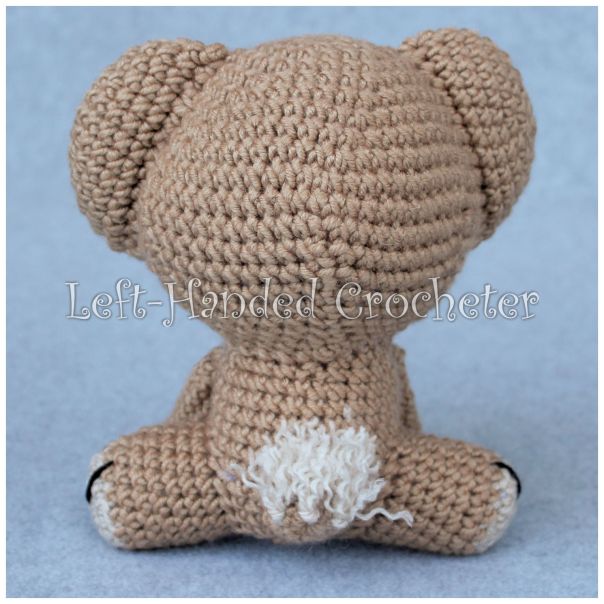
When the koala sits, his tail and legs should keep him balanced.
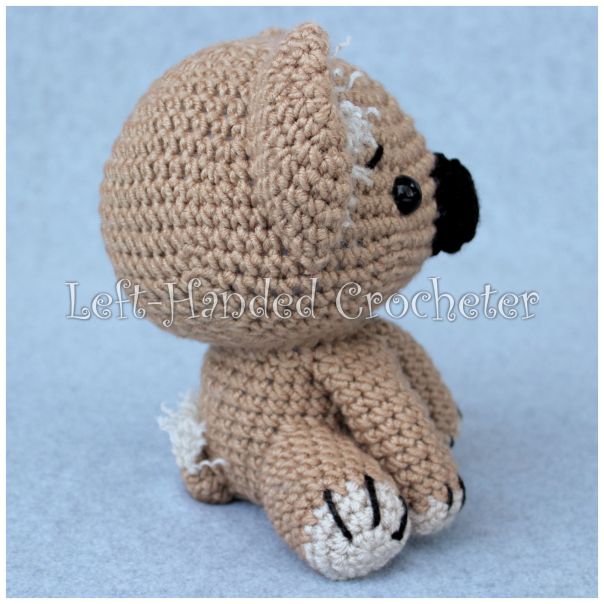
Using your black yarn, sew on a mouth, eyebrows and “claws” on his feet. You can do other things with him too, like add felt under his eyes. I made another one using a smaller hook, so he’s just slightly smaller than Kevin.

I like both of them, but as you can see adding the felt gave him a different look and expression.
I hope you enjoy this pattern! You’re welcome to sell items that you make using my patterns, as long as you don’t post the pattern anywhere else, and link back to my page if you’d like to. If there are any mistakes, or something is unclear, please feel free to leave me a comment and let me know. Or message me on Facebook. If you create any koalas of your own, be sure to post a photo on my Facebook page so I can see. I love seeing all of the things people are creating, and I’d love to see the different variations that people make of these.


Oh he is just adorable! Thank you for sharing the pattern. I love the facial expressions!
I love him!
What a super cute creature! I’ve seen koala patterns before but I love this one because of the ‘fur’ in the ears. It makes the bear so much more adorable!
Many greetings from Virginia, ivonne
This pattern is soooooooooooo cute!!! Thks for sharing! My grandchildren will LOVE this koala! And you are so generous, sharing all these patterns!