
A few days ago, I released my pattern for Sir Sprinkles the Giant Unicorn over on Ravelry. Now, you can make a matching hat to go with Sir Sprinkles.
I made these for my niece’s birthday, since she loves unicorns and was having a unicorn birthday party. Check out the mobile I also made for her bedroom!
If you want a pattern that you can save on your computer and easily print, this pattern is available in my Ravelry shop for only $2.00. I love printing patterns and saving them in a binder to keep track of the ones I’ve done and the ones I still plan to do.
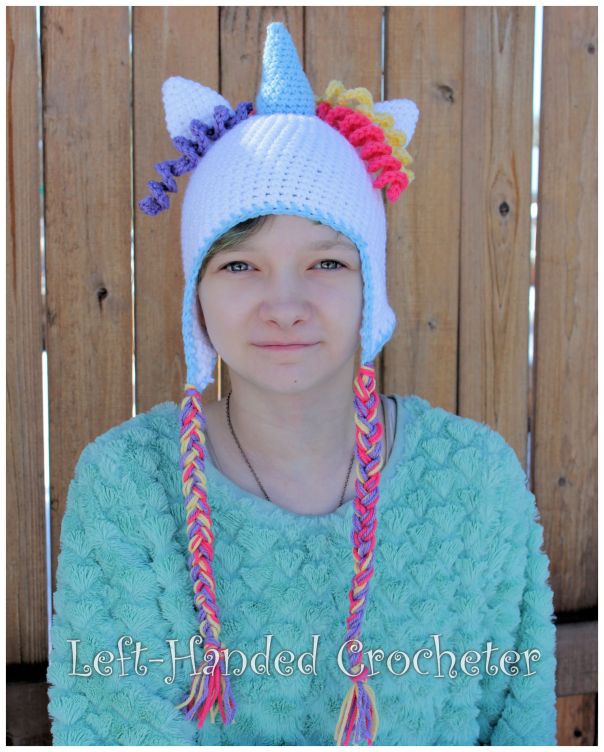
This hat was made for a 7-year-old, but it fit my 13-year-old just fine. This pattern is written as a “one-size-fits-most” hat, but I also include instructions to make it smaller or bigger.
Abbreviations:
ch: chain
sc: single crochet
sl st: slip stitch
inc: increase (2 single crochets in one loop)
dec: decrease (pull yarn through loop, pull yarn through second loop, yarn over and pull through all loops)
Materials needed (with affiliate links):
Any worsted weight yarn will work, but I used Caron One Pound in white, Lion Brand Pound of Love in pastel blue, and various Vanna’s Choice yarns for the mane and tail.
This pattern is worked “in-the-round”, and stitches are worked through both loops unless otherwise noted.
Hat:
With white yarn and J hook, ch 3. Sl st to first ch to create circle. (Instead, you can perform the “magic circle” if you’d like.)
Row 1: ch 1, 5 sc inside of circle. (5 stitches)
Row 2: Inc in each stitch around. (10 stitches)
Row 3: *Inc in first stitch, sc in next stitch, repeat from * around. (15 stitches)
Row 4: *Inc in first stitch, sc in next 2 stitches, repeat from * around. (20 stitches)
Row 5: *Inc in first stitch, sc in next 3 stitches, repeat from * around. (25 stitches)
Row 6: *Inc in first stitch, sc in next 4 stitches, repeat from * around. (30 stitches)
Row 7: *Inc in first stitch, sc in next 5 stitches, repeat from * around. (35 stitches)
Row 8: *Inc in first stitch, sc in next 6 stitches, repeat from * around. (40 stitches)
Row 9: *Inc in first stitch, sc in next 7 stitches, repeat from * around. (45 stitches)
Row 10: *Inc in first stitch, sc in next 8 stitches, repeat from * around. (50 stitches)
(To make the hat fit a smaller head, skip row 11 and go straight to row 12.)
Row 11: *Inc in first stitch, sc in next 9 stitches, repeat from * around. (55 stitches)
(To make the hat fit a larger head, add an extra increase row here: *Inc in first stitch, sc in next 10 stitches, repeat from * around.)
Rows 12-30: Sc in each stitch around. (55 stitches)
(You can make the hat smaller or larger by reducing or increasing the number of rows that you do.)
Tie off.
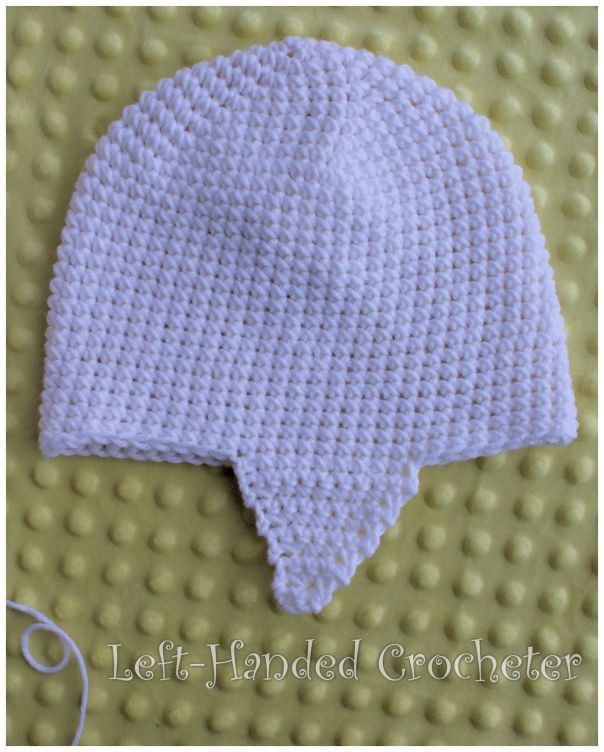
Ear Flaps:
Attach white yarn with a slip stitch to make the first ear flap.

Row 1: Sc in 10 stitches, ch 1, turn. (10 stitches)
Row 2: Sc in each stitch across, ch 1, turn. (10 stitches)
Row 3: Dec in first 2 stitches, sc in next 6 stitches, dec in last 2 stitches, ch 1, turn. (8 stitches)
Row 4: Sc in each stitch across, ch 1, turn. (8 stitches)
Row 5: Dec in first 2 stitches, sc in next 4 stitches, dec in last 2 stitches, ch 1, turn. (6 stitches)
Row 6: Sc in each stitch across, ch 1, turn. (6 stitches)
Row 7: Dec in first 2 stitches, sc in next 2 stitches, dec in last 2 stitches, ch 1, turn. (4 stitches)
Row 8: Sc in each stitch across, ch 1, turn. (4 stitches)
Row 9: Dec in first 2 stitches, dec in last 2 stitches, ch 1, turn. (2 stitches)
Row 10: Sc in each stitch across, ch 1, turn. (2 stitches)
Tie off.
Attach second ear flap 17 stitches apart from first ear flap. (15 stitches apart for a smaller hat, 20 stitches apart for a bigger hat.) Repeat pattern.
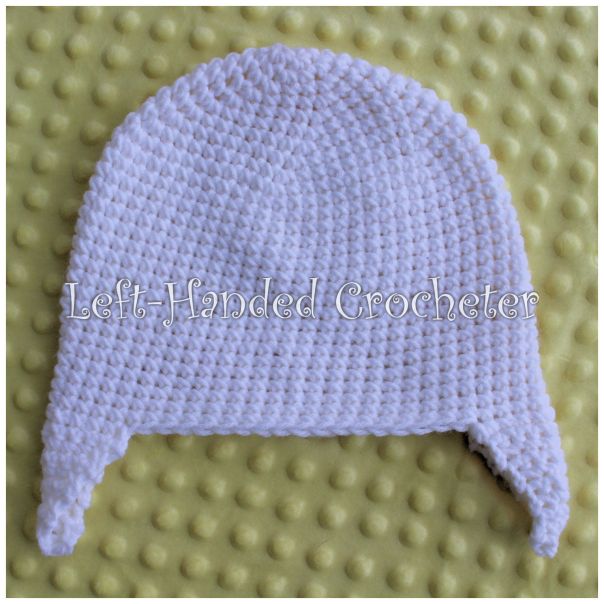
Attach blue yarn with a slip stitch and crochet around the bottom of the hat.

For the braids, cut your yarn about 40 inches long. I used 9 strands for each side, 3 strands of each color.

Using your crochet hook and fingers, loop the strands through each ear flap and pull them through, then tie it in a knot.


Separate your strands and braid them, then tie a knot at the bottom. I like to mix the colors, using all of them in each section. You could separate them by color if you want, though, and it would also look nice.


Now you’re ready to attach the unicorn pieces.
Horn:
With blue yarn and I hook, ch 3. Sl st to first ch to create circle. (Instead, you can perform the “magic circle” if you’d like.)
Row 1: ch 1, 4 sc inside of circle. (4 stitches)
Row 2: Sc in each stitch around. (4 stitches)
Row 3: *Inc in first stitch, sc in next stitch, repeat from * around. (6 stitches)
Row 4: Sc in each stitch around. (6 stitches)
Row 5: *Inc in first stitch, sc in next 2 stitches, repeat from * around. (8 stitches)
Row 6: Sc in each stitch around. (8 stitches)
Row 7: *Inc in first stitch, sc in next 3 stitches, repeat from * around. (10 stitches)
Row 8: Sc in each stitch around. (10 stitches)
Row 9: *Inc in first stitch, sc in next 4 stitches, repeat from * around. (12 stitches)
Row 10: Sc in each stitch around. (12 stitches)
Stop at this point and stuff with poly-fil. Continue to stuff as you work.
Row 11: *Inc in first stitch, sc in next 5 stitches, repeat from * around. (14 stitches)
Row 12: Sc in each stitch around. (14 stitches)
Row 13: *Inc in first stitch, sc in next 6 stitches, repeat from * around. (16 stitches)
Rows 14-16: Sc in each stitch around. (16 stitches)
Tie off. Sew onto top of hat, a bit toward the front.
Ears:
With white yarn and I hook, ch 3. Sl st to first ch to create circle. (Instead, you can perform the “magic circle” if you’d like.)
Row 1: ch 1, 4 sc inside of circle. (4 stitches)
Row 2: *Inc in first stitch, sc in next stitch, repeat from * around. (6 stitches)
Row 3: *Inc in first stitch, sc in next 2 stitches, repeat from * around. (8 stitches)
Row 4: *Inc in first stitch, sc in next 3 stitches, repeat from * around. (10 stitches)
Row 5: *Inc in first stitch, sc in next 4 stitches, repeat from * around. (12 stitches)
Row 6: *Inc in first stitch, sc in next 5 stitches, repeat from * around. (14 stitches)
Row 7: *Inc in first stitch, sc in next 6 stitches, repeat from * around. (16 stitches)
Rows 8-10: Sc in each stitch around. (16 stitches)
Row 11: *Dec in first 2 stitches, sc in next 2 stitches, repeat from * around. (12 stitches)
Tie off. Make two. Fold flat and sew onto top of hat.
Hair:
With I hook, chain 30 or 40. I did different lengths so they wouldn’t all sit even. Work 2 or 3 sc’s into each chain. Be sure to leave a long tail at the beginning and end of each curl to attach it to the hat.
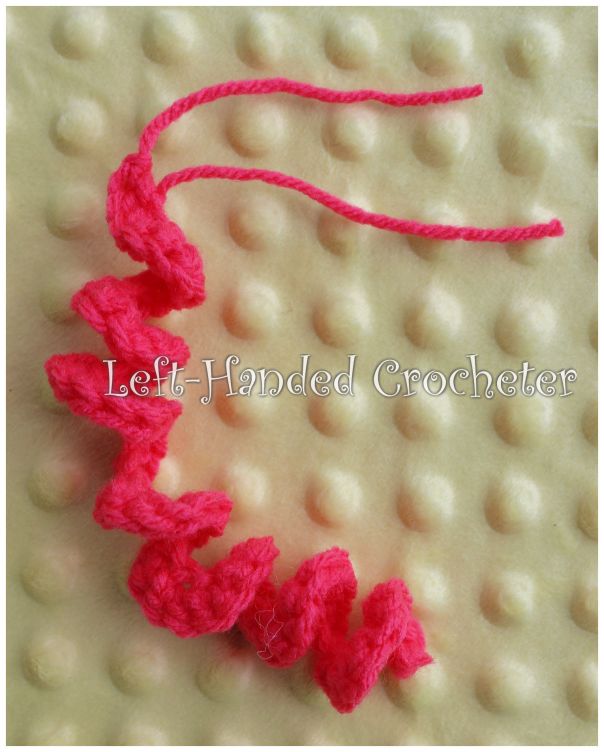
You can make this hat with lots of curls or with hardly any. The choice is yours.


I hope you enjoy this pattern! You’re welcome to sell items that you make using my patterns, as long as you don’t post the pattern anywhere else, and link back to my page if you’d like to. If there are any mistakes, or something is unclear, please feel free to leave me a comment and let me know. Or message me on Facebook. If you create any hats of your own, be sure to post a photo on my Facebook page so I can see. I love seeing all of the things people are creating, and I’d love to see the different variations that people make of these.

