
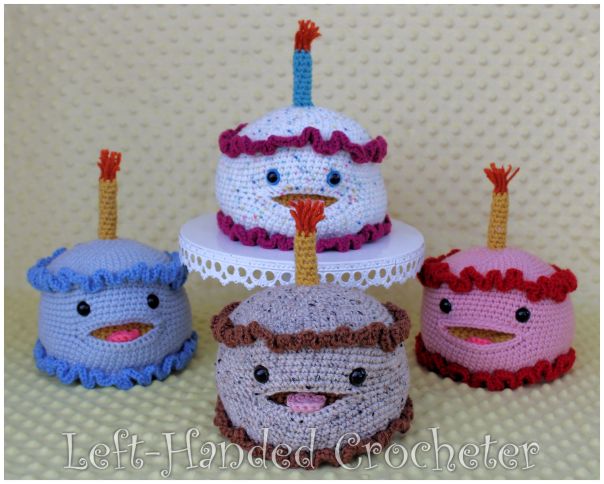
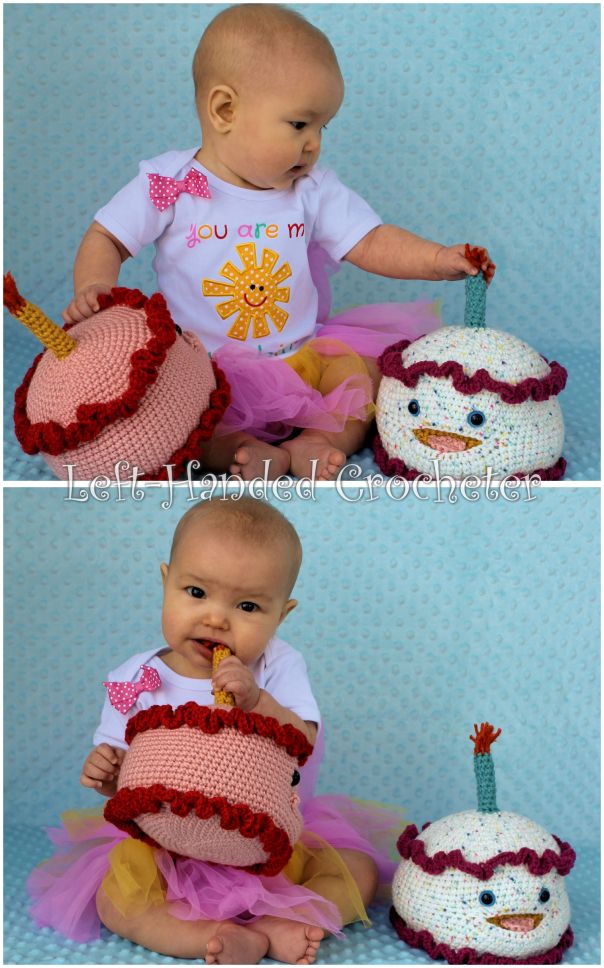
May is my birthday month, which means I’ve got all kinds of fun stuff going on on my Facebook page. A few years ago, I made myself this cake for my birthday, and this year I decided to remake it and write up the pattern or everybody. It would make a great birthday gift for any age.
Abbreviations:
ch: chain
sc: single crochet
sl st: slip stitch
inc: increase (2 single crochets in one loop)
dec: decrease (pull yarn through loop, pull yarn through second loop, yarn over and pull through all loops)
Materials needed (with affiliate links):
Any worsted weight yarn will work. I used Lion Brand Vanna’s Choice for most of the ones I made.
This pattern is worked “in-the-round”, and stitches are worked through both loops unless otherwise noted.
Top and Bottom:
Ch 3. Sl st to first ch to create circle. (Instead, you can perform the “magic circle” if you’d like.)
Row 1: ch 1, 10 sc inside of circle. (10 stitches)
Row 2: *Inc in first stitch, sc in next stitch, repeat from * around. (15 stitches)
Row 3: *Inc in first stitch, sc in next 2 stitches, repeat from * around. (20 stitches)
Row 4: *Inc in first stitch, sc in next 3 stitches, repeat from * around. (25 stitches)
Row 5: *Inc in first stitch, sc in next 4 stitches, repeat from * around. (30 stitches)
Row 6: *Inc in first stitch, sc in next 5 stitches, repeat from * around. (35 stitches)
Row 7: *Inc in first stitch, sc in next 6 stitches, repeat from * around. (40 stitches)
Row 8: *Inc in first stitch, sc in next 7 stitches, repeat from * around. (45 stitches)
Row 9: *Inc in first stitch, sc in next 8 stitches, repeat from * around. (50 stitches)
Row 10: *Inc in first stitch, sc in next 9 stitches, repeat from * around. (55 stitches)
Row 11: *Inc in first stitch, sc in next 10 stitches, repeat from * around. (60 stitches)
Row 12: *Inc in first stitch, sc in next 11 stitches, repeat from * around. (65 stitches)
Row 13: *Inc in first stitch, sc in next 12 stitches, repeat from * around. (70 stitches)
Tie off.
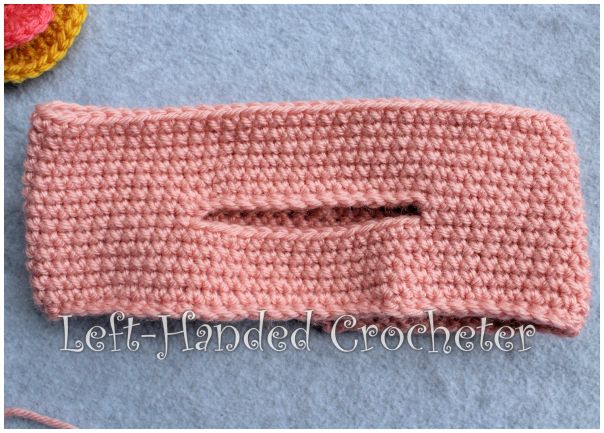
Cake Round:
Ch. 70. Sl st to first ch to form a ring.
Row 1: Sc in each ch around. (70 stitches)
Rows 2-6: Sc in each stitch around. (70 stitches)
Row 7: Sc in first 27 stitches, ch 15, skip 15 and sc in the last 28 stitches. (Hole for mouth made.)
Row 8: Sc in each stitch around, working a sc into each ch of the ch 15. (70 stitches)
Rows 9-14: Sc in each stitch around. (70 stitches)
Tie off.
Mouth:
Ch 3. Sl st to first ch to create circle. (Instead, you can perform the “magic circle” if you’d like.)
Row 1: ch 1, 10 sc inside of circle. (10 stitches)
Row 2: *Inc in first stitch, sc in next stitch, repeat from * around. (15 stitches)
Row 3: *Inc in first stitch, sc in next 2 stitches, repeat from * around. (20 stitches)
Row 4: *Inc in first stitch, sc in next 3 stitches, repeat from * around. (25 stitches)
Row 5: *Inc in first stitch, sc in next 4 stitches, repeat from * around. (30 stitches)
Fold the mouth in half and sc across the back to create the crease. Tie off.


Tongue:
Ch 3. Sl st to first ch to create circle. (Instead, you can perform the “magic circle” if you’d like.)
Row 1: ch 1, 10 sc inside of circle. (10 stitches)
Row 2: Sc in first 8 stitches. Leave last 2 stitches unworked. (8 stitches)
Tie off. Sew tongue to mouth only at the flat end so it sticks out.


Insert mouth inside of cake round and line it up with the opening. Using the same color as the cake round, sc the pieces together.


Line the top piece up with the top of the cake round and sc together using your trim color. For the second row, work 4 sc’s into each stitch. Tie off. Position and insert the safety eyes.


Stuff your cake, making sure the poly-fil doesn’t push the mouth outward. Line up the bottom piece and repeat the instructions for the top.


Candle:
Ch 3. Sl st to first ch to create circle. (Instead, you can perform the “magic circle” if you’d like.)
Row 1: ch 1, 6 sc inside of circle. (6 stitches)
Rows 2-10: Sc in each stitch around. (6 stitches)
Tie off. Stuff with poly-fil. Loop and attach pieces of orange yarn to the top for the flames. Sew onto top of cake.


There you have your finished cake.

Try making them in different colors to create different flavors of cake.
If you want a pattern that you can save on your computer and easily print, this pattern is available in my Ravelry shop for only $2.00. I love printing patterns and saving them in a binder to keep track of the ones I’ve done and the ones I still plan to do. The purchased pattern also comes with the instructions to make a unicorn cake:


You know what goes great with one of these cakes? A cake hat!

You can also pick up the pattern for the cake hat in my Ravelry shop for only $2.00. Or if you wait, it will be posted free on my blog soon.
I hope you enjoy this pattern! You’re welcome to sell items that you make using my patterns, as long as you don’t post the pattern anywhere else, and link back to my page if you’d like to. If there are any mistakes, or something is unclear, please feel free to leave me a comment and let me know. Or message me on Facebook. If you create any cakes of your own, be sure to post a photo on my Facebook page so I can see. I love seeing all of the things people are creating, and I’d love to see the different variations that people make of these.


1 thought on “Smiling Birthday Cake”