Crochet Some Yummy Candy Corns

IMG_7463

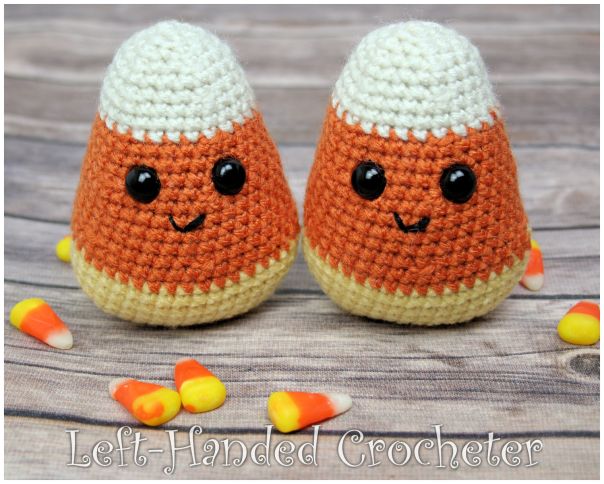
Whether you like to eat them or not, it just wouldn’t be Halloween without some candy corn. Made with worsted weight yarn, this finished doll measures approximately 4 inches tall.

Abbreviations:

ch: chain

sc: single crochet

sl st: slip stitch

inc: increase (2 single crochets in one loop)

dec: decrease (pull yarn through loop, pull yarn through second loop, yarn over and pull through all loops)

Materials needed:

Any worsted weight yarn. I used Red Heart Super Saver in cornmeal, carrot and aran.

G (4mm) crochet hook

Poly-fil

Yarn needle

12mm safety eyes

Embroidery thread

This pattern is worked “in-the-round”, and stitches are worked through both loops unless otherwise noted. 

Body:

With cornmeal, ch. 11.

Row 1: This is worked around the chain you just made. Sc in 2nd chain from hook and in each across, working 3 sc’s into the last ch. Turn and work in the other loop of the chain and sc across, working 2 sc’s in last ch. St st to 1st sc, ch. 1. (22 total stitches)

Row 2: 2 sc in first st, sc in next 8 st, work 2 sc’s in each of the next 3 st, sc in next 8, work 2 sc’s in each of the next 2. St sl to 1st sc, ch. 1. (28 total stitches)

Row 3: 2 sc in first st, sc in next 11 st, work 2 sc’s in each of the next 3 st, sc in next 11, work 2 sc’s in each of the next 2. St sl to 1st sc, ch. 1. (34 total stitches)

Row 4: 2 sc in first st, sc in next 14 st, work 2 sc’s in each of the next 3 st, sc in next 14, work 2 sc’s in each of the next 2. St sl to 1st sc, ch. 1. (40 total stitches)

Rows 5-7: Sc in each stitch around. (40 stitches)

Switch to carrot.

Rows 8-9: Sc in each stitch around. (40 stitches)

Row 10: *Dec in first 2 stitches, sc in next 6 stitches, repeat from * around. (35 stitches)

Rows 11-14: Sc in each stitch around. (35 stitches)

Row 15: *Dec in first 2 stitches, sc in next 5 stitches, repeat from * around. (30 stitches)

Rows 16-18: Sc in each stitch around. (30 stitches)

Switch to aran.

Row 19: *Dec in first 2 stitches, sc in next 4 stitches, repeat from * around. (25 stitches)

Rows 20-21: Sc in each stitch around. (25 stitches)

Stuff tight with poly-fil. Insert safety eyes between rows 15 and 16 with 5 stitches between them. Continue stuffing as you work.

Row 22: *Dec in first 2 stitches, sc in next 3 stitches, repeat from * around. (20 stitches)

Row 23: Sc in each stitch around. (20 stitches)

Row 24: *Dec in first 2 stitches, sc in next 2 stitches, repeat from * around. (15 stitches)

Row 25: *Dec in first 2 stitches, sc in next stitch, repeat from * around. (10 stitches)

Row 26: Dec around. (5 stitches)

Sew end shut and tie off. Sew mouth on with embroidery thread.

I hope you enjoy this pattern! You’re welcome to sell items that you make using my patterns, as long as you don’t post the pattern anywhere else, and link back to my page if you’d like to. If there are any mistakes, or something is unclear, please feel free to message me on Facebook.


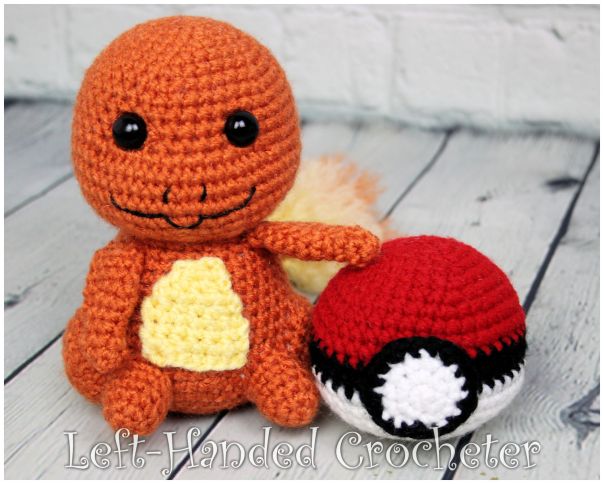
Crochet a Charmander

IMG_7417

Gotta catch ‘em all! Charmander is #004 in the Pokemon collection. Made with worsted weight yarn, this finished doll measures approximately 5½ inches tall.

Abbreviations:

ch: chain

sc: single crochet

sl st: slip stitch

inc: increase (2 single crochets in one loop)

dec: decrease (pull yarn through loop, pull yarn through second loop, yarn over and pull through all loops)

Materials needed:

Any worsted weight yarn. I used Red Heart Super Saver in carrot and lemon.

G (4mm) crochet hook

Poly-fil

Yarn needle

12mm safety eyes

Black embroidery thread

Stitch markers

Wire pet brush

This pattern is worked “in-the-round”, and stitches are worked through both loops unless otherwise noted. 

Head:

With carrot, ch 3. Sl st to first ch to create circle. (Instead, you can perform the “magic circle” if you’d like.)

Row 1: ch 1, 10 sc inside of circle. (10 stitches)

Row 2: *Inc in first stitch, sc in next stitch, repeat from * around. (15 stitches)

Row 3: *Inc in first stitch, sc in next 2 stitches, repeat from * around. (20 stitches)

Row 4: *Inc in first stitch, sc in next 3 stitches, repeat from * around. (25 stitches)

Row 5: *Inc in first stitch, sc in next 4 stitches, repeat from * around. (30 stitches)

Row 6: *Inc in first stitch, sc in next 5 stitches, repeat from * around. (35 stitches)

Row 7: *Inc in first stitch, sc in next 6 stitches, repeat from * around. (40 stitches)

Rows 8-11: Sc in each stitch around. (40 stitches)

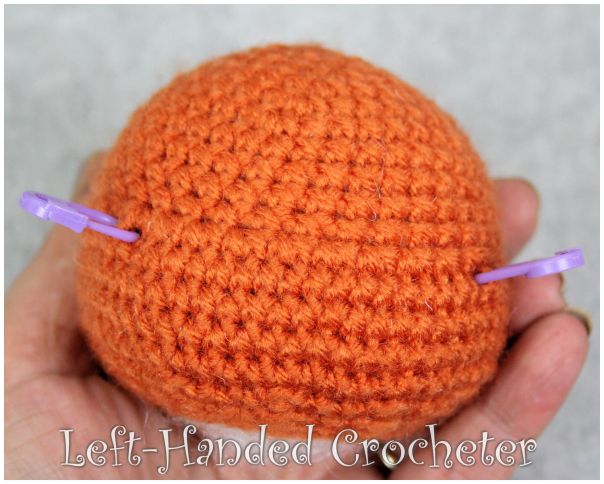
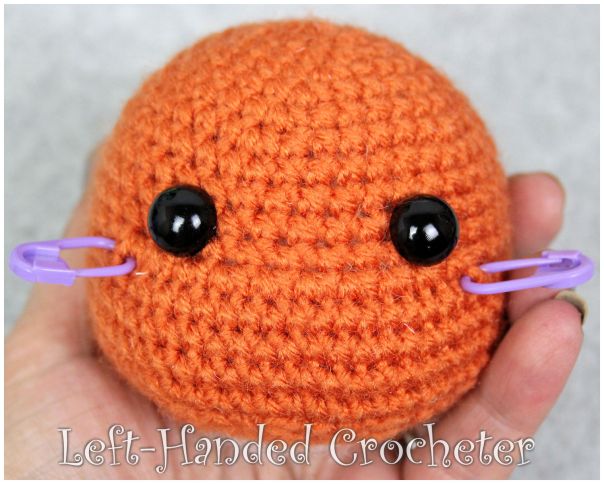
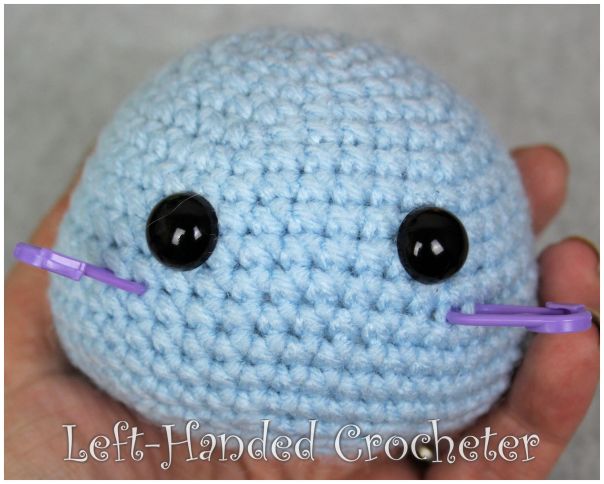
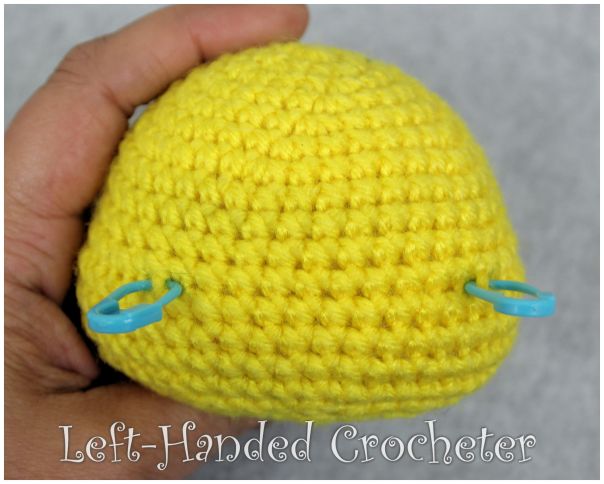
**For the following row, you’ll place stitch markers to create guidelines for where to place his facial features.**

IMG_7245

Row 12: Sc in first 15 stitches, inc in next 10 stitches (place stitch marker in first inc and in last inc), sc in next 15 stitches. (50 stitches)

Rows 13-16: Sc in each stitch around. (50 stitches)

Row 17: *Dec in first 2 stitches, sc in next 3 stitches, repeat from * around. (40 stitches)

Row 18: *Dec in first 2 stitches, sc in next 2 stitches, repeat from * around. (30 stitches)

Row 19: *Dec in first 2 stitches, sc in next stitch, repeat from * around. (20 stitches)

Tie off. Stuff tight with poly-fil. Using your stitch markers to guide you, place the eyes between rows 10 and 11 with 7 stitches between them.

IMG_7246

Sew a nose and mouth on with embroidery thread.

Body:

With carrot, ch 3. Sl st to first ch to create circle. (Instead, you can perform the “magic circle” if you’d like.)

Row 1: ch 1, 10 sc inside of circle. (10 stitches)

Row 2: *Inc in first stitch, sc in next stitch, repeat from * around. (15 stitches)

Row 3: *Inc in first stitch, sc in next 2 stitches, repeat from * around. (20 stitches)

Row 4: *Inc in first stitch, sc in next 3 stitches, repeat from * around. (25 stitches)

Row 5: *Inc in first stitch, sc in next 4 stitches, repeat from * around. (30 stitches)

Row 6: *Inc in first stitch, sc in next 5 stitches, repeat from * around. (35 stitches)

Row 7: *Inc in first stitch, sc in next 6 stitches, repeat from * around. (40 stitches)

Row 8: *Inc in first stitch, sc in next 7 stitches, repeat from * around. (45 stitches)

Row 9: *Dec in first 2 stitches, sc in next 7 stitches, repeat from * around. (40 stitches)

Row 10: Sc in each stitch around. (40 stitches)

Row 11: *Dec in first 2 stitches, sc in next 6 stitches, repeat from * around. (35 stitches)

Rows 12-13: Sc in each stitch around. (35 stitches)

Row 14: *Dec in first 2 stitches, sc in next 5 stitches, repeat from * around. (30 stitches)

Rows 15-16: Sc in each stitch around. (30 stitches)

Row 17: *Dec in first 2 stitches, sc in next 4 stitches, repeat from * around. (25 stitches)

Row 18: Sc in each stitch around. (25 stitches)

Row 19: *Dec in first 2 stitches, sc in next 3 stitches, repeat from * around. (20 stitches)

Tie off. Stuff body tight with poly-fil. Position and sew head onto body.

Legs:

With carrot, ch 3. Sl st to first ch to create circle. (Instead, you can perform the “magic circle” if you’d like.)

Row 1: ch 1, 10 sc inside of circle. (10 stitches)

Row 2: *Inc in first stitch, sc in next stitch, repeat from * around. (15 stitches)

Row 3: *Inc in first stitch, sc in next 2 stitches, repeat from * around. (20 stitches)

Rows 4-5: Sc in each stitch around. (20 stitches)

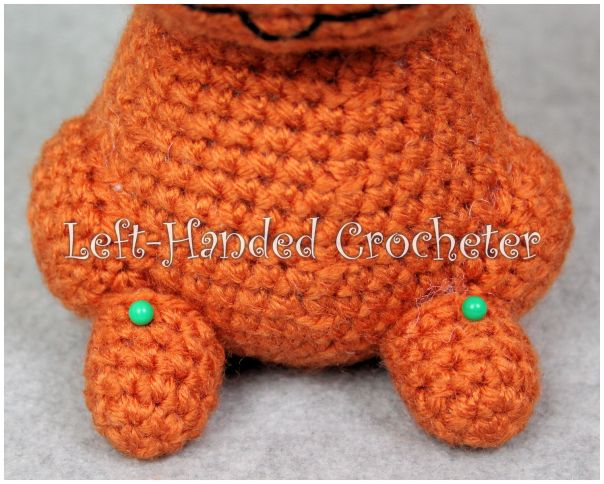
Tie off. Position onto sides of body. Sew on, stopping before you do the last few stitches to stuff some poly-fil inside.

Feet:

With carrot, ch 3. Sl st to first ch to create circle. (Instead, you can perform the “magic circle” if you’d like.)

Row 1: ch 1, 5 sc inside of circle. (5 stitches)

Row 2: Inc in each stitch around. (10 stitches)

Rows 3-6: Sc in each stitch around. (10 stitches)

Tie off. Stuff tight with poly-fil. Position onto legs, making sure it stands before sewing them on.

IMG_7255

Arms:

With carrot, ch 3. Sl st to first ch to create circle. (Instead, you can perform the “magic circle” if you’d like.)

Row 1: ch 1, 4 sc inside of circle. (4 stitches)

Row 2: *Inc in first stitch, sc in next stitch, repeat from * around. (6 stitches)

Rows 3-4: Sc in each stitch around. (6 stitches)

Row 5: *Inc in first stitch, sc in next 2 stitches, repeat from * around. (8 stitches)

Row 6: *Inc in first stitch, sc in next 3 stitches, repeat from * around. (10 stitches)

Rows 7-9: Sc in each stitch around. (10 stitches)

Row 10: *Dec in first 2 stitches, sc in next 3 stitches, repeat from * around. (8 stitches)

Tie off. Don’t stuff. Position and sew onto body.

Tail:

With carrot, ch 3. Sl st to first ch to create circle. (Instead, you can perform the “magic circle” if you’d like.)

Row 1: ch 1, 4 sc inside of circle. (4 stitches)

Row 2: *Inc in first stitch, sc in next stitch, repeat from * around. (6 stitches)

Rows 3-4: Sc in each stitch around. (6 stitches)

Row 5: *Inc in first stitch, sc in next 2 stitches, repeat from * around. (8 stitches)

Rows 6-7: Sc in each stitch around. (8 stitches)

Row 8: *Inc in first stitch, sc in next 3 stitches, repeat from * around. (10 stitches)

Stuff tight with poly-fil. Continue stuffing as you work.

Rows 9-10: Sc in each stitch around. (10 stitches)

Row 11: *Inc in first stitch, sc in next 4 stitches, repeat from * around. (12 stitches)

Rows 12-13: Sc in each stitch around. (12 stitches)

Row 14: *Inc in first stitch, sc in next 5 stitches, repeat from * around. (14 stitches)

Rows 15-16: Sc in each stitch around. (14 stitches)

Row 17: *Inc in first stitch, sc in next 6 stitches, repeat from * around. (16 stitches)

Rows 18-21: Sc in each stitch around. (16 stitches)

Tie off. Attach lemon and carrot yarn to the end. Using a wire pet brush, brush the yarn out to make it fluffy.

Stomach:

With lemon, ch 7.

Row 1: Sc in 2nd ch from hook and in each across, ch 1, turn. (6 stitches)

Rows 2-4: Sc in each stitch across, ch 1, turn. (6 stitches)

Row 5: Dec in first 2 stitches, sc in next 2 stitches, dec in last 2 stitches, ch 1, turn. (4 stitches)

Row 6: Sc in each stitch across, ch 1, turn. (4 stitches)

Row 7: Dec in first 2 stitches, dec in last 2 stitches, ch 1, turn. (2 stitches)

Row 8: Sc in each stitch across. (2 stitches)

Tie off. Position and sew onto front of body.

I hope you enjoy this pattern! You’re welcome to sell items that you make using my patterns, as long as you don’t post the pattern anywhere else, and link back to my page if you’d like to. If there are any mistakes, or something is unclear, please feel free to message me on Facebook.

Crochet a Squirtle

IMG_7402

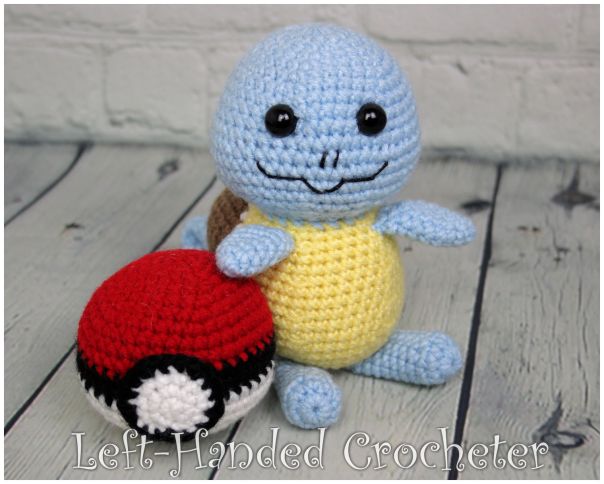
Gotta catch ‘em all! Squirtle is #007 in the Pokemon collection. Made with worsted weight yarn, this finished doll measures approximately 5½ inches tall.

Abbreviations:

ch: chain

sc: single crochet

sl st: slip stitch

inc: increase (2 single crochets in one loop)

dec: decrease (pull yarn through loop, pull yarn through second loop, yarn over and pull through all loops)

Materials needed:

Any worsted weight yarn. I used Red Heart Super Saver in light blue, lemon, café latte and white.

G (4mm) crochet hook

Poly-fil

Yarn needle

12mm safety eyes

Black embroidery thread

Stitch markers

This pattern is worked “in-the-round”, and stitches are worked through both loops unless otherwise noted. 

Head:

With light blue, ch 3. Sl st to first ch to create circle. (Instead, you can perform the “magic circle” if you’d like.)

Row 1: ch 1, 10 sc inside of circle. (10 stitches)

Row 2: *Inc in first stitch, sc in next stitch, repeat from * around. (15 stitches)

Row 3: *Inc in first stitch, sc in next 2 stitches, repeat from * around. (20 stitches)

Row 4: *Inc in first stitch, sc in next 3 stitches, repeat from * around. (25 stitches)

Row 5: *Inc in first stitch, sc in next 4 stitches, repeat from * around. (30 stitches)

Row 6: *Inc in first stitch, sc in next 5 stitches, repeat from * around. (35 stitches)

Row 7: *Inc in first stitch, sc in next 6 stitches, repeat from * around. (40 stitches)

Rows 8-10: Sc in each stitch around. (40 stitches)

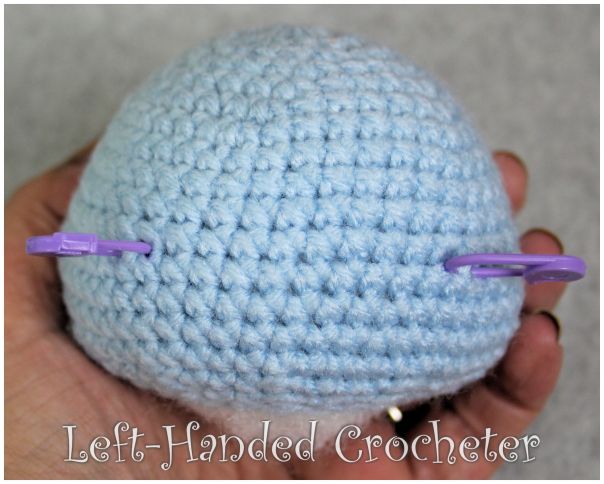
**For the following row, you’ll place stitch markers to create guidelines for where to place his facial features.**

IMG_7228

Row 11: Sc in first 10 stitches, inc in next 5 stitches (place stitch marker in last inc), sc in next 10 stitches, inc in next 5 stitches (place stitch marker in first inc), sc in last 10 stitches. (50 stitches)

Rows 12-15: Sc in each stitch around. (50 stitches)

Row 16: *Dec in first 2 stitches, sc in next 3 stitches, repeat from * around. (40 stitches)

Row 17: *Dec in first 2 stitches, sc in next 2 stitches, repeat from * around. (30 stitches)

Row 18: *Dec in first 2 stitches, sc in next stitch, repeat from * around. (20 stitches)

Tie off. Stuff tight with poly-fil. Using your stitch markers to guide you, place the eyes between rows 9 and 10 with 7 stitches between them.

IMG_7230

Using a needle and yarn, drop a stitch from one eye to the other and pull tight to make the eyes indented.

Sew a nose and mouth on with embroidery thread.

Body:

With lemon, ch 3. Sl st to first ch to create circle. (Instead, you can perform the “magic circle” if you’d like.)

Row 1: ch 1, 10 sc inside of circle. (10 stitches)

Row 2: *Inc in first stitch, sc in next stitch, repeat from * around. (15 stitches)

Row 3: *Inc in first stitch, sc in next 2 stitches, repeat from * around. (20 stitches)

Row 4: *Inc in first stitch, sc in next 3 stitches, repeat from * around. (25 stitches)

Row 5: *Inc in first stitch, sc in next 4 stitches, repeat from * around. (30 stitches)

Row 6: *Inc in first stitch, sc in next 5 stitches, repeat from * around. (35 stitches)

Row 7: *Inc in first stitch, sc in next 6 stitches, repeat from * around. (40 stitches)

Row 8: *Inc in first stitch, sc in next 7 stitches, repeat from * around. (45 stitches)

Row 9: *Dec in first 2 stitches, sc in next 7 stitches, repeat from * around. (40 stitches)

Row 10: Sc in each stitch around. (40 stitches)

Row 11: *Dec in first 2 stitches, sc in next 6 stitches, repeat from * around. (35 stitches)

Rows 12-13: Sc in each stitch around. (35 stitches)

Row 14: *Dec in first 2 stitches, sc in next 5 stitches, repeat from * around. (30 stitches)

Rows 15-16: Sc in each stitch around. (30 stitches)

Row 17: *Dec in first 2 stitches, sc in next 4 stitches, repeat from * around. (25 stitches)

Row 18: Sc in each stitch around. (25 stitches)

Switch to light blue.

Row 19: *Dec in first 2 stitches, sc in next 3 stitches, repeat from * around. (20 stitches)

Tie off. Stuff body tight with poly-fil. Position and sew head onto body.

Legs:

With light blue, ch 3. Sl st to first ch to create circle. (Instead, you can perform the “magic circle” if you’d like.)

Row 1: ch 1, 10 sc inside of circle. (10 stitches)

Row 2: *Inc in first stitch, sc in next stitch, repeat from * around. (15 stitches)

Row 3: *Dec in first 2 stitches, sc in next stitch, repeat from * around. (10 stitches)

Rows 4-9: Sc in each stitch around. (10 stitches)

Row 10: *Dec in first 2 stitches, sc in next 3 stitches, repeat from * around. (8 stitches)

Tie off. Stuff with poly-fil, leaving the top 4-5 rows unstuffed. Position and sew onto bottom of body.

Arms:

With light blue, ch 3. Sl st to first ch to create circle. (Instead, you can perform the “magic circle” if you’d like.)

Row 1: ch 1, 4 sc inside of circle. (4 stitches)

Row 2: *Inc in first stitch, sc in next stitch, repeat from * around. (6 stitches)

Row 3: *Inc in first stitch, sc in next 2 stitches, repeat from * around. (8 stitches)

Row 4: *Inc in first stitch, sc in next 3 stitches, repeat from * around. (10 stitches)

Rows 5-7: Sc in each stitch around. (10 stitches)

Row 8: *Dec in first 2 stitches, sc in next 3 stitches, repeat from * around. (8 stitches)

Tie off. Don’t stuff. Position and sew onto body.

Shell:

With café latte, ch 3. Sl st to first ch to create circle. (Instead, you can perform the “magic circle” if you’d like.)

Row 1: ch 1, 5 sc inside of circle. (5 stitches)

Row 2: Inc in each stitch around. (10 stitches)

Row 3: *Inc in first stitch, sc in next stitch, repeat from * around. (15 stitches)

Row 4: *Inc in first stitch, sc in next 2 stitches, repeat from * around. (20 stitches)

Row 5: *Inc in first stitch, sc in next 3 stitches, repeat from * around. (25 stitches)

Row 6: *Inc in first stitch, sc in next 4 stitches, repeat from * around. (30 stitches)

Row 7: *Inc in first stitch, sc in next 5 stitches, repeat from * around. (35 stitches)

Rows 8-9: Sc in each stitch around. (35 stitches)

Row 10: *Dec in first 2 stitches, sc in next 5 stitches, repeat from * around. (30 stitches)

Row 11: Sc in each stitch around. (30 stitches)

Switch to white.

Row 12: Sc in each stitch around. (30 stitches)

Tie off. Stuff with poly-fil. Position and sew onto back. Stop before you close it up to put some more stuffing in.


Tail:

With light blue, ch 3. Sl st to first ch to create circle. (Instead, you can perform the “magic circle” if you’d like.)

Row 1: ch 1, 5 sc inside of circle. (5 stitches)

Row 2: Inc in each stitch around. (10 stitches)

Rows 3-22: Sc in each stitch around. (10 stitches)

Row 23: *Dec in first 2 stitches, sc in next 3 stitches, repeat from * around. (8 stitches)

Rows 24-25: Sc in each stitch around. (8 stitches)

Tie off. Don’t stuff. Roll end up and sew a couple of stitches to hold it.

IMG_7242

Position and sew onto back of body.

I hope you enjoy this pattern! You’re welcome to sell items that you make using my patterns, as long as you don’t post the pattern anywhere else, and link back to my page if you’d like to. If there are any mistakes, or something is unclear, please feel free to message me on Facebook.

Crochet a Bulbasaur

IMG_5788

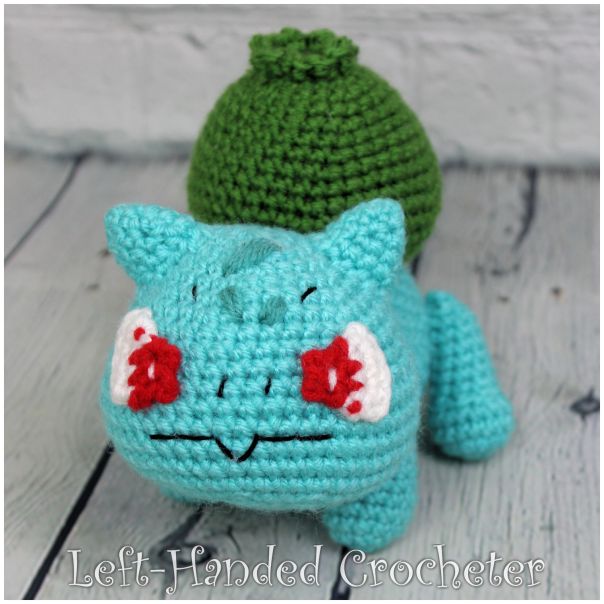
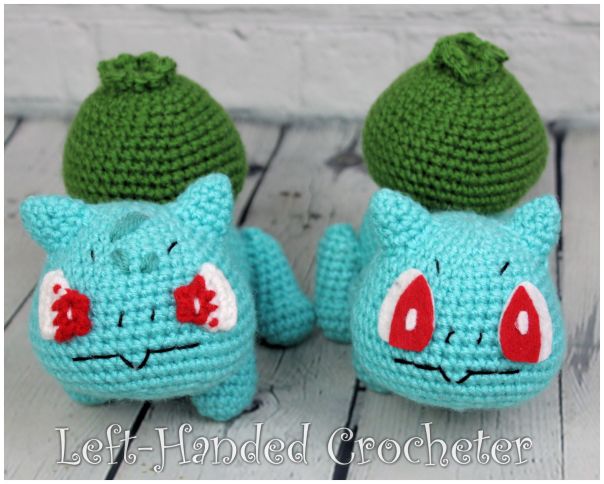
Gotta catch ‘em all! Whip up a couple of crocheted Bulbasaurs, and they’re sure to be a hit. Made with worsted weight yarn, this finished doll measures approximately 5½ inches tall.

Abbreviations:

ch: chain

sc: single crochet

sl st: slip stitch

inc: increase (2 single crochets in one loop)

dec: decrease (pull yarn through loop, pull yarn through second loop, yarn over and pull through all loops)

Materials needed:

Any worsted weight yarn. I used Red Heart Super Saver in jade, cherry red and white, and Lion Brand Vanna’s choice in aquamarine and Kelly green.

G (4mm) crochet hook

Poly-fil

Yarn needle

Black embroidery thread

Stitch markers

This pattern is worked “in-the-round”, and stitches are worked through both loops unless otherwise noted. 

Head:

With aquamarine, ch 3. Sl st to first ch to create circle. (Instead, you can perform the “magic circle” if you’d like.)

Row 1: ch 1, 10 sc inside of circle. (10 stitches)

Row 2: *Inc in first stitch, sc in next stitch, repeat from * around. (15 stitches)

Row 3: *Inc in first stitch, sc in next 2 stitches, repeat from * around. (20 stitches)

Row 4: *Inc in first stitch, sc in next 3 stitches, repeat from * around. (25 stitches)

Row 5: *Inc in first stitch, sc in next 4 stitches, repeat from * around. (30 stitches)

Row 6: *Inc in first stitch, sc in next 5 stitches, repeat from * around. (35 stitches)

Row 7: *Inc in first stitch, sc in next 6 stitches, repeat from * around. (40 stitches)

Rows 8-10: Sc in each stitch around. (40 stitches)

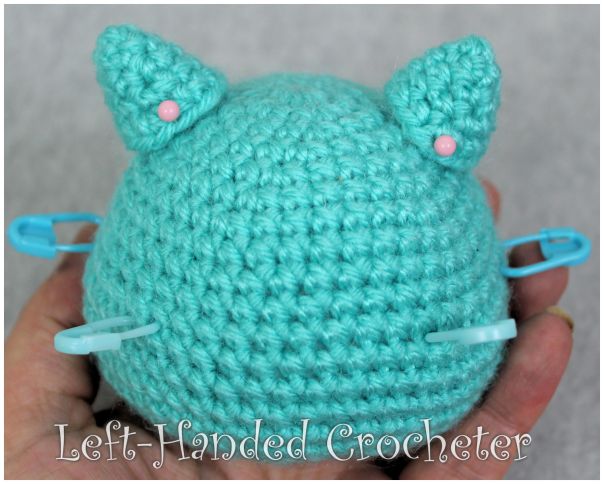
**For the following row, you’ll place stitch markers to create guidelines for where to place his facial features.**

Row 11: Sc in first 10 stitches, inc in next 5 stitches (place stitch marker in first and last inc), sc in next 10 stitches, inc in next 5 stitches (place stitch marker in first and last inc), sc in last 10 stitches. (50 stitches)

Rows 12-16: Sc in each stitch around. (50 stitches)

Row 17: *Dec in first 2 stitches, sc in next 3 stitches, repeat from * around. (40 stitches)

Row 18: *Dec in first 2 stitches, sc in next 2 stitches, repeat from * around. (30 stitches)

Stuff head tight with poly-fil. Continue stuffing as you work.

Row 19: *Dec in first 2 stitches, sc in next stitch, repeat from * around. (20 stitches)

Row 20: *Dec in first 2 stitches, sc in next 2 stitches, repeat from * around. (15 stitches)

Row 21: *Dec in first 2 stitches, sc in next stitch, repeat from * around. (10 stitches)

Row 22: Dec around. (5 stitches)

Sew end shut and tie off.

Ears:

With aquamarine, ch 3. Sl st to first ch to create circle. (Instead, you can perform the “magic circle” if you’d like.)

Row 1: ch 1, 4 sc inside of circle. (4 stitches)

Row 2: *Inc in first stitch, sc in next stitch, repeat from * around. (6 stitches)

Row 3: *Inc in first stitch, sc in next 2 stitches, repeat from * around. (8 stitches)

Row 4: *Inc in first stitch, sc in next 3 stitches, repeat from * around. (10 stitches)

Row 5: *Inc in first stitch, sc in next 4 stitches, repeat from * around. (12 stitches)

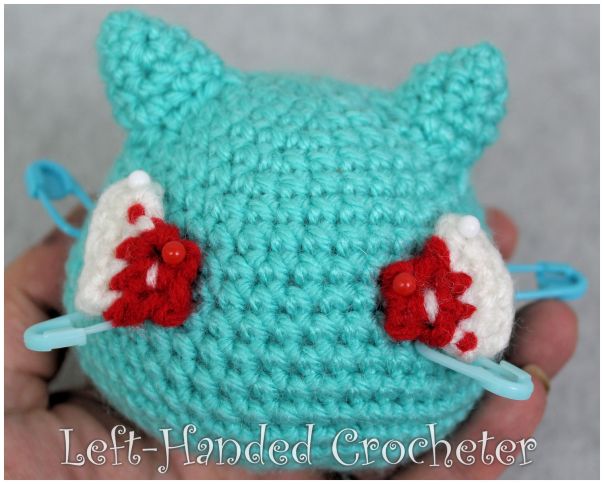
Tie off. Stuff ears lightly with poly-fil. Sew on above outside stitch markers.

IMG_5675

Eyes:

With cherry red, ch 3.

Row 1: Sc in 2nd ch from hook and in each across, ch 1, turn. (2 stitches)

Row 2: Sc in first stitch, inc in last stitch, switch to white, ch 1, turn. (3 stitches)

Row 3: Inc in first stitch, sc in next 2 stitches, ch 1, turn. (4 stitches)

Row 4: Sc in first 3 stitches, inc in last stitch. (5 stitches)

Tie off. Make two. Position above inside stitch markers and sew or hot glue on.

IMG_5679

Using black embroidery thread, sew on his nose and mouth. You can also use jade yarn to sew darker spots on him. You can also try using felt for his eyes.

IMG_5794

Body:

With aquamarine, ch 3. Sl st to first ch to create circle. (Instead, you can perform the “magic circle” if you’d like.)

Row 1: ch 1, 10 sc inside of circle. (10 stitches)

Row 2: *Inc in first stitch, sc in next stitch, repeat from * around. (15 stitches)

Row 3: *Inc in first stitch, sc in next 2 stitches, repeat from * around. (20 stitches)

Row 4: *Inc in first stitch, sc in next 3 stitches, repeat from * around. (25 stitches)

Row 5: *Inc in first stitch, sc in next 4 stitches, repeat from * around. (30 stitches)

Row 6: *Inc in first stitch, sc in next 5 stitches, repeat from * around. (35 stitches)

Row 7: *Inc in first stitch, sc in next 6 stitches, repeat from * around. (40 stitches)

Rows 8-11: Sc in each stitch around. (40 stitches)

Row 12: *Dec in first 2 stitches, sc in next 6 stitches, repeat from * around. (35 stitches)

Row 13: Sc in each stitch around. (35 stitches)

Row 14: *Dec in first 2 stitches, sc in next 5 stitches, repeat from * around. (30 stitches)

Rows 15-16: Sc in each stitch around. (30 stitches)

Row 17: *Dec in first 2 stitches, sc in next 4 stitches, repeat from * around. (25 stitches)

Rows 18-19: Sc in each stitch around. (25 stitches)

Row 20: *Dec in first 2 stitches, sc in next 3 stitches, repeat from * around. (20 stitches)

Tie off. Stuff body tight with poly-fil. Position head onto body and sew on.

IMG_5682

Legs:

With aquamarine, ch 3. Sl st to first ch to create circle. (Instead, you can perform the “magic circle” if you’d like.)

Row 1: ch 1, 10 sc inside of circle. (10 stitches)

Row 2: *Inc in first stitch, sc in next stitch, repeat from * around. (15 stitches)

Rows 3-4: Sc in each stitch around. (15 stitches)

Row 5: Sc in first 3 stitches, work 5 dec’s over next 10 stitches, sc in last 2 stitches. (10 stitches)

Stuff foot tight with poly-fil. Continue stuffing as you work.

Rows 6-11: Sc in each stitch around. (10 stitches)

Row 12: Dec around. (5 stitches)

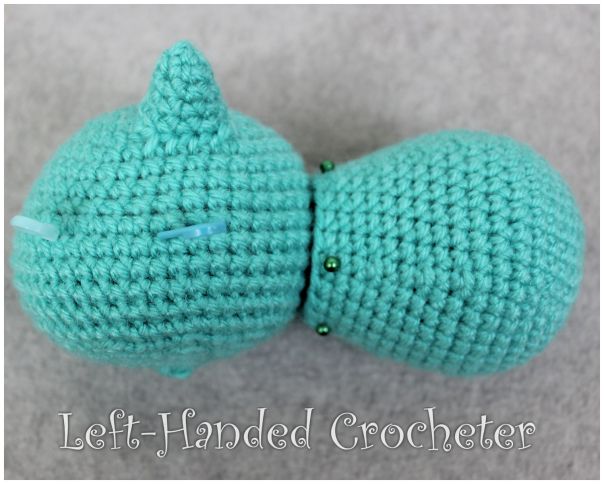
Sew end shut and tie off. Position legs onto body and sew on. Be sure that he stands before you start sewing, and check to be sure his balance is ok after sewing each leg. I sewed the front legs a bit lower than the back legs to keep his head up.

Pod:

With Kelly green, ch 3. Sl st to first ch to create circle. (Instead, you can perform the “magic circle” if you’d like.)

Row 1: ch 1, 10 sc inside of circle. (10 stitches)

Row 2: In inside loops only, *inc in first stitch, sc in next stitch, repeat from * around. (15 stitches)

Row 3: *Inc in first stitch, sc in next 2 stitches, repeat from * around. (20 stitches)

Row 4: *Inc in first stitch, sc in next 3 stitches, repeat from * around. (25 stitches)

Row 5: Sc in each stitch around. (25 stitches)

Row 6: *Inc in first stitch, sc in next 4 stitches, repeat from * around. (30 stitches)

Row 7: Sc in each stitch around. (30 stitches)

Row 8: *Inc in first stitch, sc in next 5 stitches, repeat from * around. (35 stitches)

Row 9: *Inc in first stitch, sc in next 6 stitches, repeat from * around. (40 stitches)

Row 10: Sc in each stitch around. (40 stitches)

Row 11: *Inc in first stitch, sc in next 7 stitches, repeat from * around. (45 stitches)

Row 12: *Inc in first stitch, sc in next 8 stitches, repeat from * around. (50 stitches)

Rows 13-15: Sc in each stitch around. (50 stitches)

Row 16: *Dec in first 2 stitches, sc in next 3 stitches, repeat from * around. (40 stitches)

Row 17: *Dec in first 2 stitches, sc in next 2 stitches, repeat from * around. (30 stitches)

Row 18: *Dec in first 2 stitches, sc in next stitch, repeat from * around. (20 stitches)

Tie off. Stuff tight with poly-fil. Find the line you created by crocheting into the inside loops on row 2. Attach Kelly green yarn with a sl st and work 3 sc’s into each loop around. Tie off.

Position pod onto his back and sew on.

I hope you enjoy this pattern! You’re welcome to sell items that you make using my patterns, as long as you don’t post the pattern anywhere else, and link back to my page if you’d like to. If there are any mistakes, or something is unclear, please feel free to message me on Facebook.


Crochet a Pokeball

IMG_5924

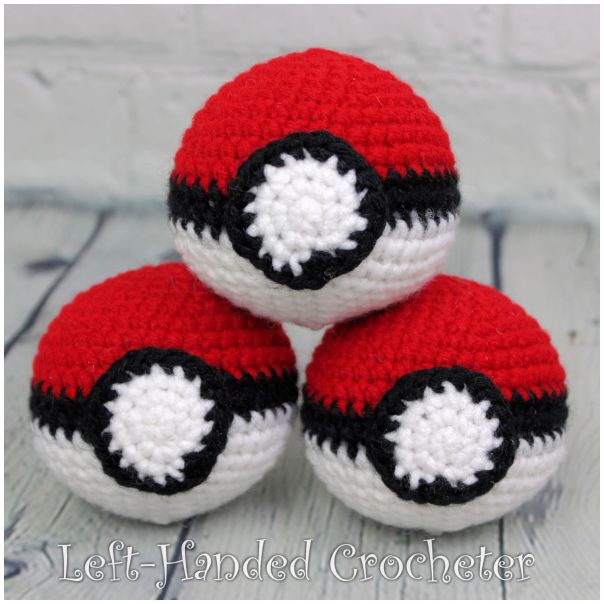
Gotta catch ‘em all! Whip up a couple of crocheted Pokeballs, and they’re sure to be a hit. Made with worsted weight yarn, this finished plush measures approximately 2½ inches tall.

Abbreviations:

ch: chain

sc: single crochet

sl st: slip stitch

inc: increase (2 single crochets in one loop)

dec: decrease (pull yarn through loop, pull yarn through second loop, yarn over and pull through all loops)

Materials needed:

Any worsted weight yarn. I used Red Heart Super Saver in cherry red, white and black.

G (4mm) crochet hook

Poly-fil

Yarn needle

This pattern is worked “in-the-round”, and stitches are worked through both loops unless otherwise noted. 

Ball:

With cherry red, ch 3. Sl st to first ch to create circle. (Instead, you can perform the “magic circle” if you’d like.)

Row 1: Ch 1, 5 sc inside of circle. (5 stitches)

Row 2: Inc in each stitch around. (10 stitches)

Row 3: *Inc in first stitch, sc in next stitch, repeat from * around. (15 stitches)

Row 4: *Inc in first stitch, sc in next 2 stitches, repeat from * around. (20 stitches)

Row 5: *Inc in first stitch, sc in next 3 stitches, repeat from * around. (25 stitches)

Row 6: *Inc in first stitch, sc in next 4 stitches, repeat from * around. (30 stitches)

Row 7: *Inc in first stitch, sc in next 5 stitches, repeat from * around. (35 stitches)

Row 8: *Inc in first stitch, sc in next 6 stitches, repeat from * around. (40 stitches)

Rows 9-10: Sc in each stitch around. (40 stitches)

Switch to black.

Rows 11-12: Sc in each stitch around. (40 stitches)

Switch to white.

Rows 13-14: Sc in each stitch around. (40 stitches)

Row 15: *Dec in first 2 stitches, sc in next 6 stitches, repeat from * around. (35 stitches)

Row 16: *Dec in first 2 stitches, sc in next 5 stitches, repeat from * around. (30 stitches)

Row 17: *Dec in first 2 stitches, sc in next 4 stitches, repeat from * around. (25 stitches)

Row 18: *Dec in first 2 stitches, sc in next 3 stitches, repeat from * around. (20 stitches)

Stuff tight with poly-fil. Continue stuffing as you work.

Row 19: *Dec in first 2 stitches, sc in next 2 stitches, repeat from * around. (15 stitches)

Row 20: *Dec in first 2 stitches, sc in next stitch, repeat from * around. (10 stitches)

Row 21: Dec around. (5 stitches)

Sew end shut and tie off.

 Button:

With white, ch 3. Sl st to first ch to create circle. (Instead, you can perform the “magic circle” if you’d like.)

Row 1: Ch 1, 5 sc inside of circle. (5 stitches)

Row 2: Inc in each stitch around. (10 stitches)

Row 3: *Inc in first stitch, sc in next stitch, repeat from * around. (15 stitches)

Switch to black.

Row 4: *Inc in first stitch, sc in next 2 stitches, repeat from * around. (20 stitches)

Sl st to next stitch. Tie off. Sew or hot glue onto ball.

I hope you enjoy this pattern! You’re welcome to sell items that you make using my patterns, as long as you don’t post the pattern anywhere else, and link back to my page if you’d like to. If there are any mistakes, or something is unclear, please feel free to message me on Facebook.


Crochet a Little Pikachu

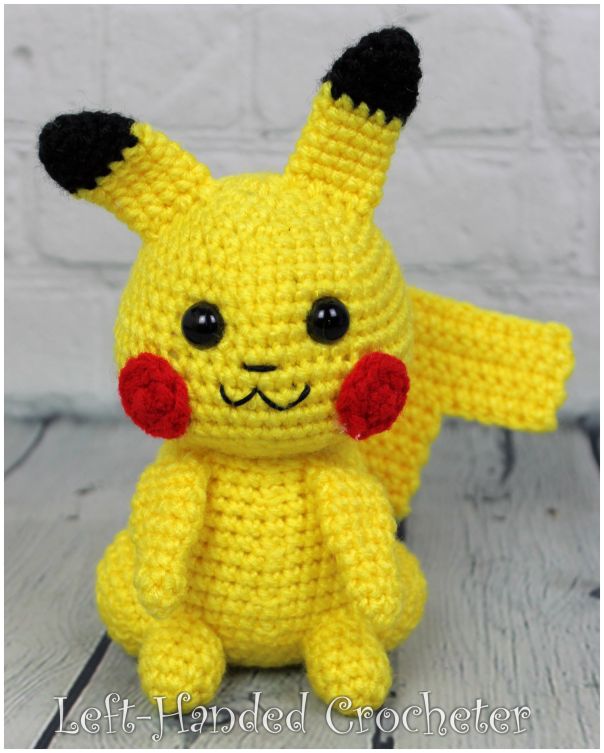
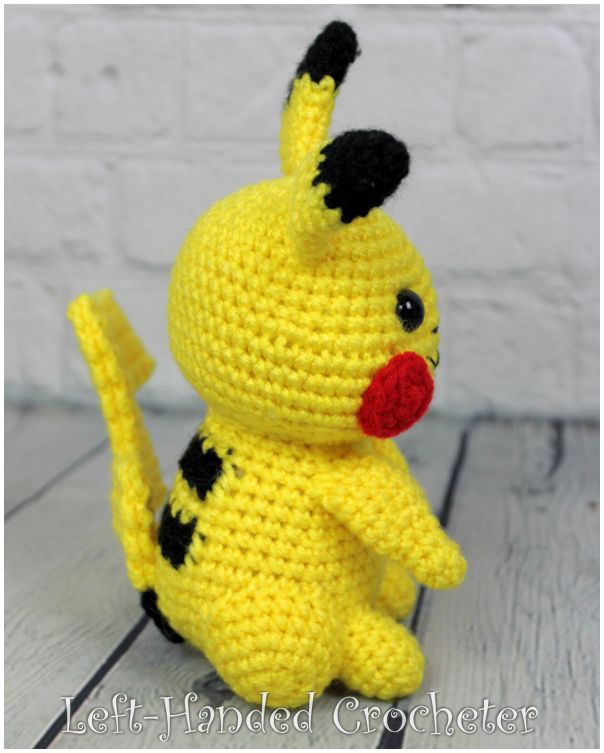
IMG_5669

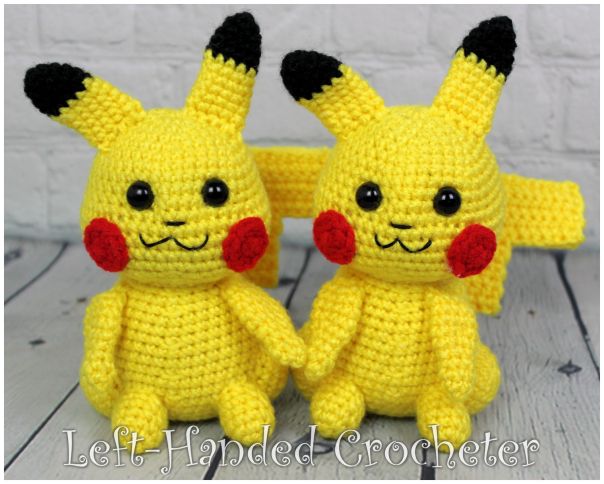
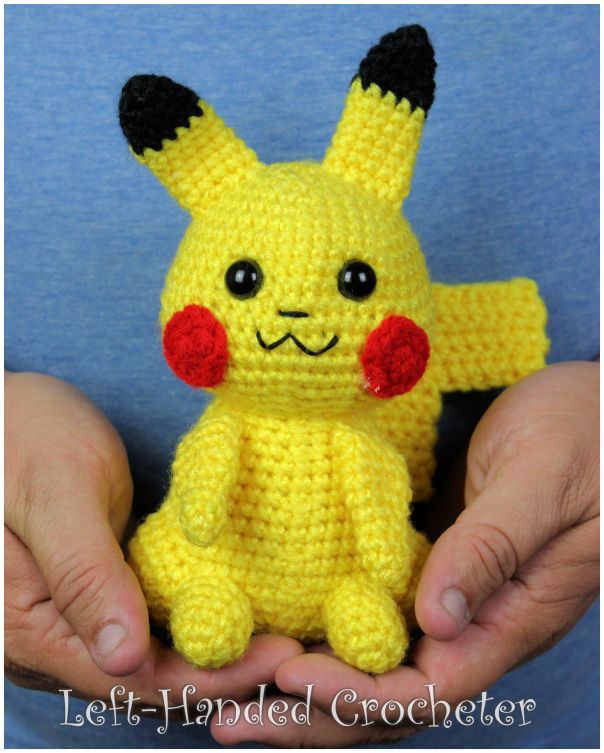
Gotta catch ‘em all! Pikachu is a favorite amongst Pokemon lovers. Whip up a couple of crocheted Pikachus, and they’re sure to be a hit. Made with worsted weight yarn, this finished doll measures approximately 7 inches tall, with his ears.

Abbreviations:

ch: chain

sc: single crochet

sl st: slip stitch

inc: increase (2 single crochets in one loop)

dec: decrease (pull yarn through loop, pull yarn through second loop, yarn over and pull through all loops)

Materials needed:

Any worsted weight yarn. I used Red Heart Super Saver in bright yellow, cherry red and black.

G (4mm) crochet hook

Poly-fil

Yarn needle

12mm safety eyes

Black embroidery thread

Stitch markers

This pattern is worked “in-the-round”, and stitches are worked through both loops unless otherwise noted. 

Head:

With bright yellow, ch 3. Sl st to first ch to create circle. (Instead, you can perform the “magic circle” if you’d like.)

Row 1: ch 1, 10 sc inside of circle. (10 stitches)

Row 2: *Inc in first stitch, sc in next stitch, repeat from * around. (15 stitches)

Row 3: *Inc in first stitch, sc in next 2 stitches, repeat from * around. (20 stitches)

Row 4: *Inc in first stitch, sc in next 3 stitches, repeat from * around. (25 stitches)

Row 5: *Inc in first stitch, sc in next 4 stitches, repeat from * around. (30 stitches)

Row 6: *Inc in first stitch, sc in next 5 stitches, repeat from * around. (35 stitches)

Row 7: *Inc in first stitch, sc in next 6 stitches, repeat from * around. (40 stitches)

Rows 8-10: Sc in each stitch around. (40 stitches)

**For the following row, you’ll place stitch markers to create guidelines for where to place his facial features.**

IMG_5594

Row 11: Sc in first 10 stitches, inc in next 5 stitches (place stitch marker in last inc), sc in next 10 stitches, inc in next 5 stitches (place stitch marker in first inc), sc in last 10 stitches. (50 stitches)

Rows 12-15: Sc in each stitch around. (50 stitches)

Row 16: *Dec in first 2 stitches, sc in next 3 stitches, repeat from * around. (40 stitches)

Row 17: *Dec in first 2 stitches, sc in next 2 stitches, repeat from * around. (30 stitches)

Row 18: *Dec in first 2 stitches, sc in next stitch, repeat from * around. (20 stitches)

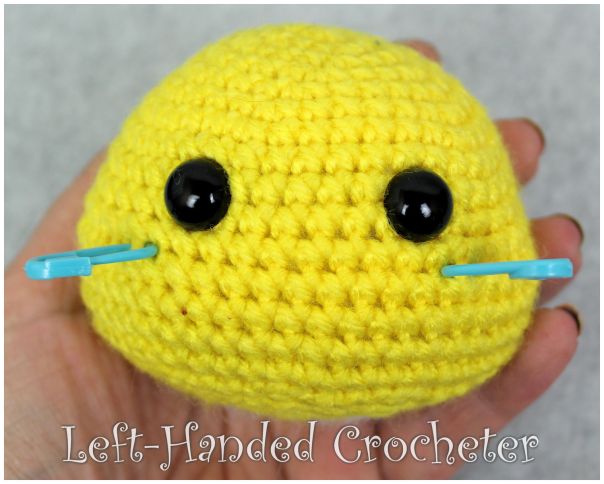
Tie off. Stuff tight with poly-fil. Using your stitch markers to guide you, place the eyes between rows 9 and 10 with 7 stitches between them.

IMG_5598

Using a needle and yarn, drop a stitch from one eye to the other and pull tight to make the eyes indented.

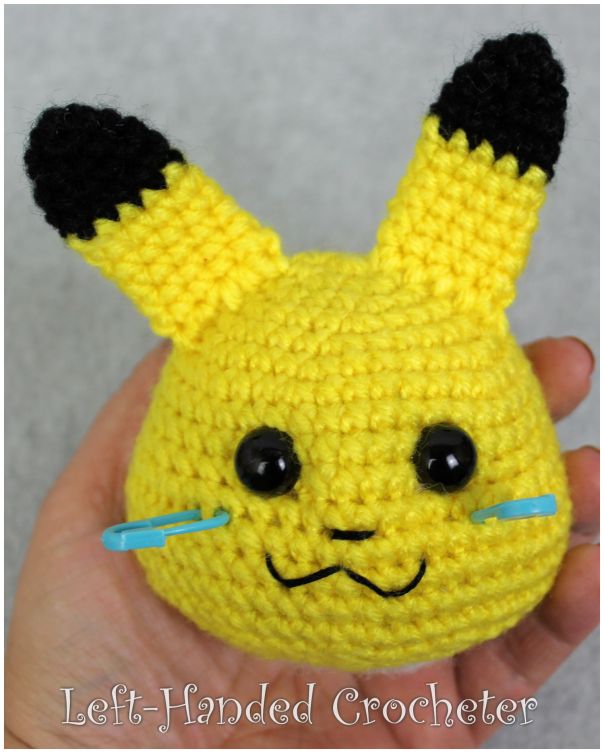
Sew a nose and mouth on with embroidery thread.

Ears:

With black, ch 3. Sl st to first ch to create circle. (Instead, you can perform the “magic circle” if you’d like.)

Row 1: ch 1, 4 sc inside of circle. (4 stitches)

Row 2: *Inc in first stitch, sc in next stitch, repeat from * around. (6 stitches)

Row 3: *Inc in first stitch, sc in next 2 stitches, repeat from * around. (8 stitches)

Row 4: *Inc in first stitch, sc in next 3 stitches, repeat from * around. (10 stitches)

Row 5: Sc in each stitch around. (10 stitches)

Switch to bright yellow.

Rows 6-11: Sc in each stitch around. (10 stitches)

Tie off. Make two. Lay flat, position and sew onto top of head.

IMG_5610

Cheeks:

With cherry red, ch 3. Sl st to first ch to create circle. (Instead, you can perform the “magic circle” if you’d like.)

Row 1: ch 1, 5 sc inside of circle. (5 stitches)

Row 2: Inc in each stitch around. (10 stitches)

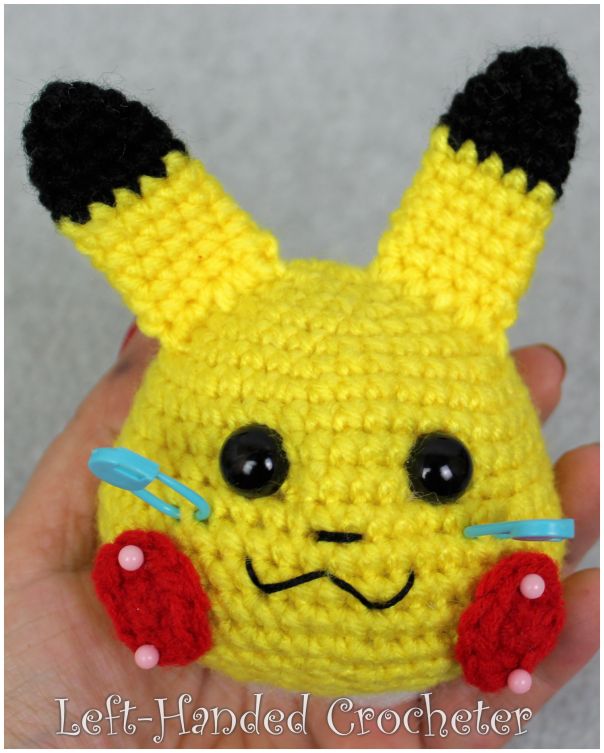
Sl st into next stitch. Tie off. Make two. Position on face, just under stitch markers. Sew or hot glue cheeks on.

IMG_5612

Body:

With bright yellow, ch 3. Sl st to first ch to create circle. (Instead, you can perform the “magic circle” if you’d like.)

Row 1: ch 1, 10 sc inside of circle. (10 stitches)

Row 2: *Inc in first stitch, sc in next stitch, repeat from * around. (15 stitches)

Row 3: *Inc in first stitch, sc in next 2 stitches, repeat from * around. (20 stitches)

Row 4: *Inc in first stitch, sc in next 3 stitches, repeat from * around. (25 stitches)

Row 5: *Inc in first stitch, sc in next 4 stitches, repeat from * around. (30 stitches)

Row 6: *Inc in first stitch, sc in next 5 stitches, repeat from * around. (35 stitches)

Row 7: *Inc in first stitch, sc in next 6 stitches, repeat from * around. (40 stitches)

Row 8: *Inc in first stitch, sc in next 7 stitches, repeat from * around. (45 stitches)

Row 9: *Dec in first 2 stitches, sc in next 7 stitches, repeat from * around. (40 stitches)

Row 10: Sc in each stitch around. (40 stitches)

Row 11: *Dec in first 2 stitches, sc in next 6 stitches, repeat from * around. (35 stitches)

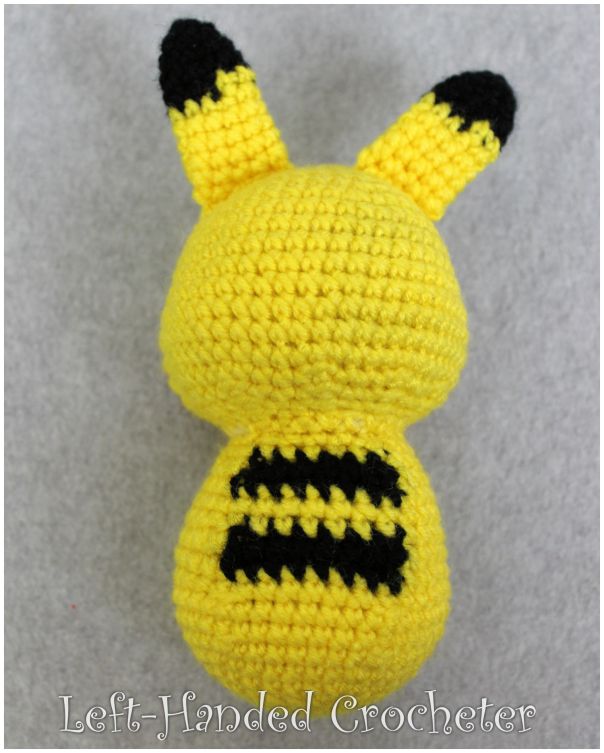
Switch to black.

Row 12: Sc in first 8 stitches, switch to bright yellow, sc in each stitch around, switch to black. (35 stitches)

Row 13: Sc in first 8 stitches, switch to bright yellow, sc in each stitch around. (35 stitches)

Row 14: *Dec in first 2 stitches, sc in next 5 stitches, repeat from * around. (30 stitches)

Row 15: Sc in each stitch around. (30 stitches)

Switch to black.

Row 16: Sc in first 8 stitches, switch to bright yellow, sc in each stitch around, switch to black. (30 stitches)

Row 17: Dec in first 2 stitches, sc in next 4 stitches, dec in next 2 stitches. Switch to bright yellow. Sc in next 4 stitches, *dec in next 2 stitches, sc in next 4 stitches, repeat from * around. (25 stitches)

Row 18: Sc in each stitch around. (25 stitches)

Row 19: *Dec in first 2 stitches, sc in next 3 stitches, repeat from * around. (20 stitches)

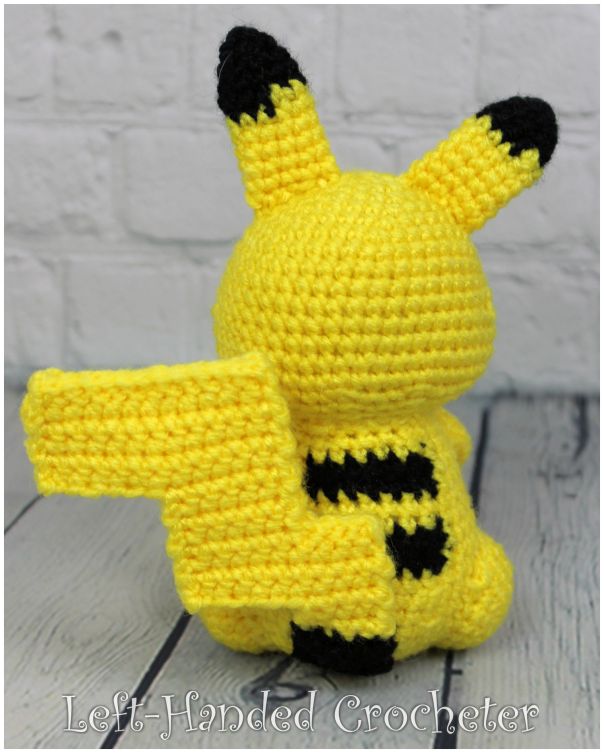
Tie off. Stuff body tight with poly-fil. Position and sew head onto body, being sure the black stripes are centered on his back.

IMG_5616

Legs:

With bright yellow, ch 3. Sl st to first ch to create circle. (Instead, you can perform the “magic circle” if you’d like.)

Row 1: ch 1, 10 sc inside of circle. (10 stitches)

Row 2: *Inc in first stitch, sc in next stitch, repeat from * around. (15 stitches)

Row 3: *Inc in first stitch, sc in next 2 stitches, repeat from * around. (20 stitches)

Rows 4-5: Sc in each stitch around. (20 stitches)

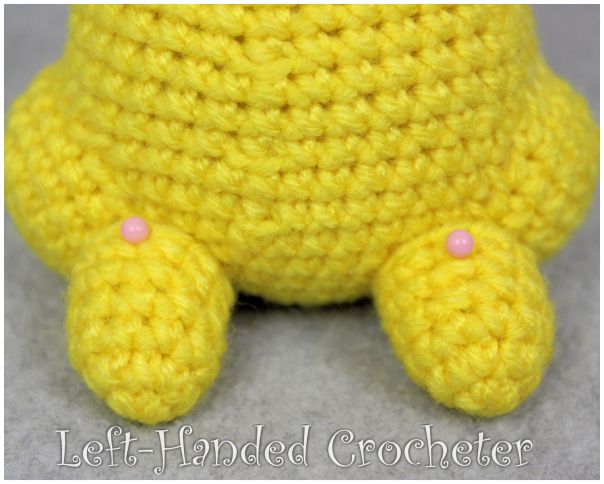
Tie off. Position onto sides of body. Sew on, stopping before you do the last few stitches to stuff some poly-fil inside.

Feet:

With bright yellow, ch 3. Sl st to first ch to create circle. (Instead, you can perform the “magic circle” if you’d like.)

Row 1: ch 1, 5 sc inside of circle. (5 stitches)

Row 2: Inc in each stitch around. (10 stitches)

Rows 3-6: Sc in each stitch around. (10 stitches)

Tie off. Stuff tight with poly-fil. Position onto legs, making sure it stands before sewing them on.

IMG_5626

Arms:

With bright yellow, ch 3. Sl st to first ch to create circle. (Instead, you can perform the “magic circle” if you’d like.)

Row 1: ch 1, 4 sc inside of circle. (4 stitches)

Row 2: *Inc in first stitch, sc in next stitch, repeat from * around. (6 stitches)

Rows 3-4: Sc in each stitch around. (6 stitches)

Row 5: *Inc in first stitch, sc in next 2 stitches, repeat from * around. (8 stitches)

Row 6: *Inc in first stitch, sc in next 3 stitches, repeat from * around. (10 stitches)

Rows 7-9: Sc in each stitch around. (10 stitches)

Row 10: *Dec in first 2 stitches, sc in next 3 stitches, repeat from * around. (8 stitches)

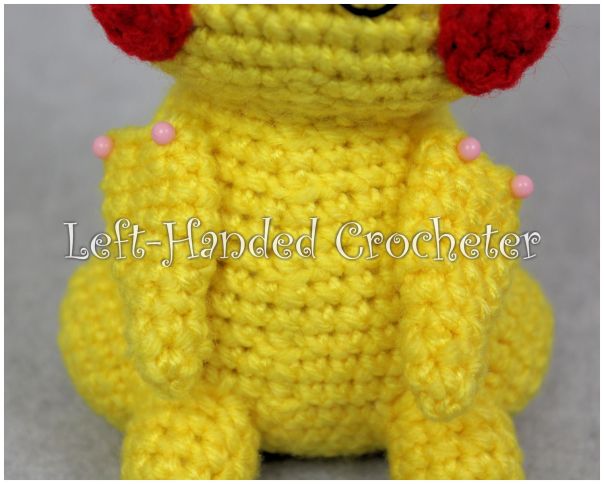
Tie off. Don’t stuff. Position and sew onto body.

IMG_5629

Tail:

With bright yellow, ch 13.

Row 1: Sc in 2nd ch from hook and in each across, ch 1, turn. (12 stitches)

Rows 2-6: Sc in each stitch across, ch 1, turn. (12 stitches)

Row 7: Sc in first 6 stitches, ch 1, turn. (6 stitches)

Rows 8-9: Sc in each stitch across, ch 1, turn. (6 stitches)

Row 10: Sc in each stitch across, ch 5. (6 stitches)

Row 11: Sc in 2nd ch from hook and in each across, then sc in each stitch across, ch 1, turn. (10 stitches)

Rows 12-14: Sc in each stitch across, ch 1, turn. (10 stitches)

Row 15: Sc in first 4 stitches, ch 1, turn. (4 stitches)

Rows 16-17: Sc in each stitch across, ch 1, turn. (4 stitches)

Switch to black.

Rows 18-20: Sc in each stitch across, ch 1, turn. (4 stitches)

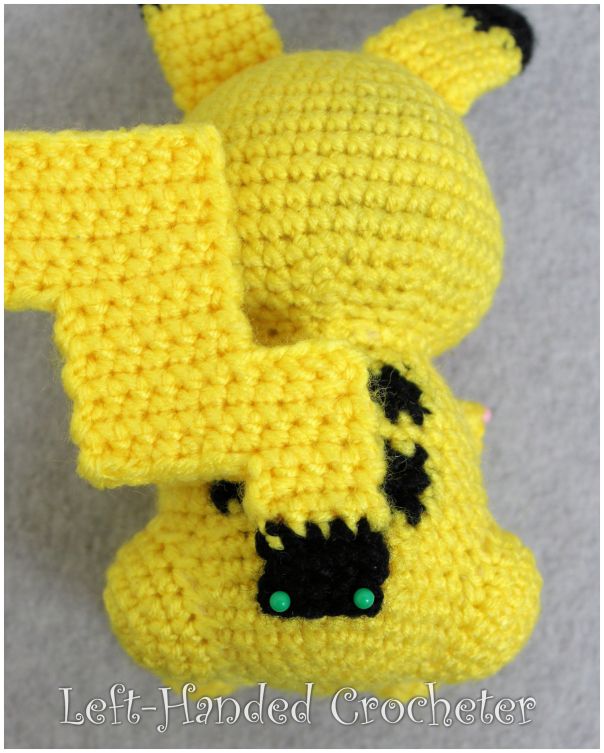
Tie off. Make two. Sew both of them together, using bright yellow yarn across the yellow parts and black yarn across the black parts.

Position on back of body and sew on.

IMG_5639

There you have your little Pikachu.

IMG_5643IMG_5646IMG_5651IMG_5685

I hope you enjoy this pattern! You’re welcome to sell items that you make using my patterns, as long as you don’t post the pattern anywhere else, and link back to my page if you’d like to. If there are any mistakes, or something is unclear, please feel free to message me on Facebook.

Spring Bunny

IMG_1941

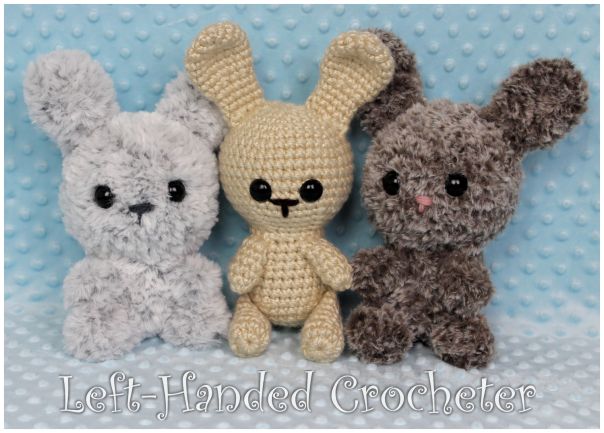
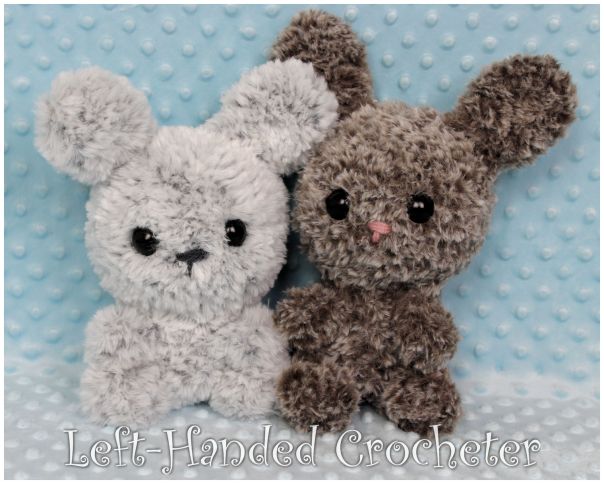
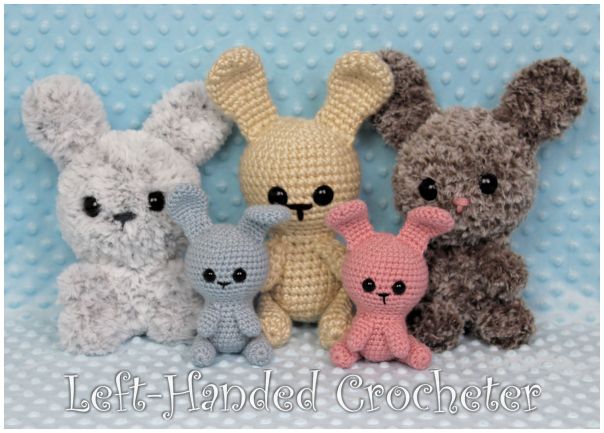
Nothing says spring like a cute, little bunny. This pattern was designed using size 6 bulky yarn, and the finished bunny measures approximately 9½-10 inches tall. It can be made with any yarn, though. I used 3 different yarns to make my spring bunnies.

If you want a pattern that you can save on your computer and easily print, this pattern is available in my Ravelry shop. I love printing patterns and saving them in a binder to keep track of the ones I’ve done and the ones I still plan to do.

Abbreviations:

ch: chain

sc: single crochet

sl st: slip stitch

inc: increase (2 single crochets in one loop)

dec: decrease (pull yarn through loop, pull yarn through second loop, yarn over and pull through all loops)

Materials needed:

Any size 6 bulky yarn. I used Lion Brand Go For Faux in Chinchilla and Bear, and Lion Brand Hometown USA in Los Angeles Tan.

I (5.5mm) crochet hook

Poly-fil

Yarn needle

20mm safety eyes

Yarn or embroidery thread for the nose

This pattern is worked “in-the-round”, and stitches are worked through both loops unless otherwise noted. 

Head:

Ch 3. Sl st to first ch to create circle. (Instead, you can perform the “magic circle” if you’d like.)

Row 1: ch 1, 10 sc inside of circle. (10 stitches)

Row 2: *Inc in first stitch, sc in next stitch, repeat from * around. (15 stitches)

Row 3: *Inc in first stitch, sc in next 2 stitches, repeat from * around. (20 stitches)

Row 4: *Inc in first stitch, sc in next 3 stitches, repeat from * around. (25 stitches)

Row 5: *Inc in first stitch, sc in next 4 stitches, repeat from * around. (30 stitches)

Row 6: *Inc in first stitch, sc in next 5 stitches, repeat from * around. (35 stitches)

Row 7: *Inc in first stitch, sc in next 6 stitches, repeat from * around. (40 stitches)

Rows 8-13: Sc in each stitch around. (40 stitches)

Row 14: *Dec in first 2 stitches, sc in next 6 stitches, repeat from * around. (35 stitches)

Row 15: *Dec in first 2 stitches, sc in next 5 stitches, repeat from * around. (30 stitches)

Row 16: *Dec in first 2 stitches, sc in next 4 stitches, repeat from * around. (25 stitches)

Row 17: *Dec in first 2 stitches, sc in next 3 stitches, repeat from * around. (20 stitches)

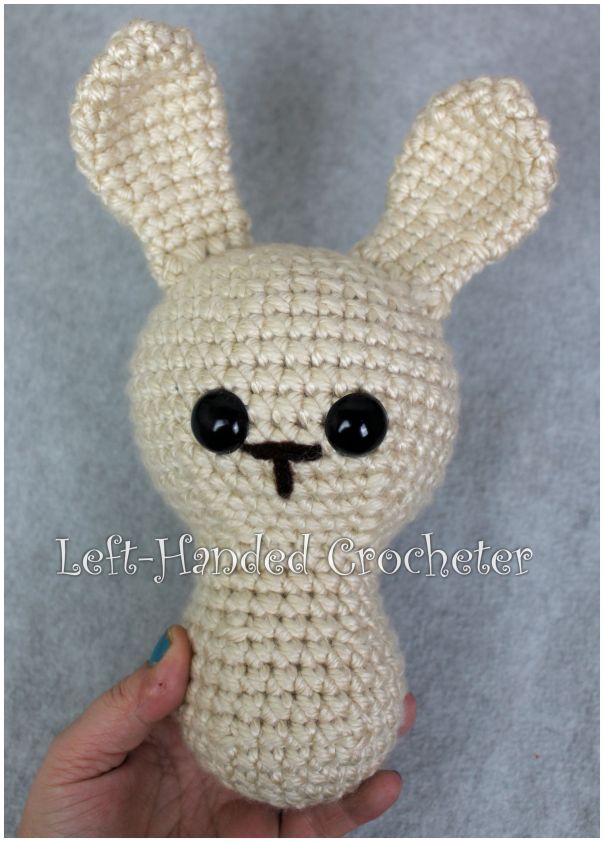
Tie off. Stuff tight with poly-fil. Insert safety eyes between rows 11 and 12 with 5 stitches between them. Sew on a nose with yarn or embroidery thread.

Ears:

Ch 3. Sl st to first ch to create circle. (Instead, you can perform the “magic circle” if you’d like.)

Row 1: ch 1, 5 sc inside of circle. (5 stitches)

Row 2: Inc in each stitch around. (10 stitches)

Row 3: *Inc in first stitch, sc in next stitch, repeat from * around. (15 stitches)

Rows 4-8: Sc in each stitch around. (15 stitches)

Row 9: *Dec in first 2 stitches, sc in next stitch, repeat from * around. (10 stitches)

Rows 10-12: Sc in each stitch around. (10 stitches)

Tie off. Make two. Pin ears onto top of head, making sure they’re in the right spot, then sew on.

Body:

Ch 3. Sl st to first ch to create circle. (Instead, you can perform the “magic circle” if you’d like.)

Row 1: ch 1, 10 sc inside of circle. (10 stitches)

Row 2: *Inc in first stitch, sc in next stitch, repeat from * around. (15 stitches)

Row 3: *Inc in first stitch, sc in next 2 stitches, repeat from * around. (20 stitches)

Row 4: *Inc in first stitch, sc in next 3 stitches, repeat from * around. (25 stitches)

Row 5: *Inc in first stitch, sc in next 4 stitches, repeat from * around. (30 stitches)

Row 6: *Dec in first 2 stitches, sc in next 4 stitches, repeat from * around. (25 stitches)

Rows 7-9: Sc in each stitch around. (25 stitches)

Row 10: *Dec in first 2 stitches, sc in next 3 stitches, repeat from * around. (20 stitches)

Rows 11-12: Sc in each stitch around. (20 stitches)

Tie off. Stuff tight with poly-fil. Sew head onto body. Stop before you close it up, and insert more poly-fil to reinforce the neck.

IMG_1914

Arms:

Ch 3. Sl st to first ch to create circle. (Instead, you can perform the “magic circle” if you’d like.)

Row 1: ch 1, 8 sc inside of circle. (8 stitches)

Rows 2-5: Sc in each stitch around. (8 stitches)

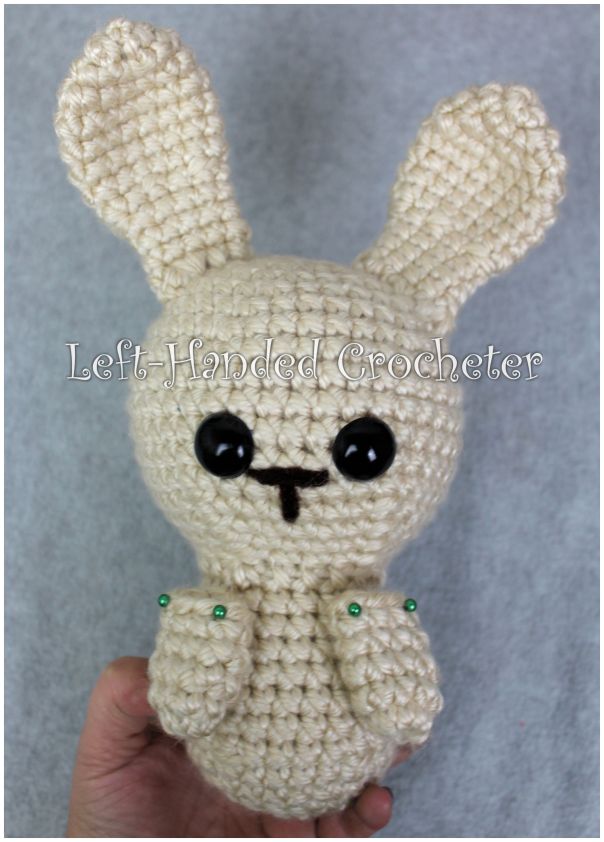
Tie off. Don’t stuff. Pin to body around row 11, making sure they’re in the spot you want them. Sew on.

IMG_1917

Legs:

Ch 3. Sl st to first ch to create circle. (Instead, you can perform the “magic circle” if you’d like.)

Row 1: ch 1, 10 sc inside of circle. (10 stitches)

Row 2: *Inc in first stitch, sc in next stitch, repeat from * around. (15 stitches)

Row 3: *Dec in first 2 stitches, sc in next stitch, repeat from * around. (10 stitches)

Rows 4-8: Sc in each stitch around. (10 stitches)

Tie off. Stuff tight with poly-fil, leaving the top 2-3 rows unstuffed. Pin legs onto side of body, making sure they’re where you want them. Sew on.

Tail:

Ch 3. Sl st to first ch to create circle. (Instead, you can perform the “magic circle” if you’d like.)

Row 1: ch 1, 8 sc inside of circle. (8 stitches)

Rows 2: Sc in each stitch around. (8 stitches)

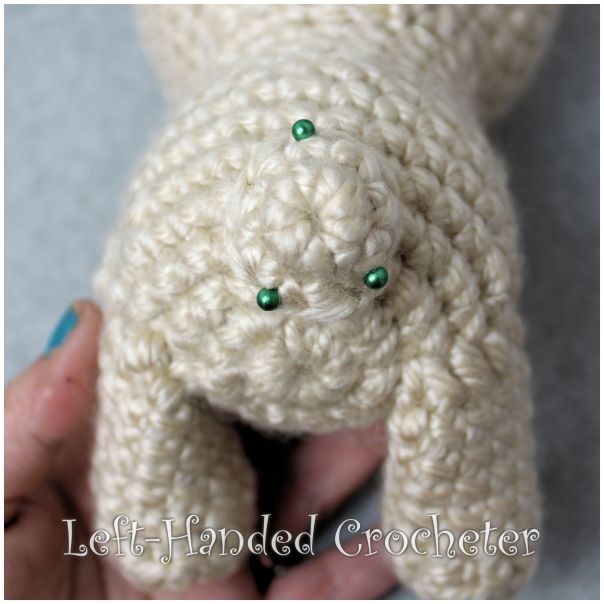
Tie off. Don’t stuff. Pin to back of body, making sure it’s where you want it. Sew on.

IMG_1924

The Go For Faux yarn is kind of tough to work with because you can’t see the stitches. On the plus side, that means you can’t see if you’ve messed it up. Take it one row at a time, and be sure to use stitch markers and count your stitches in each row. It makes such cute, soft, fluffy bunnies that it’s totally worth the extra work.

IMG_1945

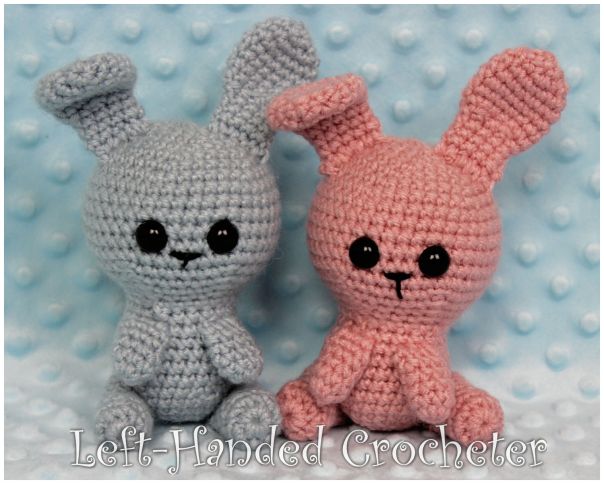
You can also make these bunnies with worsted weight yarn. I used Lion Brand Vanna’s Choice in pink and silver blue. Use a G(4mm) hook, and 12mm eyes. These finished bunnies are approximately 6-6½ inches tall.

IMG_1963

IMG_1934

I hope you enjoy this pattern! You’re welcome to sell items that you make using my patterns, as long as you don’t post the pattern anywhere else, and link back to my page if you’d like to. If there are any mistakes, or something is unclear, please feel free to message me on Facebook.


Jellyfish Bean Bag Balls

img_0502b

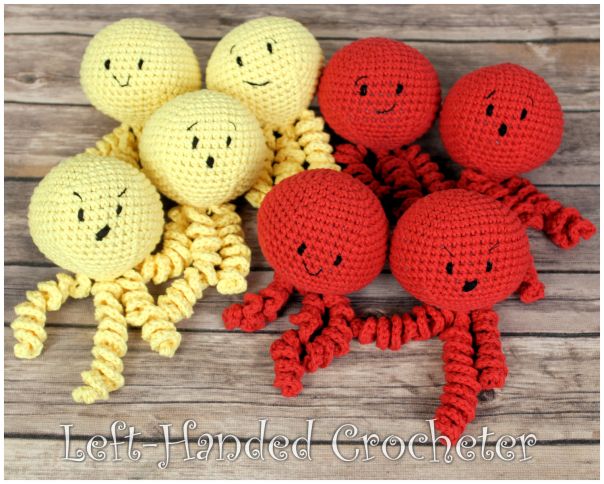
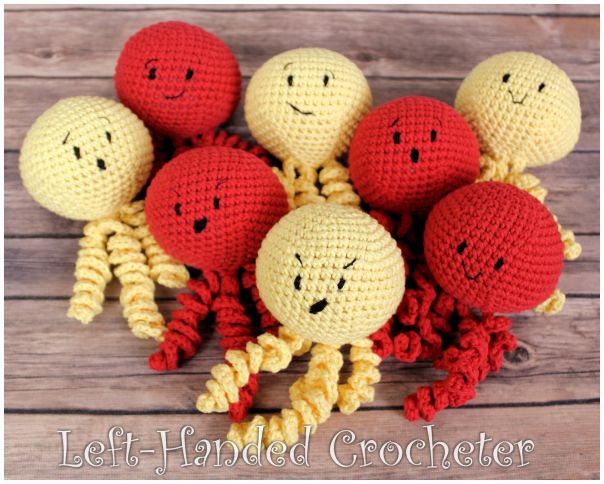
My boyfriend is a LARPer (LARP = Live Action Role Playing), and for Christmas I made him some spell balls. While he’ll use these as fireballs and lightning bolts, you could make these bean bag jellyfish in many different colors. These jellyfish bean bag balls are a great toy for kids. Made with cotton yarn and filled with poly-pellets and poly-fil, they’re perfect for any bean bag games you can come up with. 

If you want a pattern that you can save on your computer and easily print, this pattern is available in my Ravelry shop. I love printing patterns and saving them in a binder to keep track of the ones I’ve done and the ones I still plan to do.

Abbreviations:

ch: chain

sc: single crochet

inc: increase (2 single crochets in one loop)

dec: decrease (pull yarn through loop, pull yarn through second loop, yarn over and pull through all loops)

Materials needed:

Any cotton worsted weight yarn. These can also be made with acrylic worsted weight yarn, but the acrylic will fray over time and the cotton won’t.

G (4mm) crochet hook

Poly-fil

Poly-pellets

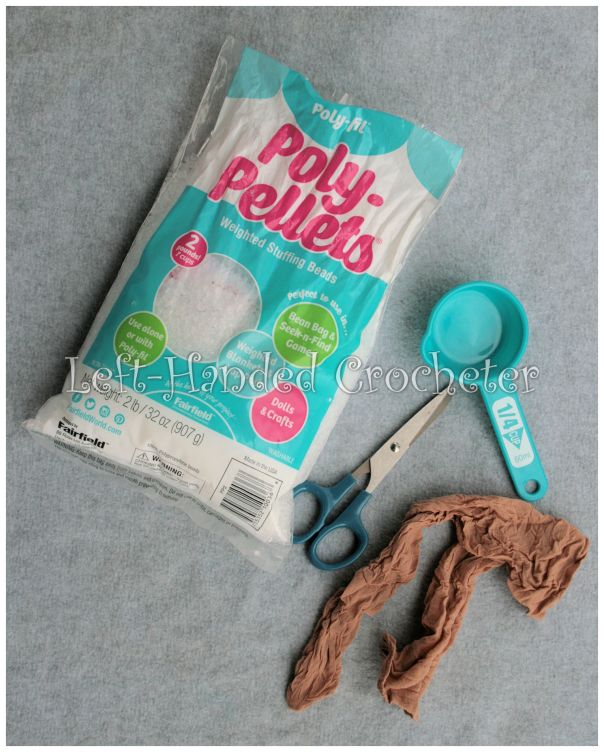
Nylons

Yarn needle

Black embroidery thread


This pattern is worked “in-the-round”, and stitches are worked through both loops unless otherwise noted. 


Making the weighted pouches

You don’t have to use the poly-pellets if you don’t want to, but it gives them a bit of extra weight so they fly better when you throw them.

img_2333

I got the nylon stockings so they were already 2 individual pieces. By cutting them in half, I was able to make 4 pouches using 1 set of nylons.

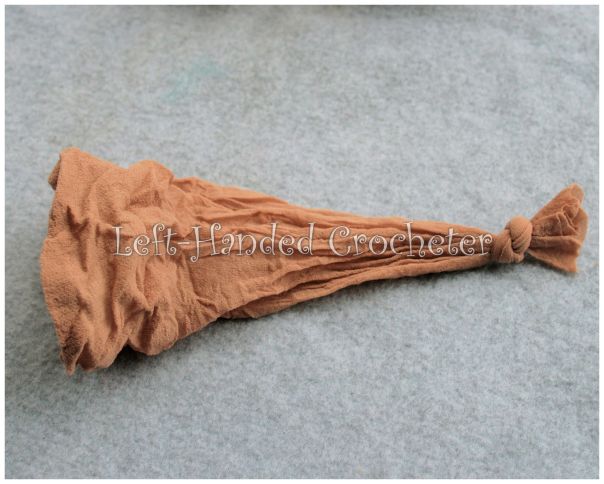
img_2335

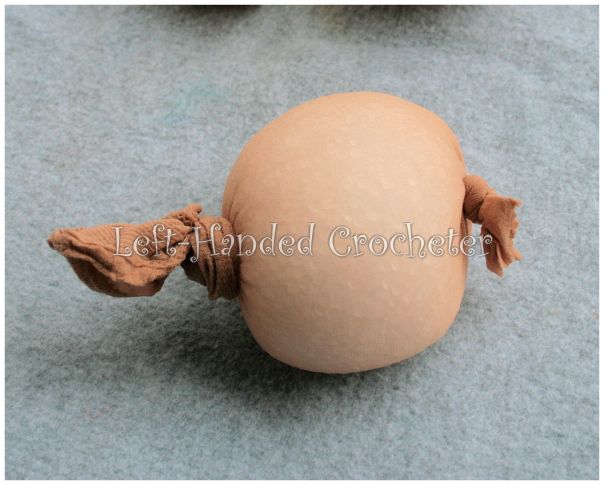
With the toe part, you just fill it and tie the end. With the other half, tie a knot at one end first. Fill each of them with ¼  cup of poly-pellets. Tie a knot in the top to close it.

img_2337

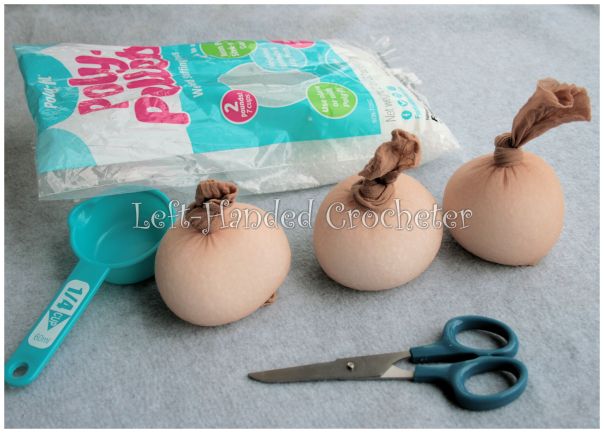
This extra bit of weight really does help them to go further when you throw them, but you can just fill them with regular poly-fil if you’d like.

img_2339

Ball:

Ch 3. Sl st to first ch to create circle. (Instead, you can perform the “magic circle” if you’d like.)

Row 1: ch 1, 10 sc inside of circle. (10 stitches)

Row 2: *Inc in first stitch, sc in next stitch, repeat from * around. (15 stitches)

Row 3: *Inc in first stitch, sc in next 2 stitches, repeat from * around. (20 stitches)

Row 4: *Inc in first stitch, sc in next 3 stitches, repeat from * around. (25 stitches)

Row 5: *Inc in first stitch, sc in next 4 stitches, repeat from * around. (30 stitches)

Row 6: *Inc in first stitch, sc in next 5 stitches, repeat from * around. (35 stitches)

Row 7: *Inc in first stitch, sc in next 6 stitches, repeat from * around. (40 stitches)

Row 8: *Inc in first stitch, sc in next 7 stitches, repeat from * around. (45 stitches)

Rows 9-14: Sc in each stitch around. (45 stitches)

Row 15: *Dec in first 2 stitches, sc in next 7 stitches, repeat from * around. (40 stitches)

Row 16: *Dec in first 2 stitches, sc in next 6 stitches, repeat from * around. (35 stitches)

Row 17: *Dec in first 2 stitches, sc in next 5 stitches, repeat from * around. (30 stitches)

Row 18: *Dec in first 2 stitches, sc in next 4 stitches, repeat from * around. (25 stitches)

Insert the weighted pouches. Stuff poly-fil tight around the pouch. Continue to stuff as you work.

Row 19: *Dec in first 2 stitches, sc in next 3 stitches, repeat from * around. (20 stitches)

Row 20: *Dec in first 2 stitches, sc in next 2 stitches, repeat from * around. (15 stitches)

Row 21: *Dec in first 2 stitches, sc in next stitch, repeat from * around. (10 stitches)

Row 22: Dec around. (5 stitches)

Sew end shut and tie off.

Tails:

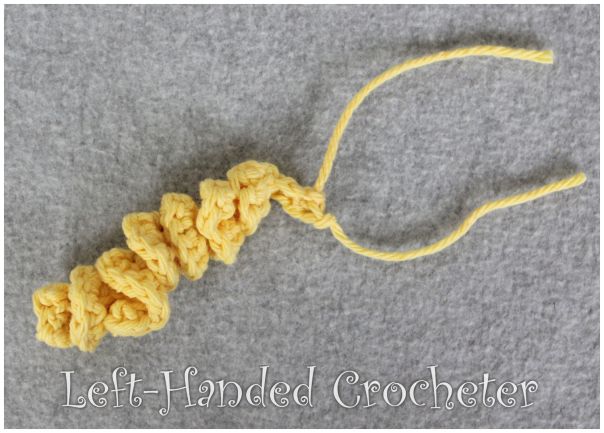
Crochet a chain longer than you want the tail to be. I used starting chains of 30 and 40 because I wanted different lengths for them. Work 3 sc’s into each chain. Be sure to leave a long tail at the beginning and end of each curl to attach it.

img_0709

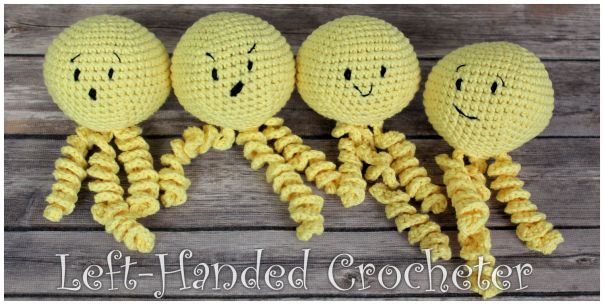
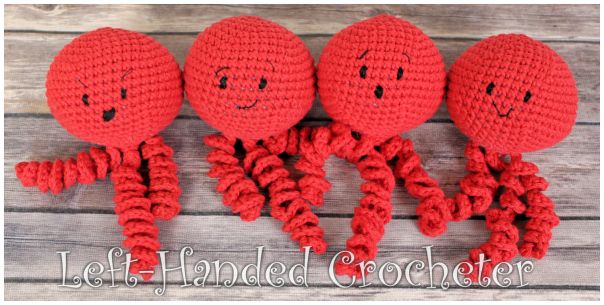
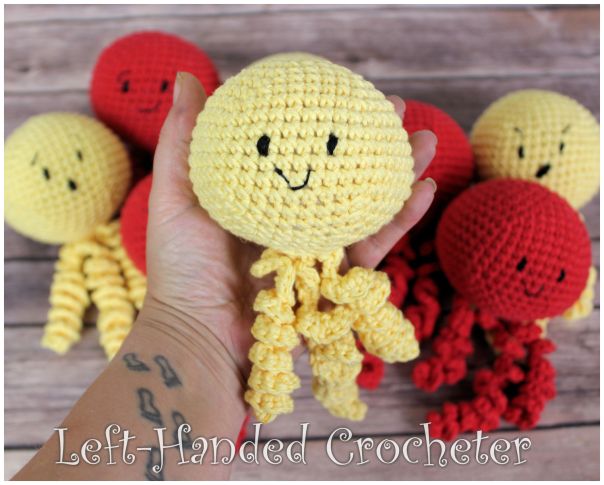
Attach the tails on the bottom. Use embroidery thread to sew on a face. I had fun making different faces for mine. I did a happy face, a scared face, an angry face, And a “how YOU doin’” face.


img_0717img_0719

img_0736img_0731a

I hope you enjoy this pattern! You’re welcome to sell items that you make using my patterns, as long as you don’t post the pattern anywhere else, and link back to my page if you’d like to. If there are any mistakes, or something is unclear, please feel free to message me on Facebook.

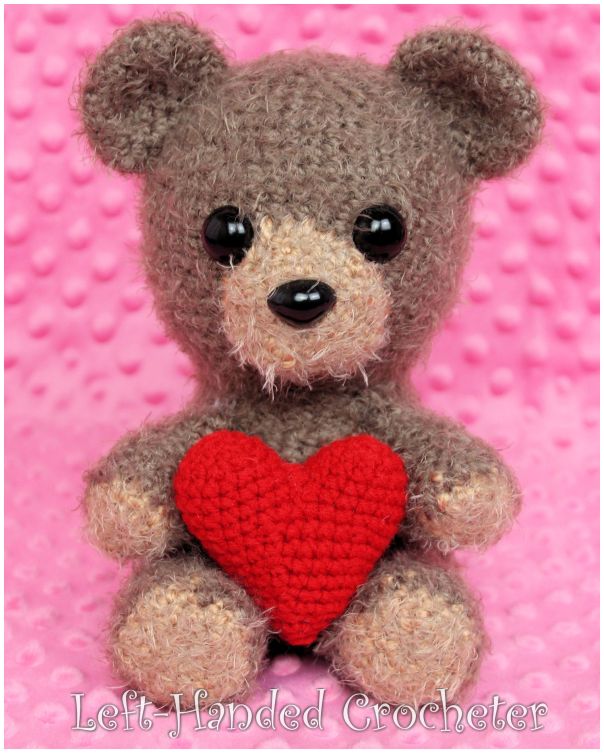
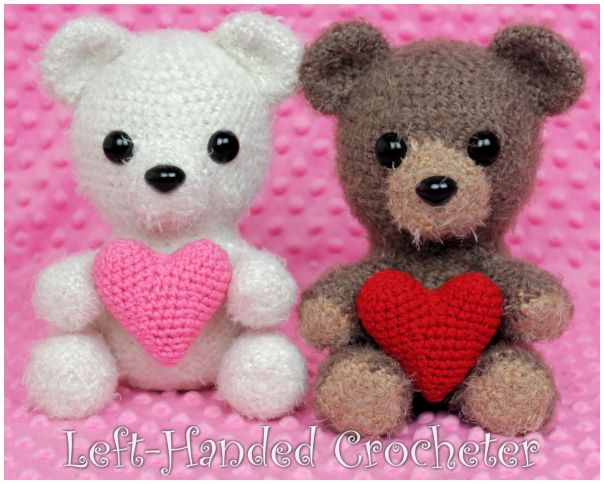
Valentine Bear

img_1480

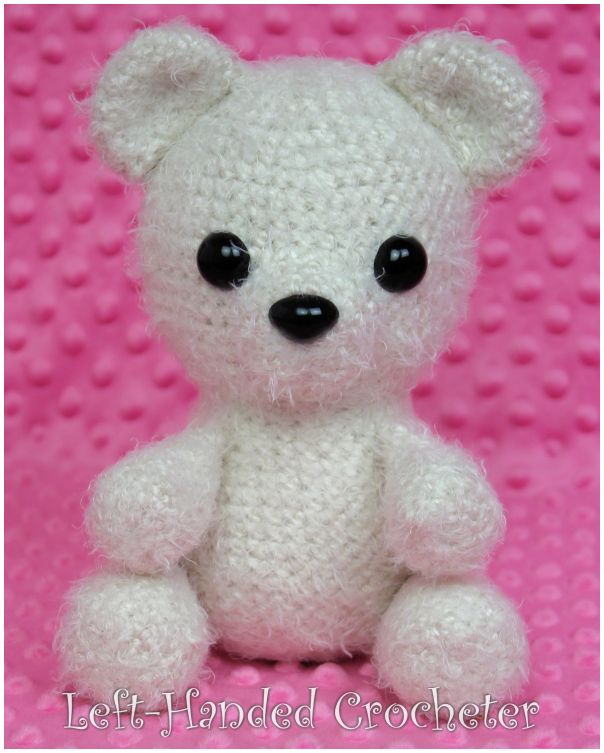
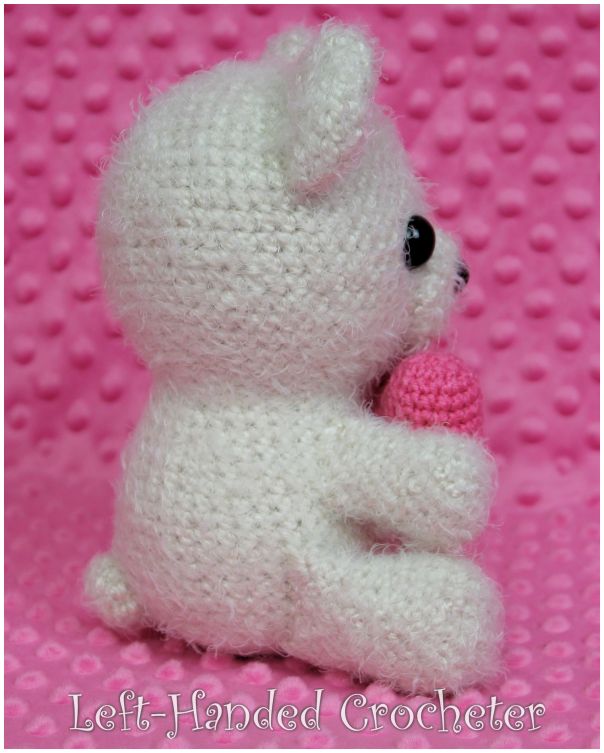
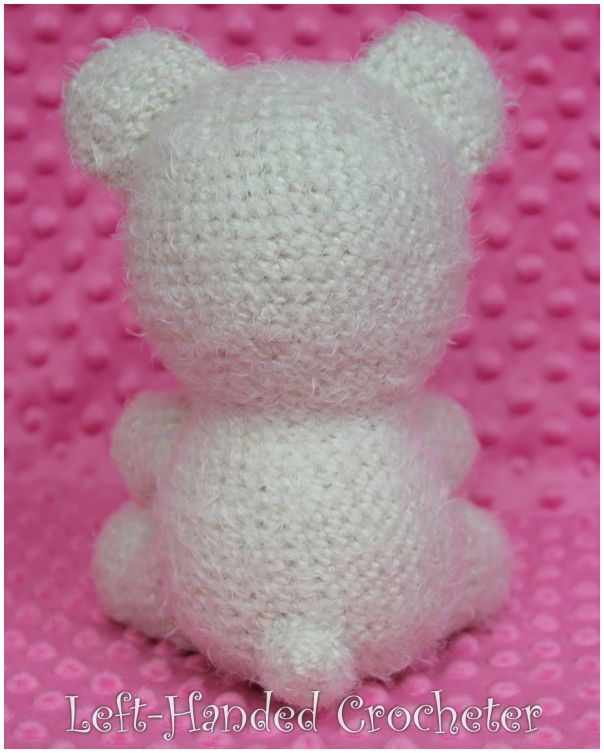
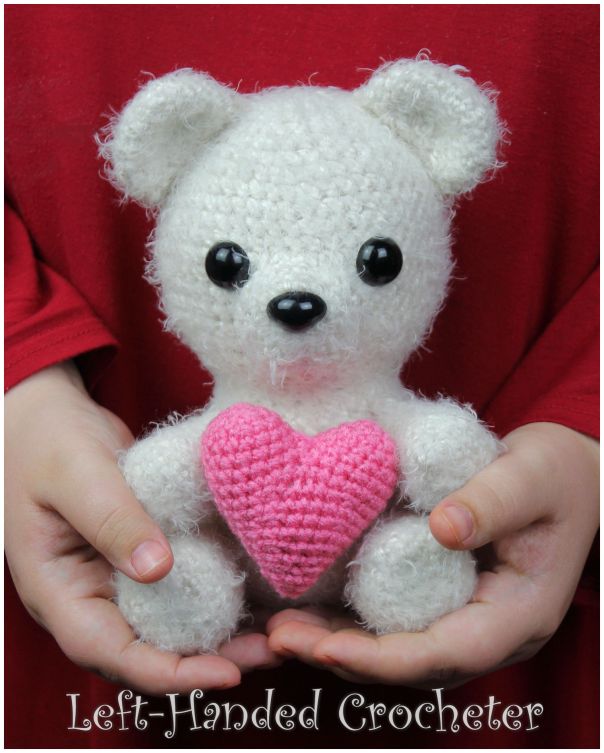
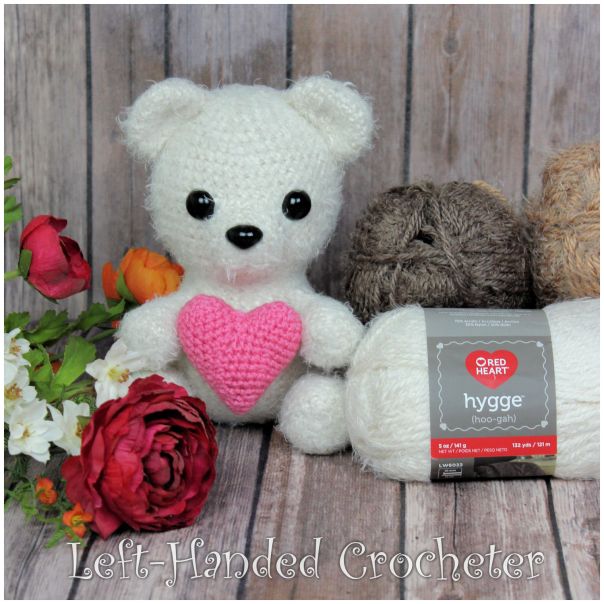
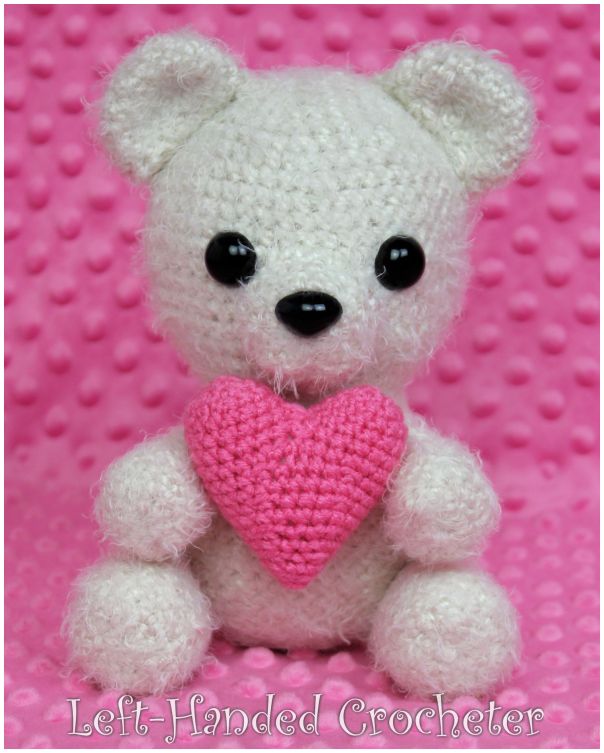
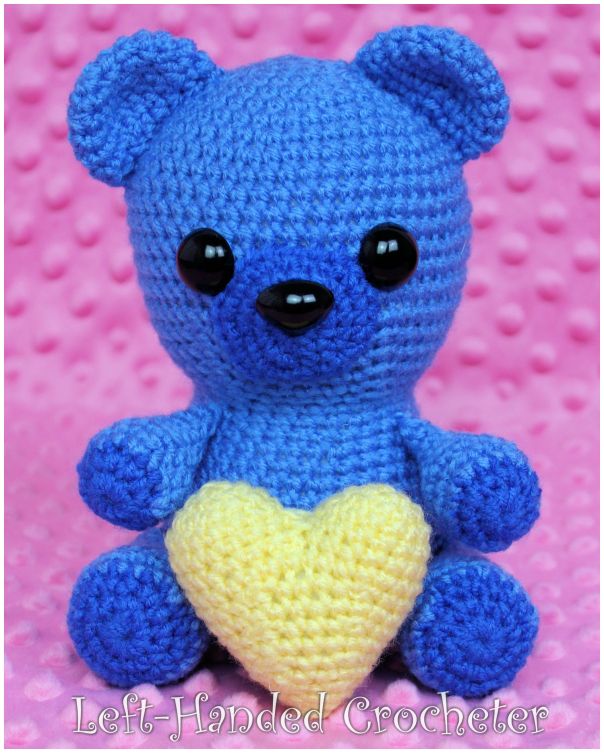
This bear is a perfect gift for your Valentine. Made with Red Heart Hygge yarn, this finished doll measures approximately 7½ inches tall, perfect size for little hands to play with.

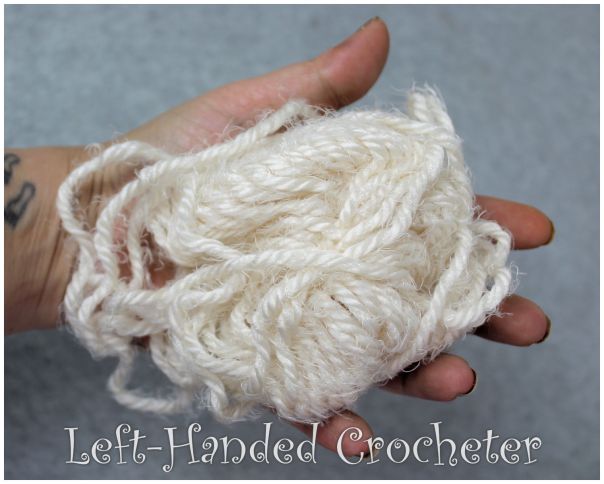
If you haven’t checked out the Red Heart Hygge yarn yet, you definitely should. I am absolutely in love with this yarn. It’s so soft and fuzzy, but unlike most fuzzy yarn, you can actually see your stitches as you work. It’s perfect for making soft, cuddly stuffed animals. 

If you want a pattern that you can save on your computer and easily print, this pattern is available in my Ravelry shop. I love printing patterns and saving them in a binder to keep track of the ones I’ve done and the ones I still plan to do.

Abbreviations:

ch: chain

sc: single crochet

sl st: slip stitch

inc: increase (2 single crochets in one loop)

dec: decrease (pull yarn through loop, pull yarn through second loop, yarn over and pull through all loops)

Materials needed:

Red Heart Hygge yarn for the bear. Red Heart Super Saver for the heart.

G (4mm) crochet hook

Poly-fil

Yarn needle

18mm safety eyes

20mm safety nose

This pattern is worked “in-the-round”, and stitches are worked through both loops unless otherwise noted. 

Snout:

Ch 3. Sl st to first ch to create circle. (Instead, you can perform the “magic circle” if you’d like.)

Row 1: ch 1, 10 sc inside of circle. (10 stitches)

Row 2: *Inc in first stitch, sc in next stitch, repeat from * around. (15 stitches)

Row 3: *Inc in first stitch, sc in next 2 stitches, repeat from * around. (20 stitches)

Row 4: *Inc in first stitch, sc in next 3 stitches, repeat from * around. (25 stitches)

Tie off. Insert safety nose and set aside.

Head and Body:

Ch 3. Sl st to first ch to create circle. (Instead, you can perform the “magic circle” if you’d like.)

Row 1: ch 1, 5 sc inside of circle. (5 stitches)

Row 2: Inc in each stitch around. (10 stitches)

Row 3: *Inc in first stitch, sc in next stitch, repeat from * around. (15 stitches)

Row 4: *Inc in first stitch, sc in next 2 stitches, repeat from * around. (20 stitches)

Row 5: *Inc in first stitch, sc in next 3 stitches, repeat from * around. (25 stitches)

Row 6: *Inc in first stitch, sc in next 4 stitches, repeat from * around. (30 stitches)

Row 7: *Inc in first stitch, sc in next 5 stitches, repeat from * around. (35 stitches)

Row 8: *Inc in first stitch, sc in next 6 stitches, repeat from * around. (40 stitches)

Row 9: *Inc in first stitch, sc in next 7 stitches, repeat from * around. (45 stitches)

Row 10: *Inc in first stitch, sc in next 8 stitches, repeat from * around. (50 stitches)

Rows 11-18: Sc in each stitch around. (50 stitches)

Row 19: *Dec in first 2 stitches, sc in next 8 stitches, repeat from * around. (45 stitches)

Row 20: *Dec in first 2 stitches, sc in next 7 stitches, repeat from * around. (40 stitches)

Row 21: *Dec in first 2 stitches, sc in next 6 stitches, repeat from * around. (35 stitches)

Row 22: *Dec in first 2 stitches, sc in next 5 stitches, repeat from * around. (30 stitches)

Row 23: *Dec in first 2 stitches, sc in next 4 stitches, repeat from * around. (25 stitches)

Row 24: Sc in each stitch around. (25 stitches)

Row 25: *Inc in first stitch, sc in next 4 stitches, repeat from * around. (30 stitches)

Row 26: Sc in each stitch around. (30 stitches)

Row 27: *Inc in first stitch, sc in next 5 stitches, repeat from * around. (35 stitches)

Row 28: Sc in each stitch around. (35 stitches)

Row 29: *Inc in first stitch, sc in next 6 stitches, repeat from * around. (40 stitches)

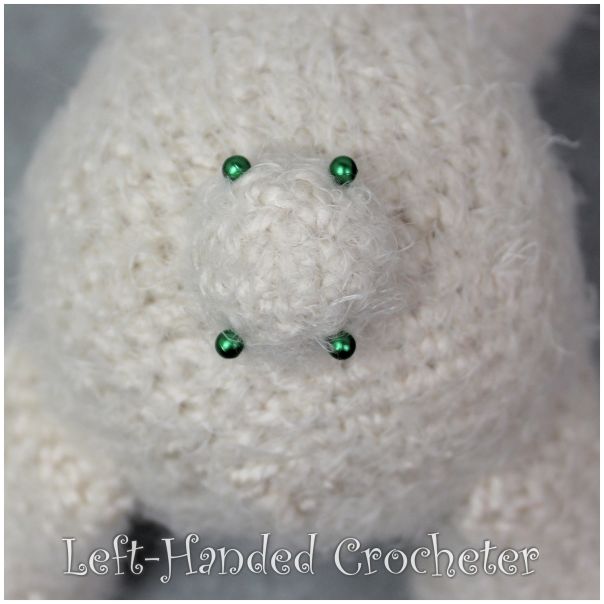
Stuff head tight with poly-fil. Insert safety eyes between rows 15 and 16 with 8 stitches between them. Before you put the backs on the safety eyes, position the snout and sew it on.
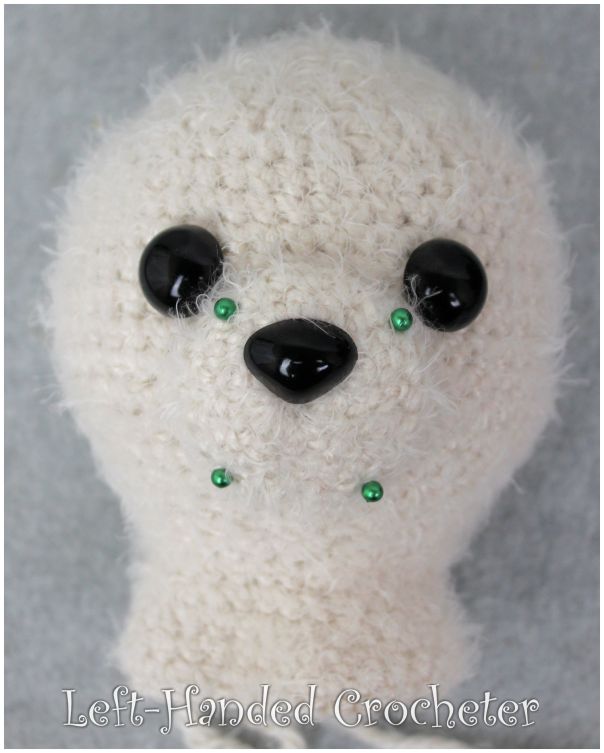
img_1377

Rows 30-37: Sc in each stitch around. (40 stitches)

Row 38: *Dec in first 2 stitches, sc in next 6 stitches, repeat from * around. (35 stitches)

Row 39: *Dec in first 2 stitches, sc in next 5 stitches, repeat from * around. (30 stitches)

Stuff body tight with poly-fil. Continue to stuff as you work.

Row 40: *Dec in first 2 stitches, sc in next 4 stitches, repeat from * around. (25 stitches)

Row 41: *Dec in first 2 stitches, sc in next 3 stitches, repeat from * around. (20 stitches)

Row 42: *Dec in first 2 stitches, sc in next 2 stitches, repeat from * around. (15 stitches)

Row 43: *Dec in first 2 stitches, sc in next stitch, repeat from * around. (10 stitches)

Row 44: Dec around. (5 stitches)

Sew end shut and tie off.

Ears:

Ch 3. Sl st to first ch to create circle. (Instead, you can perform the “magic circle” if you’d like.)

Row 1: ch 1, 5 sc inside of circle. (5 stitches)

Row 2: Inc in each stitch around. (10 stitches)

Row 3: *Inc in first stitch, sc in next stitch, repeat from * around. (15 stitches)

Row 4: *Inc in first stitch, sc in next 2 stitches, repeat from * around. (20 stitches)

Rows 5-6: Sc in each stitch around. (20 stitches)

Row 7: *Dec in first 2 stitches, sc in next 2 stitches, repeat from * around. (15 stitches)

Tie off. Make two. Flatten, then position and sew onto head.
img_1425

Legs:

Ch 3. Sl st to first ch to create circle. (Instead, you can perform the “magic circle” if you’d like.)

Row 1: Ch 1, 10 sc inside of circle. (10 stitches)

Row 2: *Inc in first stitch, sc in next stitch, repeat from * around. (15 stitches)

Row 3: *Inc in first stitch, sc in next 2 stitches, repeat from * around. (20 stitches)

Row 4: *Inc in first stitch, sc in next 3 stitches, repeat from * around. (25 stitches)

Row 5: *Dec in first 2 stitches, sc in next 3 stitches, repeat from * around. (20 stitches)

Rows 6-7: Sc in each stitch around. (20 stitches)

Row 8: *Dec in first 2 stitches, sc in next 2 stitches, repeat from * around. (15 stitches)

Rows 9-13: Sc in each stitch around. (15 stitches)

Tie off. Stuff tight with poly-fil, leaving top 3-4 rows unstuffed. Make two. Position on sides of body and sew on.
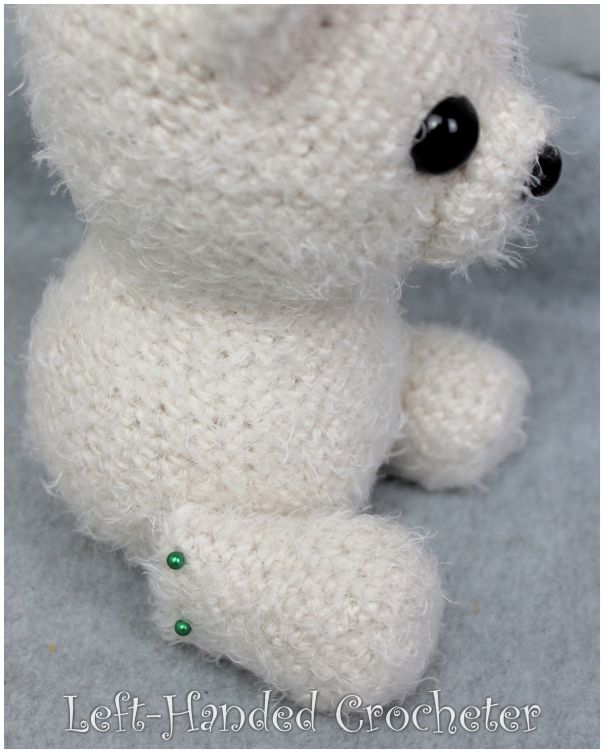
img_1380

Arms:

Ch 3. Sl st to first ch to create circle. (Instead, you can perform the “magic circle” if you’d like.)

Row 1: Ch 1, 10 sc inside of circle. (10 stitches)

Row 2: *Inc in first stitch, sc in next stitch, repeat from * around. (15 stitches)

Row 3: *Inc in first stitch, sc in next 2 stitches, repeat from * around. (20 stitches)

Row 4: *Dec in first 2 stitches, sc in next 2 stitches, repeat from * around. (15 stitches)

Row 5: Sc in each stitch around. (15 stitches)

Row 6: *Dec in first 2 stitches, sc in next stitch, repeat from * around. (10 stitches)

Rows 7-10: Sc in each stitch around. (10 stitches)

Tie off. Stuff tight with poly-fil, leaving top 2-3 rows unstuffed. Make two. Position on sides of body above legs and sew on.
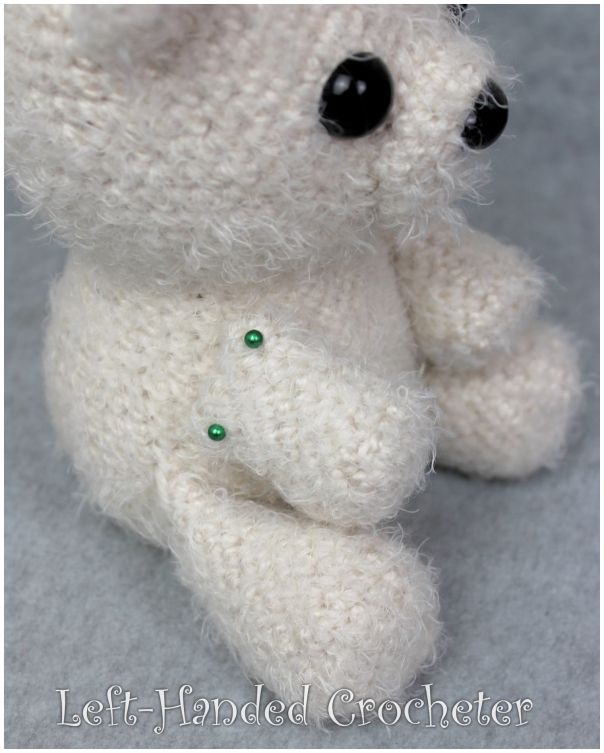
img_1386

Tail:

Ch 3. Sl st to first ch to create circle. (Instead, you can perform the “magic circle” if you’d like.)

Row 1: ch 1, 5 sc inside of circle. (5 stitches)

Row 2: Inc in each stitch around. (10 stitches)

Rows 3-4: Sc in each stitch around. (10 stitches)

Tie off. Stuff lightly with poly-fil. Position and sew onto back of body.
img_1388

img_1428

I only used 1 skein of the Hygge yarn to make this bear, and I still had a bit left over.
img_1392

Heart:

Ch 3. Sl st to first ch to create circle. (Instead, you can perform the “magic circle” if you’d like.)

Row 1: ch 1, 5 sc inside of circle. (5 stitches)

Row 2: Inc in each stitch around. (10 stitches)

Row 3: *Inc in first stitch, sc in next stitch, repeat from * around. (15 stitches)

Row 4-5: Sc in each stitch around. (15 stitches)

Make two. Tie off first one. Don’t tie off second one. Continue on with heart.

Row 6: With yarn still attached to second one, attach to first one and sc in each stitch around. (30 stitches)

Row 7: Sc in each stitch around. (30 stitches)

Row 8: *Dec in first 2 stitches, sc in next 4 stitches, repeat from * around. (25 stitches)

Row 9: Sc in each stitch around. (25 stitches)

Row 10: *Dec in first 2 stitches, sc in next 3 stitches, repeat from * around. (20 stitches)

Row 11: Sc in each stitch around. (20 stitches)

Stop at this point and stuff tight with poly-fil. Continue stuffing as you work.

Row 12: *Dec in first 2 stitches, sc in next 2 stitches, repeat from * around. (15 stitches)

Row 13: Sc in each stitch around. (15 stitches)

Row 14: *Dec in first 2 stitches, sc in next stitch, repeat from * around. (10 stitches)

Row 15: Sc in each stitch around. (10 stitches)

Row 16: Dec around. (5 stitches)

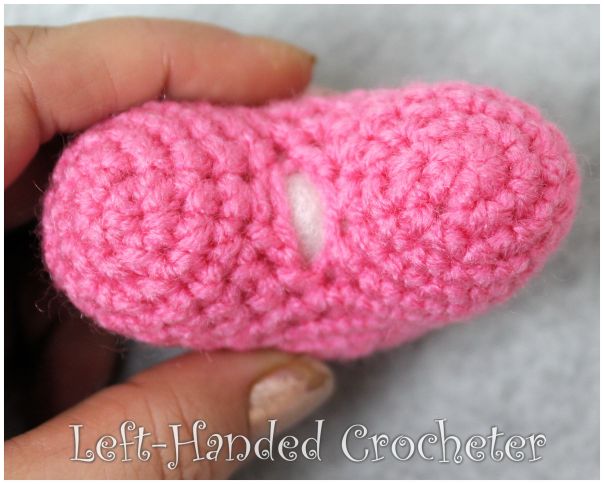
Sew end shut and tie off. There will be a hole in between the two humps on top. Use your yarn needle and yarn to sew this closed.
img_1403

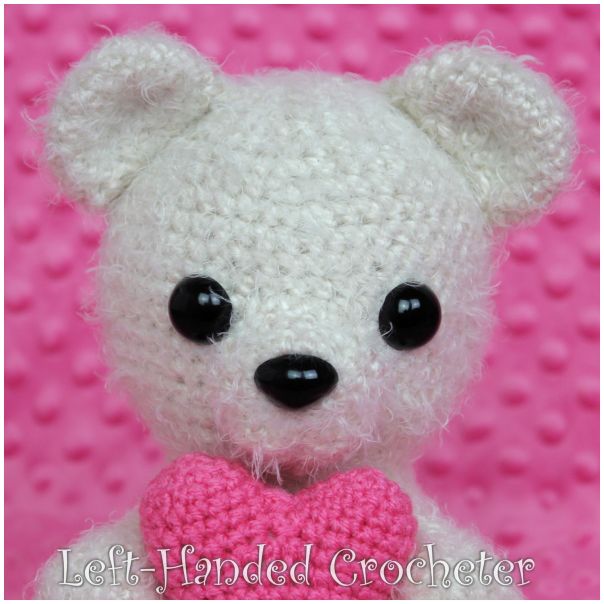
You can attach the heart to his hands, or leave it loose like I did.
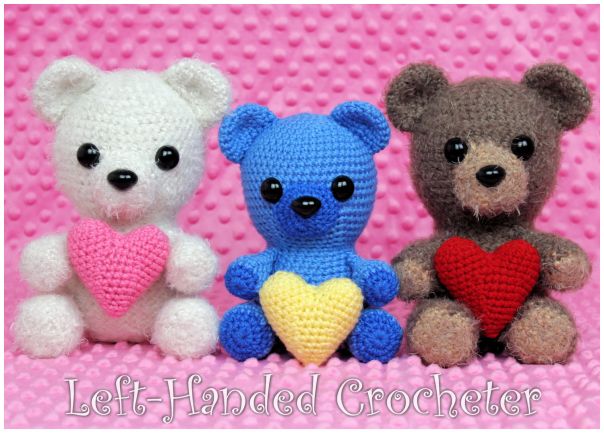
img_1413img_1416img_1419img_1470Try making him in other colors.

img_1439img_1435

You can also make this bear using regular worsted weight yarn if you don’t have the Hygge yarn. It still comes out really cute, but it’s just a bit smaller.
img_1444img_1449

I hope you enjoy this pattern! You’re welcome to sell items that you make using my patterns, as long as you don’t post the pattern anywhere else, and link back to my page if you’d like to. If there are any mistakes, or something is unclear, please feel free to message me on Facebook.
 

Snowman Ornament

IMG_0168

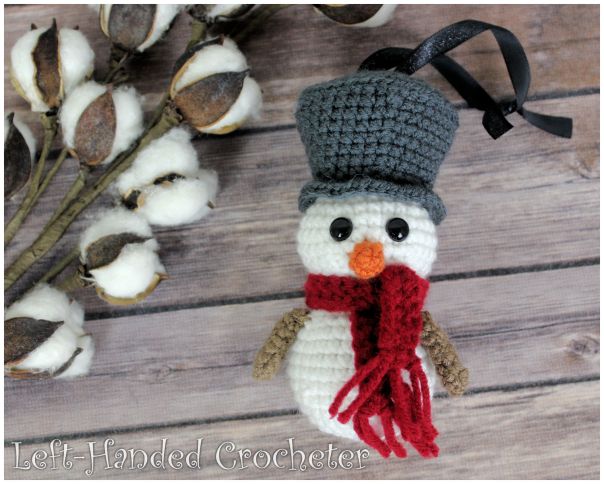
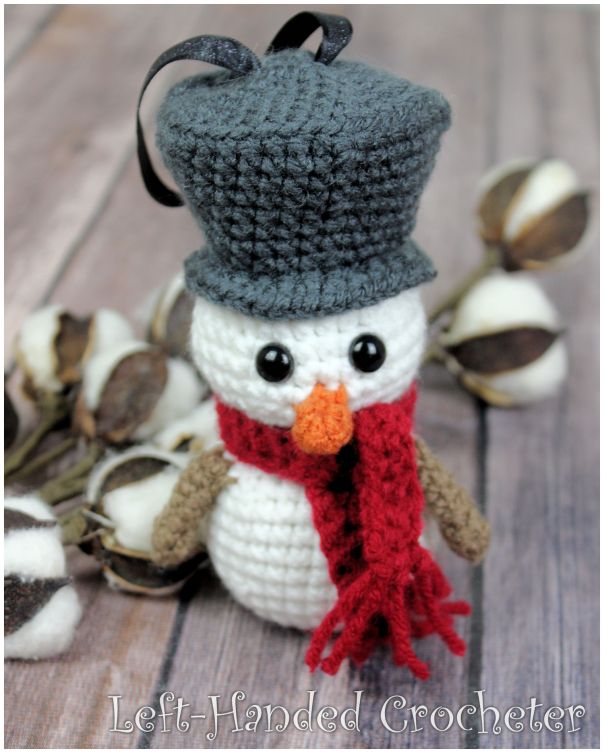
I absolutely love snowmen. I also love that they’re a decoration you could leave up all winter. My crocheted Christmas tree really needed to have a snowman on it, so I worked up this quick little snowman to hang on there.

This pattern is so fast to make, and it doesn’t use much yarn at all.

IMG_0185

Abbreviations:

ch: chain

sc: single crochet

sl st: slip stitch

inc: increase (2 single crochets in one loop)

dec: decrease (pull yarn through loop, pull yarn through second loop, yarn over and pull through all loops)

Materials needed:

Any worsted weight yarn. I used Red Heart Super Saver.

G (4mm) crochet hook

Poly-fil

Yarn needle

Ribbon

This pattern is worked “in-the-round”, and stitches are worked through both loops unless otherwise noted. 

Head:

Ch 3. Sl st to first ch to create circle. (Instead, you can perform the “magic circle” if you’d like.)

Row 1: Ch 1, 5 sc inside of circle. (5 stitches)

Row 2: Inc in each stitch around. (10 stitches)

Row 3: *Inc in first stitch, sc in next stitch, repeat from * around. (15 stitches)

Row 4: *Inc in first stitch, sc in next 2 stitches, repeat from * around. (20 stitches)

Row 5: *Inc in first stitch, sc in next 3 stitches, repeat from * around. (25 stitches)

Row 6: *Inc in first stitch, sc in next 4 stitches, repeat from * around. (30 stitches)

Rows 7-9: Sc in each stitch around. (30 stitches)

Row 10: *Dec in first 2 stitches, sc in next 4 stitches, repeat from * around. (25 stitches)

Row 11: *Dec in first 2 stitches, sc in next 3 stitches, repeat from * around. (20 stitches)

Row 12: *Dec in first 2 stitches, sc in next 2 stitches, repeat from * around. (15 stitches)

Tie off. Stuff tight with poly-fil. Insert safety eyes between rows 7 and 8 with 4 stitches between them.

Nose:

Ch 3. Sl st to first ch to create circle. (Instead, you can perform the “magic circle” if you’d like.)

Row 1: Ch 1, 5 sc inside of circle. (5 stitches)

Rows 2-3: Sc in each stitch around. (5 stitches)

Tie off. Center and sew onto face.

Body:

Ch 3. Sl st to first ch to create circle. (Instead, you can perform the “magic circle” if you’d like.)

Row 1: Ch 1, 10 sc inside of circle. (10 stitches)

Row 2: *Inc in first stitch, sc in next stitch, repeat from * around. (15 stitches)

Row 3: *Inc in first stitch, sc in next 2 stitches, repeat from * around. (20 stitches)

Row 4: *Inc in first stitch, sc in next 3 stitches, repeat from * around. (25 stitches)

Row 5: *Inc in first stitch, sc in next 4 stitches, repeat from * around. (30 stitches)

Row 6: *Inc in first stitch, sc in next 5 stitches, repeat from * around. (35 stitches)

Row 7: *Dec in first 2 stitches, sc in next 5 stitches, repeat from * around. (30 stitches)

Rows 8-11: Sc in each stitch around. (30 stitches)

Row 12: *Dec in first 2 stitches, sc in next 4 stitches, repeat from * around. (25 stitches)

Row 13: *Dec in first 2 stitches, sc in next 3 stitches, repeat from * around. (20 stitches)

Row 14: *Dec in first 2 stitches, sc in next 2 stitches, repeat from * around. (15 stitches)

Tie off. Stuff tight with poly-fil. Sew head onto body.

Arms:

Ch 3. Sl st to first ch to create circle. (Instead, you can perform the “magic circle” if you’d like.)

Row 1: Ch 1, 5 sc inside of circle. (5 stitches)

Rows 2-7: Sc in each stitch around. (5 stitches)

Tie off. Make two. Position and sew onto sides of body.

Hat:

Ch 3. Sl st to first ch to create circle. (Instead, you can perform the “magic circle” if you’d like.)

Row 1: Ch 1, 10 sc inside of circle. (10 stitches)

Row 2: *Inc in first stitch, sc in next stitch, repeat from * around. (15 stitches)

Row 3: *Inc in first stitch, sc in next 2 stitches, repeat from * around. (20 stitches)

Row 4: *Inc in first stitch, sc in next 3 stitches, repeat from * around. (25 stitches)

Row 5: *Inc in first stitch, sc in next 4 stitches, repeat from * around. (30 stitches)

Row 6: *Inc in first stitch, sc in next 5 stitches, repeat from * around. (35 stitches)

Row 7: *Inc in first stitch, sc in next 6 stitches, repeat from * around. (40 stitches)

Row 8: In inside loops only, sc in each stitch around. (40 stitches)

Row 9: *Dec in first 2 stitches, sc in next 6 stitches, repeat from * around. (35 stitches)

Rows 10-11: Sc in each stitch around. (35 stitches)

Row 12: *Dec in first 2 stitches, sc in next 5 stitches, repeat from * around. (30 stitches)

Rows 13-14: Sc in each stitch around. (30 stitches)

Row 15: *Dec in first 2 stitches, sc in next 4 stitches, repeat from * around. (25 stitches)

Row 16: In outside loops, sc in each stitch around. (25 stitches)

Row 17: Inc in each stitch around. (50 stitches)

Tie off. Stuff lightly with poly-fil. Position and sew onto top of head.  Attach ribbon to the top of the hat to hang him.

Scarf:

Ch 41

Row 1: Sc in 2nd ch from hook and in each across, ch 1, turn. (40 stitches)

Row 2: Sc in each stitch across. (40 stitches)

Tie off. Attach fringe at each end. Tie around neck.
I hope you enjoy this pattern! You’re welcome to sell items that you make using my patterns, as long as you don’t post the pattern anywhere else, and link back to my page if you’d like to. If there are any mistakes, or something is unclear, please feel free to message me on Facebook.