
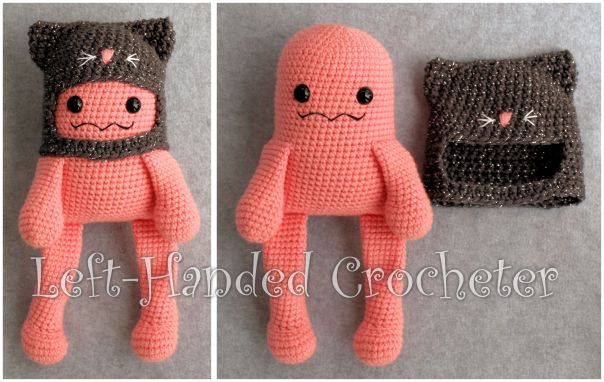
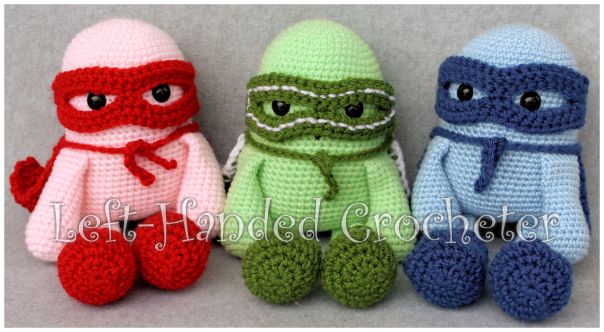
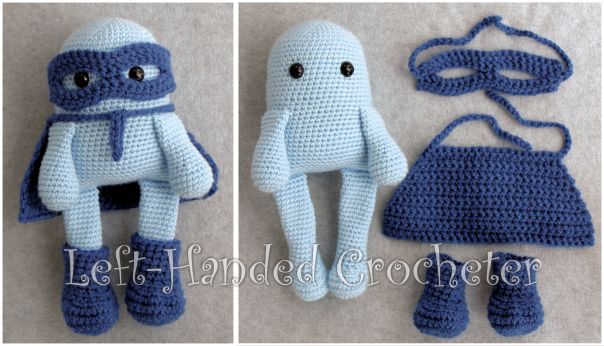
I’ve had so much fun making mini monsters lately, I just couldn’t stop. They’re such a fun pattern that doesn’t take much time at all to make. With removable accessories, you could make 1 monster with all of the hats to change him into, or you could do like I did and make a monster for each hat. Don’t forget to check out Camp Happy Heart Fibre Arts on Facebook to see the awesome monsters she makes that inspired these patterns.
Here are the patterns for the monster, and each of the hat accessories. If you want the patterns for the super hero accessories, you’ll have to purchase the whole set on Ravelry. It’s worth it to have a pattern that you can save on your computer and easily print. I love printing patterns and saving them in a binder to keep track of the ones I’ve done and the ones I still plan to do.
Abbreviations:
ch: chain
sc: single crochet
inc: increase (2 single crochets in one loop)
dec: decrease (pull yarn through loop, pull yarn through second loop, yarn over and pull through all loops)
Materials needed (with affiliate links):
Baby yarn, or any size 3 yarn.
This pattern is worked “in-the-round”, and stitches are worked through both loops unless otherwise noted.
Body:
ch 3. Sl st to first ch to create circle. (Instead, you can perform the “magic circle” if you’d like.)
Row 1: ch 1, 10 sc inside of circle. (10 stitches)
Row 2: *Inc in first stitch, sc in next stitch, repeat from * around. (15 stitches)
Row 3: *Inc in first stitch, sc in next 2 stitches, repeat from * around. (20 stitches)
Row 4: *Inc in first stitch, sc in next 3 stitches, repeat from * around. (25 stitches)
Row 5: *Inc in first stitch, sc in next 4 stitches, repeat from * around. (30 stitches)
Row 6: *Inc in first stitch, sc in next 5 stitches, repeat from * around. (35 stitches)
Row 7: *Inc in first stitch, sc in next 6 stitches, repeat from * around. (40 stitches)
Row 8: *Inc in first stitch, sc in next 7 stitches, repeat from * around. (45 stitches)
Row 9: *Inc in first stitch, sc in next 8 stitches, repeat from * around. (50 stitches)
Rows 10-40: Sc in each stitch around. (50 stitches)
Tie off, leaving open at the bottom.
Insert safety eyes between rows 16 and 17, with 9 sc’s in between eyes. (I like to put the poly-fil in before I insert the eyes so I can decide which side looks best for the front.) Stuff with poly-fil, and sew closed across the bottom. Using embroidery thread, sew on mouth.
Arms:
Ch 3. Sl st to first ch to create circle. (Instead, you can perform the “magic circle” if you’d like.)
Row 1: ch 1, 10 sc inside of circle. (10 stitches)
Row 2: *Inc in first stitch, sc in next stitch, repeat from * around. (15 stitches)
Row 3: *Inc in first stitch, sc in next 2 stitches, repeat from * around. (20 stitches)
Rows 4-7: Sc in each stitch around. (20 stitches)
Row 8: *Dec in first 2 stitches, sc in next 2 stitches, repeat from * around. (15 stitches)
Rows 9-18: Sc in each stitch around. (15 stitches)
Tie off. Stuff halfway with poly-fil, leaving the rest of the arm empty and flattened. You can make the arms shorter or longer by adding or subtracting rows, and you can change how full you stuff them as well.
Legs:
Ch 3. Sl st to first ch to create circle. (Instead, you can perform the “magic circle” if you’d like.)
Row 1: ch 1, 10 sc inside of circle. (10 stitches)
Row 2: *Inc in first stitch, sc in next stitch, repeat from * around. (15 stitches)
Row 3: *Inc in first stitch, sc in next 2 stitches, repeat from * around. (20 stitches)
Row 4: *Inc in first stitch, sc in next 3 stitches, repeat from * around. (25 stitches)
Rows 5-6: Sc in each stitch around. (25 stitches)
Row 7: Sc in first 7 stitches, dec in next 10 stitches (5 dec’s), sc in next 8 stitches. (20 stitches)
Row 8: Sc in first 5 stitches, dec in next 10 stitches (5 dec’s), sc in next 5 stitches. (15 stitches)
Rows 9-13: Sc in each stitch around. (15 stitches)
Stop at this point and stuff with poly-fil. You won’t stuff beyond this point, so make sure it’s stuffed in there really tight.
Rows 14-28: Sc in each stitch around. (15 stitches)
Tie off. You can make the legs shorter or longer by adding or subtracting rows, and you can change how full you stuff them as well.
Sew legs to bottom, lining them up with the edge of the body. Sew the arms on at row 25 of the body. I usually position the arms so they’re slightly in the front, not on the sides.
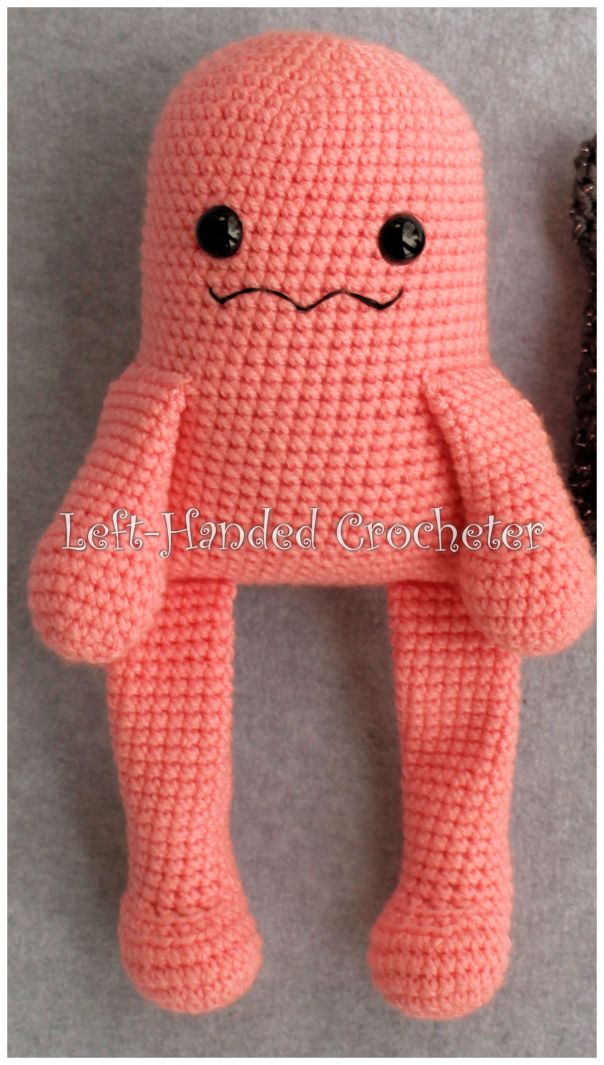
The placement of the eyes and arms are important for the hats to fit right, so be sure you count the rows and attach them where the pattern says to.
Hats
There are 2 basic patterns for the hats, a round one and a square one.
Materials needed (with affiliate links):
Any worsted weight (size 4) yarn
White felt (for shark hat)
This pattern is worked “in-the-round”, and stitches are worked through both loops unless otherwise noted.
Round Hat
Ch 3. Sl st to first ch to create circle. (Instead, you can perform the “magic circle” if you’d like.)
Row 1: ch 1, 10 sc inside of circle. (10 stitches)
Row 2: *Inc in first stitch, sc in next stitch , repeat from * around. (15 stitches)
Row 3: *Inc in first stitch, sc in next 2 stitches, repeat from * around. (20 stitches)
Row 4: *Inc in first stitch, sc in next 3 stitches, repeat from * around. (25 stitches)
Row 5: *Inc in first stitch, sc in next 4 stitches, repeat from * around. (30 stitches)
Row 6: *Inc in first stitch, sc in next 5 stitches, repeat from * around. (35 stitches)
Rows 7-12: Sc in each stitch around. (35 stitches)
Row 13: Sc in next 25 stitches, leaving last 10 stitches unworked. Ch 1, turn. (25 stitches)
Rows 14-17: Sc across, ch 1, turn. (25 stitches)
Row 18: Sc across, ch 12, sl st to first sc.
Row 19: Sc in each stitch around, working 12 sc’s into ch 12 space. (37 stitches)
Rows 20-21: Continuing working in the round, sc in each stitch around. (37 stitches)
Tie off.
Square Hat
Ch. 35. Attach to first ch to form a ring.
Row 1: Sc in each ch around. (35 stitches)
Rows 2-13: Sc in each stitch around. (35 stitches)
Row 14: Sc in next 25 stitches, leaving last 10 stitches unworked. Ch 1, turn. (25 stitches)
Rows 15-18: Sc across, ch 1, turn. (25 stitches)
Row 19: Sc across, ch 12, sl st to first sc.
Row 20: Sc in each stitch around, working 12 sc’s into ch 12 space. (37 stitches)
Rows 21-22: Continuing working in the round, sc in each stitch around. (37 stitches)
Tie off. Using yarn and yarn needle, sew across the top to close it.
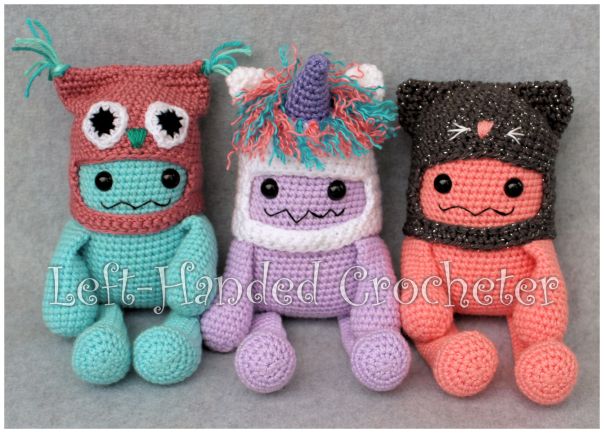
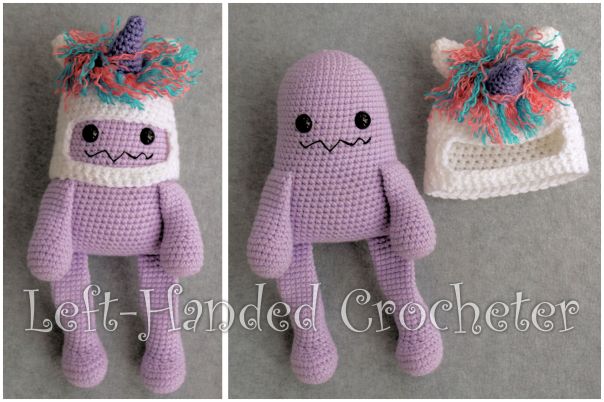
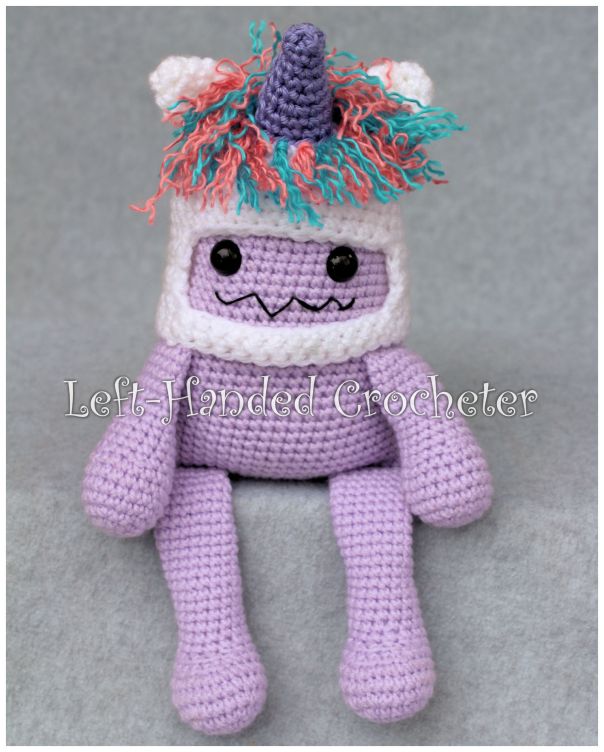
Unicorn Hat
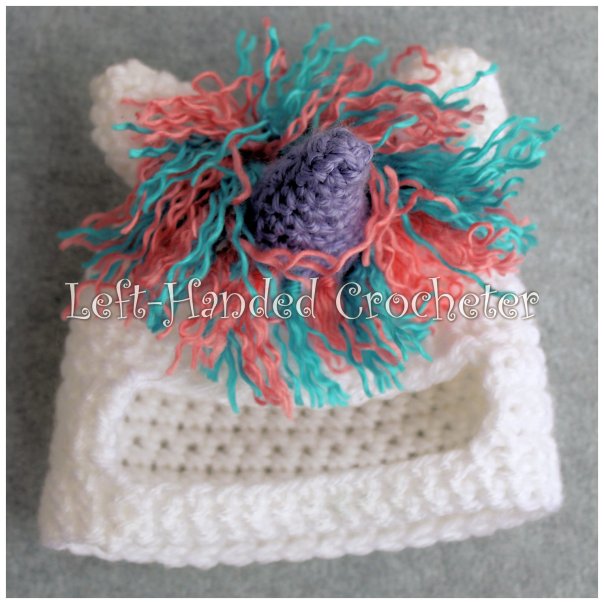
For the unicorn hat, use the round hat pattern. I used Lion Brand Vanna’s Choice yarn in white for the hat and ears. I used Caron Simply Soft Periwinkle for the horn, and other Simply Soft colors for the hair.
Ears
Ch 3. Sl st to first ch to create circle. (Instead, you can perform the “magic circle” if you’d like.)
Row 1: ch 1, 5 sc inside of circle. (5 stitches)
Row 2: Sc in each stitch around. (5 stitches)
Row 3: Inc in each stitch around. (10 stitches)
Rows 4-6: Sc in each stitch around. (10 stitches)
Tie off. Lay flat and sew onto hat. I find it helpful to put the hat on the monster’s head when sewing pieces on, to be able to get them where I want them. Just be sure to only sew onto the hat and not into the monster.
Horn
Ch 3. Sl st to first ch to create circle. (Instead, you can perform the “magic circle” if you’d like.)
Row 1: ch 1, 4 sc inside of circle. (4 stitches)
Row 2: Sc in each stitch around. (4 stitches)
Row 3: *Inc in first stitch, sc in next stitch , repeat from * around. (6 stitches)
Row 4: Sc in each stitch around. (6 stitches)
Row 5: *Inc in first stitch, sc in next 2 stitches, repeat from * around. (8 stitches)
Row 6: Sc in each stitch around. (8 stitches)
Row 7: *Inc in first stitch, sc in next 3 stitches, repeat from * around. (10 stitches)
Rows 8-9: Sc in each stitch around. (10 stitches)
Tie off. Stuff with poly-fil and sew onto hat. Attach hair around horn.
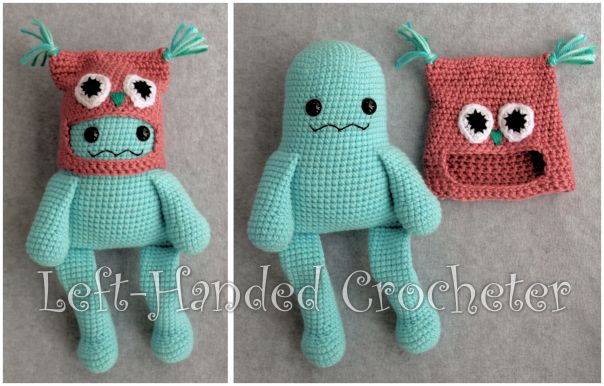
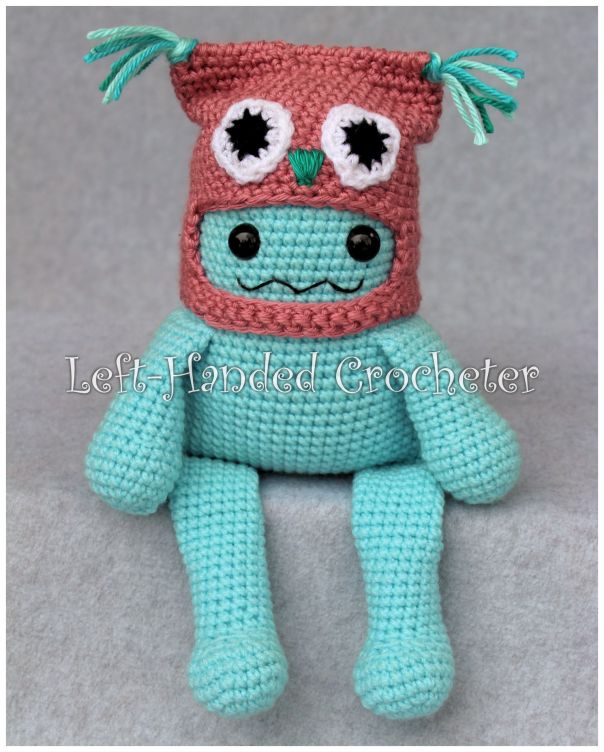
Owl Hat
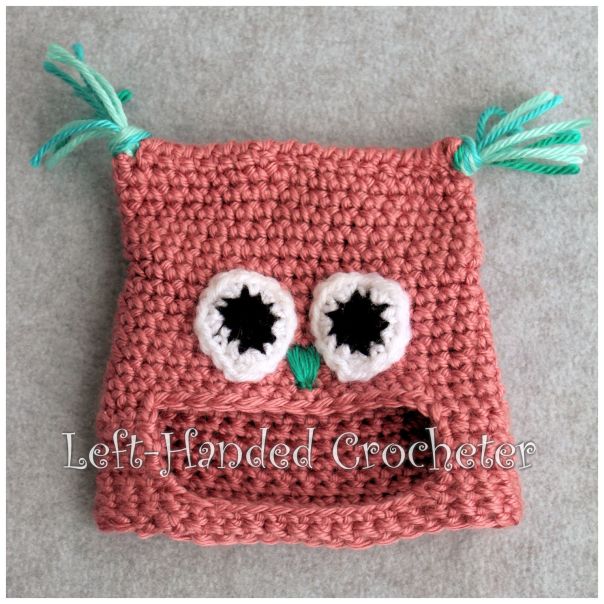
For the owl hat, use the square hat pattern. I used Caron Simply Soft in Plum Wine for the hat, and cool green, robin’s egg blue and aqua for the hair and beak. I used Lion Brand Vanna’s Choice yarn in white and black for the eyes.
Eyes
With black yarn, ch 3. Sl st to first ch to create circle. (Instead, you can perform the “magic circle” if you’d like.)
Row 1: ch 1, 10 sc inside of circle. (10 stitches)
Switch to white yarn.
Row 2: *Inc in first stitch, sc in next stitch , repeat from * around. (15 stitches)
Tie off. Sew or hot glue eyes onto hat. Use yarn needle and yarn to sew on beak. Attach hair at the corners. I find it helpful to put the hat on the monster’s head when sewing pieces on, to be able to get them where I want them. Just be sure to only sew onto the hat and not into the monster.
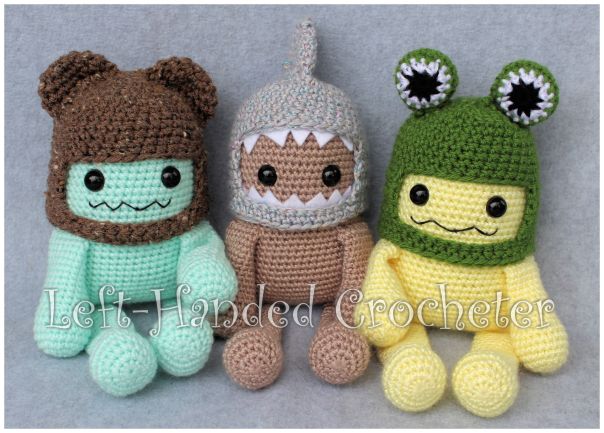
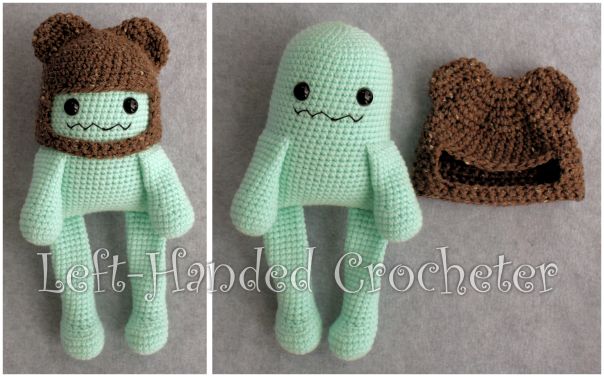
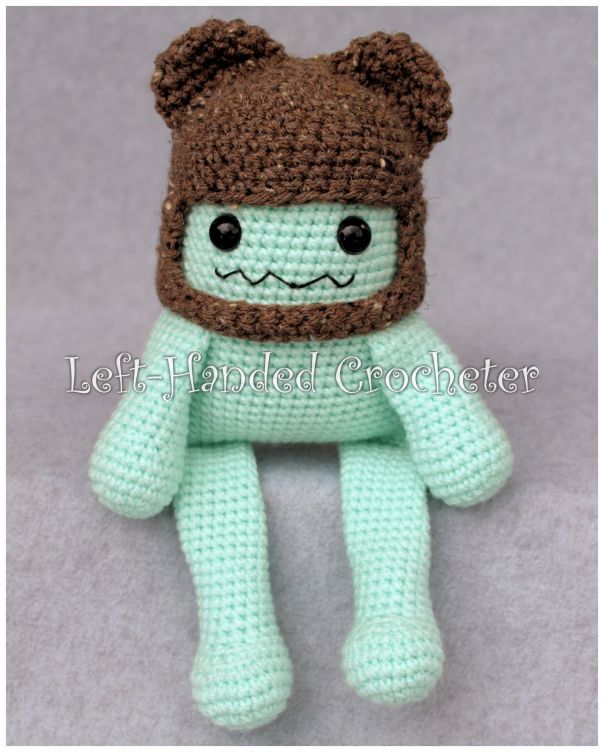
Bear Hat
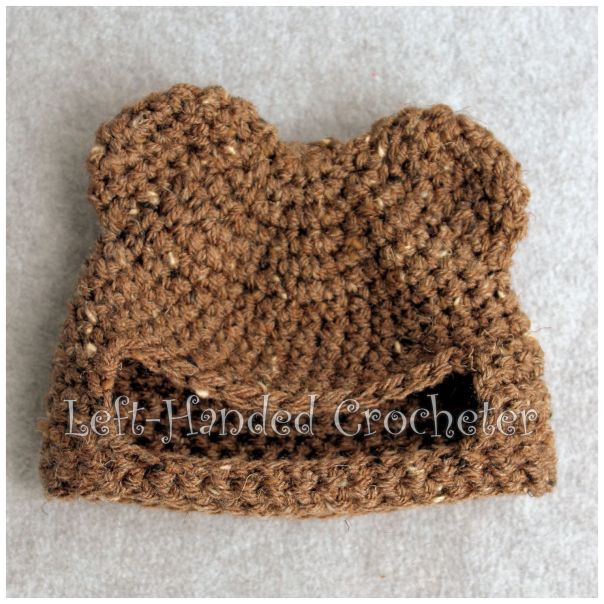
For the bear hat, use the round hat pattern. I used Lion Brand Vanna’s Choice yarn in barley.
Ears
Ch 3. Sl st to first ch to create circle. (Instead, you can perform the “magic circle” if you’d like.)
Row 1: ch 1, 10 sc inside of circle. (10 stitches)
Row 2: *Inc in first stitch, sc in next stitch , repeat from * around. (15 stitches)
Rows 3-4: Sc in each stitch around. (15 stitches)
Tie off. Lay flat and sew onto hat. I find it helpful to put the hat on the monster’s head when sewing pieces on, to be able to get them where I want them. Just be sure to only sew onto the hat and not into the monster.
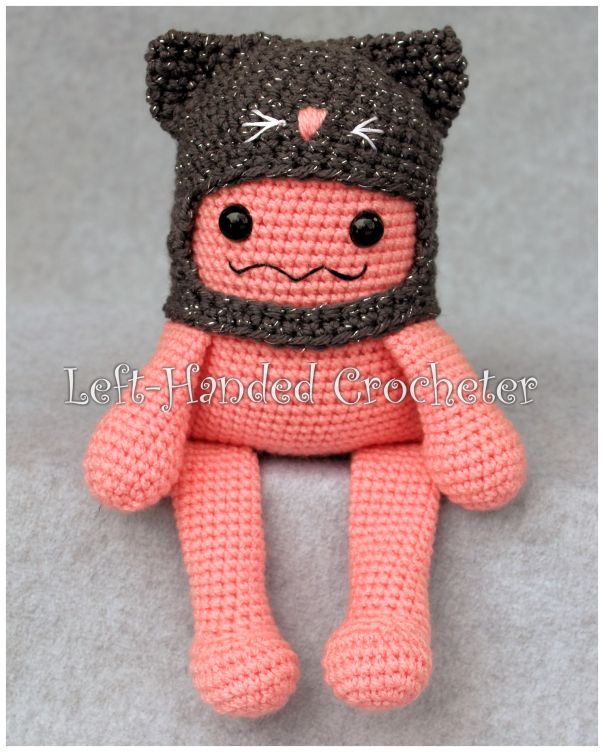
Cat Hat
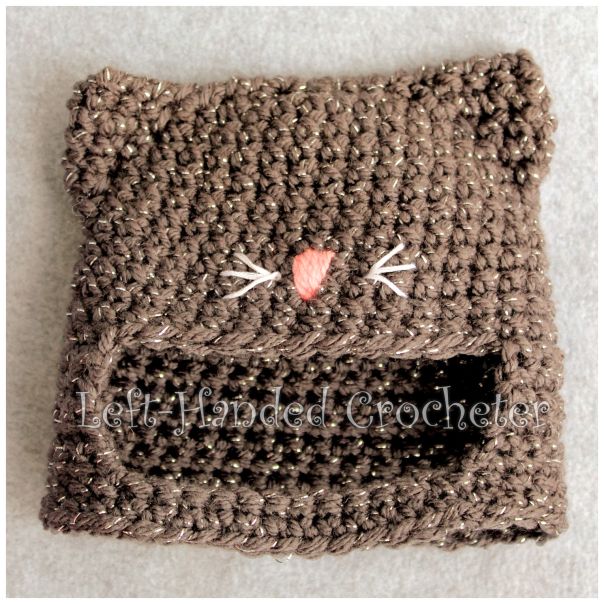
For the cat hat, use the square hat pattern. I used Red Heart w/Love in charcoal for the hat. I used Caron Simply Soft in white for the whiskers and soft pink for the nose.
Once you have the square hat finished and the top sewn shut, place the hat on the monsters head and stitch diagonally up each side to create the ears. Use your yarn needle and yarn (or embroidery thread) to create the whiskers and nose. You can add eyes to the cat hat if you want to, but I liked the way it looked without them.
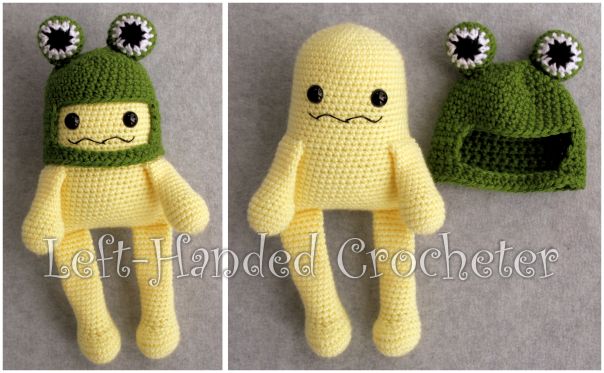
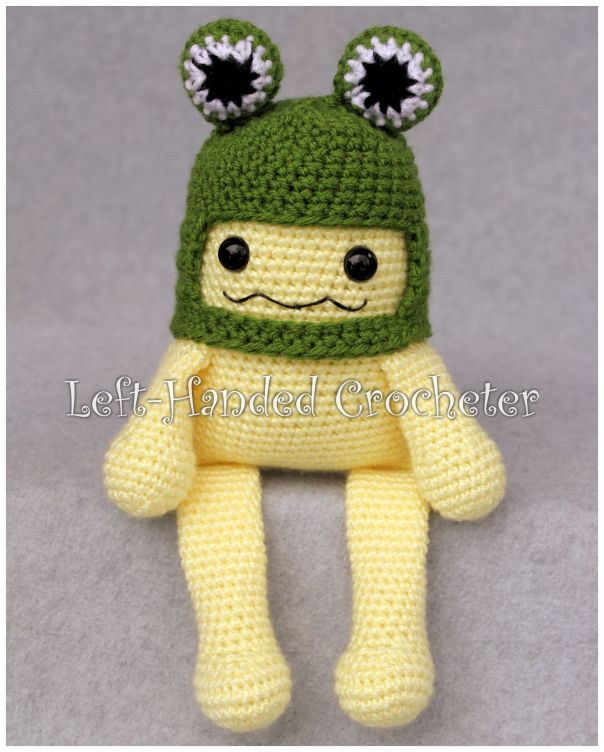
Frog Hat

For the frog hat, use the round hat pattern. I used Lion Brand Vanna’s Choice yarn in kelly green, white and black.
Eyes
With black yarn, ch 3. Sl st to first ch to create circle. (Instead, you can perform the “magic circle” if you’d like.)
Row 1: ch 1, 10 sc inside of circle. (10 stitches)
Switch to white yarn.
Row 2: *Inc in first stitch, sc in next stitch , repeat from * around. (15 stitches)
Switch to kelly green.
Rows 3-5: Sc in each stitch around. (15 stitches)
Row 4: *Dec in first 2 stitches, sc in next stitch, repeat from * around. (10 stitches)
Stuff with poly-fil.
Row 5: Dec around. (5 stitches)
Sew hole closed. Use yarn needle and yarn to sew eyes onto top of hat. I find it helpful to put the hat on the monster’s head when sewing pieces on, to be able to get them where I want them. Just be sure to only sew onto the hat and not into the monster.
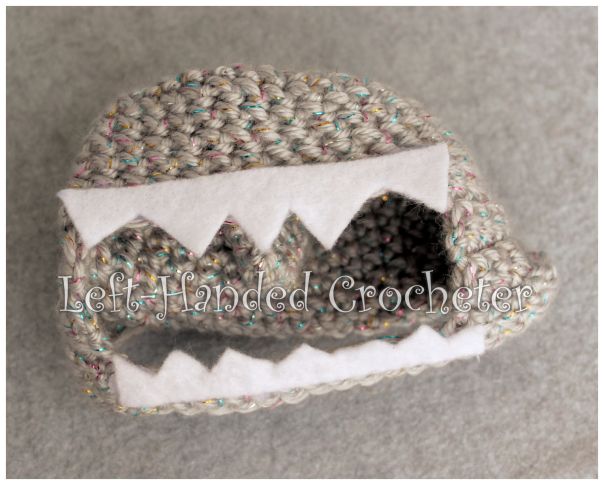
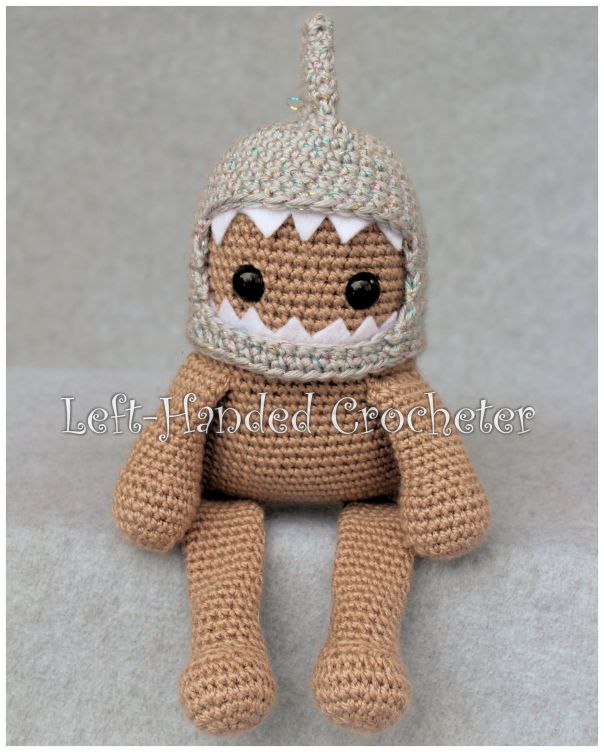
Shark Hat
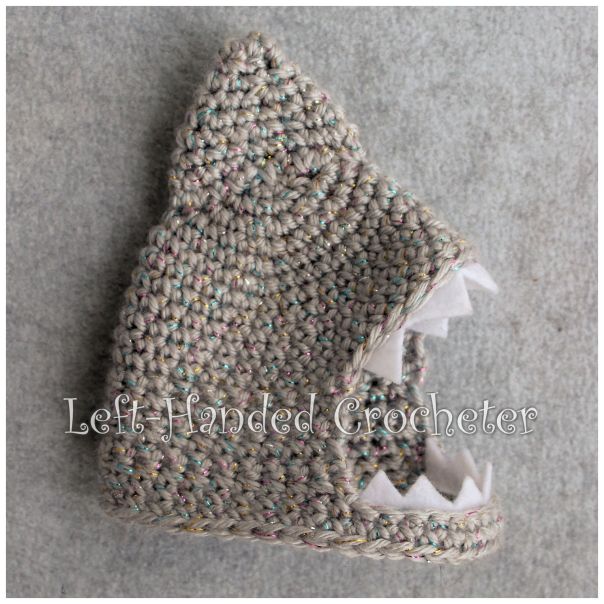
For the shark hat, use the round hat pattern. I used Caron Simply Soft Party in silver sparkle.
Fin
Ch 3. Sl st to first ch to create circle. (Instead, you can perform the “magic circle” if you’d like.)
Row 1: ch 1, 5 sc inside of circle. (5 stitches)
Row 2: Sc in each stitch around. (5 stitches)
Row 3: Inc in each stitch around. (10 stitches)
Row 4: Sc in each stitch around. (10 stitches)
Row 5: *Inc in first stitch, sc in next stitch , repeat from * around. (15 stitches)
Row 6: Sc in each stitch around. (15 stitches)
Row 7: *Inc in first stitch, sc in next 2 stitches, repeat from * around. (20 stitches)
Row 8: Sc in each stitch around. (20 stitches)
Tie off. Using yarn needle and yarn, sew onto top of hat. I find it helpful to put the hat on the monster’s head when sewing pieces on, to be able to get them where I want them. Just be sure to only sew onto the hat and not into the monster.
Cut out shark teeth with white felt. You can sew the teeth on, or do like I did and hot glue it. Just make sure you attach the teeth to the inside of the hat.

Don’t forget, if you want the patterns for the super hero accessories, you’ll have to purchase the full set on my Ravelry.
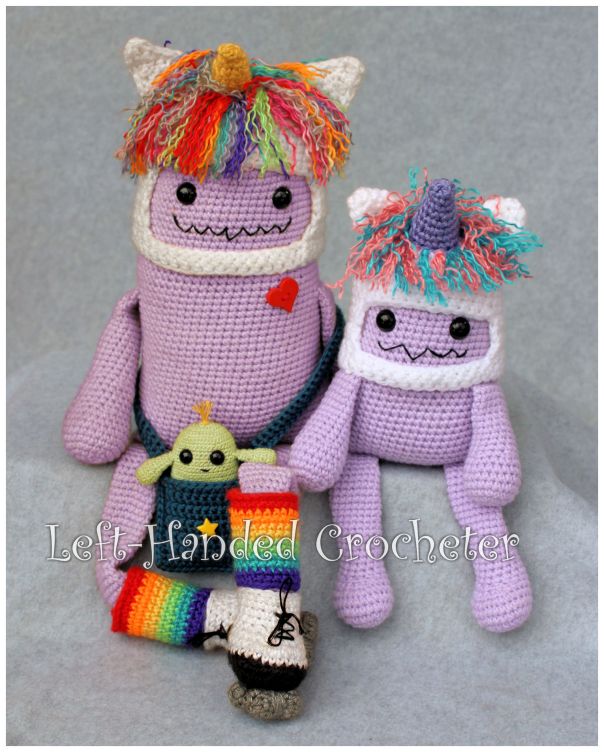
Be sure to check out the patterns for my big monsters too. The mini ones look really cute with the big ones.
I hope you enjoy this pattern! You’re welcome to sell items that you make using my patterns, as long as you don’t post the pattern anywhere else, and link back to my page if you’d like to. If there are any mistakes, or something is unclear, please feel free to leave me a comment and let me know. Or message me on Facebook. If you create any monsters of your own, be sure to post a photo on my Facebook page so I can see. I love seeing all of the things people are creating, and I’d love to see the different variations that people make of these.


Love these, they are adorable!
they are just precious!!! No wonder you can’t stop making them! ‘Sharky’ is my favorite! 😀
Many greetings and happy Tuesday from Virginia, ivonne