I am not a professional photographer, but I did take photography classes in college, and I learned a few things. I have always been a portrait photographer because I love taking pictures of people.


Taking photographs of crocheted items has been a bit different for me, but I’ve found that a lot of the same concepts apply as I use when I do portrait photography. If you sell handmade items, especially if you do your selling online, taking good photographs is very important. The photographs will sell your item. I put together a few dos and don’ts that I think are important to remember when you’re taking your photographs.
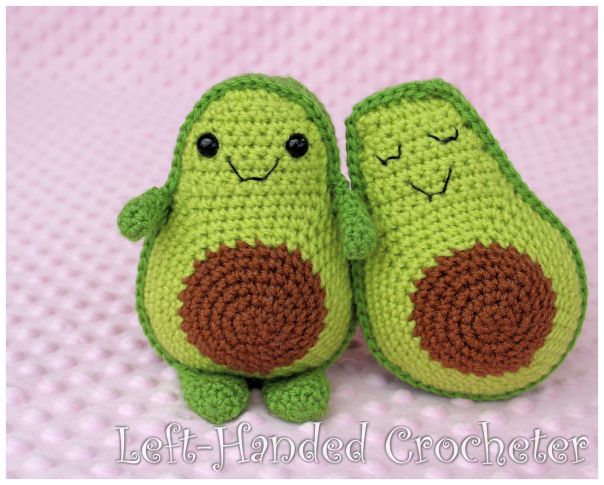
DO take your photos in natural lighting.
Natural lighting will always give you the best, most accurate colors without deep shadows. I take all of my pictures outside. I know it’s really tempting to snap your photos quickly in your house after you finish the product, but it really is worth it to wait until you can get good photos outdoors.
DON’T take your photos in bright sunlight.
I find this is a common mistake people make with any photography. I often have people get a hold of me on bright, sunny days because they think it’s perfect weather to do a photoshoot. Bright sunlight will create harsh shadows on your subject.
Cloudy days are the best for photos. If it’s not a cloudy day, find a place with some good shade. You don’t want deep shade because you still want the natural lighting, but you also don’t want bright sunlight behind your subject. Personally, I use my front porch. It faces north, and I’m in the Pacific Northwest so the sun is always behind my house, which puts my porch in the shade.
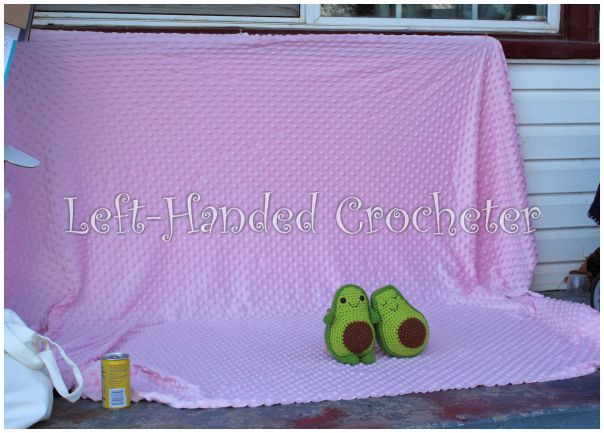
I buy yards of fabric at Joann’s to use for backdrops, and I tack them to my window frame. This works really well for me, and I’m generally happy with how my pictures turn out.
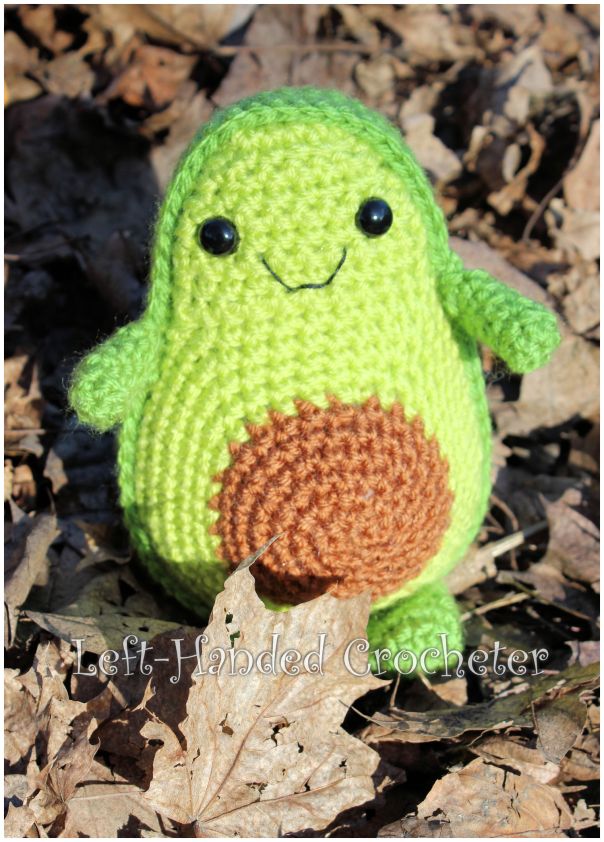
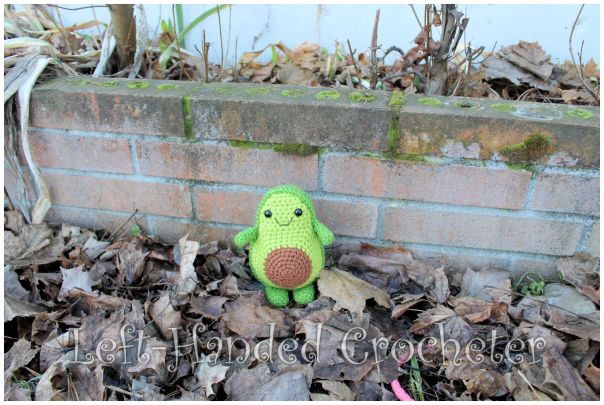
If you don’t have a good area you can set up a backdrop, there are lots of other options. Find a relatively uncluttered background (a wooden fence, bricks, etc) to set your item in front of.
DO frame your picture correctly.
When you’re photographing your item, you don’t want to stand above it (unless you’re trying to get it from an unusual angle), and you don’t want to be too far away from it.
You want your item to fill as much of the picture as you can without cutting any of it off. It may mean kneeling on the ground, or even laying down to get that perfect photo.

Sometimes, taking photos outdoors isn’t a great option. I know it’s tough for me in the winter months, or when it’s raining a lot, because it means I either have to brave the cold and wade through snow, or I need to bring an umbrella outside with me. Some people live in apartments with no real yard to speak of for setting up a space to take photographs. I know that it’s often a necessity to take photographs indoors. If this is the case for you, remember that natural lighting is always going to be best.
DON’T use a flash.

One of the worst things you can do is to use an on-camera flash to take photographs of your handmade items. As with bright sunlight, it creates harsh shadows and washes other things out. It also changes the color quite a bit and overall just looks unflattering. If you must take photos inside, find a spot in your house that gets a lot of natural light (but not direct sunlight) to set up an area for photos.
DO work with what you have available.
I don’t have a single room in my house that gets good natural lighting because of the trees in our backyard. My kitchen is the best place, but the colors in there are terrible. Still, I use it occasionally if the item I’m photographing goes ok with the bright orange countertops.

I try to work with what I have, and sometimes I’ll use my son’s house across the street because he has a north facing family room with lots of big windows that gets great lighting. You may need to play around with different areas in your house until you find that perfect spot, but I promise it will be worth it to get photographs that sell.
DO purchase professional lighting if you can afford it.
I’m a person who prefers natural lighting, and I’ve found ways to make it work for me. If you can afford it, and you’re willing to invest a bit of money, you can purchase lighting kits to help give you more natural lighting indoors. Here are a few examples on Amazon:

This LED light panel is relatively inexpensive. If you have to take photographs indoors, it might be a good idea to consider getting something like this to make your items stand out better, and really show off what you’re selling.

If you have space to set up an area specifically for photographs, this continuous lighting kit with umbrella would be ideal, and would give you natural lighting in the darkest of rooms.
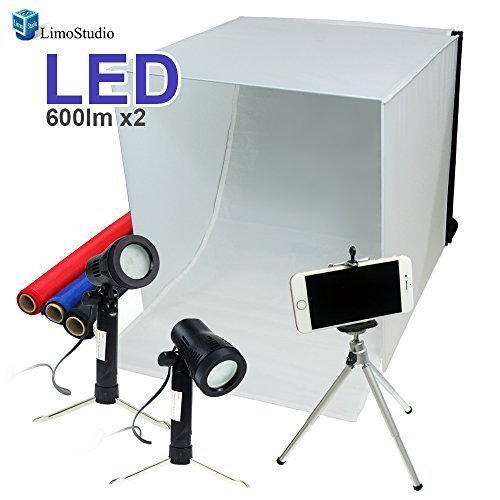
If the items that you’re photographing aren’t very big then this light box kit would be perfect. It gives you a nice background, plus lighting and some colored backgrounds. Since it’s only 16 cubic inches, though, it wouldn’t work well for most of the things that I make.
DO use nice backgrounds for your photographs.
It’s definitely a good investment to get a few different backgrounds that you like. As I said, I purchase yards of fabric from Joann’s and it works pretty well for me. I find that fleece fabrics are best for this because they don’t hold wrinkles as much as other fabrics do. Plus, you can get them in virtually any color. I recommend you avoid most printed fabrics, because that will detract from your item that you’re trying to showcase. In some cases, though, printed backgrounds can make your items stand out more. I particularly love this set of wood designs that I purchased from Amazon.

These are 4 foot by 12 foot rolls of paper that are designed to be put on a frame, but I just roll them out on my porch and use them. They look really nice with hats and scarves.


If you’re on a tight budget, posterboard works pretty well for backgrounds too, especially if the item you’re photographing isn’t too big.
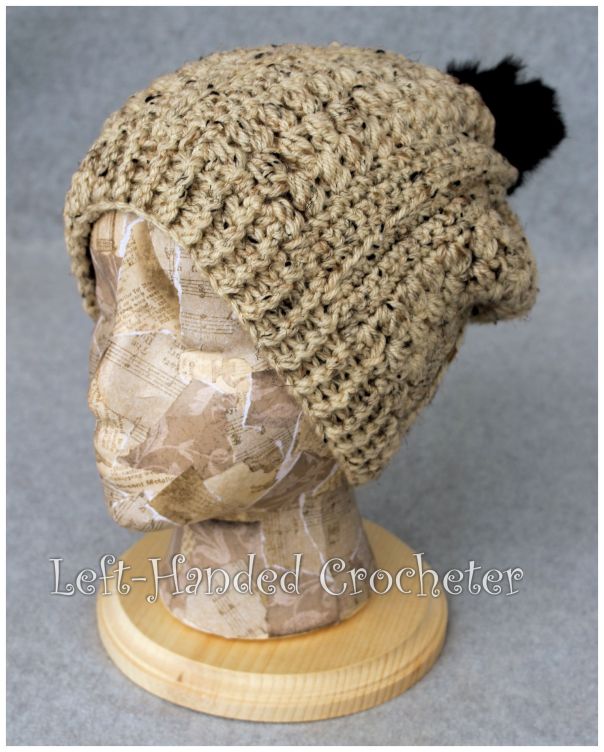
DO show clothing items being worn.
This is important if you make and sell hats and scarves, as well as other clothing items. Pictures of hats and scarves laying flat will help show off the pattern on them, but you really need to include photos of them being worn.
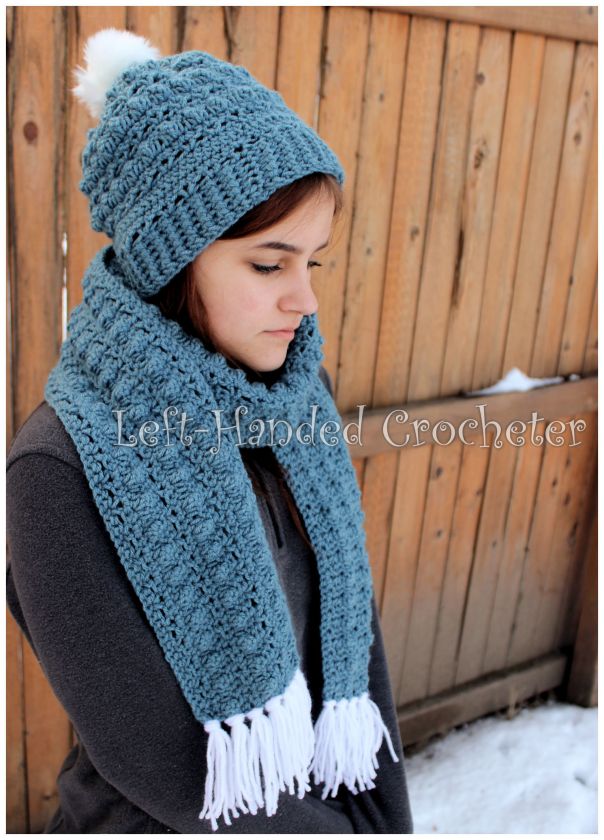

People want to see how a clothing item will look when it’s on them, since that’s why they’re buying it. If you don’t have a model handy, you can always pick up a styrofoam mannequin head. They’re pretty cheap and available at most craft stores.
Be sure to check out my post about decorating those mannequin heads to make them stand out more.
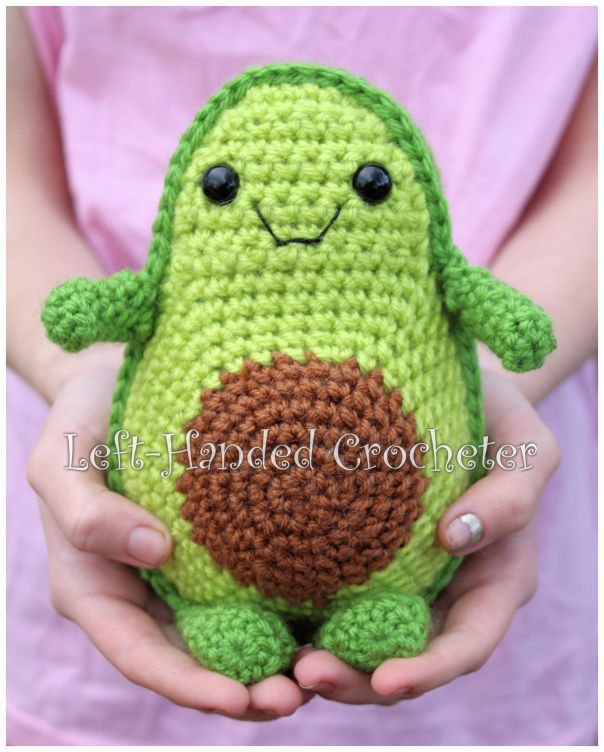
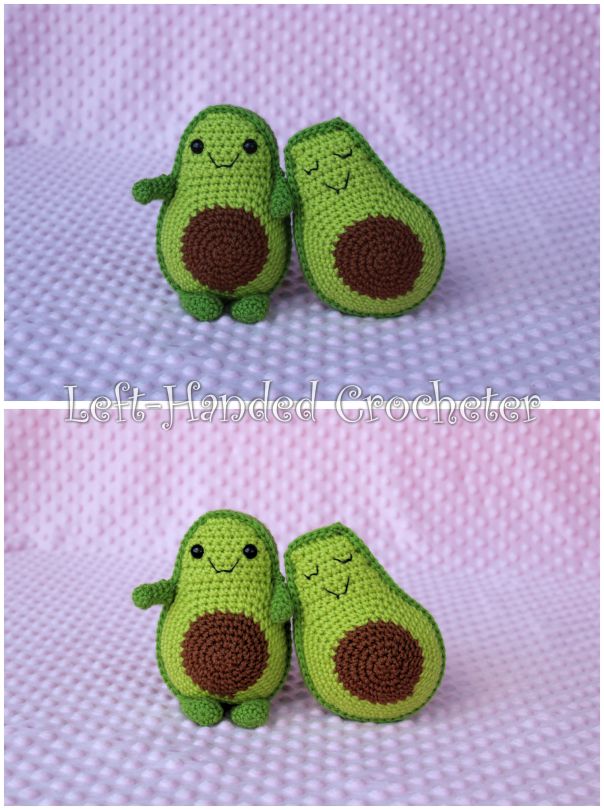
DO use people in your photographs to show size.


Whenever possible, I try to get a photograph or two that has a person in the photo with the item. It helps give some perspective to how big or small it is. Even if you’re giving measurements, those numbers often don’t mean anything until you see it with somebody. Even just putting the item in somebody’s hands will give the purchaser an idea of how big it is.

DO edit your photographs.
One last bit of advice for the technical side of your photographs. You need to edit them. It’s so rare for a photograph to have perfect lighting straight out of your camera. On those rare occasions that I get a great photograph, I still open it and see if there are any edits I can do that will make it better. Even back in my days in the darkroom, there was still a lot of adjustments I had to make to get the perfect light and dark tones in my photographs. Digital photography tends to look very flat, more so than film photography. You need to brighten up those photos, and deepen the shadows a bit to make them pop.
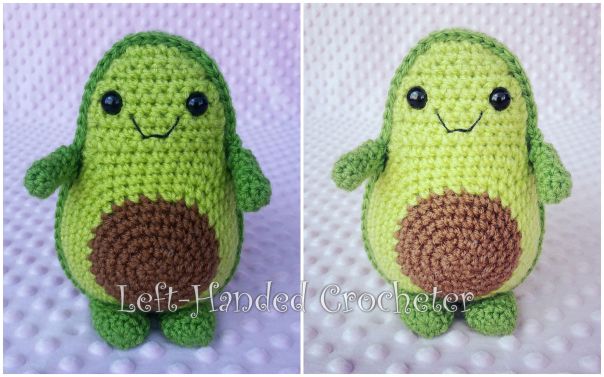
I have a really nice (and expensive) DSLR camera. It takes amazing photographs. But even so, I have to edit them. In the example above, you can see the difference editing made in the top photo (straight out of the camera) and the bottom photo (once it’s been edited). The lighting and color is so much better in the edited photograph. Next, I would crop that photograph and resize it a bit for sharing.
Most people know all about Photoshop. It really is the best photo editing software out there, because there’s so much you can do with it. However, Photoshop is a very expensive program and it can be complicated for the novice photographer. (Just a side note: most colleges have Photoshop classes you can take to learn how to use the program, but just the fact that they can fill that much time with learning it should tell you how complicated the program can be.) I’ve taken Photoshop classes, and I’ve used the program for some things, but I actually learned how to edit (and manipulate) photos using Paintshop Pro. It’s a less expensive program, and kind of a simplified version of Photoshop. Paintshop Pro is always open on my computer because I use it for everything. It’s my favorite program, and one that I’ve spent the money to upgrade every time they come out with a new version.
I know spending money on photo editing software may not be in your budget. I’m sure there are a lot of free programs out there that you can get that will at least help you adjust the lighting on your photographs. I also know that many people don’t have a camera, or even a computer anymore. Most people simply use their cell phones. With the cameras on cell phones getting better and better, there’s absolutely nothing wrong with it being your main tool for photos. You can get really good photographs with a cell phone, and there are tons of apps out there that you can download (usually free of charge) to edit those photos.
My cell phone takes pretty good pictures, but I still love taking them into Instagram and adjusting the brightness and contrast, and sometimes adding a filter to make them look a bit better. I find this fun, and often will do it just for enjoyment. If you don’t enjoy editing photos, Instagram really is a great way for you to do it because they take most of the work out of it for you.
One last thing….
DO add a watermark to your photographs.
I find this to be very important because there are a lot of people out there who don’t want to put the time and effort into taking photographs of their own work, so they’ll just steal your photos and use them like they’re their own. (Side note: If you’ve ever done this, stop right now. It’s actually illegal to use somebody else’s photographs without their permission, and it’s a pretty asshole-ish thing to do. People put a lot of work into those photographs. DO NOT STEAL OTHER PEOPLE’S PHOTOS. Use my advice and take your own.)
Your photographs are less likely to get stolen if they’ve got a watermark on them. People don’t want their buyers to know that the work they’re viewing isn’t what they’re buying, so if they’re going to steal a photo they’ll look for one without a watermark on it. Think of it as signing your artwork. You wouldn’t sell a painting without putting your signature on it, would you? Of course not. You want to make sure you always gets credit for your work.
I use Paintshop Pro to put my watermark on my photos, but there are probably free apps you can find on your phone that will allow you to do it. Take some time and search for those apps. It will help protect your work, but it also adds a bit of professionalism to your photographs.
I think that’s everything I wanted to say about taking photographs of your work. Hopefully this post wasn’t too scattered or too long-winded, and I really hope you were able to take some of this advice and use it to help advance your business. If you have any other tips that you think of, or if you know some great free apps for editing photos on phones and adding watermarks, leave me a comment or go post on my Facebook page.


Great advice and you presented it in a very understandable way.
Thanks from another southpaw. These are great suggestions to improve photos.