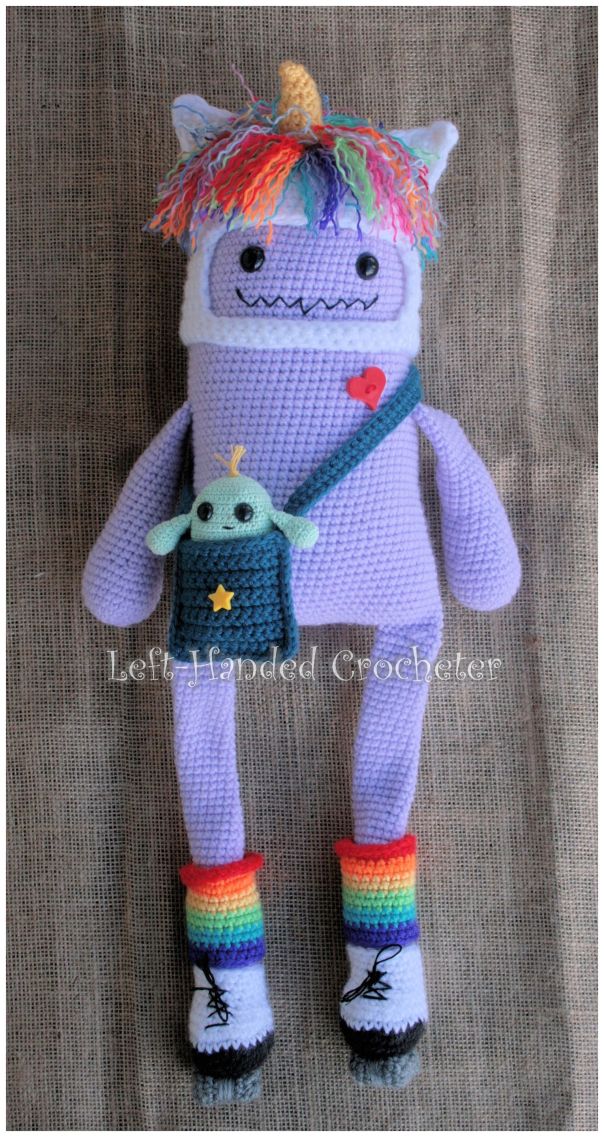
This is Gunther. He likes unicorns and rainbows, and he would love the chance to spread love into your household. I can’t take credit for Gunther. He is totally the creation of Camp Happy Heart Fibre Arts. She knits some amazing monsters, and this is one of her creations. I loved him so much, so with her permission I’ve written up a crocheted pattern of him to share with all of you. If you’re a knitter, go check out Camp Happy Heart Fibre Arts on Facebook. She has a lot of wonderful monsters that she makes and sells, but she’s also working on a knitted pattern of this guy, so be sure to check back.
Meanwhile, here’s Gunther. After I made him, my daughter named him Gunther, and I have a whole series of these guys that I’m working on now. This post will give you the pattern to make the basic monster, but the accessories will be in other posts, so keep an eye out for them. *Update: You can find the patterns for his accessories here.
One of my favorite things to do is to look at a picture of something and try to figure out how to make it myself. This one was the most fun because it was a knitted monster, and I was figuring out how to crochet him and keep him as close to the original as possible. I’m not sure what kind of yarn she used, but I knew I wanted something thin and soft. I also knew I wanted to use yarn that would be easy for everybody to find in their local craft store. In the end, I decided baby yarn (size 3) would be best for the actual monsters because it gives you a tighter stitch so you don’t notice the stitches as much, and it’s super soft.
*side note* This is actually Gunther 2.0, because I originally made him differently, more like my yeti pattern. After I had that Gunther done, I wasn’t happy with him, so I started over from scratch. Gunther 2.0 was perfect.
Abbreviations:
ch: chain
sc: single crochet
inc: increase (2 single crochets in one loop)
dec: decrease (pull yarn through loop, pull yarn through second loop, yarn over and pull through all loops)
Materials needed (with affiliate links):
Baby yarn, or any size 3 yarn. For Gunther, I used Bernat baby sport in light lilac. I’m also making some using Loops and Threads Snuggly Wuggly yarn from Michaels.
Heart button (This is optional, of course. I found these heart buttons at Walmart, and they were very similar to the one on the original monster, so I picked them up for Gunther.)
This pattern is worked “in-the-round”, and stitches are worked through both loops unless otherwise noted.
Body:
ch 3. Sl st to first ch to create circle. (Instead, you can perform the “magic circle” if you’d like.)
Row 1: ch 1, 10 sc inside of circle. (10 stitches)
Row 2: *Inc in first stitch, sc in next stitch , repeat from * around. (15 stitches)
Row 3: *Inc in first stitch, sc in next 2 stitches, repeat from * around. (20 stitches)
Row 4: *Inc in first stitch, sc in next 3 stitches, repeat from * around. (25 stitches)
Row 5: *Inc in first stitch, sc in next 4 stitches, repeat from * around. (30 stitches)
Row 6: *Inc in first stitch, sc in next 5 stitches, repeat from * around. (35 stitches)
Row 7: *Inc in first stitch, sc in next 6 stitches, repeat from * around. (40 stitches)
Row 8: *Inc in first stitch, sc in next 7 stitches, repeat from * around. (45 stitches)
Row 9: *Inc in first stitch, sc in next 8 stitches, repeat from * around. (50 stitches)
Row 10: *Inc in first stitch, sc in next 9 stitches, repeat from * around. (55 stitches)
Row 11: *Inc in first stitch, sc in next 10 stitches, repeat from * around. (60 stitches)
Row 12: *Inc in first stitch, sc in next 11 stitches, repeat from * around. (65 stitches)
Rows 13-63: Sc in each stitch around. (65 stitches)
Tie off, leaving open at the bottom.
Insert safety eyes between rows 18 and 19, with 12 sc’s in between eyes. (I like to put the poly-fil in before I insert the eyes so I can decide which side looks best for the front.) Stuff with poly-fil, and sew closed across the bottom. Using embroidery thread, sew on mouth.
Arms:
ch 3. Sl st to first ch to create circle. (Instead, you can perform the “magic circle” if you’d like.)
Row 1: ch 1, 10 sc inside of circle. (10 stitches)
Row 2: *Inc in first stitch, sc in next stitch , repeat from * around. (15 stitches)
Row 3: *Inc in first stitch, sc in next 2 stitches, repeat from * around. (20 stitches)
Row 4: *Inc in first stitch, sc in next 3 stitches, repeat from * around. (25 stitches)
Rows 5-9: Sc in each stitch around. (25 stitches)
Row 10: *Dec in first 2 stitches, sc in next 3 stitches, repeat from * around. (20 stitches)
Rows 11-14: Sc in each stitch around. (20 stitches)
Row 15: *Dec in first 2 stitches, sc in next 2 stitches, repeat from * around. (15 stitches)
Rows 16-30: Sc in each stitch around. (15 stitches)
Tie off. Stuff with poly-fil to row 20, leaving the rest of the arm empty and flattened. You can make the arms shorter or longer by adding or subtracting rows, and you can change how full you stuff them as well.
Legs:
ch 3. Sl st to first ch to create circle. (Instead, you can perform the “magic circle” if you’d like.)
Row 1: ch 1, 10 sc inside of circle. (10 stitches)
Row 2: *Inc in first stitch, sc in next stitch , repeat from * around. (15 stitches)
Row 3: *Inc in first stitch, sc in next 2 stitches, repeat from * around. (20 stitches)
Row 4: *Inc in first stitch, sc in next 3 stitches, repeat from * around. (25 stitches)
Row 5: *Inc in first stitch, sc in next 4 stitches, repeat from * around. (30 stitches)
Row 6: *Dec in first 2 stitches, sc in next 4 stitches, repeat from * around. (25 stitches)
Row 7: Sc in each stitch around. (25 stitches)
Row 8: 7 sc, dec, dec, dec, dec, dec, 8 sc. (20 stitches)
Row 9: 5 sc, dec, dec, dec, dec, dec, 5 sc. (15 stitches)
Rows 10-50: Sc in each stitch around. (15 stitches)
Tie off. Stuff with poly-fil to row 25, leaving the rest of the leg empty and flattened. You can also make the legs shorter or longer by adding or subtracting rows, and you can change how full you stuff them as well.
Sew legs to bottom of body, and sew arms onto each side. When laying flat, the end of the arm should be about at the end of the body. At this point, you can attach a button onto his body if you want to, using thread or yarn.
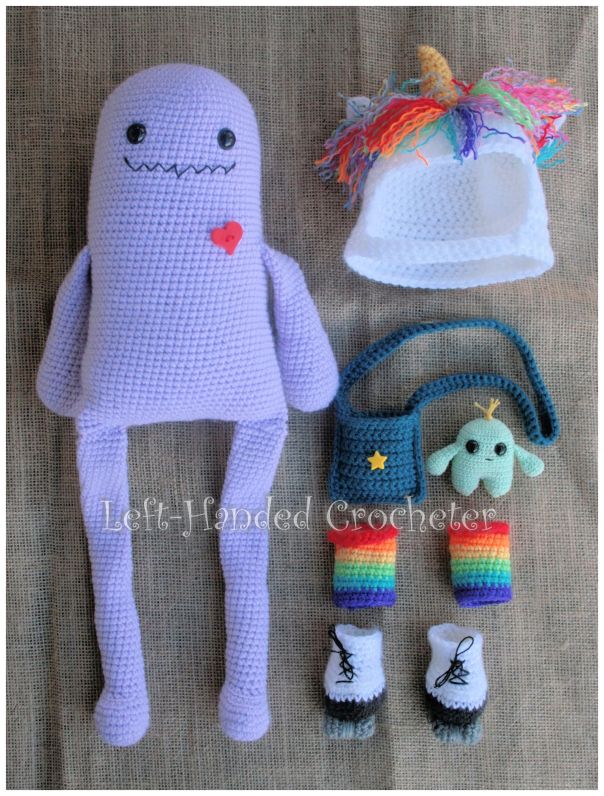
And now you have your finished monster.
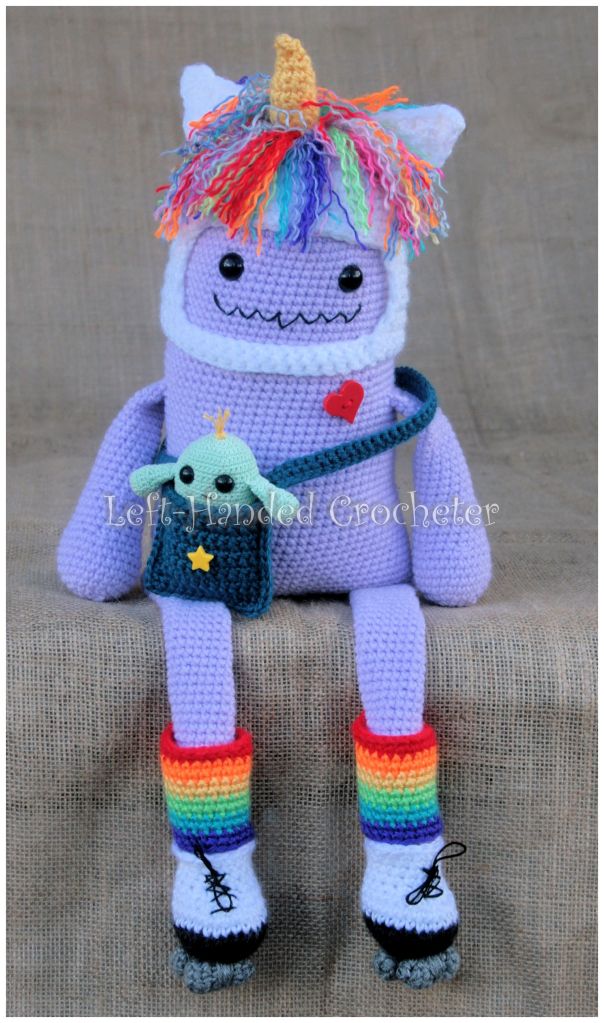

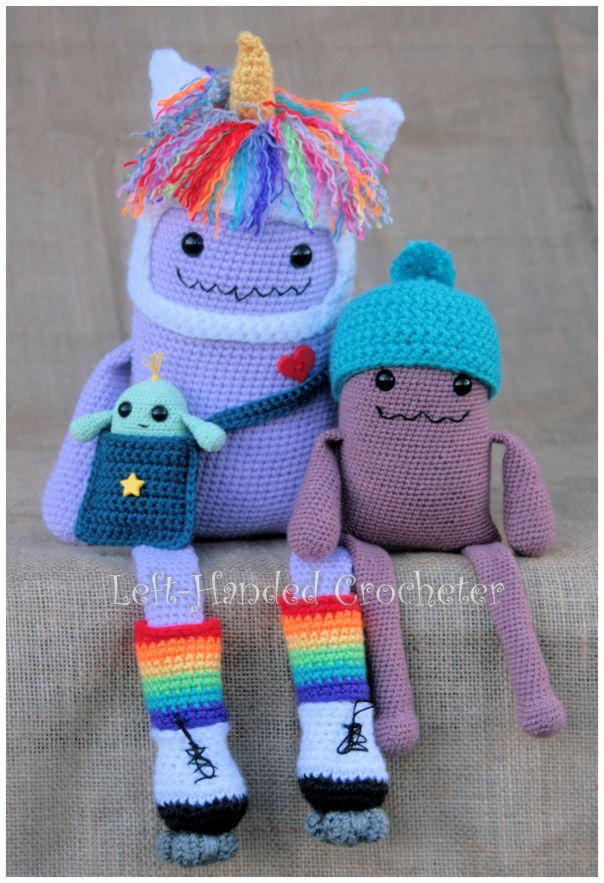
Gunther is sitting on a shelf in my bedroom, and I absolutely love him. He’s definitely one of my favorite things that I’ve made. I also made Gunther a friend, Gus, using Loops and Threads Woolike yarn, which is a size 1, so Gus ended up really small.
Next week, I’ll be posting Gunther’s accessories, so stay tuned. *Update: His accessories have been posted! You can find them here. I’m working on a few more monsters, with different accessories. You can make separate monsters, or you can just make one monster with all of the different accessories so he can play dress up.
I hope you enjoy this pattern! If there are any mistakes, or something is unclear, please feel free to leave me a comment and let me know. Or message me on Facebook. If you create any monsters of your own, be sure to post a photo on my Facebook page so I can see. I love seeing all of the things people are creating, and I’d love to see the different variations that people make of these. And don’t forget to check out Camp Happy Heart Fibre Arts on Facebook to see all of the other wonderful creations she’s made.


2 thoughts on “Gunther 2.0”