Monthly Archives: October 2017

Amigurami Tips and Tricks

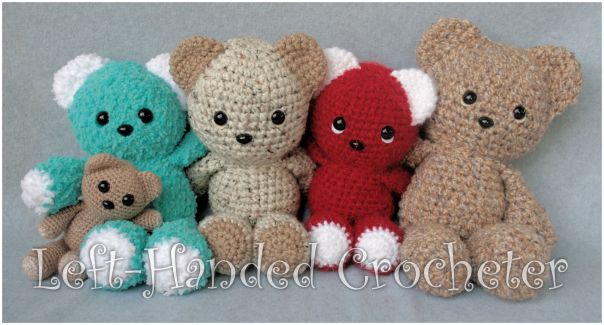
I make a lot of stuffies. I’ve been making them for a long time, and then suddenly they became very popular, and they became known as amigurami, which is the Japanese art of knitting or crocheting small, stuffed yarn creatures. Over the years, I’ve discovered a lot of little tricks that I do when I make them. I’ve also picked up tips from other yarn artists. I decided, since I have a lot of new patterns coming over the next few months, that now is a good time for me to try to put some of those tips and tricks into one blog post.

If you’re new to amigurami, or even if you’re not, you might find some of these tips useful. I know there are a lot of other things I could include in this post, so I’m sure I’ll add more to it as time goes by. For now, though, here are the tips that I’ve put together.

Gauge

For the most part, there is no gauge in amigurami. Most patterns will tell you what hook size to use and what yarn size to use, but as long as your hook matches the yarn that you’re using, the pattern should work. For example, most worsted weight yarns (like Red Heart) will say on the package to use a J hook. For amigurami, I tend to use 1 hook size smaller than what they suggest. So I would use an I hook. But I could make the same pattern with a chunky yarn that says to use an L hook, and use a K hook instead.

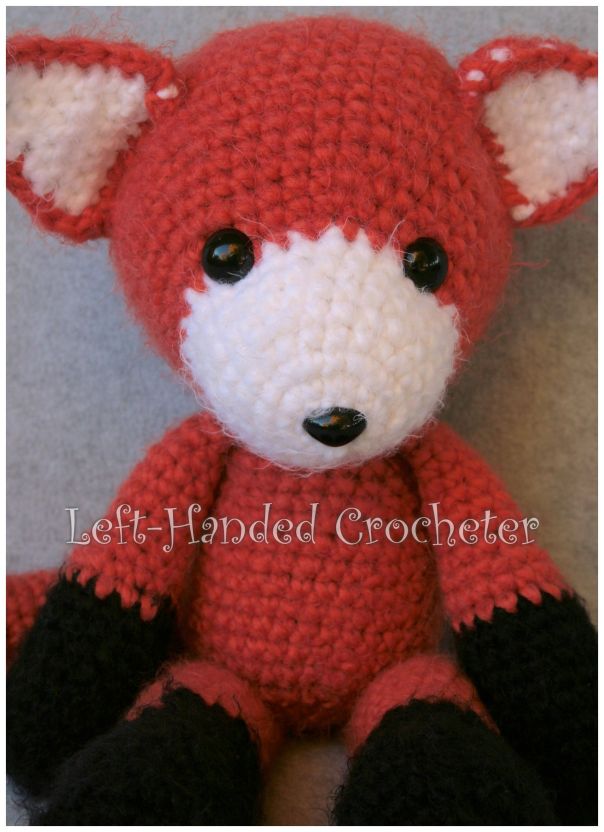
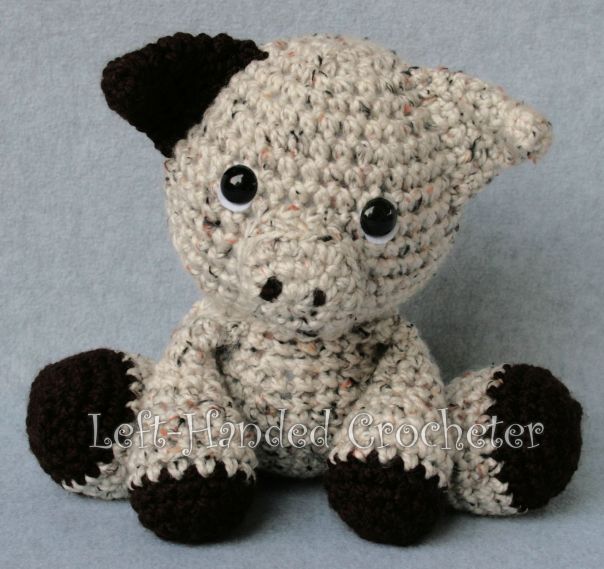
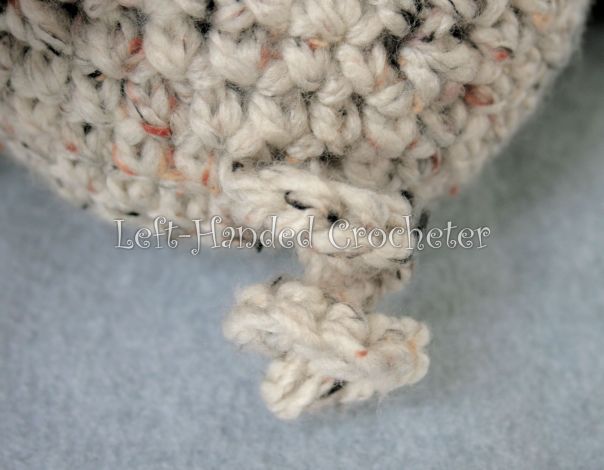
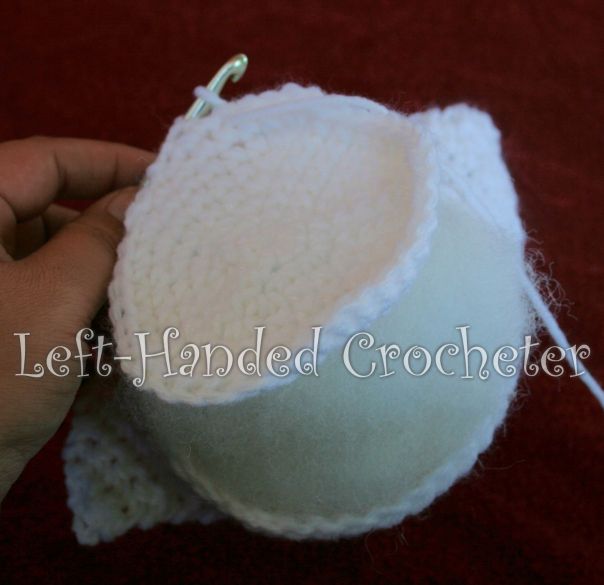
For amigurami, you want a tight stitch. Many people learn to crochet by making hats, scarves, and blankets. With things like that, you want a loose stitch, so that’s how people learn. I tend to crochet very tight stitches because I’m used to making stuffies, so it takes some concentration for me to stitch loosely with clothing and blankets. Tight stitches matter. If you stitch loosely, or use a hook that is too big, your stuffie will end up looking like this…

IMG_1951

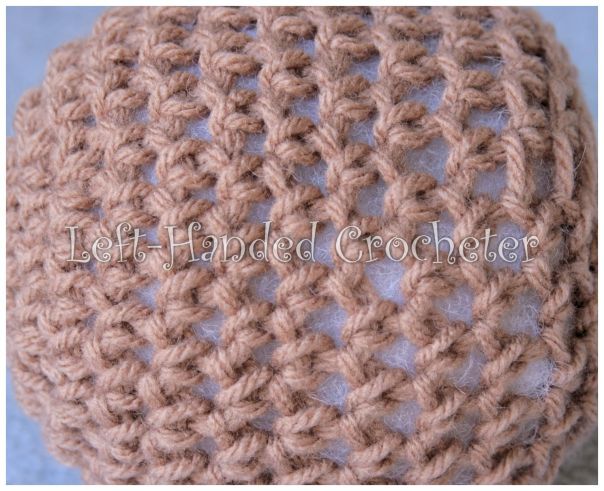
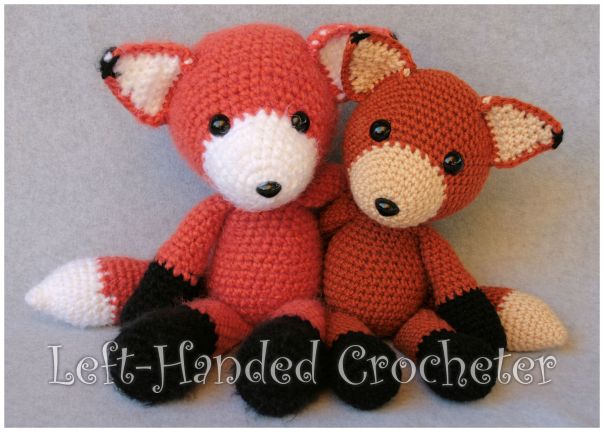
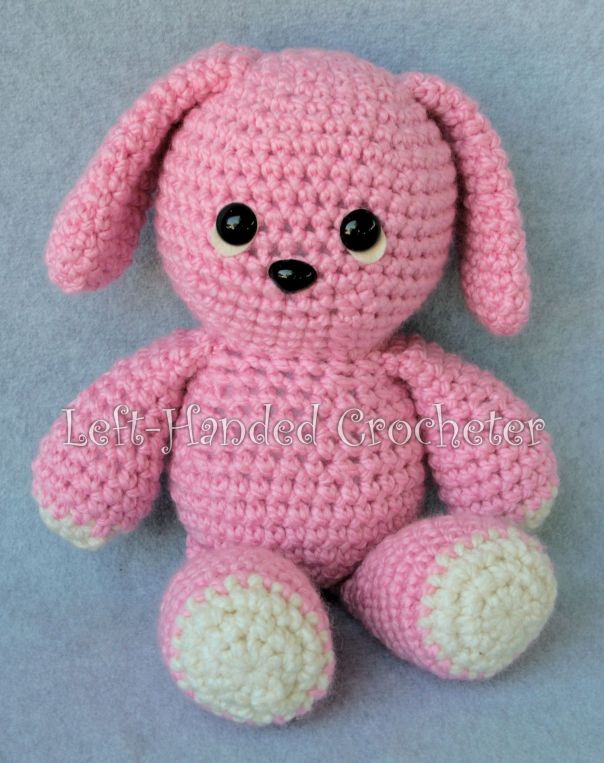
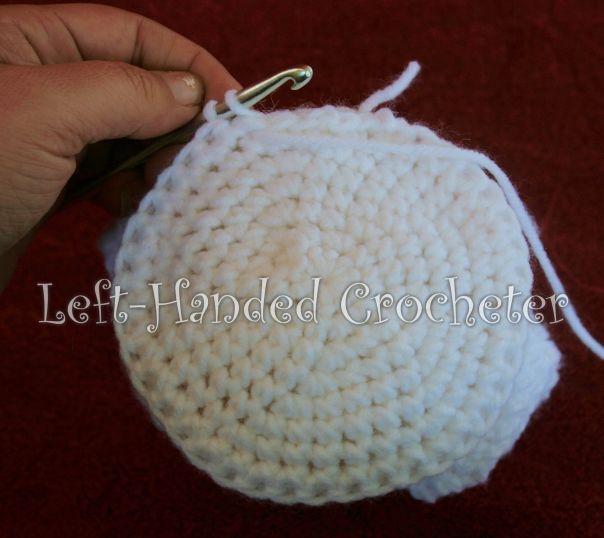
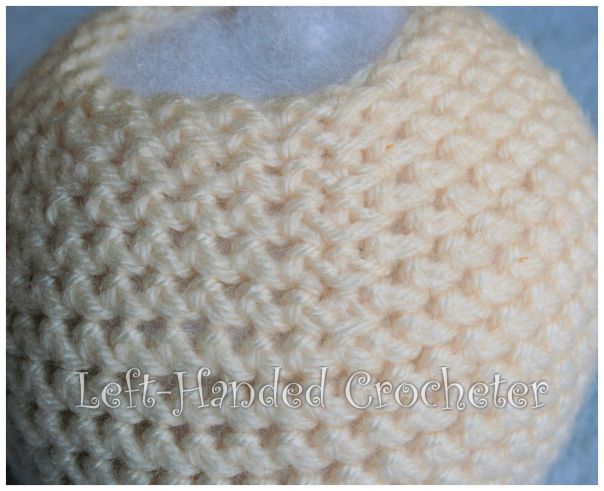
Nobody wants a stuffie with big gaps in it. If you tend to crochet loose, use a smaller hook than is recommended for the pattern. It will help tighten up your stitches so that your stuffie looks more like this…

IMG_1953

Using a smaller hook than the pattern suggests will also make your stuffie smaller, though, so if you don’t want that, then you can use a thicker yarn and go down 2 sizes with your hook to tighten up your stitches. Once you get used to making amigurami, you’ll eventually have an easier time making your stitches tighter.

I should also note that some yarn has a lot of stretch to it, and isn’t as good for amigurami as others. I like using stiffer yarns personally. They aren’t as soft and cuddly, but they don’t have stretch to them so it’s easier to get tight stitches that will stay tight once you stuff it.

Decreasing

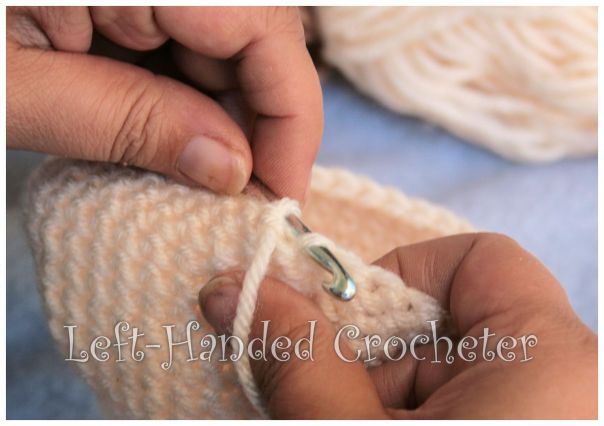
There are a few different ways to do decreases. I’m going to talk about 3 of those in this post. Let’s start with the typical way. You pull a loop up through the first stitch…

IMG_1908

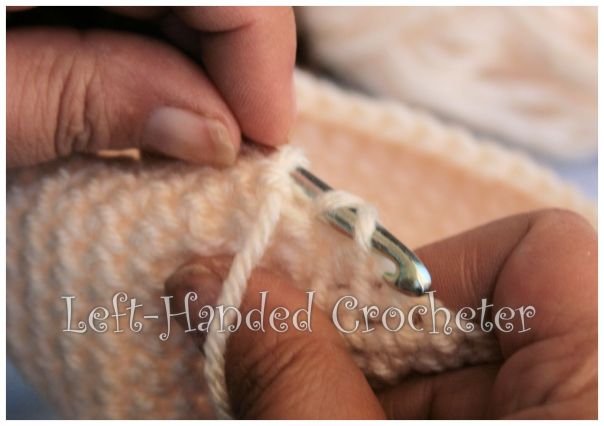
Then pull a loop up through the next stitch, so there are 3 loops on your hook…

IMG_1911

Next, you yarn over and pull through all 3 loops. This is the way that most people learned how to decrease, and it certainly works. But if you’ve made stuffies this way then you know that the end result shows where those decreases are. It ends up looking like this…

IMG_1940

Most of the time, this is still the way I do my decreases. I don’t usually mind the gaps that show where the decreases are, but I will admit it doesn’t look great.

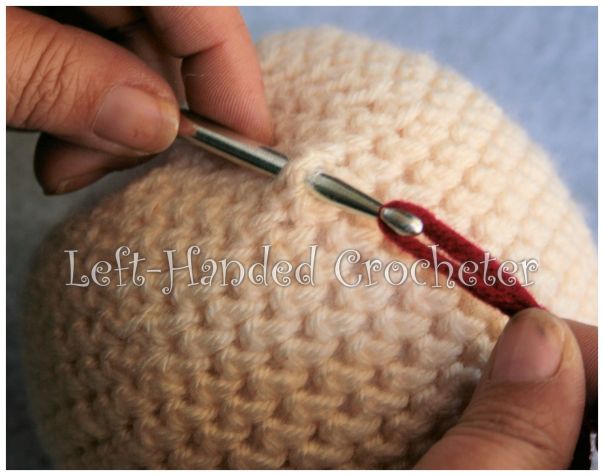
The second way you can decrease is to simply skip a stitch. I’ve also been doing this method a lot lately. The end result looks like this…

IMG_1942

As you can see, there are still gaps where the decreases are. With darker yarns (like this one) they’re particularly noticeable.

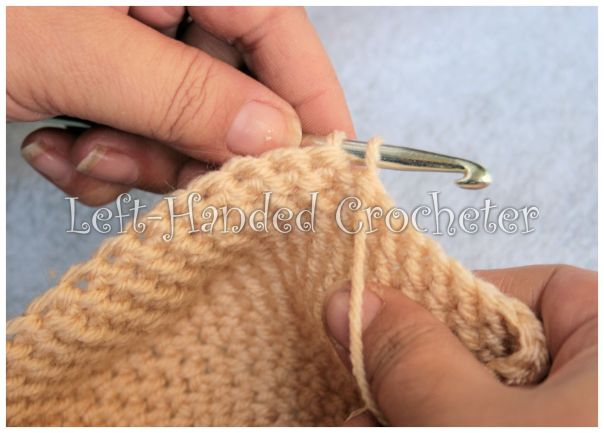
The hidden decrease is definitely the best way to go. First, you put your hook through the front loop only of the first stitch…

IMG_1919

Next, you put your loop from the bottom up through the front loop only of the next stitch…

IMG_1921

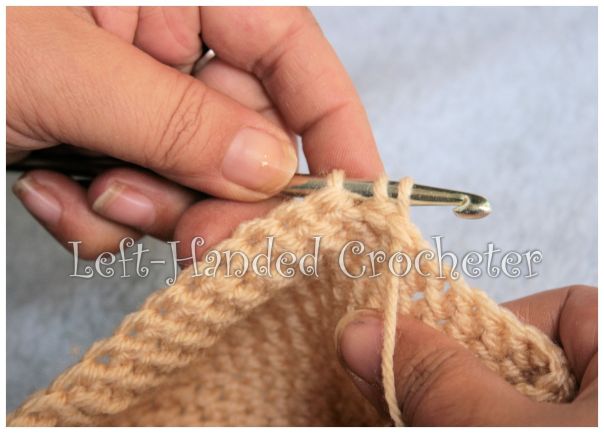
Then, pull a loop through both of these…

IMG_1923

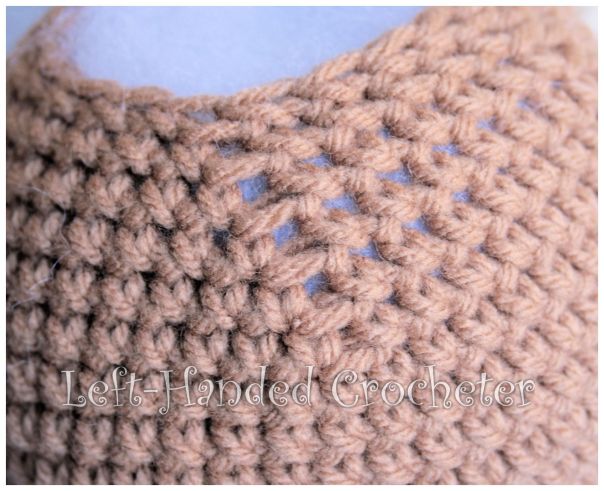
Yarn over, and pull through both loops. The end result looks like this…

IMG_1948

Doesn’t that look so much better? You can still see where the decreases are if you look for them, but it doesn’t leave the gaps that other methods do. The only problem that I have with this method is that it works better for right-handed people than for left-handed. You want to be sure that the side facing you is the outside of your pattern, and I find that when I work up patterns the side facing me ends up being the inside. If you use this method with the inside facing you then you end up with a line where the decrease is. For some patterns, though, I use this hidden crochet method because it really just looks nicer.

Now, I have to say that I picked up this hidden crochet method from another crocheter a year or two ago. I cannot remember who that crocheter was, though, so if you know please drop me a comment so I can credit the proper person for this.

Hair

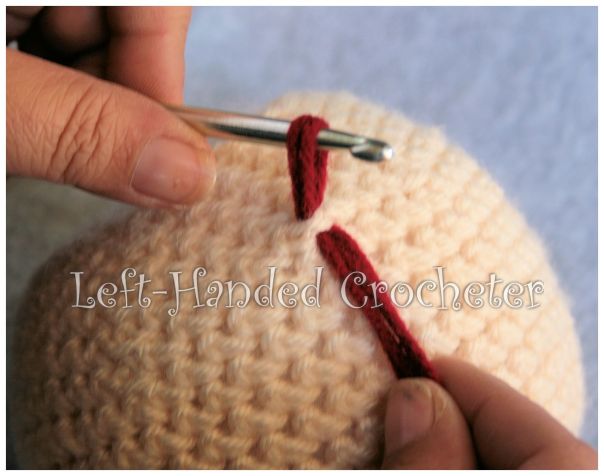
This is such a big topic, that I almost think it needs its own post. There are so very many different ways to add hair to the dolls that you make. In fact, I still experiment with different ways all the time. This is how I do it most often. I cut the yarn to the size that I want, usually making it much longer so I can just trim it later. Then I put the hook through the spot I want the hair…

IMG_1925

I take 1 or 2 pieces of yarn (depending on how thick I want it) and grab it in the middle with the hook…

IMG_1927

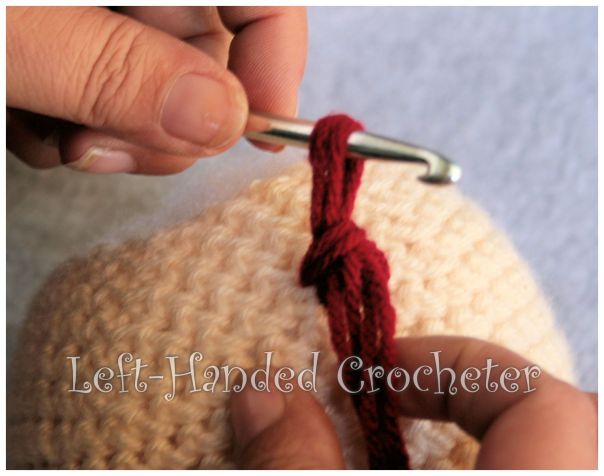
Then pull the yarn through…

IMG_1929

Keeping the loop on the hook, grab the other side of the yarn…

IMG_1931

And pull it through the loop…

IMG_1933

Then pull it tight…

IMG_1935

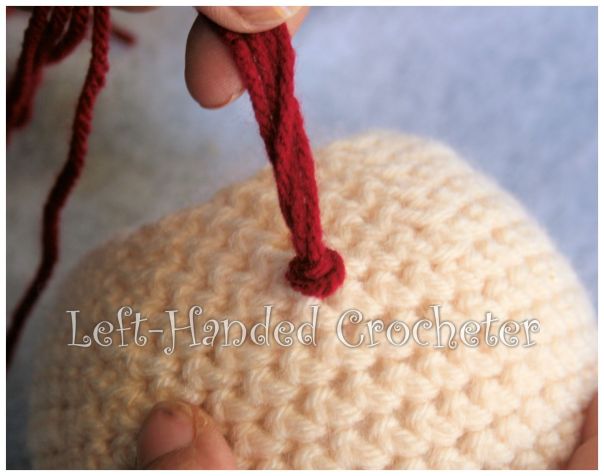
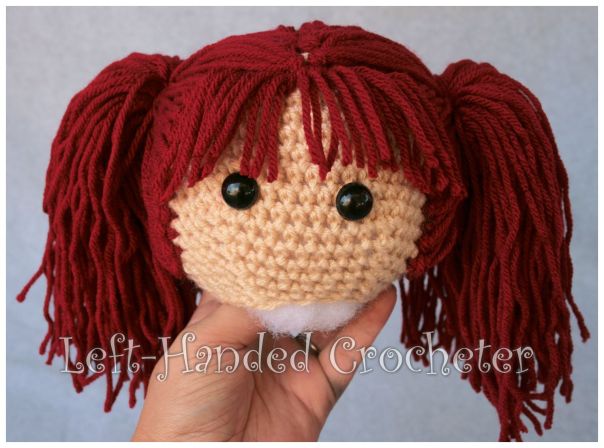
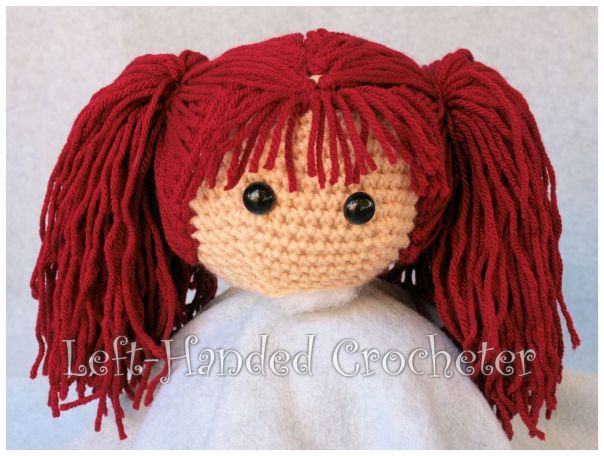
It would take a long time to cover a whole head with yarn this way, and it would also make it way too thick. So I generally only use this method when I plan to do ponytails.

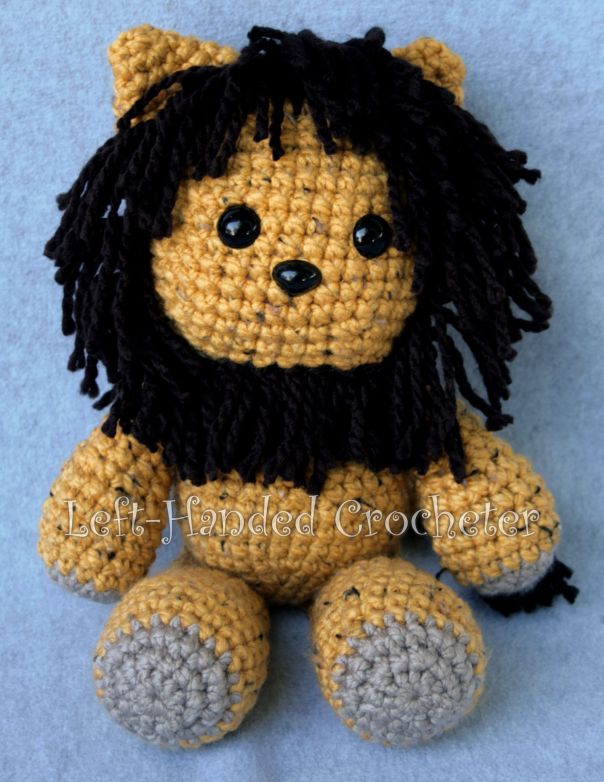
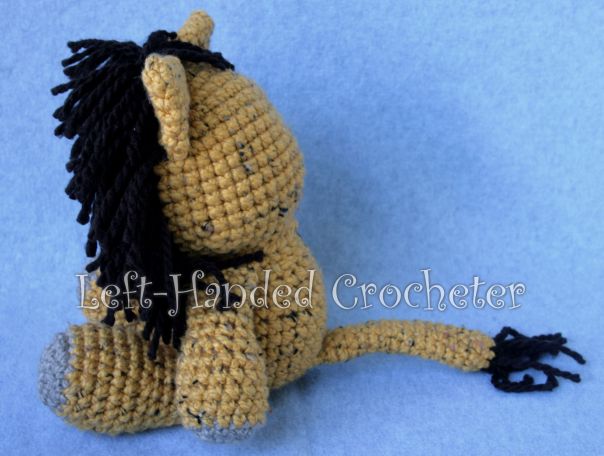
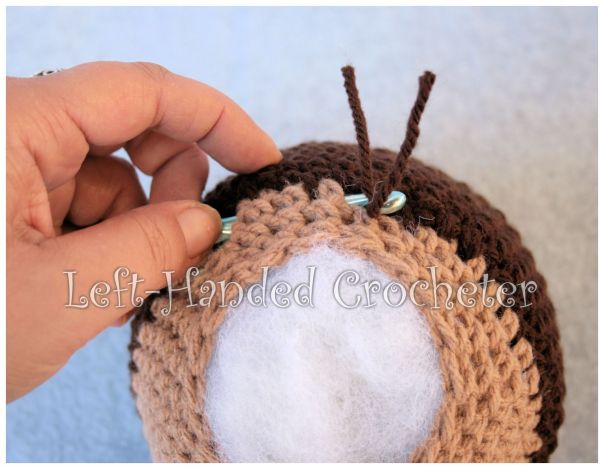
With this doll, I planned to do 2 ponytails, so I attached yarn down the middle on each side, and then across the bottom and back up to the top, leaving the center of each side empty. Then I gather up each side, brushing it out really well with my fingers to make sure it’s all pulled tight…

IMG_1973

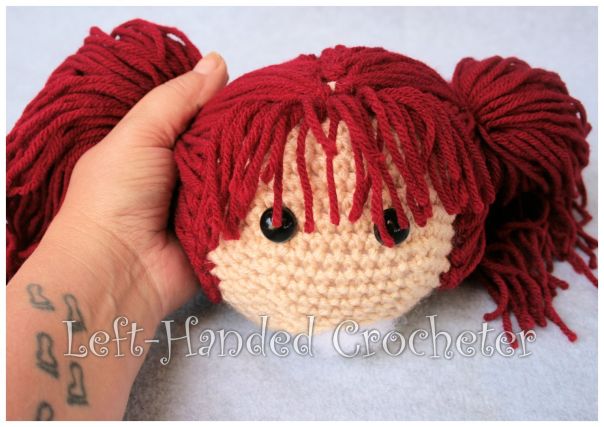
Then I use a piece of yarn in the same color to tie it up. Once the ponytails are done, I trim all of the hair to make it even.

IMG_1979

IMG_1986

It’s a cute way to do hair, and also works really well with 1 single ponytail because you just have to insert hair around the edges and pull it up.

IMG_1837

This method also works really well if you sew a hat onto their head first. You can simply insert the hair under the hat.

IMG_1993

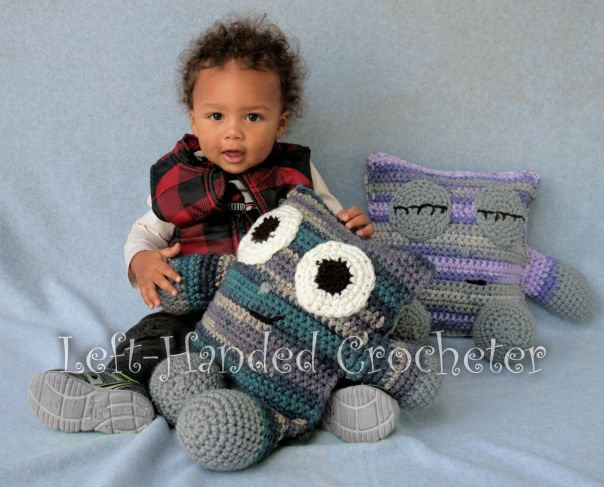
Speaking of hats, they work great for dolls because it’s less hair to add, but also less likely to fall apart if a child is playing with it.

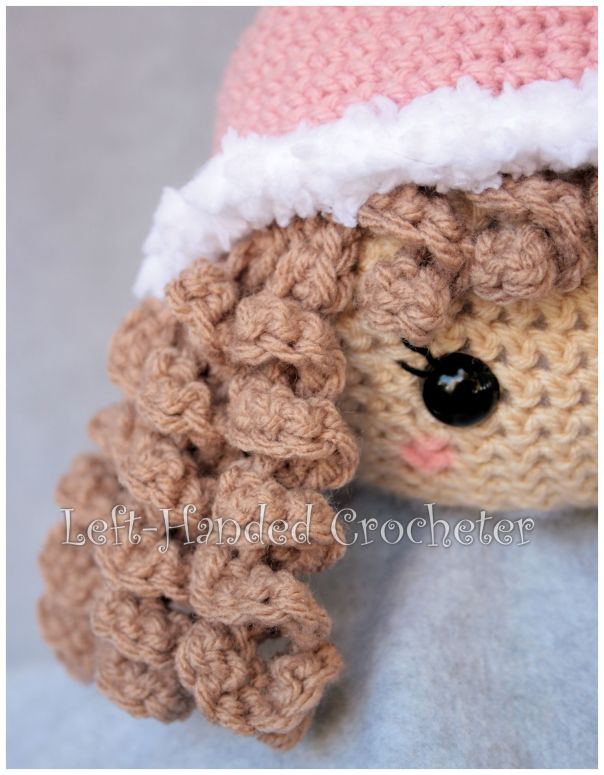
Hats also work well for curly hair.

IMG_1989

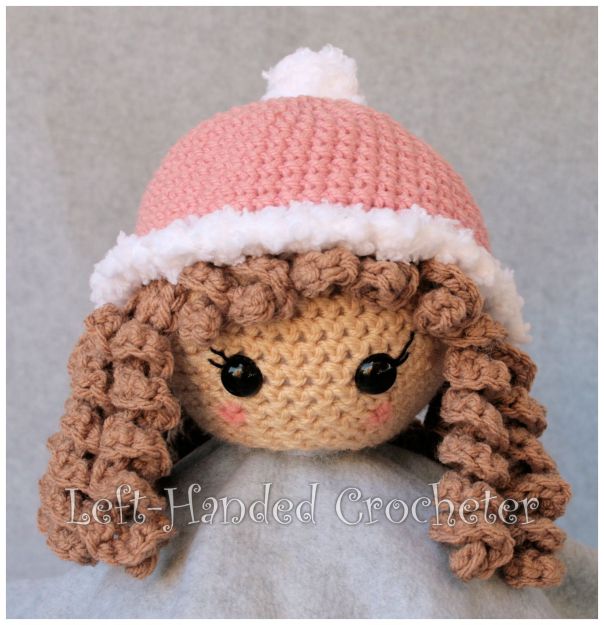
Curls are really easy to make. Just make a chain longer than you want the hair to be, then single crochet two or three times into each chain. You’ll have to test different lengths until you get it how you want it, but it comes out really cute, and you end up with two tails on one end that you can just tie onto the head under the hat.

IMG_1990

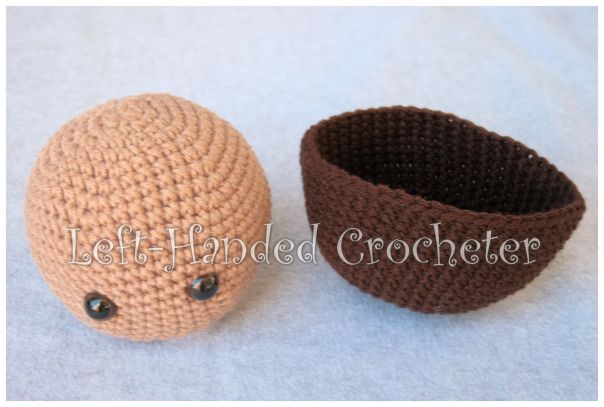
Another way to do hair is by making a cap. Generally you can do this by following the pattern for the dolls head, but instead of decreasing, add a few more rows. When I make caps, I keep testing it on my dolls head until it’s the size I want it.

IMG_1998

And there are a lot of different things you can do with hair caps. You can add edging on it…

IMG_1994

You could even add a ponytail or two to the cap the way I attached the hair up above. Or you can just sew it onto the head, which works great for boy hair.

IMG_2000

IMG_2006

I found a couple of other methods of doing hair that I haven’t tried yet, but that I plan to. This website shows a really great way to do boy hair that uses a cap but then they sew over it. The hair looks so natural, and it’s very sturdy. I’ll definitely be doing this soon, and when I do, I’ll add pictures to this post.

For more visual learners, there are a lot of videos on youtube that show different ways of attaching hair to dolls. If you want to make more natural looking hair, with a seam down the center, this video shows a neat way to do it using thread, then sewing it on the doll’s head. Or, this video shows how to make a seam right on the doll’s head using yarn instead of thread.

The Friendly Red Fox also has a post that she did showing how she attaches hair to her dolls. There are really so many different ways to do it, so test a few of them out and find what works best for you.

Extras

Here are a couple of little extra tips.

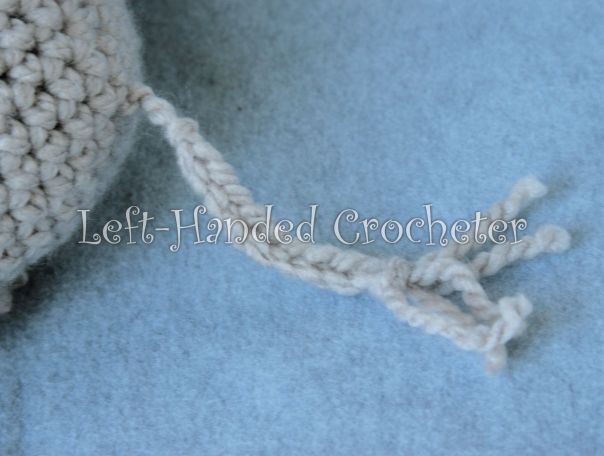
When you sew things together on your stuffie, you end up with ends sticking out like this…

IMG_2002

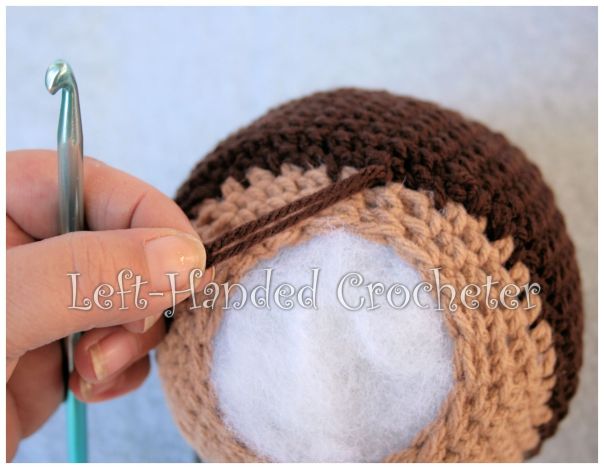
You can weave them in if you’d like, but I find that takes a lot of time. Instead, I tend to just use my hook to pull them inside of the stuffie…

IMG_2004

It hides the ends, and does it quickly.

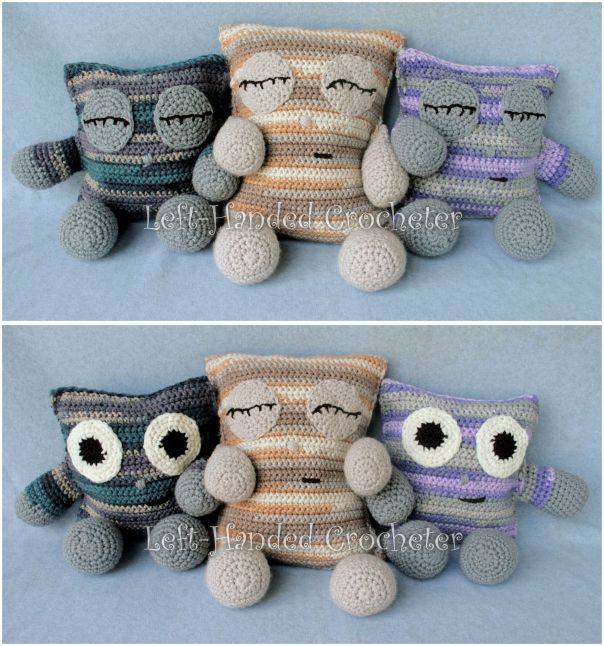
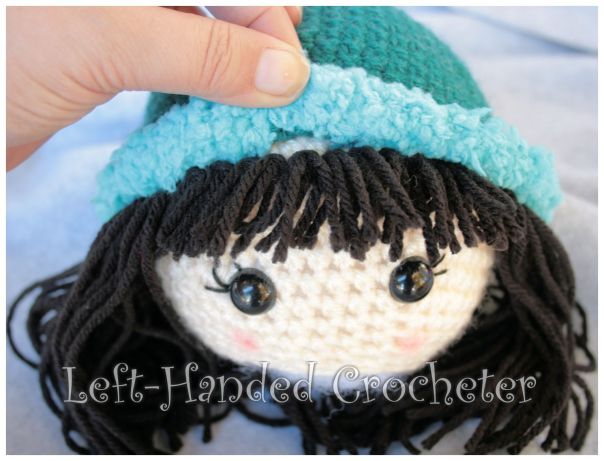
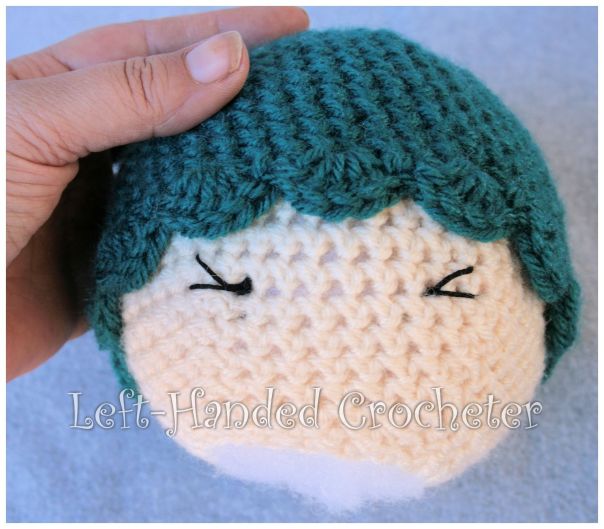
If you’re putting eyelashes on your stuffie, and you’re using safety eyes, make sure to do the lashes before you put the backs on the eyes, or else you won’t be able to get them close to the eye. Just find the spot where you’re going to place your eyes, then use embroidery thread and a needle to sew in the lashes.

IMG_2010

IMG_2015

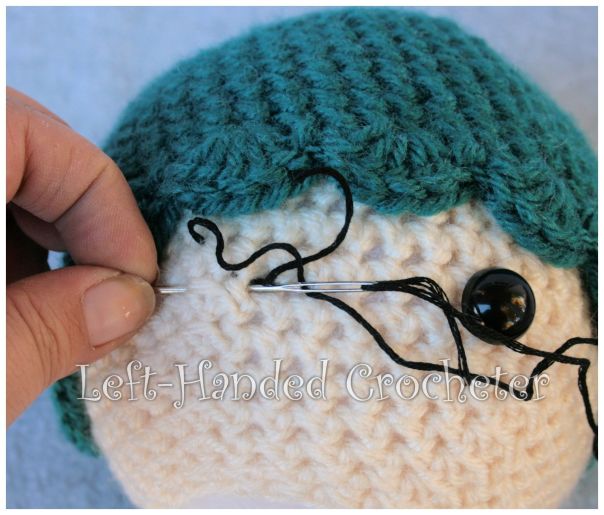
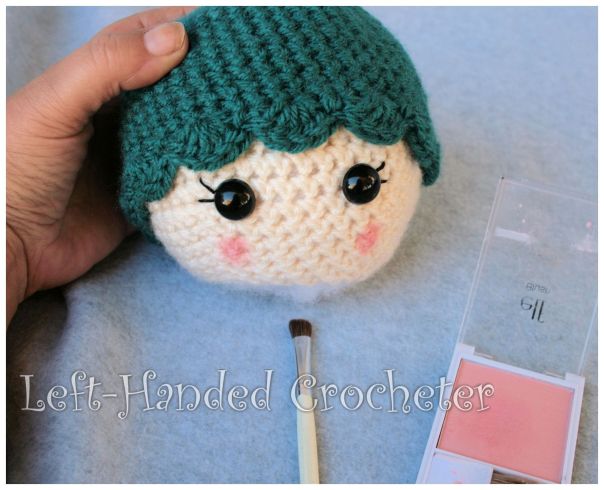
Insert the eyes and add on the backs.

IMG_2018

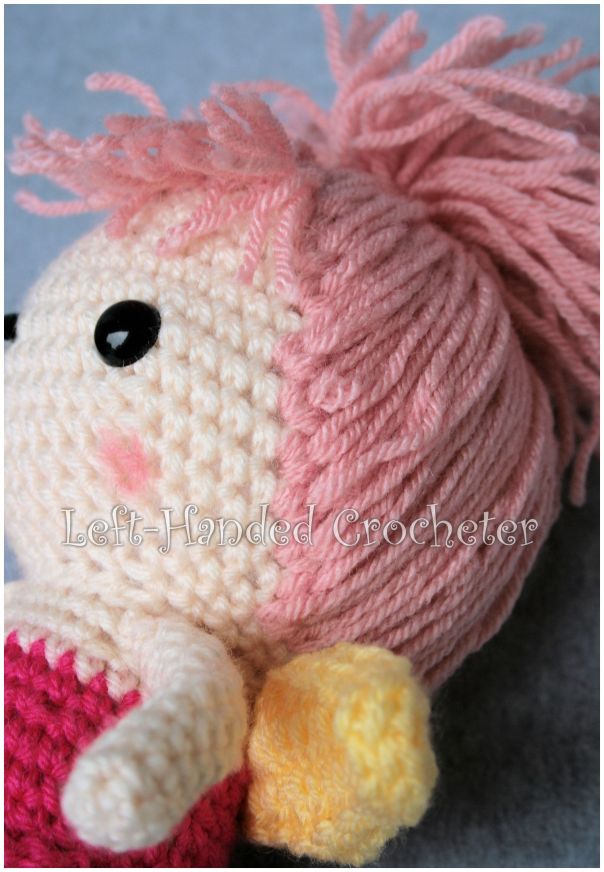
If you want your amigurami to have rosey cheeks, just grab some blush. I don’t ever wear blush, but I have this blush that I bought just for stuffies that I make. I use a brush to apply it.

IMG_2024

If the doll is played with a lot, or you wash it, then it would probably come off eventually. But you can always just reapply it. Most of the stuffies that I make just tend to sit on a shelf, so the blush stays on them just fine, and it adds an extra touch to make them more lifelike.

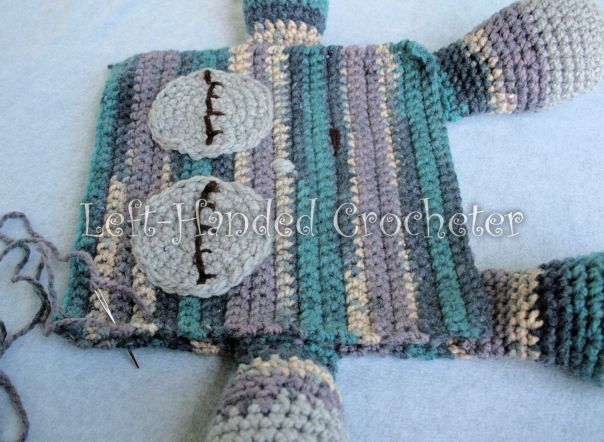
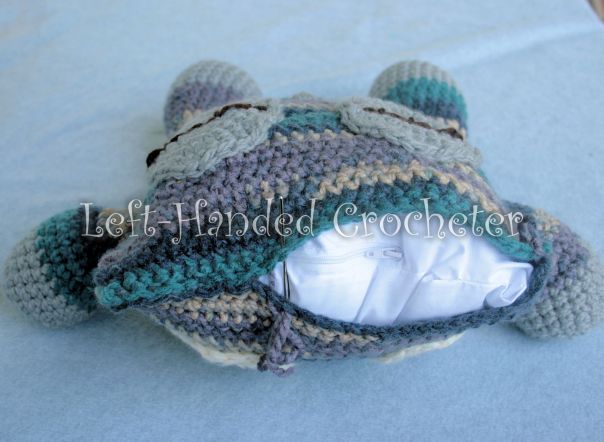
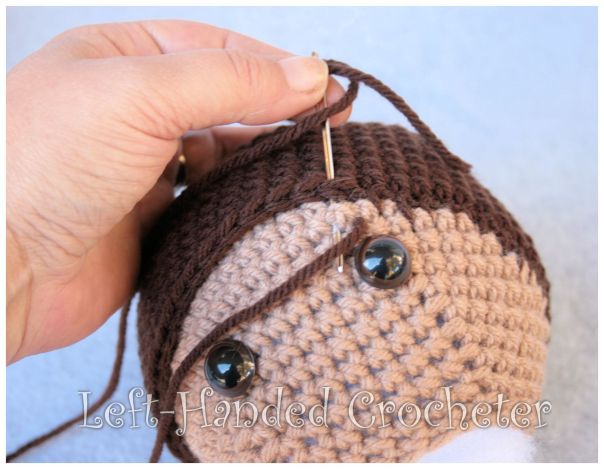
When you’re sewing pieces onto your stuffie, especially if you’re sewing an open piece on, I find it useful to use straight pins to hold it in place.

IMG_2045

The pins are also a nice way to see how it will look before you start sewing, so you can adjust the placement if need be.

That’s all of my tips for now. I’ll try to add more as they come to me. If you have any tips that I didn’t think to add, leave me a comment or message me on Facebook. I’d love to have this one blog post with everything that a beginner would need to know to start making adorable stuffies. Thanks for reading!


Freddy the Fox

IMG_1864

Foxes are such cute animals, and I know there are a lot of fox patterns out there because of how popular they’ve become. I wanted to make one for my daughter, and decided I’d rather write up my own pattern so I could make it as big and as floppy as I wanted it to be. The finished fox is about 15 inches from the tip of his toe to the top of his ears, although the size is different depending on what kind of yarn you use.

IMG_1877

I do love how he turned out. You could also add some eyelashes and maybe a bow on its head to make it into a girl fox if you’d like. This one, though, is Freddy. And here’s his pattern.

IMG_1873

If you want a pattern that you can save on your computer and easily print, this pattern is available in my Ravelry shop for only $2.00. I love printing patterns and saving them in a binder to keep track of the ones I’ve done and the ones I still plan to do.

Abbreviations:

ch: chain

sc: single crochet

sl st: slip stitch

inc: increase (2 single crochets in one loop)

dec: decrease (pull yarn through loop, pull yarn through second loop, yarn over and pull through all loops)

Materials needed (with affiliate links):

Lion Brand Vanna yarn in beige, black and rust.

I (5.25mm) crochet hook 

18mm safety eyes

20mm safety nose (you can sew a nose on if need be)

Yarn needle

Poly-fil 

This pattern is worked “in-the-round”, and stitches are worked through both loops unless otherwise noted. 

Head:

With beige yarn, ch 3. Sl st to first ch to create circle. (Instead, you can perform the “magic circle” if you’d like.)

Row 1: ch 1, 10 sc inside of circle. (10 stitches)

Row 2: *Inc in first stitch, sc in next stitch , repeat from * around. (15 stitches)

Row 3: *Inc in first stitch, sc in next 2 stitches, repeat from * around. (20 stitches)

Row 4: Sc in each stitch around. (20 stitches)

Row 5: *Inc in first stitch, sc in next 3 stitches, repeat from * around. (25 stitches)

Rows 6-8: Sc in each stitch around. (25 stitches) Switch to rust yarn.

Row 9: *Inc in first stitch, sc in next 4 stitches, repeat from * around. (30 stitches)

Row 10: *Inc in first stitch, sc in next 5 stitches, repeat from * around. (35 stitches)

Row 11: *Inc in first stitch, sc in next 6 stitches, repeat from * around. (40 stitches)

Row 12: Sc in each stitch around. (40 stitches)

Row 13: *Inc in first stitch, sc in next 7 stitches, repeat from * around. (45 stitches)

Row 14: Sc in each stitch around. (45 stitches)

Row 15: *Inc in first stitch, sc in next 8 stitches, repeat from * around. (50 stitches)

Rows 16-21: Sc in each stitch around. (50 stitches)

Row 22: *Dec in first 2 stitches, sc in next 8 stitches, repeat from * around. (45 stitches)

Row 23: *Dec in first 2 stitches, sc in next 7 stitches, repeat from * around. (40 stitches)

Row 24: *Dec in first 2 stitches, sc in next 6 stitches, repeat from * around. (35 stitches)

Row 25: *Dec in first 2 stitches, sc in next 5 stitches, repeat from * around. (30 stitches)

Row 26: *Dec in first 2 stitches, sc in next 4 stitches, repeat from * around. (25 stitches)

Row 27: *Dec in first 2 stitches, sc in next 3 stitches, repeat from * around. (20 stitches)

At this point, stuff the head, insert the nose and eyes.

Row 28: *Dec in first 2 stitches, sc in next 2 stitches, repeat from * around. (15 stitches)

Row 29: *Dec in first 2 stitches, sc in next stitch, repeat from * around. (10 stitches)

Row 30: Dec around. (5 stitches)

Sew end shut. Tie off.

Body:

With rust yarn, ch 3. Sl st to first ch to create circle. (Instead, you can perform the “magic circle” if you’d like.)

Row 1: ch 1, 10 sc inside of circle. (10 stitches)

Row 2: *Inc in first stitch, sc in next stitch , repeat from * around. (15 stitches)

Row 3: *Inc in first stitch, sc in next 2 stitches, repeat from * around. (20 stitches)

Row 4: *Inc in first stitch, sc in next 3 stitches, repeat from * around. (25 stitches)

Row 5: *Inc in first stitch, sc in next 4 stitches, repeat from * around. (30 stitches)

Row 6: *Inc in first stitch, sc in next 5 stitches, repeat from * around. (35 stitches)

Row 7: *Inc in first stitch, sc in next 6 stitches, repeat from * around. (40 stitches)

Row 8: *Dec in first 2 stitches, sc in next 6 stitches, repeat from * around. (35 stitches)

Rows 9-11: Sc in each stitch around. (35 stitches)

Row 12: *Dec in first 2 stitches, sc in next 5 stitches, repeat from * around. (30 stitches)

Rows 13-14: Sc in each stitch around. (30 stitches)

Row 15: *Dec in first 2 stitches, sc in next 4 stitches, repeat from * around. (25 stitches)

Rows 16-17: Sc in each stitch around. (25 stitches)

Row 18: *Dec in first 2 stitches, sc in next 3 stitches, repeat from * around. (20 stitches)

Rows 19-20: Sc in each stitch around. (20 stitches)

Tie off.

Ears:

Ch. 9

Row 1: Sc in 2nd ch from hook and in each ch across, ch 1, turn. (8 stitches)

Row 2: Sc in each stitch across, ch 1, turn. (8 stitches)

Row 3: Dec in first 2 stitches, sc in next 4 stitches, dec in last 2 stitches, ch 1, turn. (6 stitches)

Row 4: Sc in each stitch across, ch 1, turn. (6 stitches)

Row 5: Dec in first 2 stitches, sc in next 2 stitches, dec in last 2 stitches, ch 1, turn. (4 stitches)

Row 6: Sc in each stitch across, ch 1, turn. (4 stitches)

Row 7: Dec in first 2 stitches, dec in last 2 stitches, ch 1, turn. (2 stitches)

Row 8: Sc in each stitch across, ch 1, turn. (2 stitches)

Tie off.

Make 2 in beige and 2 in rust. Holding 1 rust piece and 1 beige piece, sc together with rust yarn around edge, leaving bottom unstitched. At the top of each ear, switch to black for 2 of the sc’s. Position and sew onto top of head.

Arms:

With black, ch 3. Sl st to first ch to create circle. (Instead, you can perform the “magic circle” if you’d like.)

Row 1: ch 1, 10 sc inside of circle. (10 stitches)

Row 2: *Inc in first stitch, sc in next stitch , repeat from * around. (15 stitches)

Row 3: *Inc in first stitch, sc in next 2 stitches, repeat from * around. (20 stitches)

Row 4: *Dec in first 2 stitches, sc in next 2 stitches, repeat from * around. (15 stitches)

Rows 5-10: Sc in each stitch around. (15 stitches) Switch to rust.

Rows 11-12: Sc in each stitch around. (15 stitches)

Row 13: *Dec in first 2 stitches, sc in next stitch, repeat from * around. (10 stitches)

Rows 14-21: Sc in each stitch around. (10 stitches)

Tie off.

Legs:

With black, ch 3. Sl st to first ch to create circle. (Instead, you can perform the “magic circle” if you’d like.)

Row 1: ch 1, 10 sc inside of circle. (10 stitches)

Row 2: *Inc in first stitch, sc in next stitch , repeat from * around. (15 stitches)


Row 3: *Inc in first stitch, sc in next 2 stitches , repeat from * around. (20 stitches)

Row 4: *Inc in first stitch, sc in next 3 stitches , repeat from * around. (25 stitches)

Row 5: *Dec in first 2 stitches, sc in next 3 stitches, repeat from * around. (20 stitches)

Rows 6-9: Sc in each stitch around. (20 stitches)

Row 10: *Dec in first 2 stitches, sc in next 2 stitches, repeat from * around. (15 stitches)

Rows 11-13: Sc in each stitch around. (15 stitches) Switch to rust.

Rows 14-23: Sc in each stitch around. (15 stitches)

Row 24: *Dec in first 2 stitches, sc in next stitch, repeat from * around. (10 stitches)

Rows 25-26: Sc in each stitch around. (10 stitches)

Tie off.

Tail:

With beige, ch 3. Sl st to first ch to create circle. (Instead, you can perform the “magic circle” if you’d like.)

Row 1: ch 1, 5 sc inside of circle. (5 stitches)

Row 2: Sc in each stitch around. (5 stitches)

Row 3: Inc in each stitch around. (10 stitches)

Row 4: Sc in each stitch around. (10 stitches)

Row 5: *Inc in first stitch, sc in next stitch , repeat from * around. (15 stitches)

Row 6: Sc in each stitch around. (15 stitches)

Row 7: *Inc in first stitch, sc in next 2 stitches , repeat from * around. (20 stitches)

Rows 8-10: Sc in each stitch around. (20 stitches) Switch to rust.

Rows 11-14: Sc in each stitch around. (20 stitches)

Row 15: *Dec in first 2 stitches, sc in next 2 stitches, repeat from * around. (15 stitches)

Rows 16-30: Sc in each stitch around. (15 stitches)

Tie off.

Using yarn needle and rust yarn, sew legs and arms on, then sew tail onto back.

IMG_1871

And there you have your finished Freddy the Fox.

IMG_1866

Try making him with different kinds of yarn. I made the one with the Vanna yarn for me, because I like to keep one of each thing that I make. But then I also made one using Buttercream Angel Hair yarn in white, black and pumpkin and a J crochet hook to give to my daughter for Christmas.

The angel hair yarn is much softer and fuzzier, so it’s great for cuddling.

IMG_1891

The thicker yarn and bigger hook also made him slightly bigger.

IMG_1897

I hope you enjoy this pattern! You’re welcome to sell items that you make using my patterns, as long as you don’t post the pattern anywhere else, and link back to my page if you’d like to. If there are any mistakes, or something is unclear, please feel free to leave me a comment and let me know. Or message me on Facebook. If you create any foxes of your own, be sure to post a photo on my Facebook page so I can see. I love seeing all of the things people are creating, and I’d love to see the different variations that people make of these, especially if you make a girly-looking one.


Pillow People

IMG_1553

Do you remember DJ Tanner’s pillow person on Full House? That’s what these remind me of. Funny story, but when I got the idea to make these, I was actually making it for me. A long time ago, I was in a car accident where I injured my neck and shoulders. Lately, I’ve been having problems with my shoulders hurting and being tense when I wake up in the morning. I’m a side-sleeper, so I decided what I needed was a pillow to hug at night to keep my shoulder straighter while I sleep. So I picked up a pillow form for myself, then decided it was too boring, and I needed to do something with it. This started the idea to make my pillow into a pillow person.

If you want a pattern that you can save on your computer and easily print, this pattern is available in my Ravelry shop for only $2.00. I love printing patterns and saving them in a binder to keep track of the ones I’ve done and the ones I still plan to do.

My pillow was 12 x 16 inch, but I decided some cute 12 x 12 pillows would be perfect for the grandbabies for Christmas. So here’s how I made my pillow people.

Abbreviations:

ch: chain

sc: single crochet

sl st: slip stitch

inc: increase (2 single crochets in one loop)

dec: decrease (pull yarn through loop, pull yarn through second loop, yarn over and pull through all loops)

Materials needed (with affiliate links):

Loops and Threads Charisma yarn. Color A will be your main, variegated color. Color B will be your secondary, solid color. If you want to do open eyes on one side, you’ll also need some black and white.

Black yarn for the mouth and eyelashes. If you’re doing open eyes, you can just use the black charisma yarn that you bought for them. If not, you could use pretty much any black yarn to sew on the mouth and eyelashes.

L (8mm) crochet hook (or whatever size your yarn recommends)

12 x 12 inch pillow form


Yarn needle

Poly-fil 

Body

With color A, ch. 31

Row 1: Sc in 2nd ch from hook and in each ch across, ch 1, turn. (30 stitches)

Rows 2-35: Sc in each row across, ch 1, turn. (30 stitches)

Make 2 of these, one for each side of the pillow. Since everybody stitches differently, be sure to check your work as you go by laying it across your pillow form to be sure it will fit right.

Arms

With color B, ch 3. Sl st to first ch to create circle. (Instead, you can perform the “magic circle” if you’d like.)

Row 1: ch 1, 10 sc inside of circle. (10 stitches)

Row 2: *Inc in first stitch, sc in next stitch , repeat from * around. (15 stitches)

Row 3: *Inc in first stitch, sc in next 2 stitches, repeat from * around. (20 stitches)

Rows 4-7: Sc in each stitch around. (20 stitches)

Switch to color A

Rows 8-11: Sc in each stitch around. (20 stitches)

Row 12: *Dec in first 2 stitches, sc in next 2 stitches, repeat from * around. (15 stitches)

Rows 13-16: Sc in each stitch around. (15 stitches)

Tie off. Stuff halfway.

Legs

With color B, ch 3. Sl st to first ch to create circle. (Instead, you can perform the “magic circle” if you’d like.)

Row 1: ch 1, 10 sc inside of circle. (10 stitches)

Row 2: *Inc in first stitch, sc in next stitch , repeat from * around. (15 stitches)

Row 3: *Inc in first stitch, sc in next 2 stitches, repeat from * around. (20 stitches)

Row 4: *Inc in first stitch, sc in next 3 stitches, repeat from * around. (25 stitches)

Rows 5-9: Sc in each stitch around. (25 stitches)

Switch to color A

Row 10: Sc in each stitch around. (25 stitches)

Row 11: *Dec in first 2 stitches, sc in next 3 stitches, repeat from * around. (20 stitches)

Rows 12-14: Sc in each stitch around. (20 stitches)

Row 15: *Dec in first 2 stitches, sc in next 2 stitches, repeat from * around. (15 stitches)

Rows 16-19: Sc in each stitch around. (15 stitches)

Tie off. Stuff halfway.

Eyes (Closed)

With color B, ch 3. Sl st to first ch to create circle. (Instead, you can perform the “magic circle” if you’d like.)

Row 1: ch 1, 10 sc inside of circle. (10 stitches)

Row 2: *Inc in first stitch, sc in next stitch , repeat from * around. (15 stitches)

Row 3: *Inc in first stitch, sc in next 2 stitches, repeat from * around. (20 stitches)

Row 4: *Inc in first stitch, sc in next 3 stitches, repeat from * around. (25 stitches)

Row 5: Sc in each stitch around. (25 stitches)

Tie off. Use black yarn to stitch on eyelashes.

Eyes (Open)

With black, ch 3. Sl st to first ch to create circle. (Instead, you can perform the “magic circle” if you’d like.)

Row 1: ch 1, 10 sc inside of circle. (10 stitches)

Row 2: *Inc in first stitch, sc in next stitch , repeat from * around. (15 stitches)

Switch to white

Row 3: *Inc in first stitch, sc in next 2 stitches, repeat from * around. (20 stitches)

Row 4: *Inc in first stitch, sc in next 3 stitches, repeat from * around. (25 stitches)

Row 5: Sc in each stitch around. (25 stitches)

Tie off.

Now that you have all of your pieces finished, it’s time to sew it all together.

IMG_1502

To put the eyes on, I first used a little bit of hot glue in the center and put them in place. Then I used matching yarn to sew around them and attach them to the main pieces. Once the eyes are in place, stitch a mouth on using black yarn, and stitch a nose on using color B.

You can just sew the main pieces together, and sew the arm and legs to them, but I was worried that would make the arms and legs more flimsy and easier to stretch or break off. I decided to do them differently. First, I sewed the arms and legs to the wrong side of just one of the main pieces.

IMG_1507

IMG_1508

Next, I laid the other piece on top and sewed around them, down one side, across the bottom, then back up the other side.

IMG_1510

Be sure when you get to the arms and legs that you sew through all of the layers.

IMG_1522

Once you get back to the top, insert the pillow form.

IMG_1523

Squeeze it tight and sew across the top.

IMG_1526

And your pillow person is finished. I made 2 of them for my 2 grandsons, with closed eyes on one side and opened eyes on the other side.

I think they’re really cute, and the Charisma yarn makes them so soft and cuddly.

IMG_1540

You can also do different sizes, like I did with my 12 x 16 inch pillow, you just have to adjust the amount of stitches in your main pieces.

IMG_1542-3

I hope you enjoy this pattern! If there are any mistakes, or something is unclear, please feel free to leave me a comment and let me know. Or message me on Facebook. If you create any pillow people of your own, be sure to post a photo on my Facebook page so I can see. I love seeing all of the things people are creating, and I’d love to see the different variations that people make of these.

October Favorite Finds

I know Halloween isn’t here yet, but this time of the year I’m always reminded that Christmas is coming soon. I have a lot of people that I shop for, so I always need to start thinking about Christmas early to be able to afford everything I want to get. I decided this month was a good time to focus on gifts for kids.

If you’re a crocheter, and you have kids, then these may be the perfect things for them. My kids always want to make things when they see me crocheting, and it’s never too early to learn. I found some neat things that you could buy as a gift for those kids in your life, or that you could give to them now so that they can make gifts for other people. It’s the perfect time to get your kid working on some crafts to give to people for Christmas. Handmade gifts are the best ones, and it’s never too soon to teach your kids that the time they put into a present is much more important than how much money they spend.

71LapytUnNL._SL1500_

Pom-poms are all the craze right now, and there are so many things you can make with them. First up, are these pom-pom makers. They make creating pom-poms really easy, and come in different sizes. Once a kid gets the hang of it, I guarantee you’ll be finding pom-poms all over your house.

51j+rfKa0dL

Once they’ve gotten the hang of making the pom-poms, this book will give them all kinds of ideas and instructions to turn those pom-poms into cute gifts that they can give to people.

These cute kits come with a book with instructions and the supplies they’ll need to make pom-pom puppies, kitties or other pets. I need to get these for my daughter. She loves making pom-pom animals.

Who doesn’t need some extra potholders? I know in my house, we can never have enough. This kit gives your child all the things they need to make potholders for family members, or maybe even some other things. It’s also a neat introduction to weaving. You can buy these refills to use once they finish with the ones in the kit, so they can make even more pretty things.

These kits are a great introduction to needlepoint, and they come with everything you need including the frame. They can make a rainbow, a horse, or a butterfly. I think these would be a great gift for a grandparent.

81r6w4vMxYL

Finger knitting is so fun. I had a friend who taught me how to do this when I was really young. Me and her used to make chains of these and string them all over her basement where we made our “clubhouse.” I’ve taught my own kids how to finger knit too, but this book goes beyond just the simple chains that we’ve always made. Finger knitting is so easy to do, and is a great tool to peak your child’s interest in other yarn crafts. And look at the fun things they can make to give to people for Christmas!

91pAzx1i6JL._SL1500_

For kids wanting to learn how to knit, a loom is a great starting place, especially if they’re wanting to make hats or scarves for their family and friends. This loom kit comes with 3 skeins of yarn, 2 different looms, and instructions for many projects.

Is your child ready to learn how to crochet or knit? These books are great tools for teaching them, and really would be good for any beginner, at any age. I’ve learned how to do a lot of things in my life, but learning to crochet has definitely been the best for me. I get a lot of fulfillment out of making cute things, and it’s such a nice way to relax and feel productive at the same time.

Is your child ready to start crocheting things for people? These kits are great for children or beginners. Granny squares are pretty easy to make, and very versatile. There are so many things you can make once you learn how to do a granny square. The Granny Square kit will teach them how to make them, then show them how to put them together to make hats and scarves. The Hip to be Square kit will show them how to make granny squares, and then show them some other things they can put them together to make. Or, if they want to learn beyond granny squares, the Rainbow Scarf kit is absolutely adorable and comes with everything they need.

I think this is a good starting point if you’re shopping for kids who want to be crafty or kids who want to give out handmade gifts this year. There are so many different options for things like this on Amazon, so if you find anything else cool, drop me a message on my Facebook page and tell me about them. I love hearing about new products, and I might use them in my next favorite finds post. And if you saw anything you like on here, by sure to use my links to order them, and help me keep posting my patterns for free. Happy shopping!!!

Lions and Elephant and Pigs….oh my!

IMG_1684

One of my favorite things is to come up with a base pattern, and then find ways to alter it to make different things. Well, I took my Bailey the Bear pattern, and changed or added things to it to turn it into an elephant, a lion, a pig and a puppy. There are so many different animals I could make with this one pattern, and I may get around to making more eventually, but for now here’s all you need to know to make these four.

Just go grab the Bailey the Bear pattern from my other page for the head, body, arms and legs. Then come back here and see what you need to add to make each of these animals.

Abbreviations:

ch: chain

sc: single crochet

sl st: slip stitch

inc: increase (2 single crochets in one loop)

dec: decrease (pull yarn through loop, pull yarn through second loop, yarn over and pull through all loops)

Materials needed (with affiliate links):

Loops and Threads Charisma yarn (or any yarn, really)

L (8mm) crochet hook (or whatever size your yarn recommends)

18mm safety eyes

20mm safety nose (for the puppy or lion, or you can stitch a nose on)

Yarn needle

Poly-fil 

This pattern is worked “in-the-round”, and stitches are worked through both loops unless otherwise noted. 

IMG_1626

Elephant

Ears

ch 3. Sl st to first ch to create circle. (Instead, you can perform the “magic circle” if you’d like.)

Row 1: ch 1, 10 sc inside of circle. (10 stitches)

Row 2: *Inc in first stitch, sc in next stitch , repeat from * four times total, leaving the last 2 stitches undone, ch 1, turn. (12 stitches)

Row 3: Sc in first 4 stitches, inc, sc in next 2 stitches, inc, sc in last 4 stitches, ch 1, turn. (14 stitches)

Row 4: Sc in first 5 stitches, inc, sc in next 2 stitches, inc, sc in last 5 stitches, ch 1, turn. (16 stitches)

Row 5: Sc in first 6 stitches, inc, sc in next 2 stitches, inc, sc in last 6 stitches, ch 1, turn. (18 stitches)

Row 6: Sc around. Tie off. (18 stitches)

Make 2 and sew to side of head.

Trunk

ch 3. Sl st to first ch to create circle. (Instead, you can perform the “magic circle” if you’d like.)

Row 1: ch 1, 10 sc inside of circle. (10 stitches)

Rows 2-6: Sc around. (10 stitches)

Rows 7-8: Dec, sc in next 2 stitches, inc, inc, sc in next 2 stitches, dec. (10 stitches)

Rows 9-10: Sc around. (10 stitches)

Rows 11-12: Dec, sc in next 2 stitches, inc, inc, sc in next 2 stitches, dec. (10 stitches)

Rows 13-14: Sc around. (10 stitches)

Tie off. Sew onto center of face.

I added a little tail to the elephant, by chaining 10, then adding some yarn to the end of it.

IMG_1640

IMG_1633

Lion

Ears

ch 3. Sl st to first ch to create circle. (Instead, you can perform the “magic circle” if you’d like.)

Row 1: ch 1, 5 sc inside of circle. (5 stitches)

Row 2: Sc around. (5 stitches)

Row 3: Inc in each stitch around. (10 stitches)

Row 4: Sc around. (10 stitches)

Row 5: *Inc in first stitch, sc in next stitch , repeat from * around. (15 stitches)

Row 6: Sc around. (15 stitches)

Tie off. Make two, fold flat and sew to head.

Tail (For lion or puppy)

ch 3. Sl st to first ch to create circle. (Instead, you can perform the “magic circle” if you’d like.)

Row 1: ch 1, 8 sc inside of circle. (8 stitches)

Rows 2-16: Sc around. (8 stitches)

Tie off. For lion tail, attach yarn to end. Sew to back of stuffie.

IMG_1635

IMG_1669

Pig

Ears

ch 3. Sl st to first ch to create circle. (Instead, you can perform the “magic circle” if you’d like.)

Row 1: ch 1, 5 sc inside of circle. (5 stitches)

Rows 2-3: Sc around. (5 stitches)

Row 4: Inc in each stitch around. (10 stitches)

Rows 5-7: Sc around. (10 stitches)

Row 8: *Inc in first stitch, sc in next stitch , repeat from * around. (15 stitches)

Tie off. Make 2, fold flat and sew to head.

Snout

ch 3. Sl st to first ch to create circle. (Instead, you can perform the “magic circle” if you’d like.)

Row 1: ch 1, 10 sc inside of circle. (10 stitches)

Row 2: *Inc in first stitch, sc in next stitch , repeat from * around. (15 stitches)

Row 3: *Inc in first stitch, sc in next 2 stitches, repeat from * around. (20 stitches)

Row 4: In front loops only, *dec in first 2 stitches, sc in next 2 stitches, repeat from * around. (15 stitches)

Tie off. Sew to center of face. Use dark yarn to stitch on nostrils.

Tail

Ch. 7

Row 1: 3 sc’s in 2nd ch from hook and in each ch across.

Attach to butt.

IMG_1674

IMG_1643

Puppy

Ears

ch 3. Sl st to first ch to create circle. (Instead, you can perform the “magic circle” if you’d like.)

Row 1: ch 1, 5 sc inside of circle. (5 stitches)

Row 2: Inc in each stitch around. (10 stitches)

Row 3: *Inc in first stitch, sc in next stitch , repeat from * around. (15 stitches)

Rows 4-8: Sc around. (15 stitches)

Row 9: *Dec in first 2 stitches, sc in next 3 stitches, repeat from * around. (12 stitches)

Rows 10-11: Sc around. (12 stitches)

Row 12: *Dec in first 2 stitches, sc in next 2 stitches, repeat from * around. (9 stitches)

Rows 13-16: Sc around. (9 stitches)

Tie off. Make 2, flatten and sew to sides of head.

For the puppy’s tail, use the same pattern as the lion but don’t add yarn to the end.

IMG_1657

I hope you have fun making a whole zoo of animals. I’m sure I’ll come up with other animals to make using this pattern, but if you think of any other animals you’d like to make, let me know and I’ll see what I can do. If there are any mistakes, or something is unclear, please feel free to leave me a comment and let me know. Or message me on Facebook. If you create any animals of your own, be sure to post a photo on my Facebook page so I can see. I love seeing all of the things people are creating, and I’d love to see the different variations that people make of these.

Bailey the Bear

Collage1

It is my opinion that everybody should have a cuddly teddy bear to hug at night. Who doesn’t love teddy bears, right? I wanted to design a cuddly bear to make for my little Peanut for Christmas. Yes, that’s him up there hugging his teddy bear. No, it’s not Christmas yet. It’s ok. He just turned 1 last month. I put the bear in a bag, and he’ll forget about it by Christmas. He loves every single stuffie that I crochet, and lately he thinks he has to hug and kiss each of them whenever he sees them.

These make a great gift for pretty much anybody, at any age. I designed him using Loops and Threads Charisma yarn because it’s a nice, soft, chunky yarn, which means it works up pretty quickly, but also because it goes on sale quite often at Michaels so I like to stock up on it.

If you want a pattern that you can save on your computer and easily print, this pattern is available in my Ravelry shop for only $2.00. I love printing patterns and saving them in a binder to keep track of the ones I’ve done and the ones I still plan to do.

With the Charisma yarn, it’s a pretty good sized bear, the perfect size for cuddling. You don’t have to limit yourself to Charisma yarn, though. I actually made this bear with a few different kinds of yarn, and I’ll post pictures after the pattern so you can see how it looks. Also, I’ve altered this base pattern to make a few other animals as well, which I’ll share with you in a later post. For now, here’s my Bailey the Bear pattern.

Abbreviations:

ch: chain

sc: single crochet

sl st: slip stitch

inc: increase (2 single crochets in one loop)

dec: decrease (pull yarn through loop, pull yarn through second loop, yarn over and pull through all loops)

Materials needed (with affiliate links):

Loops and Threads Charisma yarn (or any yarn, really)

L (8mm) crochet hook (or whatever size your yarn recommends)

18mm safety eyes

20mm safety nose (you can sew a nose on if need be)

Yarn needle

Poly-fil 

This pattern is worked “in-the-round”, and stitches are worked through both loops unless otherwise noted. 

Head:

ch 3. Sl st to first ch to create circle. (Instead, you can perform the “magic circle” if you’d like.)

Row 1: ch 1, 10 sc inside of circle. (10 stitches)

Row 2: *Inc in first stitch, sc in next stitch , repeat from * around. (15 stitches)

Row 3: *Inc in first stitch, sc in next 2 stitches, repeat from * around. (20 stitches)

Row 4: *Inc in first stitch, sc in next 3 stitches, repeat from * around. (25 stitches)

Row 5: *Inc in first stitch, sc in next 4 stitches, repeat from * around. (30 stitches)

Row 6: *Inc in first stitch, sc in next 5 stitches, repeat from * around. (35 stitches)

Row 7: *Inc in first stitch, sc in next 6 stitches, repeat from * around. (40 stitches)

Rows 8-13: Sc in each stitch around. (40 stitches)

Row 14: *Dec in first 2 stitches, sc in next 6 stitches, repeat from * around. (35 stitches)

Row 15: *Dec in first 2 stitches, sc in next 5 stitches, repeat from * around. (30 stitches)

Row 16: *Dec in first 2 stitches, sc in next 4 stitches, repeat from * around. (25 stitches)

Row 17: *Dec in first 2 stitches, sc in next 3 stitches, repeat from * around. (20 stitches)

Tie off. Stuff tight with poly-fil.

Body:

ch 3. Sl st to first ch to create circle. (Instead, you can perform the “magic circle” if you’d like.)

Row 1: ch 1, 10 sc inside of circle. (10 stitches)

Row 2: *Inc in first stitch, sc in next stitch , repeat from * around. (15 stitches)

Row 3: *Inc in first stitch, sc in next 2 stitches, repeat from * around. (20 stitches)

Row 4: *Inc in first stitch, sc in next 3 stitches, repeat from * around. (25 stitches)

Row 5: *Inc in first stitch, sc in next 4 stitches, repeat from * around. (30 stitches)

Row 6: *Inc in first stitch, sc in next 5 stitches, repeat from * around. (35 stitches)

Rows 7-9: Sc in each stitch around. (35 stitches)

Row 10: *Dec in first 2 stitches, sc in next 5 stitches, repeat from * around. (30 stitches)

Row 11: Sc in each stitch around. (30 stitches)

Row 12: *Dec in first 2 stitches, sc in next 4 stitches, repeat from * around. (25 stitches)

Row 13: Sc in each stitch around. (25 stitches)

Row 14: *Dec in first 2 stitches, sc in next 3 stitches, repeat from * around. (20 stitches)

Row 15: Sc in each stitch around. (20 stitches)

Tie off. Stuff tight with poly-fil.

Arms:

ch 3. Sl st to first ch to create circle. (Instead, you can perform the “magic circle” if you’d like.)

Row 1: ch 1, 10 sc inside of circle. (10 stitches)

Row 2: *Inc in first stitch, sc in next stitch , repeat from * around. (15 stitches)

Rows 3-7: Sc in each stitch around. (15 stitches)

Row 8: *Dec in first 2 stitches, sc in next stitch, repeat from * around. (10 stitches)

Rows 9-14: Sc in each stitch around. (10 stitches)

Tie off. Stuff halfway with poly-fil, pushing it to the bottom of the arms.

Legs:

ch 3. Sl st to first ch to create circle. (Instead, you can perform the “magic circle” if you’d like.)

Row 1: ch 1, 10 sc inside of circle. (10 stitches)

Row 2: *Inc in first stitch, sc in next stitch , repeat from * around. (15 stitches)

Row 3: *Inc in first stitch, sc in next 2 stitches, repeat from * around. (20 stitches)

Rows 4-8: Sc in each stitch around. (20 stitches)

Row 9: *Dec in first 2 stitches, sc in next 2 stitches, repeat from * around. (15 stitches)

Rows 10-13: Sc in each stitch around. (15 stitches)

Row 14: *Dec in first 2 stitches, sc in next stitch, repeat from * around. (10 stitches)

Rows 15-17: Sc in each stitch around. (10 stitches)

Tie off. Stuff halfway with poly-fil, pushing it to the bottom of the legs.

Ears:

ch 3. Sl st to first ch to create circle. (Instead, you can perform the “magic circle” if you’d like.)

Row 1: ch 1, 10 sc inside of circle. (10 stitches)

Row 2: *Inc in first stitch, sc in next stitch , repeat from * around. (15 stitches)

Rows 3-5: Sc in each stitch around. (15 stitches)

Tie off.  Flatten circles before sewing onto head.

Tail:

ch 3. Sl st to first ch to create circle. (Instead, you can perform the “magic circle” if you’d like.)

Row 1: ch 1, 10 sc inside of circle. (10 stitches)

Rows 2-3: Sc in each stitch around. (10 stitches)

Tie off. Sew to back of body and stuff lightly with poly-fil before the last couple of stitches.

Use your yarn needle and yarn to sew the pieces together. I like to sew the ears onto the head first. Then I put the face on and center it between the ears. I also like to stuff the head before sewing anything on, and before deciding where to place the face. Once you attach the back to the safety eyes and nose, you can’t move them, so be sure you have them where you want them. I also like to take a bit of felt and put it behind the eyes to give them a “sad” look. Next, I sew the head onto the body. Then I sew the arms on, then the legs, and I sew the tail on last. Sewing the pieces on can be tricky when you’re trying to make them even, but remember that you can always remove one if you need to and reattach it. It can also help to use straight pins to pin both ears, arms, legs, etc. in place before actually sewing them on.

I love the Charisma tweed yarns the best, but I also wanted to try this bear with some other chunky, soft yarn. This one was made with Loops and Threads Country Loom yarn, which is a super bulky size 6 yarn.

It’s a bit bigger, but it’s so soft and squishy.

I also made a small bear using baby yarn. This one is actually an accessory for something else that I made, but I think it’s adorable. Baby yarn makes a bear the perfect size for stuffing in stockings this Christmas.

IMG_1581

I found this super soft Buttercream Angel Hair yarn at Joann’s the other day, and decided it would make a great teddy bear for my new granddaughter.

And then there’s my favorite bear. This last one I actually made for me. I need something soft and squishy to hug at night too, you know.

That one was made with Red Heart Buttercup yarn. If you’ve never worked with this yarn, I honestly recommend that you don’t. lol  Personally, I love this yarn and the Bernat Pipsqueak, but they’re really hard to work with. You can’t see your stitches at all, so it’s tough to keep track of where you’re at, and to avoid making mistakes. The one big plus to this yarn (besides the fact that it is heavenly soft) is that it also hides mistakes pretty well. So if you’re experienced with crocheting and with working with a lot of different kinds of yarn, then definitely make a bear with Buttercup yarn. You’ll love the way it turns out.

And here’s my whole family of bears that I’ve made in the last week or so.

IMG_1706

IMG_1698

IMG_1591

Side note: It didn’t take me more than 2 skeins of yarn for each of these, and they were normal, smaller skeins of yarn.

Bears aren’t your thing? Next week, I’ll be posting some other animals that you can make using this base pattern, so stay tuned. **EDIT: NEW ANIMALS POSTED. YOU CAN FIND THEM HERE.**

I hope you enjoy this pattern! If there are any mistakes, or something is unclear, please feel free to leave me a comment and let me know. Or message me on Facebook. If you create any teddy bears of your own, be sure to post a photo on my Facebook page so I can see. I love seeing all of the things people are creating, and I’d love to see the different variations that people make of these.


Halloween Ghost

Christmas is my favorite holiday. This time of the year, I start thinking about Christmas presents that I want to make for people, and Christmas decorations that I can create patterns for. But I have a couple of daughters who love Halloween so much, and they hate it when I’m already focusing on Christmas this early in the fall. So I wanted to do a quick project for Halloween. I was thinking something fairly simple that could be completed easily in 1 day. This little ghost popped into my head.

IMG_1610

This really is a simple and quick pattern, and it doesn’t use a lot of materials. I actually used some leftover yarn that I had here from a hat that I made years ago. I’ve got a lot of safety eyes, including googly safety eyes, but I hadn’t found the perfect project for them yet. So I made 2 ghosts, one for my grandson and one for my daughter.

IMG_1665

Of course, you could also just embroider eyes on with thread or black yarn. So here’s a quick weekend project for you to make in the spirit of Halloween.

Abbreviations:

ch: chain

sc: single crochet

inc: increase (2 single crochets in one loop)

dec: decrease (pull yarn through loop, pull yarn through second loop, yarn over and pull through all loops)

Materials needed (with affiliate links):

I (5.25mm) crochet hook

Any worsted weight yarn. Red Heart yarns work well for stuffies, although I think this leftover yarn I used was Big Twist.

15mm safety eyes

Black embroidery thread or yarn (if you choose to do a mouth)

Yarn needle

Poly-fil

This pattern is worked “in-the-round”, and stitches are worked through both loops unless otherwise noted. 

Body:

ch 3. Sl st to first ch to create circle. (Instead, you can perform the “magic circle” if you’d like.)

Row 1: ch 1, 10 sc inside of circle. (10 stitches)

Row 2: *Inc in first stitch, sc in next stitch , repeat from * around. (15 stitches)

Row 3: *Inc in first stitch, sc in next 2 stitches, repeat from * around. (20 stitches)

Row 4: *Inc in first stitch, sc in next 3 stitches, repeat from * around. (25 stitches)

Row 5: *Inc in first stitch, sc in next 4 stitches, repeat from * around. (30 stitches)

Row 6: *Inc in first stitch, sc in next 5 stitches, repeat from * around. (35 stitches)

Row 7: *Inc in first stitch, sc in next 6 stitches, repeat from * around. (40 stitches)

Rows 8-27: Sc in each stitch around. (40 stitches)

Tie off, leaving open at the bottom.

Bottom:

ch 3. Sl st to first ch to create circle. (Instead, you can perform the “magic circle” if you’d like.)

Row 1: ch 1, 10 sc inside of circle. (10 stitches)

Row 2: *Inc in first stitch, sc in next stitch , repeat from * around. (15 stitches)

Row 3: *Inc in first stitch, sc in next 2 stitches, repeat from * around. (20 stitches)

Row 4: *Inc in first stitch, sc in next 3 stitches, repeat from * around. (25 stitches)

Row 5: *Inc in first stitch, sc in next 4 stitches, repeat from * around. (30 stitches)

Row 6: *Inc in first stitch, sc in next 5 stitches, repeat from * around. (35 stitches)

Row 7: *Inc in first stitch, sc in next 6 stitches, repeat from * around. (40 stitches)

Tie off

Arm Flaps:

Ch 11

Row 1: Sc in 2nd ch from hook and in each ch across, ch 1, turn. (10 stitches)

Row 2: Sc in each stitch across, ch 1, turn. (10 stitches)

Row 3: Dec in first 2 stitches, sc in next 6 stitches, dec in last 2 stitches, ch 1, turn. (8 stitches)

Row 4: Sc in each stitch across, ch 1, turn. (8 stitches)

Row 5: Dec in first 2 stitches, sc in next 4 stitches, dec in last 2 stitches, ch 1, turn. (6 stitches)

Row 6: Sc in each stitch across, ch 1, turn. (6 stitches)

Row 7: Dec in first 2 stitches, sc in next 2 stitches, dec in last 2 stitches, ch 1, turn. (4 stitches)

Row 8: Sc in each stitch across, ch 1, turn. (4 stitches)

Row 9: Dec in first 2 stitches, dec in last 2 stitches, ch 1, turn. (2 stitches)

Row 10: Sc in each stitch across, tie off. (2 stitches)

Attach eyes and stuff body with poly-fil. With the bottom facing you, sc around the bottom, sewing it onto the body.

IMG_1606

IMG_1614

Position the arm flaps and sew onto the body using your yarn needle. You can lay the flaps down flat against the body, or pose them however you want.

IMG_1658

IMG_1660

IMG_1611

I hope you enjoy this pattern! If there are any mistakes, or something is unclear, please feel free to leave me a comment and let me know. Or message me on Facebook. If you create any ghosts of your own, be sure to post a photo on my Facebook page so I can see. I love seeing all of the things people are creating, and I’d love to see the different ways that people make these. Happy Halloween!