Monthly Archives: August 2018

Get Ready for Craft Fairs Part Two

Last week, I talked about some great wearable items to make to sell at craft fairs, and included a lot of free patterns from great designers. If you missed that post, be sure to go check it out because there are also some tips on there that you might find useful. This week, I’d like to talk about other items you can make for craft fairs.

While wearables (hats, scarves, etc.) are pretty popular items for people to buy, there are other things you can fill your table with. The most common one that I usually see are washcloths. Many people will only use handmade washcloths, and since they’re relatively cheap and easy to make, you can whip up a batch of them in no time. You can really make these using any stitch, but textured stitches work the best. Here are 4 stitch ideas that look great.

Collage3

  1. Crochet Washcloths on Craftaholics Anonymous
  2. Basket Weave Stitch Washcloth Pattern by Medmade with Love
  3. Diagonal Weave Crochet Dishcloths by 5 Little Monsters
  4. Prettiest ‘lil Crocheted Washcloths by Mama In A Stitch

Another quick and popular thing to make are scrubbies. Whether you’re making them for washing dishes, or packing them up to be used on the face or body, they really are a great gift idea. Here are 4 of my favorite scrubby patterns.

Collage3

  1. Handy Palm Scrubby on Red Heart Yarns
  2. Crochet Flower Cleansing Pad by Petals to Picots
  3. Here’s My Heart Scrubby on Red Heart Yarns
  4. Thick & Quick Bumpy Scrubby by Beatrice Ryan Designs

Washcloths and scrubbies are both great items to sell as “spa” accessories. Or you can use these patterns by The Stitchin’ Mommy and make this whole spa gift basket. It even includes the recipe to make your own sugar scrub.

PicMonkey-Collage1

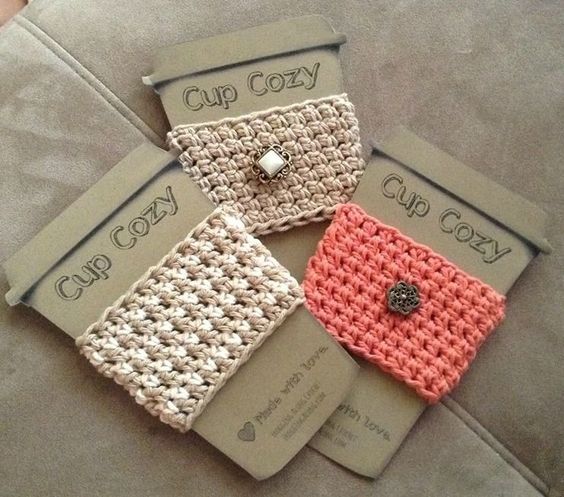
It seems these days everybody is obsessed with coffee. Why not dress up those coffee mugs or cups with a sleeve to keep your hands from getting too warm? These can be made to fit on a coffee mug or to fit around a cup. Once you know the basics and dimensions, it’s easy enough to create your own designs. Here are 4 free patterns to get you started.

Collage3

  1. Give Me Some Sugar Coffee Cozy by The Stitchin’ Mommy
  2. Striped Mug Cozy by Little Monkeys Crochet
  3. Simple Crochet Mug Cozy by Midwestern Moms
  4. Brain Waves Coffee Cozy by Playin’ Hooky Designs

You can also find a free printable for your cup sleeves to go on by Frogging Along.

f5232e5abe918fda1a22e0efe7bbe5d9

Gift cards used to be a last resort for me, until I had teenagers. I discovered that teens really love to receive gift cards because part of the joy of their present is the shopping trip to pick things out. In addition to other gifts, I always like to get my kids at least one gift card so they can pick out something they’ve been wanting. I love to dress up those gift cards with a handmade gift card holder. These are great for using up those scraps of yarn you have around your house, and a good way to make some money at craft fairs. Here are 4 patterns you can use to start out with.

Collage3

  1. Snowman Gift Card Holder by One Dog Woof
  2. Mini Stocking/Gift Card Holder by AllieCat’s Hats and Crafts
  3. Holiday Gift Card Holder by Petals to Picots
  4. Coffee Mug Gift Card Holder by Repeat Crafter Me

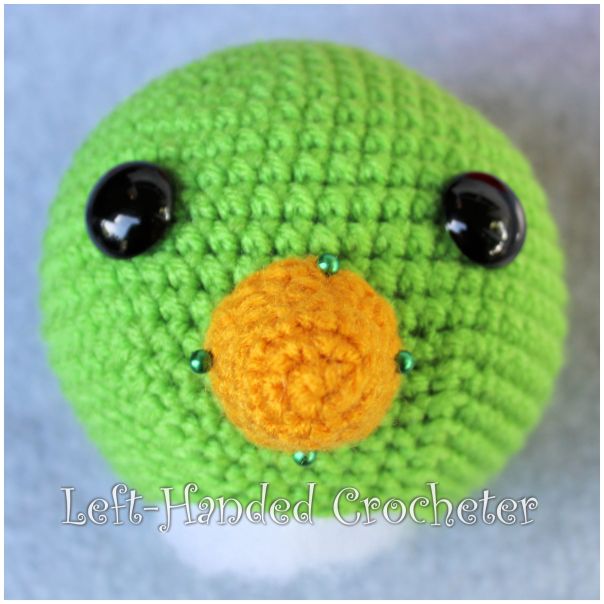
And lastly, my favorite thing to make for craft fairs (or any time really) is amigurumi. I admit I am a total amigurumi addict, and that tends to be what I want to make the most. For craft fairs, look for patterns that aren’t too complicated so that they’re fairly quick to make and don’t use a lot of materials. That’s the best way to maximize your earnings. For this section, I’m giving you links to 12 of my personal amigurumi patterns that are on this blog for free.
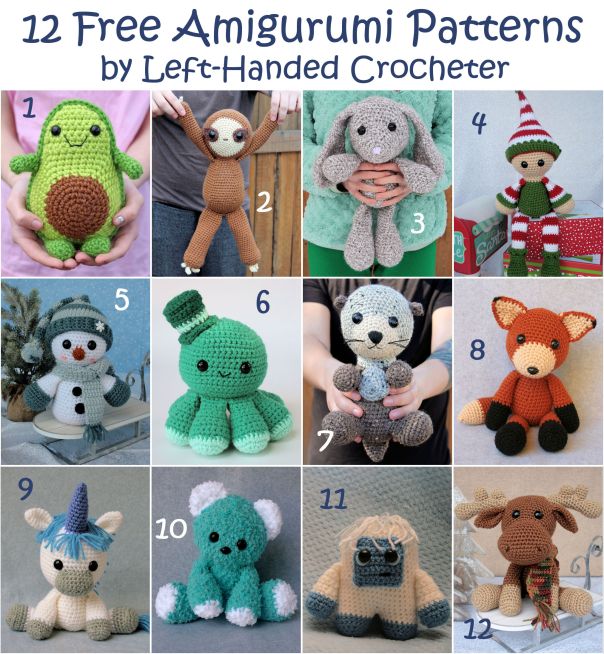
Collage3

  1. Avocado
  2. Sammy the Sloth
  3. Floppy Bunny
  4. Elf Shelf Sitter
  5. Snowman Shelf Sitter
  6. Octopus
  7. Oscar the Otter
  8. Freddy the Fox
  9. Stanley the Unicorn
  10. Bailey the Bear
  11. Eddie the Yeti
  12. Marty the Moose

You can find links for all of my free crochet patterns here.

This wraps up my posts on getting ready for craft fairs. I hope you found some useful information here, and that you found a lot of things you want to make. Have you done craft fairs before? Are you about to do your first one? What kinds of things are you making? Go post on my Facebook wall and tell me about it.

Get Ready for Craft Fairs Part One

There are a few seasons where craft fairs are more popular, and the fall is one of the biggest ones. Everybody is gearing up for Christmas and starting their shopping. And what’s better than a handmade gift?

If you sell at craft fairs, or you’re thinking about having your first booth, this will be a great post for you. This post is filled with free patterns from lots of great designers for things that will sell in your booths this fall. I’ve separated it into categories to make it easier to find the things you want to make.

If you’re doing your first craft fair, here are a couple of tips:

  1. Be sure to have plenty of stock on hand. You don’t want to run out of products before the craft fair is over.
  2. Make some items in multiple sizes so you’re sure to have the perfect fit for your customers.
  3. Don’t overcrowd your table. Keep extra stock in boxes or tubs under the table to replenish as people purchase items.
  4. Don’t undercrowd your table either. Make sure you fill your table. Bring boxes or crates to put items on that will give your table layers. Lay hats directly on the table, or hang them up on the side, but bring a couple of mannequin heads to put your more popular hats on so that people can see what they look like.
  5. Make sure you have business cards to include with purchases, or to hand out to people who are interested in purchasing custom work.
  6. If you can, print up photos of your items and put them in a book on the table. It gives people an idea of other things you can make, and if you sell out of a certain product then they’ll still be able to see it and order it for you to make later.

Now on to the patterns. First up is hats. With winter approaching, crocheted hats are wildly popular at craft fairs. There are tons of free crochet hat patterns online, but here are 4 of my favorites.

Collage3

  1. Elegant Slouchy Hat by Posh Patterns
  2. 1920’s Cloche Hat by Hopeful Honey
  3. Alabaster Slouch by Croyden Crochet
  4. Snowfall Slouchy Hat by Whistle and Ivy

Last year, messy bun hats were all the rage. I have a feeling they’ll be just as popular this year. With so many new designs created last year, there are plenty to choose from. Here are 4 of my favorite free ones.

Collage3

  1. Quick & Textured Bun Hat by MegMade with Love
  2. Mommy and Me Messy Bun Hats by Repeat Crafter Me
  3. 1 Hour Messy Bun Beanie by Sewrella
  4. Messy Bun Hat Pattern by Mary Maxim

Making full hat and scarf sets might be a bit much, but they’re such a great gift for people to give for Christmas that it’s beneficial to have a few of them on hand. Here are 4 of my favorite free patterns, including one of mine.

Collage3

  1. Elena Slouch by Little Monkeys Crochet
  2. Easy Peasy Hat and Scarf set by Lion Brand
  3. Rustic Slouch by Little Monkeys Crochet
  4. V-Pop Hat and Scarf set by Left-Handed Crocheter

Sometimes people don’t want to buy a whole set, and are just looking for a scarf. Here are 4 free scarf patterns, including one made especially for men.

Collage3

  1. Moss Fringe Scarf by All About Ami
  2. Honey Bird Triangle Scarf by Hopeful Honey
  3. Simple Scarf from Yarnspirations on Stitch and Unwind
  4. The Gentlemen’s Scarf by YARNutopia

Another great thing to make for craft fairs are cowls. They’re much quicker and take a lot less yarn than a full scarf, and they’re also very popular. Here are 4 free ones for you.

Collage3

  1. Quick One Hour Cowl by Rescued Paw Designs
  2. Twisted Crochet Neck Warmer by Crochet in Paternoster
  3. Outlander Cowl by Dabbles and Babbles
  4. Comfy Squares Buttoned Cowl by Little Monkey Crochet

Another quick item to make for craft fairs are ear warmers. Some people really prefer them because they don’t mess up their hair as much as a hat does, but they help keep their ears from getting too cold in the winter. Here are 4 free patterns.

Collage3

  1.  Easiest Head Wrap Ever by I’m Frayed Knot
  2. Golden Fave Twist Headband by Mama In A Stitch
  3. Knotted Headband by All About Ami
  4. The Katelyn Ear Warmer by The Friendly Red Fox

Another great wearable to make for craft fairs are boot cuffs. They’re pretty quick to make, and people love looking a bit more stylish. Here are 4 great patterns.

Collage3

  1. Crochet Plaid Boot Cuffs by Whistle and Ivy
  2. Lace Boot Cuff by Kitty Adventures
  3. Easy Reversible Crochet Boot Cuffs by Dabbles and Babbles
  4. Even Moss Stitch Boot Cuff by Ideal Me

Don’t forget to include some fun hats for the kids. (And make some in adult sizes too, because these type of novelty hats are popular with adults as well.) These type of hats were always my biggest sellers. Here are 6 fun free ones, including one of mine.

Collage3

  1. Snowman Hat by Repeat Crafter Me
  2. Sir Sprinkles the Unicorn Hat by Left-Handed Crocheter
  3. Fox Hat Pattern by The Friendly Red Fox
  4. Sock Monkey Hat by Repeat Crafter Me
  5. Shark Hat by Repeat Crafter Me
  6. Owl Hat by Daisy Cottage Designs

That’s all for the crochet wearables. Next week, I’ll give you some patterns of other popular things to sell at craft fairs. Do you do booths at craft fairs? What are your biggest sellers? Head on over to my Facebook page and tell me about it.

Parrots

IMG_6203

These little parrots are perfectly happy on their pirate ship, or hanging out in your home. Made with worsted weight yarn, the finished parrot measures approximately 8 inches tall.

Abbreviations:

ch: chain

sc: single crochet

sl st: slip stitch

dc: double crochet

inc: increase (2 single crochets in one loop)

dec: decrease (pull yarn through loop, pull yarn through second loop, yarn over and pull through all loops)

Materials needed:

Any worsted weight yarn. I used Red Heart Super Saver.

G (4mm) crochet hook

Poly-fil

Yarn needle

18mm safety eyes

Head:

With green yarn, ch 3. Sl st to first ch to create circle. (Instead, you can perform the “magic circle” if you’d like.)

Row 1: ch 1, 5 sc inside of circle. (5 stitches)

Row 2: Inc in each stitch around. (10 stitches)

Row 3: *Inc in first stitch, sc in next stitch, repeat from * around. (15 stitches)

Row 4: *Inc in first stitch, sc in next 2 stitches, repeat from * around. (20 stitches)

Row 5: *Inc in first stitch, sc in next 3 stitches, repeat from * around. (25 stitches)

Row 6: *Inc in first stitch, sc in next 4 stitches, repeat from * around. (30 stitches)

Row 7: *Inc in first stitch, sc in next 5 stitches, repeat from * around. (35 stitches)

Row 8: *Inc in first stitch, sc in next 6 stitches, repeat from * around. (40 stitches)

Row 9: *Inc in first stitch, sc in next 7 stitches, repeat from * around. (45 stitches)

Row 10: *Inc in first stitch, sc in next 8 stitches, repeat from * around. (50 stitches)

Row 11: *Inc in first stitch, sc in next 9 stitches, repeat from * around. (55 stitches)

Rows 12-18: Sc in each stitch around. (55 stitches)

Row 19: *Dec in first 2 stitches, sc in next 9 stitches, repeat from * around. (50 stitches)

Row 20: *Dec in first 2 stitches, sc in next 8 stitches, repeat from * around. (45 stitches)

Row 21: *Dec in first 2 stitches, sc in next 7 stitches, repeat from * around. (40 stitches)

Row 22: *Dec in first 2 stitches, sc in next 6 stitches, repeat from * around. (35 stitches)

Row 23: *Dec in first 2 stitches, sc in next 5 stitches, repeat from * around. (30 stitches)

Row 24: *Dec in first 2 stitches, sc in next 4 stitches, repeat from * around. (25 stitches)

Tie off. Stuff tight with poly-fil. Insert eyes between rows 14 and 15 with 11 stitches between them. I like to position and sew the beak on before I put the backs on the eyes, to make sure it’s all centered.

Beak:

With yellow yarn, ch 3. Sl st to first ch to create circle. (Instead, you can perform the “magic circle” if you’d like.)

Row 1: ch 1, 5 sc inside of circle. (5 stitches)

Row 2: Inc in each stitch around. (10 stitches)

Rows 3-5: Sc in each stitch around. (10 stitches)

Row 6: *Inc in first stitch, sc in next stitch, repeat from * around. (15 stitches)

Row 7: Sc in each stitch around. (15 stitches)

Tie off. Position and sew below and between eyes.

IMG_5985

Body:

With green yarn, ch 3. Sl st to first ch to create circle. (Instead, you can perform the “magic circle” if you’d like.)

Row 1: ch 1, 10 sc inside of circle. (10 stitches)

Row 2: *Inc in first stitch, sc in next stitch, repeat from * around. (15 stitches)

Row 3: *Inc in first stitch, sc in next 2 stitches, repeat from * around. (20 stitches)

Row 4: *Inc in first stitch, sc in next 3 stitches, repeat from * around. (25 stitches)

Row 5: *Inc in first stitch, sc in next 4 stitches, repeat from * around. (30 stitches)

Row 6: *Inc in first stitch, sc in next 5 stitches, repeat from * around. (35 stitches)

Row 7: *Inc in first stitch, sc in next 6 stitches, repeat from * around. (40 stitches)

Row 8: *Inc in first stitch, sc in next 7 stitches, repeat from * around. (45 stitches)

Row 9: *Inc in first stitch, sc in next 8 stitches, repeat from * around. (50 stitches)

Row 10: *Dec in first 2 stitches, sc in next 8 stitches, repeat from * around. (45 stitches)

Rows 11-15: Sc in each stitch around. (45 stitches)

Row 16: *Dec in first 2 stitches, sc in next 7 stitches, repeat from * around. (40 stitches)

Row 17: *Dec in first 2 stitches, sc in next 6 stitches, repeat from * around. (35 stitches)

Row 18: Sc in each stitch around. (35 stitches)

Row 19: *Dec in first 2 stitches, sc in next 5 stitches, repeat from * around. (30 stitches)

Row 20: Sc in each stitch around. (30 stitches)

Row 21: *Dec in first 2 stitches, sc in next 4 stitches, repeat from * around. (25 stitches)

Tie off. Stuff tight with poly-fil. Sew head onto body.

Wings:

With blue yarn, ch 3. Sl st to first ch to create circle. (Instead, you can perform the “magic circle” if you’d like.)

Row 1: ch 1, 5 sc inside of circle. (5 stitches)

Row 2: Inc in each stitch around. (10 stitches)

Rows 3-4: Sc in each stitch around. (10 stitches)

Make two. Tie off first one. Don’t tie off second one.

Row 5: With yarn still attached to second piece, attach to first piece and sc around. (20 stitches)

Switch to red.

Row 7: Sc in each stitch around. (20 stitches)

Row 8: *Dec in first 2 stitches, sc in next 2 stitches, repeat from * around. (15 stitches)

Switch to green.

Rows 9-10: Sc in each stitch around. (15 stitches)

Row 11: *Dec in first 2 stitches, sc in next stitch, repeat from * around. (10 stitches)

Rows 12-13: Sc in each stitch around. (10 stitches)

Tie off. Make two. Sew onto sides of body.

IMG_5987

Tail:

With blue yarn, ch 3. Sl st to first ch to create circle. (Instead, you can perform the “magic circle” if you’d like.)

Row 1: ch 1, 5 sc inside of circle. (5 stitches)

Row 2: Inc in each stitch around. (10 stitches)

Row 3: Sc in each stitch around. (10 stitches)

Switch to red.

Row 4: Sc in each stitch around. (10 stitches)

Make two. Tie off first one. Don’t tie off second one.

Row 5: With yarn still attached to second piece, attach to first piece and sc around. (20 stitches)

Switch to green.

Row 6: *Dec in first 2 stitches, sc in next 2 stitches, repeat from * around. (15 stitches)

Row 7: Sc in each stitch around. (15 stitches)

Row 8: *Dec in first 2 stitches, sc in next stitch, repeat from * around. (10 stitches)

Tie off. Position and sew onto back of body.

IMG_5993

Feet:

With yellow yarn, ch 3. Sl st to first ch to create circle. (Instead, you can perform the “magic circle” if you’d like.)

Row 1: ch 1, 5 sc inside of circle. (5 stitches)

Rows 2-4: Sc in each stitch around. (5 stitches)

Tie off. Make two. Position and sew onto bottom of body.

If you want a pattern that you can save on your computer and easily print, this pattern is available in my Ravelry shop for only $3.00. I love printing patterns and saving them in a binder to keep track of the ones I’ve done and the ones I still plan to do. The purchased pattern also comes with the pattern to make a baby parrot.

These parrots are part of an ebook, that you can also purchase on my Ravelry.

Cover

I hope you enjoy this pattern! You’re welcome to sell items that you make using my patterns, as long as you don’t post the pattern anywhere else, and link back to my page if you’d like to. If there are any mistakes, or something is unclear, please feel free to message me on Facebook.

Monkey

IMG_6278

Monkeys are always fun, and they’re even more fun when there’s more than one. Made with worsted weight yarn, the finished monkeys measure approximately 8 inches tall.

Abbreviations:

ch: chain

sc: single crochet

sl st: slip stitch

inc: increase (2 single crochets in one loop)

dec: decrease (pull yarn through loop, pull yarn through second loop, yarn over and pull through all loops)

Materials needed:

Any worsted weight yarn. I used Red Heart Super Saver.

G (4mm) crochet hook

Poly-fil

Yarn needle

18mm safety eyes (for big monkeys)

12mm safety eyes (for baby monkeys)

Head:

With brown yarn, ch 3. Sl st to first ch to create circle. (Instead, you can perform the “magic circle” if you’d like.)

Row 1: ch 1, 10 sc inside of circle. (10 stitches)

Row 2: *Inc in first stitch, sc in next stitch, repeat from * around. (15 stitches)

Row 3: *Inc in first stitch, sc in next 2 stitches, repeat from * around. (20 stitches)

Row 4: *Inc in first stitch, sc in next 3 stitches, repeat from * around. (25 stitches)

Row 5: *Inc in first stitch, sc in next 4 stitches, repeat from * around. (30 stitches)

Row 6: *Inc in first stitch, sc in next 5 stitches, repeat from * around. (35 stitches)

Row 7: *Inc in first stitch, sc in next 6 stitches, repeat from * around. (40 stitches)

Row 8: *Inc in first stitch, sc in next 7 stitches, repeat from * around. (45 stitches)

Row 9: *Inc in first stitch, sc in next 8 stitches, repeat from * around. (50 stitches)

Row 10: *Inc in first stitch, sc in next 9 stitches, repeat from * around. (55 stitches)

Rows 11-17: Sc in each stitch around. (55 stitches)

Row 18: *Dec in first 2 stitches, sc in next 9 stitches, repeat from * around. (50 stitches)

Row 19: *Dec in first 2 stitches, sc in next 8 stitches, repeat from * around. (45 stitches)

Row 20: *Dec in first 2 stitches, sc in next 7 stitches, repeat from * around. (40 stitches)

Row 21: *Dec in first 2 stitches, sc in next 6 stitches, repeat from * around. (35 stitches)

Row 22: *Dec in first 2 stitches, sc in next 5 stitches, repeat from * around. (30 stitches)

Row 23: *Dec in first 2 stitches, sc in next 4 stitches, repeat from * around. (25 stitches)

Tie off. Stuff tight with poly-fil. Insert eyes between rows 14 and 15 with 8 stitches between them.

Snout:

With beige yarn, ch 3. Sl st to first ch to create circle. (Instead, you can perform the “magic circle” if you’d like.)

Row 1: ch 1, 5 sc inside of circle. (5 stitches)

Row 2: Inc in each stitch around. (10 stitches)

Row 3: *Inc in first stitch, sc in next stitch, repeat from * around. (15 stitches)

Row 4: *Inc in first stitch, sc in next 2 stitches, repeat from * around. (20 stitches)

Row 5: *Inc in first stitch, sc in next 3 stitches, repeat from * around. (25 stitches)

Row 6: Sc in each stitch around. (25 stitches)

Row 7: *Dec in first 2 stitches, sc in next 3 stitches, repeat from * around. (20 stitches)

Tie off. Stuff with poly-fil. Position and sew between and below eyes. Sew a nose on with brown yarn.

Ears:

With brown yarn, ch 3. Sl st to first ch to create circle. (Instead, you can perform the “magic circle” if you’d like.)

Row 1: ch 1, 10 sc inside of circle. (10 stitches)

Row 2: *Inc in first stitch, sc in next stitch, repeat from * around. (15 stitches)

Row 3: *Inc in first stitch, sc in next 2 stitches, repeat from * around. (20 stitches)

Row 4: *Inc in first stitch, sc in next 3 stitches, repeat from * around. (25 stitches)

Rows 5-6: Sc in each stitch around. (25 stitches)

Row 7: *Dec in first 2 stitches, sc in next 3 stitches, repeat from * around. (20 stitches)

Row 8: *Dec in first 2 stitches, sc in next 2 stitches, repeat from * around. (15 stitches)

Tie off. Make two. Position onto sides of head and sew on.

Body:

With brown yarn, ch 3. Sl st to first ch to create circle. (Instead, you can perform the “magic circle” if you’d like.)

Row 1: ch 1, 10 sc inside of circle. (10 stitches)

Row 2: *Inc in first stitch, sc in next stitch, repeat from * around. (15 stitches)

Row 3: *Inc in first stitch, sc in next 2 stitches, repeat from * around. (20 stitches)

Row 4: *Inc in first stitch, sc in next 3 stitches, repeat from * around. (25 stitches)

Row 5: *Inc in first stitch, sc in next 4 stitches, repeat from * around. (30 stitches)

Row 6: *Inc in first stitch, sc in next 5 stitches, repeat from * around. (35 stitches)

Row 7: *Inc in first stitch, sc in next 6 stitches, repeat from * around. (40 stitches)

Row 8: *Inc in first stitch, sc in next 7 stitches, repeat from * around. (45 stitches)

Row 9: *Inc in first stitch, sc in next 8 stitches, repeat from * around. (50 stitches)

Row 10: *Dec in first 2 stitches, sc in next 8 stitches, repeat from * around. (45 stitches)

Rows 11-15: Sc in each stitch around. (45 stitches)

Row 16: *Dec in first 2 stitches, sc in next 7 stitches, repeat from * around. (40 stitches)

Row 17: *Dec in first 2 stitches, sc in next 6 stitches, repeat from * around. (35 stitches)

Row 18: Sc in each stitch around. (35 stitches)

Row 19: *Dec in first 2 stitches, sc in next 5 stitches, repeat from * around. (30 stitches)

Row 20: Sc in each stitch around. (30 stitches)

Row 21: *Dec in first 2 stitches, sc in next 4 stitches, repeat from * around. (25 stitches)

Tie off. Stuff tight with poly-fil. Sew head onto body. Stop and stuff more poly-fil in before you close it up to reinforce the neck.

Arms:

With beige yarn, ch 3. Sl st to first ch to create circle. (Instead, you can perform the “magic circle” if you’d like.)

Row 1: ch 1, 5 sc inside of circle. (5 stitches)

Row 2: Inc in each stitch around. (10 stitches)

Row 3: *Inc in first stitch, sc in next stitch, repeat from * around. (15 stitches)

Row 4: *Inc in first stitch, sc in next 2 stitches, repeat from * around. (20 stitches)

Row 5: *Dec in first 2 stitches, sc in next 2 stitches, repeat from * around. (15 stitches)

Row 6: Sc in each stitch around. (15 stitches)

Row 7: *Dec in first 2 stitches, sc in next stitch, repeat from * around. (10 stitches)

Switch to brown yarn. Stuff hand tight with poly-fil.

Rows 8-17: Sc in each stitch around. (10 stitches)

Tie off. Make two. Position and sew onto sides of body.

Legs:

With beige yarn, ch 3. Sl st to first ch to create circle. (Instead, you can perform the “magic circle” if you’d like.)

Row 1: ch 1, 5 sc inside of circle. (5 stitches)

Row 2: Inc in each stitch around. (10 stitches)

Row 3: *Inc in first stitch, sc in next stitch, repeat from * around. (15 stitches)

Row 4: *Inc in first stitch, sc in next 2 stitches, repeat from * around. (20 stitches)

Row 5: *Inc in first stitch, sc in next 3 stitches, repeat from * around. (25 stitches)

Row 6: *Dec in first 2 stitches, sc in next 3 stitches, repeat from * around. (20 stitches)

Row 7: Sc in each stitch around. (20 stitches)

Row 8: *Dec in first 2 stitches, sc in next 2 stitches, repeat from * around. (15 stitches)

Switch to brown yarn. Stuff foot tight with poly-fil.

Rows 9-17: Sc in each stitch around. (15 stitches)

Row 18: *Dec in first 2 stitches, sc in next stitch, repeat from * around. (10 stitches)

Tie off. Stuff halfway with poly-fil. Make two. Position and sew onto bottom of body.

Tail:

With brown yarn, ch 3. Sl st to first ch to create circle. (Instead, you can perform the “magic circle” if you’d like.)

Row 1: ch 1, 8 sc inside of circle. (8 stitches)

Rows 2-30: Sc in each stitch around. (8 stitches)

Tie off. Don’t stuff. Position and sew onto back of body.


If you want a pattern that you can save on your computer and easily print, this pattern is available in my Ravelry shop for only $3.00. I love printing patterns and saving them in a binder to keep track of the ones I’ve done and the ones I still plan to do. The purchased pattern also comes with the pattern to make a baby monkey.


These monkeys are part of an ebook, that you can also purchase on my Ravelry.

Cover

I hope you enjoy this pattern! You’re welcome to sell items that you make using my patterns, as long as you don’t post the pattern anywhere else, and link back to my page if you’d like to. If there are any mistakes, or something is unclear, please feel free to message me on Facebook.